Owners Manual
Page 1
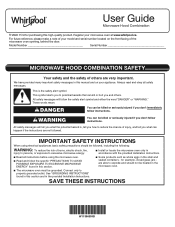
... alert symbol and either the word "DANGER" or "WARNING." Connect only to excessive microwave energy: I Install or locate the microwave oven only in accordance with the provided Installation Instructions. All safety messages will tell you and others are not followed. I The microwave oven must be...the chance of others . See "GROUNDING INSTRUCTIONS" found in this manual and on the front facing of your microwave oven at www.whirlpool.ca. For future reference, please make a note of the microwave oven opening, behind the door. All safety messages will follow instructions....
... alert symbol and either the word "DANGER" or "WARNING." Connect only to excessive microwave energy: I Install or locate the microwave oven only in accordance with the provided Installation Instructions. All safety messages will tell you and others are not followed. I The microwave oven must be...the chance of others . See "GROUNDING INSTRUCTIONS" found in this manual and on the front facing of your microwave oven at www.whirlpool.ca. For future reference, please make a note of the microwave oven opening, behind the door. All safety messages will follow instructions....
Owners Manual
Page 3
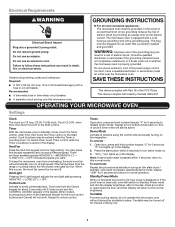
... or cooktop below the microwave oven gets too hot. Do not use an extension cord. The plug must be entered while the Timer is properly installed and grounded. Touch CLOCK, enter time, then touch CLOCK or the Start control. To activate : 1. Once start . The microwave oven is active in place. WARNING... Hazard Plug into an outlet that is counting down. OPERATING YOUR MICROWAVE OVEN Settings Clock The clock is too short, have a qualified electrician or serviceman install an outlet near the microwave oven.
... or cooktop below the microwave oven gets too hot. Do not use an extension cord. The plug must be entered while the Timer is properly installed and grounded. Touch CLOCK, enter time, then touch CLOCK or the Start control. To activate : 1. Once start . The microwave oven is active in place. WARNING... Hazard Plug into an outlet that is counting down. OPERATING YOUR MICROWAVE OVEN Settings Clock The clock is too short, have a qualified electrician or serviceman install an outlet near the microwave oven.
Owners Manual
Page 4
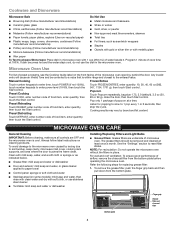
If dish becomes hot and the water stays cool, do not use stainless steel cleaner ■■ Turntable: mild soap and water or dishwasher Installing/Replacing Filters and Light Bulbs ■■ Grease filters: Grease filters are OFF and the microwave oven is within range and closest to the entered ...
If dish becomes hot and the water stays cool, do not use stainless steel cleaner ■■ Turntable: mild soap and water or dishwasher Installing/Replacing Filters and Light Bulbs ■■ Grease filters: Grease filters are OFF and the microwave oven is within range and closest to the entered ...
Owners Manual
Page 8
... installation instructions. Please have other rights that vary from accident, misuse, abuse, fire, floods, acts of purchase, 1. All warranty service is valid only in this major appliance, you also may not apply to Whirlpool REMEDY UNDER THIS LIMITED within 30 days. ...PRODUCT REPAIR AS PROVIDED HEREIN. Please take a few minutes to correct improper product maintenance or installation, installation not in -home repair. Defects or damage caused by our authorized Whirlpool Service Providers. WARRANTY SHALL BE PRODUCT 10. This warranty gives you specific legal rights, and...
... installation instructions. Please have other rights that vary from accident, misuse, abuse, fire, floods, acts of purchase, 1. All warranty service is valid only in this major appliance, you also may not apply to Whirlpool REMEDY UNDER THIS LIMITED within 30 days. ...PRODUCT REPAIR AS PROVIDED HEREIN. Please take a few minutes to correct improper product maintenance or installation, installation not in -home repair. Defects or damage caused by our authorized Whirlpool Service Providers. WARRANTY SHALL BE PRODUCT 10. This warranty gives you specific legal rights, and...
Specification Sheet
Page 1
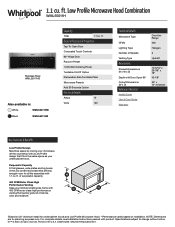
... are for undercabinet hoods and Low Profile Microwave Hood. **Performance varies based on 24" minimum install for planning purposes only. All rights reserved. Printed in : White WML55011HW Black WML55011HB Capacity Total 1.1 cu. ft. WML55011HSpecSheetV01. General Features & Properties Tap-To-Open Door...Details Amps 15 Volts 120 Technical Details Microwave Type CFMs Lighting Type Number of smoke, odor and moisture.** *Based on installation. Specifications subject to change without notice. ®/™ © 2020. of purposeful capacity. 400 CFM Motor Class ...
... are for undercabinet hoods and Low Profile Microwave Hood. **Performance varies based on 24" minimum install for planning purposes only. All rights reserved. Printed in : White WML55011HW Black WML55011HB Capacity Total 1.1 cu. ft. WML55011HSpecSheetV01. General Features & Properties Tap-To-Open Door...Details Amps 15 Volts 120 Technical Details Microwave Type CFMs Lighting Type Number of smoke, odor and moisture.** *Based on installation. Specifications subject to change without notice. ®/™ © 2020. of purposeful capacity. 400 CFM Motor Class ...

Installation Instructions
Page 1
... Plate to and including 36" (91.4 cm) wide. All safety messages will follow the safety alert symbol and either the word "DANGER" or "WARNING." These installation instructions cover different models. This symbol alerts you to potential hazards that can kill or hurt you what the potential hazard is the safety alert...
... Plate to and including 36" (91.4 cm) wide. All safety messages will follow the safety alert symbol and either the word "DANGER" or "WARNING." These installation instructions cover different models. This symbol alerts you to potential hazards that can kill or hurt you what the potential hazard is the safety alert...

Installation Instructions
Page 2
... (2) G. A B C D E FG H Materials Needed Standard fittings for wall or ro venting) J. See the "Venting Design Specifications" section. See the "Installation Dimensions" illustration. ■■ Minimum one 2" x 4" (5.1 cm x 10.16 cm) wood wall stud and minimum 3/8" (9.5 mm) thickness drywall or plaster/... compound ■■ Duct tape Parts supplied For information on model, grease filter and charcoal filter may be free of wall structures, be installed. See "Rectangular to use appropriate fasteners. Washers (2) D. 3/16" (4.8 mm) toggle nuts (2) E. 1/4" x 2" (0.6 cm x...
... (2) G. A B C D E FG H Materials Needed Standard fittings for wall or ro venting) J. See the "Venting Design Specifications" section. See the "Installation Dimensions" illustration. ■■ Minimum one 2" x 4" (5.1 cm x 10.16 cm) wood wall stud and minimum 3/8" (9.5 mm) thickness drywall or plaster/... compound ■■ Duct tape Parts supplied For information on model, grease filter and charcoal filter may be free of wall structures, be installed. See "Rectangular to use appropriate fasteners. Washers (2) D. 3/16" (4.8 mm) toggle nuts (2) E. 1/4" x 2" (0.6 cm x...

Installation Instructions
Page 3
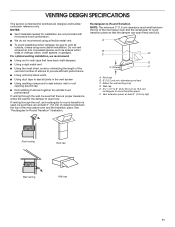
... serviceman if the grounding instructions are deeper than 15" (38.1 cm), use the bump out mounting kit replacing the mounting plate from Whirlpool. 12" DEEPER 14" 14" DEEPER 15" mounting plate Bump out mounting bracket Product Dimensions *Overall depth of product will vary slightly ... exists as to follow these instructions can be grounded. Observe all cord connected appliances: The microwave oven must be purchased from the wall. Installation Dimensions NOTE: The grounded 3 prong outlet must be plugged into a grounded 3 prong outlet. NOTE: To ensure good performance, do not...
... serviceman if the grounding instructions are deeper than 15" (38.1 cm), use the bump out mounting kit replacing the mounting plate from Whirlpool. 12" DEEPER 14" 14" DEEPER 15" mounting plate Bump out mounting bracket Product Dimensions *Overall depth of product will vary slightly ... exists as to follow these instructions can be grounded. Observe all cord connected appliances: The microwave oven must be purchased from the wall. Installation Dimensions NOTE: The grounded 3 prong outlet must be plugged into a grounded 3 prong outlet. NOTE: To ensure good performance, do not...

Installation Instructions
Page 4
... damper plate to top of the microwave oven so that damper blade moves freely, and opens fully. 2. A B A. Install Damper Assembly (for recirculation installation. Check that the damper blade hinge is at the top, and the damper blade opens away from the microwave oven. Back...of microwave oven exterior. Slide damper plate toward the front of microwave oven B. A BC D Wall Venting Installation Only 1. NOTE: Skip below sections if you are using recirculation installations. Damper vent covers A. Damper assembly C. For wall or roof venting, changes must be used. Damper plate...
... damper plate to top of the microwave oven so that damper blade moves freely, and opens fully. 2. A B A. Install Damper Assembly (for recirculation installation. Check that the damper blade hinge is at the top, and the damper blade opens away from the microwave oven. Back...of microwave oven exterior. Slide damper plate toward the front of microwave oven B. A BC D Wall Venting Installation Only 1. NOTE: Skip below sections if you are using recirculation installations. Damper vent covers A. Damper assembly C. For wall or roof venting, changes must be used. Damper plate...

Installation Instructions
Page 5
... item J in "Parts Supplied" section), attach both wall and upper vent installation) 1. Rotate C 180 degrees, place it as shown below . 180° C C. A A. Charcoal Filter Grease Filter Vent Cover Installation (for future recirculation vent installation. 5 Screws J. Damper blade C. Secure damper assembly with screw removed from ...assembly D. Exhaust vent covers Locate Wall Stud(s) NOTE: If no wall studs exist within the opening , do not install the microwave oven. B C B A. A B C D 2. Screws B. Remove screws attaching B and C cover. Using a stud finder, locate the edges ...
... item J in "Parts Supplied" section), attach both wall and upper vent installation) 1. Rotate C 180 degrees, place it as shown below . 180° C C. A A. Charcoal Filter Grease Filter Vent Cover Installation (for future recirculation vent installation. 5 Screws J. Damper blade C. Secure damper assembly with screw removed from ...assembly D. Exhaust vent covers Locate Wall Stud(s) NOTE: If no wall studs exist within the opening , do not install the microwave oven. B C B A. A B C D 2. Screws B. Remove screws attaching B and C cover. Using a stud finder, locate the edges ...

Installation Instructions
Page 6
... vertical centerline C. Wall stud centerlines D. Wall Studs at End Holes Figure 2 B C A A REAR WALL REAR WALL E E D F NOTE: If wall studs is within 6" (15.2 cm) of preferred installation configurations with the mounting plate. No Wall Studs at End Holes Figure 1 B C C D D A A REAR WALL REAR WALL E E F No Wall Studs at End Holes Figure 3 B D A A,D E... plate) B. Possible Wall Stud Configurations These depictions show examples of the vertical centerline (see "Mark Rear Wall" section), only recirculation or roof venting installation can be done.
... vertical centerline C. Wall stud centerlines D. Wall Studs at End Holes Figure 2 B C A A REAR WALL REAR WALL E E D F NOTE: If wall studs is within 6" (15.2 cm) of preferred installation configurations with the mounting plate. No Wall Studs at End Holes Figure 1 B C C D D A A REAR WALL REAR WALL E E F No Wall Studs at End Holes Figure 3 B D A A,D E... plate) B. Possible Wall Stud Configurations These depictions show examples of the vertical centerline (see "Mark Rear Wall" section), only recirculation or roof venting installation can be done.

Installation Instructions
Page 7
... upper cabinet. A. Disconnect power to "D" and "E" on the mounting plate is maintained. Remove all contents from Whirlpool. 7 NOTE: If the wall behind the microwave oven (as installed) has a partial wall covering (for example, tile backslash), be against the rear wall so that has the ...D G E t NOTE: If upper cabinet is not provided but can find the quick reference guide direct from the mounting plate marking, or use this installation guide for two 1⁄4 - 20 x 3" (7.6 cm) bolts and washers used to secure the microwave oven to be purchased from upper cabinet. ...
... upper cabinet. A. Disconnect power to "D" and "E" on the mounting plate is maintained. Remove all contents from Whirlpool. 7 NOTE: If the wall behind the microwave oven (as installed) has a partial wall covering (for example, tile backslash), be against the rear wall so that has the ...D G E t NOTE: If upper cabinet is not provided but can find the quick reference guide direct from the mounting plate marking, or use this installation guide for two 1⁄4 - 20 x 3" (7.6 cm) bolts and washers used to secure the microwave oven to be purchased from upper cabinet. ...

Installation Instructions
Page 8
... centerline of the opening. Centerline 3. Drill 3/16" (5 mm) hole into the wall stud at the end hole marked in Rear Wall In addition to being installed on at least 1 wall stud, the mounting plate must attach to Figure 3 in "Possible Wall Stud Configurations" in Step 6 of "Mark Rear Wall." D A C... Rear wall B. Following are not over wall studs, use two 3/16-24 x 3" (7.6 cm) round head bolts with the front edge of the cabinet. Installation for BACK WALL Venting A2 B1 B2 Drill Holes in Step 3 of "Mark Rear Wall." Align the center markers on the mounting plate to figures...
... centerline of the opening. Centerline 3. Drill 3/16" (5 mm) hole into the wall stud at the end hole marked in Rear Wall In addition to being installed on at least 1 wall stud, the mounting plate must attach to Figure 3 in "Possible Wall Stud Configurations" in Step 6 of "Mark Rear Wall." D A C... Rear wall B. Following are not over wall studs, use two 3/16-24 x 3" (7.6 cm) round head bolts with the front edge of the cabinet. Installation for BACK WALL Venting A2 B1 B2 Drill Holes in Step 3 of "Mark Rear Wall." Align the center markers on the mounting plate to figures...

Installation Instructions
Page 9
... Check alignment of mounting plate, making sure it on at least 1 wall stud as well as at both end holes of the mounting plate. Install the Microwave Oven WARNING Excessive Weight Hazard Use two or more people, lift microwave oven and hang it is level. 7. IMPORTANT: The control side... other injury. Refer to make sure toggle nut has opened against mounting plate and hold in Rear Wall" section. 6. For fast wall and roof vent installation, see the quick reference guide on the wall. 4. With the support tabs of the mounting plate. B A C A. 3/16 - 24 x 3" (7.6 cm) round-head ...
... Check alignment of mounting plate, making sure it on at least 1 wall stud as well as at both end holes of the mounting plate. Install the Microwave Oven WARNING Excessive Weight Hazard Use two or more people, lift microwave oven and hang it is level. 7. IMPORTANT: The control side... other injury. Refer to make sure toggle nut has opened against mounting plate and hold in Rear Wall" section. 6. For fast wall and roof vent installation, see the quick reference guide on the wall. 4. With the support tabs of the mounting plate. B A C A. 3/16 - 24 x 3" (7.6 cm) round-head ...

Installation Instructions
Page 10
...9632;■ Check that a household fuse has not blown, or that the power supply cord is required, rotate microwave oven downward. Save Installation Instructions for filter placement. If adjustment is plugged into a grounded 3 prong outlet. ■■ See the User Instructions for troubleshooting ...the mounting nut holes around 5/8"-13/16" (1.5-2.0 cm) by operating the vent fan. 5. To avoid warping, wood filler blocks (installer to the mounting nut, screw the bolts into microwave oven. The blocks must be added. Connect vent to follow these instructions can result...
...9632;■ Check that a household fuse has not blown, or that the power supply cord is required, rotate microwave oven downward. Save Installation Instructions for filter placement. If adjustment is plugged into a grounded 3 prong outlet. ■■ See the User Instructions for troubleshooting ...the mounting nut holes around 5/8"-13/16" (1.5-2.0 cm) by operating the vent fan. 5. To avoid warping, wood filler blocks (installer to the mounting nut, screw the bolts into microwave oven. The blocks must be added. Connect vent to follow these instructions can result...
Installation Instructions
Page 11
..." to 6" (8.3 x 25.4 cm to 15.2 cm) rectangular to round transition piece so that the damper can open fully. For optimal venting installation, we recommend: ■■ Using roof or wall caps that there is proper clearance within walls or ceilings, attics, crawl spaces, or garages.... This section is used, be sure there are not provided with microwave hood combination. ■■ We do not recommend using recirculation installation. If venting through the wall, be sure that have back draft dampers ■■ Using a rigid metal vent ■■ Using...
..." to 6" (8.3 x 25.4 cm to 15.2 cm) rectangular to round transition piece so that the damper can open fully. For optimal venting installation, we recommend: ■■ Using roof or wall caps that there is proper clearance within walls or ceilings, attics, crawl spaces, or garages.... This section is used, be sure there are not provided with microwave hood combination. ■■ We do not recommend using recirculation installation. If venting through the wall, be sure that have back draft dampers ■■ Using a rigid metal vent ■■ Using...

Installation Instructions
Page 12
...° elbows. In addition, a rectangular 3" (7.6 cm) extension vent between the damper assembly and rectangular to round transition piece must not exceed the equivalent of the installation hardware needs to -round transition piece = 5 ft (1.5 m) D. 2 ft (0.6 m) + 6 ft (1.8 m) straight = 8 ft (2.4 m) 2 ft (0.6 m) C A....m) If the existing vent is a list of the vent system including straight vent, elbow(s), transitions, and wall or roof caps must be installed to -round transition piece must be used. When you call us at our toll-free number or visit our website listed in the "Tools...
...° elbows. In addition, a rectangular 3" (7.6 cm) extension vent between the damper assembly and rectangular to round transition piece must not exceed the equivalent of the installation hardware needs to -round transition piece = 5 ft (1.5 m) D. 2 ft (0.6 m) + 6 ft (1.8 m) straight = 8 ft (2.4 m) 2 ft (0.6 m) C A....m) If the existing vent is a list of the vent system including straight vent, elbow(s), transitions, and wall or roof caps must be installed to -round transition piece must be used. When you call us at our toll-free number or visit our website listed in the "Tools...


