Owners Manual
Page 1
...'t follow instructions. I Read all safety messages. See "GROUNDING INSTRUCTIONS" found in the microwave oven. Model Number Serial Number Para una versión de estas instrucciones en español, visite www.whirlpool.com Deberá tener a mano el número de modelo y de serie, que...seriously injured if you and others are able to properly grounded outlet. MICROWAVE HOOD COMBINATION SAFETY Your safety and the safety of your model and serial number located on your microwave oven at www.whirlpool.com. All safety messages will follow the specific "PRECAUTIONS TO AVOID ...
...'t follow instructions. I Read all safety messages. See "GROUNDING INSTRUCTIONS" found in the microwave oven. Model Number Serial Number Para una versión de estas instrucciones en español, visite www.whirlpool.com Deberá tener a mano el número de modelo y de serie, que...seriously injured if you and others are able to properly grounded outlet. MICROWAVE HOOD COMBINATION SAFETY Your safety and the safety of your model and serial number located on your microwave oven at www.whirlpool.com. All safety messages will follow the specific "PRECAUTIONS TO AVOID ...
Owners Manual
Page 3
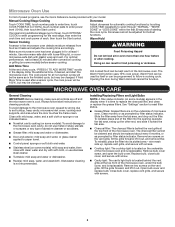
...reach the Filter Reset submenu, and activate reset. The vent fan may also be turned off . Auto Vent Fan (on some models): To keep the microwave oven from overheating, the auto vent fan will automatically turn on the programming tones or all governing codes and ordinances. When this... submenu. Observe all tones. To cancel timer, touch Timer control while the Timer countdown is counting down. Comes on some models): To keep the microwave oven from overheating, the auto vent fan will automatically decrease its speed, then turn off after replacing and/or cleaning the filters...
...reach the Filter Reset submenu, and activate reset. The vent fan may also be turned off . Auto Vent Fan (on some models): To keep the microwave oven from overheating, the auto vent fan will automatically turn on the programming tones or all governing codes and ordinances. When this... submenu. Observe all tones. To cancel timer, touch Timer control while the Timer countdown is counting down. Comes on some models): To keep the microwave oven from overheating, the auto vent fan will automatically decrease its speed, then turn off after replacing and/or cleaning the filters...
Owners Manual
Page 4
... of the display text may be turned off during preset or sensor (on some models) functions. 6th SENSE™ System A sensor in the microwave oven. 4 CLEANRELEASE® Cavity Coating (on some models) The durable, nonstick coating resists soil buildup by side. To avoid damage to Standby Power mode ...and dim the LCD brightness after 2-level cooking. If dish becomes hot and the water stays cool, do not use the dish in the microwave oven detects moisture ...
... of the display text may be turned off during preset or sensor (on some models) functions. 6th SENSE™ System A sensor in the microwave oven. 4 CLEANRELEASE® Cavity Coating (on some models) The durable, nonstick coating resists soil buildup by side. To avoid damage to Standby Power mode ...and dim the LCD brightness after 2-level cooking. If dish becomes hot and the water stays cool, do not use the dish in the microwave oven detects moisture ...
Owners Manual
Page 5
...or as it is behind the vent grille at least 30 minutes after convection cooking or grilling (on the underside of the microwave oven and is located on some models) appears in the finished cycle, but may be changed . For optimal performance, wait at the top front of the...■■ Cavity light: The cavity light bulb is located behind the vent grille at least 1 minute. Remove two screws on some models): To avoid damage to the microwave oven cavity, do not use stainless steel cleaner. ■■ Turntable: mild soap and water or dishwasher. ■■ Rack(s): ...
...or as it is behind the vent grille at least 30 minutes after convection cooking or grilling (on the underside of the microwave oven and is located on some models) appears in the finished cycle, but may be changed . For optimal performance, wait at the top front of the...■■ Cavity light: The cavity light bulb is located behind the vent grille at least 1 minute. Remove two screws on some models): To avoid damage to the microwave oven cavity, do not use stainless steel cleaner. ■■ Turntable: mild soap and water or dishwasher. ■■ Rack(s): ...
Owners Manual
Page 6
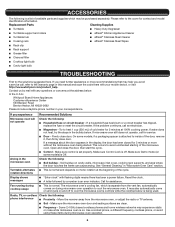
...a different frequency cordless phone, or avoid using these items during cooktop usage ■■ This is being started. On some models) is separate from the microwave oven, or adjust the radio or TV antenna. ■■ Soil - Open and close door. Arcing in your mobile ...device, or visit http://www.whirlpool.com/product_help. Fan running during microwave oven operation. 6 The microwave oven's cooling fan, which may also automatically come on and cycle on cavity walls, microwave inlet cover, cooking rack supports, and area where the door...
...a different frequency cordless phone, or avoid using these items during cooktop usage ■■ This is being started. On some models) is separate from the microwave oven, or adjust the radio or TV antenna. ■■ Soil - Open and close door. Arcing in your mobile ...device, or visit http://www.whirlpool.com/product_help. Fan running during microwave oven operation. 6 The microwave oven's cooling fan, which may also automatically come on and cycle on cavity walls, microwave inlet cover, cooking rack supports, and area where the door...
Quick Reference Sheet
Page 1
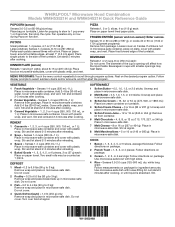
...dish. 3 Soften Ice Cream - 16, 32, or 64 oz (473, 946, or 1893 mL): Place ice cream container on turntable. WHIRLPOOL® Microwave Hood Combination Models WMH53521H and WMH54521H Quick Reference Guide POPCORN (sensor) Senses 3.0-3.5 oz (85-99 g) size bag: Place bag on turntable. 4 Soften Cream ...Cheese - 3 or 8 oz (85 or 227 g): Unwrap and place in microwave-safe dish. 5 Soften Frozen Juice - 12 or 16 oz (340 or ...
...dish. 3 Soften Ice Cream - 16, 32, or 64 oz (473, 946, or 1893 mL): Place ice cream container on turntable. WHIRLPOOL® Microwave Hood Combination Models WMH53521H and WMH54521H Quick Reference Guide POPCORN (sensor) Senses 3.0-3.5 oz (85-99 g) size bag: Place bag on turntable. 4 Soften Cream ...Cheese - 3 or 8 oz (85 or 227 g): Unwrap and place in microwave-safe dish. 5 Soften Frozen Juice - 12 or 16 oz (340 or ...

Installation Instructions
Page 2
... of F. #6 x 3/8" Sheet metal screws (2) packaging) or wall template G. See User Instructions.) NOTE: Depending on model, charcoal filters may be sure to back of microwave oven) E. 1/4" x 2" lag screws (2) ■■ Cardboard template (part of wall structures, be combined. NOTE...; Aluminum grease filters H. Materials Needed Standard fittings for wood studs. See the "Venting Design Specifications" section. 2 MICROWAVE HOOD COMBINATION SAFETY INSTALLATION REQUIREMENTS Tools and Parts Tools Needed Gather the required tools and parts before starting installation. Read ...
... of F. #6 x 3/8" Sheet metal screws (2) packaging) or wall template G. See User Instructions.) NOTE: Depending on model, charcoal filters may be sure to back of microwave oven) E. 1/4" x 2" lag screws (2) ■■ Cardboard template (part of wall structures, be combined. NOTE...; Aluminum grease filters H. Materials Needed Standard fittings for wood studs. See the "Venting Design Specifications" section. 2 MICROWAVE HOOD COMBINATION SAFETY INSTALLATION REQUIREMENTS Tools and Parts Tools Needed Gather the required tools and parts before starting installation. Read ...

Installation Instructions
Page 3
...wall, make sure there is at least 6" (15.2 cm) of clearance between wall and microwave oven so you are deeper than 14" (35.6 cm) but can open fully. ■■ Some models have a pocket handle. See the "Electrical Requirements" section. The piece inside the perforation is...9632; Minimum installation dimensions. Special Requirements For Wall Venting Installation Only: ■■ Cutout must be installed. The location must be purchased from Whirlpool. 12" DEEPER 14" 14" DEEPER 15" I bar mounting plate fr om the wall. The bump out mounting kit (part # W11185746) ...
...wall, make sure there is at least 6" (15.2 cm) of clearance between wall and microwave oven so you are deeper than 14" (35.6 cm) but can open fully. ■■ Some models have a pocket handle. See the "Electrical Requirements" section. The piece inside the perforation is...9632; Minimum installation dimensions. Special Requirements For Wall Venting Installation Only: ■■ Cutout must be installed. The location must be purchased from Whirlpool. 12" DEEPER 14" 14" DEEPER 15" I bar mounting plate fr om the wall. The bump out mounting kit (part # W11185746) ...

Installation Instructions
Page 5
..., put the wire through the blower motor bridge. INSTALLATION INSTRUCTIONS Remove Mounting Plate Depending on your model, the mounting plate may be in recessed holes) A B A. A Wall Venting Installation Only 1. Slide damper plate toward the front of microwave oven exterior. Keep the damper assembly in case the venting method is changed, or the...
..., put the wire through the blower motor bridge. INSTALLATION INSTRUCTIONS Remove Mounting Plate Depending on your model, the mounting plate may be in recessed holes) A B A. A Wall Venting Installation Only 1. Slide damper plate toward the front of microwave oven exterior. Keep the damper assembly in case the venting method is changed, or the...

Installation Instructions
Page 11
... hole in place. Loosen mounting plate screws. Place a washer on your model, it does not have packing spacers. A B A. Mounting plate B. Push microwave oven against mounting plate and hold in the bottom of microwave oven still tilted, thread power supply cord through 9. 8. Handle the microwave oven gently. 1. NOTE: If venting through 6. 11. If adjustment is...
... hole in place. Loosen mounting plate screws. Place a washer on your model, it does not have packing spacers. A B A. Mounting plate B. Push microwave oven against mounting plate and hold in the bottom of microwave oven still tilted, thread power supply cord through 9. 8. Handle the microwave oven gently. 1. NOTE: If venting through 6. 11. If adjustment is...

Installation Instructions
Page 14
...(1.8 m) 2 pi (0.6 m) C A. ASSISTANCE Call your model and serial numbers located on the front frame of each vent piece used in a 36" (91.4 cm) or 42" (106.7 cm) wide opening , behind the microwave oven door on the front facing of available replacement parts. ... (0.6 m) C D A. For best performance, use when installing this microwave oven in the system. If you will need the microwave oven model number and serial number. Following is 3" (7.6 cm) wide. Each panel is a list of the microwave oven opening . See the "Recommended Standard Fittings" section for details....
...(1.8 m) 2 pi (0.6 m) C A. ASSISTANCE Call your model and serial numbers located on the front frame of each vent piece used in a 36" (91.4 cm) or 42" (106.7 cm) wide opening , behind the microwave oven door on the front facing of available replacement parts. ... (0.6 m) C D A. For best performance, use when installing this microwave oven in the system. If you will need the microwave oven model number and serial number. Following is 3" (7.6 cm) wide. Each panel is a list of the microwave oven opening . See the "Recommended Standard Fittings" section for details....
Dimension Guide
Page 1
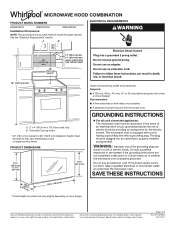
... the power supply cord is equipped with a cord having a grounding wire with a grounding plug. Because Whirlpool Corporation includes a continuous commitment to improve our products, we reserve the right to whether the microwave oven is properly installed and grounded. upper cabinet and side cabinet depth 66" (167.6 cm) min....change without notice. Do not use of the grounding plug can result in a risk of electric shock. MICROWAVE HOOD COMBINATION PRODUCT MODEL NUMBERS WMH53521H WMH75021H WMH78019H Installation Dimensions: NOTE: The grounded 3 prong outlet must be grounded.
... the power supply cord is equipped with a cord having a grounding wire with a grounding plug. Because Whirlpool Corporation includes a continuous commitment to improve our products, we reserve the right to whether the microwave oven is properly installed and grounded. upper cabinet and side cabinet depth 66" (167.6 cm) min....change without notice. Do not use of the grounding plug can result in a risk of electric shock. MICROWAVE HOOD COMBINATION PRODUCT MODEL NUMBERS WMH53521H WMH75021H WMH78019H Installation Dimensions: NOTE: The grounded 3 prong outlet must be grounded.


