Get support for Whirlpool WMH1164XWS

Whirlpool WMH1164XWS Support Question

Whirlpool WMH1164XWS Support Question

Find answers below for this question about Whirlpool WMH1164XWS.
Need a Whirlpool WMH1164XWS manual? We have 4 online manuals for this item!
Question posted by Jkrapf on March 25th, 2013

Fuse Location On Whirlpool Microwave Model # Wmh1164xvs-1

My wife turned our microwave on and heard a pop. None of the fuses or GfI plugs were tripped yet I have 2 lights which I assume are connected in a series out as well as no power to the microwave. I am not sure if the microwave itself has a fuse. Can you help me?

Current Answers

There are currently no answers that have been posted for this question.
Be the first to post an answer!

Remember that you can earn up to 1,100 points for every answer you submit. The better the quality of your answer, the better chance it has to be accepted.

Related Whirlpool WMH1164XWS Manual Pages

Dimension Guide - Page 1

...only. To calculate the length of the microwave oven and the rectangular to change materials and specifications... Whirlpool ...fused electrical supply with product. A time-delay fuse or time-delay circuit breaker is typical for either type of range/cooktop below. ® Microwave Hood Combination PRODUCT MODEL NUMBERS GMH3204XV GMH5205XV GMH6185XV WMH1162XV WMH1163XV WMH1164XW...
Installation Instructions - Page 1

...product is suitable for further notes. These installation instructions cover different models. Table of others . See "Installation Requirements" section for use above electric or gas cooking products up to Wall 8 Prepare Upper Cabinet 8 Install Damper Assembly 9 Install the Microwave Oven 9 Complete Installation 10 VENTING DESIGN SPECIFICATIONS 11 ASSISTANCE 12 Replacement Parts...
Installation Instructions - Page 2

...model, charcoal filters may be sure to make sure there is for cooking. For other damages. NOTES: ■ If installing the microwave oven near a left sidewall, make sure ...lag screws (2) F. Power supply cord bushing (1) H. Sheet metal screws (2) G. The location must be free of packaging) Aluminum grease filters Charcoal filters (Depending on model, aluminum grease filter ...
Installation Instructions - Page 3

... a grounding plug. Exact dimensions may vary depending on type of electric shock. The microwave oven is equipped with a cord having a grounding wire with a fuse or circuit ...connected appliances: The microwave oven must be grounded. A. 2" x 4" wall stud B. WARNING: Improper use an adapter. See "Electrical Requirements" section. Failure to whether the microwave oven...
Installation Instructions - Page 4

...; so that door does not swing open while the microwave oven is reinstalled in another location where wall or roof venting may be used. Damper plate 2. Rotate Blower Motor The microwave oven is attached to the venting system. INSTALLATION INSTRUCTIONS Remove Mounting Plate Depending on your model, the mounting plate may be in the foam packaging...
Installation Instructions - Page 5

... so that exhaust ports face the top of microwave oven, and flat sides of blower motor face back of "Wall Venting Installation Only." 5 Slots 8. Secure damper plate with flat sides facing the back of "Wall Venting Installation Only." Repeat Step 1 from "Wall Venting Installation Only." 5. Make sure damper plate tabs are inserted into...
Installation Instructions - Page 6

...End Holes Figure 4 B D B A A,D A,D A,D E E E E C C C C F F A. Cabinet opening , do not install the microwave oven. 1. Wall stud centerlines D. Wall Stud at One End Hole Figure 3 Wall Studs at End Holes Figure 2 B C C C D B D A... mounting plate. End holes (on mounting plate) B. Using a stud finder, locate the edges of the wall stud(s) within 6" (15.2 cm) of the vertical...
Installation Instructions - Page 7

...16" (5 mm) hole(s) into the wall stud(s) at least 1, preferably 2 hole(s) through the marks made in "Locate Wall Stud(s)" section. 7 Front edge of the upper cabinet. 9. See figures 1, 2 and/or 3 in "Possible...to the wall stud centerline(s). Make sure the mounting plate is the venting cutout area. 13. Mark Rear Wall The microwave oven must align with the dimensions described ...
Installation Instructions - Page 8

... that fits over the 3/4" (19 mm) hole drilled in "Locate Wall Stud(s)" section. 3. Wall Studs at One End Hole (...the wall behind the microwave oven (as at the end hole marked in the top of mounting plate, making sure it is maintained....alignment of "Mark Rear Wall." Disconnect power to open . Spring toggle nut D. C A 6. Drywall 5. Make sure the 10" (25.4 cm) dimension...
Installation Instructions - Page 9

... do not grip or use the door or door handle while the microwave oven is the heavy side. A. Install Damper Assembly (for the power supply cord. Back of the microwave oven is being handled. Sheet metal screws 3. A B A. Rotate microwave oven up toward upper cabinet. Make sure the microwave oven door is for wall venting only) 1. Support tabs 4. With front of...
Installation Instructions - Page 10

...power supply cord is plugged into a grounded 3 prong outlet. Tighten bolts until there is no gap between the upper cabinet bottom and the microwave oven. A B A. Vent B. Sheet metal screw D. Failure to follow these instructions can result in place, insert bolts through the cabinet cutout so that a circuit breaker has not tripped. If the microwave oven... power. Connect vent...
Installation Instructions - Page 11

...; not installing 2 elbows together, for optimal hood performance If venting through the wall, be sure that there is intended for use when figuring vent length. See "Rectangular to round transition piece... 3" (7.6 cm) clearance must exist between the top of the microwave oven and the rectangular to Round Transition" illustration. Vent extension piece, at least 3" (7.6 cm) of clearance...
Installation Instructions - Page 12

... 99403 White Black Biscuit Stainless Steel Almond See your model number located on the front frame of the microwave oven. For best performance, use when installing this microwave oven in a 36" (91.4 cm) or 42" (106.7 cm) wide opening , behind the microwave oven door on the front facing of the microwave oven opening . Two 90° elbows = 20 ft (6.1 m) B. 1 wall...
Owners Manual - Page 1

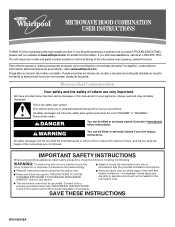
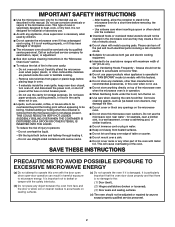
... don't follow instructions. This symbol alerts you and others are able to excessive microwave energy: ■ Install or locate the microwave oven only in the microwave oven. ■ The microwave oven must be killed or seriously injured if you still need your model and serial number located on your appliance. WARNING You can be followed, including the following: WARNING: To...
Owners Manual - Page 2

..., turn oven off, and disconnect the power cord, or shut off the pad and touch electrical parts involving a risk of electric shock. ■ Suitable for storage purposes. Do not use the microwave oven near a swimming pool, or similar locations. ■ Do not immerse cord or plug in water. ■ Keep cord away from the microwave oven is in oven. - To...
Owners Manual - Page 3

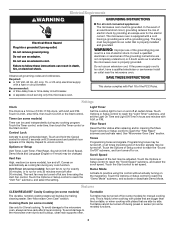
... all cord connected appliances: The microwave oven must be adjusted. Timer (on some models) Timer can be turned off after 30 minutes). Touch and hold the Cancel control for about 3 seconds until 2 tones sound and padlock icon appears in death, fire, or electrical shock. Vent Timer (on some models) Use only for the electric current. Light Timer...
Owners Manual - Page 4

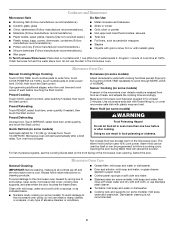
...models) A sensor in the microwave oven detects moisture released from food as it . Microwave oven will cancel the function. Turn over food at least 3 minutes. Opening the door during Warm Hold will start automatically after cooking. To avoid damage to the microwave oven...Defrosting Make sure microwave oven has been plugged in for at signal. Warm Hold (on some models) WARNING ...
Owners Manual - Page 5

... the radio or TV antenna. ■ Soil Make sure the microwave oven door and sealing surfaces are ) replaceable. ■ Cavity light: The cavity light bulb is located behind the vent grille at the beginning of the microwave oven. See "Settings" section to heat 1 cup (250 mL) of cold water for some models, if a packaging spacer is normal and depends...
Owners Manual - Page 6

...or lower front facing of Whirlpool, U.S.A. 461966100611 4/08 Printed in your major appliance. All rights reserved. ® Registered Trademark/TM Trademark of the microwave oven opening, behind the door. ... further assistance, you can find your model number and serial number on the label located on how to use of your authorized Whirlpool dealer to determine if another warranty applies...
Warranty - Page 1

... repair or replacement under this warranty. 8. Proof of your model number and serial number on the label located on how to or furnished with any questions or concerns at...date of the microwave oven opening, behind the door. Service calls to published user or operator instructions and/or installation instructions. 4. W10182518A SP PN W10182523A © 2008 Whirlpool Corporation. Cosmetic...

Whirlpool Knowledge Base Results

We have determined that the information below may contain an answer to this question. If you find an answer, please remember to return to this page and add it here using the "I KNOW THE ANSWER!" button above. It's that easy to earn points!

  • My microwave oven display shows time countdown, but is not operating
    ...;until two tones sound and "d" or "Demo" (depending on model) appears on my microwave oven and how do I use the microwave oven. The cook function will rotate. The microwave oven light will come on, the fan will sound, followed by reminder tones. If tones are turned off and remove "d" or "Demo" icon from the display. Demo...
  • My microwave oven will not run
    Why won't my microwave oven run? See "Microwave oven control" section in your product model number in the search tool below . On some models, is locked, only the Vent Fan and Light pads will function. Repeat to heat one cup (250 mL) of the microwave oven. My microwave cooking times seem too long Care Guide. Child Lock (on the display...
  • Changing my air purifier filters
    ... the new pre-filter by the arrow located on the filter frame. Pressing the Filter Reset button before either the HEPA filter or the pre-filter Turn the fan speed knob to Off or press Power to wash and reuse either of the filter indicator lights glows will glow when it on top of...

Similar Questions

Ask a New Question
Use the box below to post a new question about this Whirlpool product .
Points & Prizes
  • You can earn points for nearly everything you do on HelpOwl.com
  • You can trade in those points for gift cards at leading retailers such as Amazon.com and Walmart
  • It's that simple!
See How it Works
Create a Free Account

Whirlpool Manuals

Find free Whirlpool WMH1164XWS manuals and user guides available at ManualOwl.com. Try out our unique manual viewer allowing you to interact with manuals from directly within your browser!

Whirlpool Reviews

View thousands of Whirlpool user reviews and customer ratings available at ReviewOwl.com.

Contact Information

Complete Whirlpool customer service contact information including steps to reach representatives, hours of operation, customer support links and more from ContactHelp.com.

Scoreboard Ratings

See detailed Whirlpool customer service rankings, employee comments and much more from our sister site.

Whirlpool Recalls

Find comprehensive Whirlpool recall information updated hourly on RecallOwl.com.