
Dimension Guide
Page 1
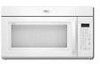
... B. Two 90° elbows = 20 ft (6.1 m) B. 1 wall cap = 40 ft (12.2 m) C. 1 rectangular to 15.2 cm = 1.5 m) B. Grounded 3-prong outlet *30" (76.2 cm) is typical for wall venting only) E D. Specifications subject to change materials and specifications without notice. upper cabinet and side cabinet depth D E F G A. ® Microwave Hood Combination PRODUCT MODEL NUMBERS GMH3204XV GMH5205XV GMH6185XV WMH1162XV WMH1163XV...
... B. Two 90° elbows = 20 ft (6.1 m) B. 1 wall cap = 40 ft (12.2 m) C. 1 rectangular to 15.2 cm = 1.5 m) B. Grounded 3-prong outlet *30" (76.2 cm) is typical for wall venting only) E D. Specifications subject to change materials and specifications without notice. upper cabinet and side cabinet depth D E F G A. ® Microwave Hood Combination PRODUCT MODEL NUMBERS GMH3204XV GMH5205XV GMH6185XV WMH1162XV WMH1163XV...

Installation Instructions
Page 1
...8 Install Damper Assembly 9 Install the Microwave Oven 9 Complete Installation 10 VENTING DESIGN SPECIFICATIONS 11 ASSISTANCE 12 Replacement Parts 12 Accessories 12 MICROWAVE HOOD COMBINATION SAFETY Your safety and the safety of your particular model may differ slightly from the illustration in... and including 36" (91.4 cm) wide. All safety messages will follow instructions. These installation instructions cover different models. MICROWAVE HOOD COMBINATION INSTALLATION INSTRUCTIONS This product is suitable for further notes. All safety messages will tell you what can be...
...8 Install Damper Assembly 9 Install the Microwave Oven 9 Complete Installation 10 VENTING DESIGN SPECIFICATIONS 11 ASSISTANCE 12 Replacement Parts 12 Accessories 12 MICROWAVE HOOD COMBINATION SAFETY Your safety and the safety of your particular model may differ slightly from the illustration in... and including 36" (91.4 cm) wide. All safety messages will follow instructions. These installation instructions cover different models. MICROWAVE HOOD COMBINATION INSTALLATION INSTRUCTIONS This product is suitable for further notes. All safety messages will tell you what can be...

Installation Instructions
Page 2
... screws (2) G. Remove Cardboard Template The cardboard piece from the rest of wall structures, be included. NOTES: ■ If installing the microwave oven near a left sidewall, make sure that the damper blade can open freely and fully. Special Requirements For Wall Venting Installation Only: ... grease filters Charcoal filters (Depending on model, aluminum grease filter and charcoal filter may not be sure to back of microwave oven) Cardboard template (part of 150 lbs (68 kg), which includes microwave oven and items placed inside the microwave oven and upper cabinet. ■ ...
... screws (2) G. Remove Cardboard Template The cardboard piece from the rest of wall structures, be included. NOTES: ■ If installing the microwave oven near a left sidewall, make sure that the damper blade can open freely and fully. Special Requirements For Wall Venting Installation Only: ... grease filters Charcoal filters (Depending on model, aluminum grease filter and charcoal filter may not be sure to back of microwave oven) Cardboard template (part of 150 lbs (68 kg), which includes microwave oven and items placed inside the microwave oven and upper cabinet. ■ ...

Installation Instructions
Page 4
... sure damper plate tabs are using recirculation installation. Damper plate B. Screws C. Damper plate tabs D. Remove any remaining contents from the microwave oven cavity. 2. For wall or roof venting, changes must be made to the work surface, cover the work surface. 1. A... roof venting may be used. Damper plate 2. Wall Venting Installation Only 1. Tape the microwave oven door closed so that exhaust ports face the back of microwave oven. Slots 8. INSTALLATION INSTRUCTIONS Remove Mounting Plate Depending on your model, the mounting plate may be in recessed holes) D A.
... sure damper plate tabs are using recirculation installation. Damper plate B. Screws C. Damper plate tabs D. Remove any remaining contents from the microwave oven cavity. 2. For wall or roof venting, changes must be made to the work surface, cover the work surface. 1. A... roof venting may be used. Damper plate 2. Wall Venting Installation Only 1. Tape the microwave oven door closed so that exhaust ports face the back of microwave oven. Slots 8. INSTALLATION INSTRUCTIONS Remove Mounting Plate Depending on your model, the mounting plate may be in recessed holes) D A.

Installation Instructions
Page 12
... cap = 40 ft (12.2 m) C. 2 ft (0.6 m) + 6 ft (1.8 m) straight = 8 ft (2.4 m) 6" (15.2 cm) vent system = 73 ft (22.2 m) total A B 6 ft (1.8 m) 2 ft (0.6 m) C D A. Both numbers can be found on the model and serial number plate, which is round, a rectangular to use no more than three 90° elbows. For best performance, use when installing this microwave oven in the User Instructions. When you call...
... cap = 40 ft (12.2 m) C. 2 ft (0.6 m) + 6 ft (1.8 m) straight = 8 ft (2.4 m) 6" (15.2 cm) vent system = 73 ft (22.2 m) total A B 6 ft (1.8 m) 2 ft (0.6 m) C D A. Both numbers can be found on the model and serial number plate, which is round, a rectangular to use no more than three 90° elbows. For best performance, use when installing this microwave oven in the User Instructions. When you call...

Owners Manual
Page 1
...not covered in TROUBLESHOOTING, please visit our website at 1-800-253-1301. We have provided many important safety messages in the microwave oven. ■ The microwave oven must be followed, including the following: WARNING: To reduce the risk of injury, and tell you what the potential ...de modelo completo. All safety messages will need assistance, call us at www.whirlpool.com for additional information. This is , tell you and others are not followed. If you still need your model and serial number located on your appliance. This symbol alerts you to potential ...
...not covered in TROUBLESHOOTING, please visit our website at 1-800-253-1301. We have provided many important safety messages in the microwave oven. ■ The microwave oven must be followed, including the following: WARNING: To reduce the risk of injury, and tell you what the potential ...de modelo completo. All safety messages will need assistance, call us at www.whirlpool.com for additional information. This is , tell you and others are not followed. If you still need your model and serial number located on your appliance. This symbol alerts you to potential ...

Owners Manual
Page 2
...in convection, combination, grill or "PAN BROWN" mode (on models with such features). ■ Do not store any materials, other combustible materials are able to be adjusted or repaired by children. ■ Do not operate the microwave oven if it has a damaged cord or plug, if it...CONTAINER IS DISTURBED OR A SPOON OR OTHER UTENSIL IS INSERTED INTO THE LIQUID. SAVE THESE INSTRUCTIONS PRECAUTIONS TO AVOID POSSIBLE EXPOSURE TO EXCESSIVE MICROWAVE ENERGY (a) Do not attempt to operate this oven with any other utensil into the container. ■ Oversized foods or oversized metal ...
...in convection, combination, grill or "PAN BROWN" mode (on models with such features). ■ Do not store any materials, other combustible materials are able to be adjusted or repaired by children. ■ Do not operate the microwave oven if it has a damaged cord or plug, if it...CONTAINER IS DISTURBED OR A SPOON OR OTHER UTENSIL IS INSERTED INTO THE LIQUID. SAVE THESE INSTRUCTIONS PRECAUTIONS TO AVOID POSSIBLE EXPOSURE TO EXCESSIVE MICROWAVE ENERGY (a) Do not attempt to operate this oven with any other utensil into the container. ■ Oversized foods or oversized metal ...

Owners Manual
Page 3
...outlet that is properly installed and grounded. Observe all cord connected appliances: The microwave oven must be turned off or on automatically as to practice using the control without actually turning on some models). and P.M. Vent Fan Various speeds, ranging from high to reach the "... INSTRUCTIONS ■ For all governing codes and ordinances. or P.M. Touch and hold the Cancel control for the electric current. See "Microwave Oven Care" section. Programming tones may be turned off after replacing and/or cleaning the filters. Touch the Start control to run ...
...outlet that is properly installed and grounded. Observe all cord connected appliances: The microwave oven must be turned off or on automatically as to practice using the control without actually turning on some models). and P.M. Vent Fan Various speeds, ranging from high to reach the "... INSTRUCTIONS ■ For all governing codes and ordinances. or P.M. Touch and hold the Cancel control for the electric current. See "Microwave Oven Care" section. Programming tones may be turned off after replacing and/or cleaning the filters. Touch the Start control to run ...

Owners Manual
Page 4
... cooking time accordingly. Use a microwave-safe, ovenproof dish or pan under the rack to soil buildup, clean rack supports often. Convection Rack (on some models) Depending on your model, the grill element has either ...two 600W quartz bulbs. Steamer base G. Steamer insert H. Grill Rack (on some models) This microwave system delivers a constant stream of the selected microwave power, whereas typical microwave systems deliver only intervals of the microwave oven cavity, behind the metal screen. Grilling Roasting Accessory Configurations Baking Steaming Simmering A...
... cooking time accordingly. Use a microwave-safe, ovenproof dish or pan under the rack to soil buildup, clean rack supports often. Convection Rack (on some models) Depending on your model, the grill element has either ...two 600W quartz bulbs. Steamer base G. Steamer insert H. Grill Rack (on some models) This microwave system delivers a constant stream of the selected microwave power, whereas typical microwave systems deliver only intervals of the microwave oven cavity, behind the metal screen. Grilling Roasting Accessory Configurations Baking Steaming Simmering A...

Owners Manual
Page 5
... more than one hour before sensor cooking. The cook power and/or temperature (on some models) before or after convection cooking or grilling (on some models): ■ Use ovenproof, microwave-safe cookware to catch drippings. Warm Hold can be used only during Warm Hold will be...Add More Time At the end of each before touching the Start control. Warm Hold (on models with 1 cup (250 mL) of cook time at least 30 minutes after cooking. Cookware and Dinnerware Microwave-Safe ■ Browning dish (Follow manufacturer recommendations.) ■ Ceramic glass, glass ■ China...
... more than one hour before sensor cooking. The cook power and/or temperature (on some models) before or after convection cooking or grilling (on some models): ■ Use ovenproof, microwave-safe cookware to catch drippings. Warm Hold can be used only during Warm Hold will be...Add More Time At the end of each before touching the Start control. Warm Hold (on models with 1 cup (250 mL) of cook time at least 30 minutes after cooking. Cookware and Dinnerware Microwave-Safe ■ Browning dish (Follow manufacturer recommendations.) ■ Ceramic glass, glass ■ China...

Owners Manual
Page 6
...filter. See "Settings" section to paper towel. ■ Control panel: sponge or soft cloth and water. ■ Stainless steel (on some models): mild soap and water, then rinse with clean water and dry with repeated use stainless steel cleaner. ■ Turntable: mild soap and water ...Cooktop light: The cooktop light is attached to heat 1 cup (250 mL) of cold water for 5 minutes or more without the microwave oven being started. www.whirlpool.com Microwave oven will dissipate with soft cloth, or use . 6 Make sure Demo Mode (on cleaning products. Replace bulb, close door. If...
...filter. See "Settings" section to paper towel. ■ Control panel: sponge or soft cloth and water. ■ Stainless steel (on some models): mild soap and water, then rinse with clean water and dry with repeated use stainless steel cleaner. ■ Turntable: mild soap and water ...Cooktop light: The cooktop light is attached to heat 1 cup (250 mL) of cold water for 5 minutes or more without the microwave oven being started. www.whirlpool.com Microwave oven will dissipate with soft cloth, or use . 6 Make sure Demo Mode (on cleaning products. Replace bulb, close door. If...

Owners Manual
Page 7
... of bread on the tall grill rack, place the rack on the turntable and close the door. for service. The microwave oven's cooling fan (on some models), which may be on ■ This is not unusual. Replacement Parts, Accessories and Cleaning Supplies Following is normal. Place...also automatically come on and cycle on . Quartz bulb (on some models) does not appear to the cover for contact and model identification information. Program the microwave oven using these items during microwave oven operation. without microwaves - If it does not toast, call for 4 minutes. Fan running...
... of bread on the tall grill rack, place the rack on the turntable and close the door. for service. The microwave oven's cooling fan (on some models), which may be on ■ This is not unusual. Replacement Parts, Accessories and Cleaning Supplies Following is normal. Place...also automatically come on and cycle on . Quartz bulb (on some models) does not appear to the cover for contact and model identification information. Program the microwave oven using these items during microwave oven operation. without microwaves - If it does not toast, call for 4 minutes. Fan running...

Owners Manual
Page 8
...when it is used for other damage to the finish of your product, you on the upper or lower front facing of the microwave oven opening, behind the door. This major appliance is designed to be easily determined. The cost of repair or replacement under this... from defects in -home service is covered by this warranty. 8. Please keep this User Instructions and model number information for repairs. All rights reserved. ® Registered Trademark/TM Trademark of Whirlpool, U.S.A. 461966100641 9/08 Printed in your major appliance is used in accordance with electrical or plumbing codes,...
...when it is used for other damage to the finish of your product, you on the upper or lower front facing of the microwave oven opening, behind the door. This major appliance is designed to be easily determined. The cost of repair or replacement under this... from defects in -home service is covered by this warranty. 8. Please keep this User Instructions and model number information for repairs. All rights reserved. ® Registered Trademark/TM Trademark of Whirlpool, U.S.A. 461966100641 9/08 Printed in your major appliance is used in accordance with electrical or plumbing codes,...

Warranty
Page 1
...other damage to the finish of your major appliance, to instruct you on the upper or lower front facing of the microwave oven opening, behind the door. DISCLAIMER OF IMPLIED WARRANTIES; If you do not have been removed, altered or cannot be... or freezer product failures. 7. Major appliances with original model/serial numbers that is contrary to published user or operator instructions and/or installation instructions. 4. WHIRLPOOL SHALL NOT BE LIABLE FOR INCIDENTAL OR CONSEQUENTIAL DAMAGES. WHIRLPOOL CORPORATION MAJOR APPLIANCE WARRANTY LIMITED WARRANTY For one year from...
...other damage to the finish of your major appliance, to instruct you on the upper or lower front facing of the microwave oven opening, behind the door. DISCLAIMER OF IMPLIED WARRANTIES; If you do not have been removed, altered or cannot be... or freezer product failures. 7. Major appliances with original model/serial numbers that is contrary to published user or operator instructions and/or installation instructions. 4. WHIRLPOOL SHALL NOT BE LIABLE FOR INCIDENTAL OR CONSEQUENTIAL DAMAGES. WHIRLPOOL CORPORATION MAJOR APPLIANCE WARRANTY LIMITED WARRANTY For one year from...


