Use & Care Guide
Page 1
www.whirlpool.com Table of Contents 2 Model WMC50522 W10434259C MICROWAVE OVEN Use & Care Guide For questions about features, operation/performance, parts, accessories or service, call: 1-800-253-1301. or visit our website at...
www.whirlpool.com Table of Contents 2 Model WMC50522 W10434259C MICROWAVE OVEN Use & Care Guide For questions about features, operation/performance, parts, accessories or service, call: 1-800-253-1301. or visit our website at...
Use & Care Guide
Page 2
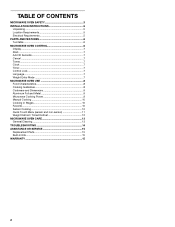
TABLE OF CONTENTS MICROWAVE OVEN SAFETY 3 INSTALLATION INSTRUCTIONS 5 Unpacking 5 Location Requirements 5 Electrical Requirements 5 PARTS AND FEATURES 6 Turntable 6 MICROWAVE OVEN CONTROL 6 Display 7 Start 7 Add 30 Seconds 7 Cancel 7 Tones 7 Clock 7 Timer 7 Control Lock 7 Language 7 Weight Entry Mode 7 MICROWAVE OVEN USE 8 Food ... Menu (sensor and non-sensor 11 Weight Defrost / Timed Defrost 12 MICROWAVE OVEN CARE 13 General Cleaning 13 TROUBLESHOOTING 14 ASSISTANCE OR SERVICE 15 Replacement Parts 15 Built-In Kits 15 WARRANTY 15 2
TABLE OF CONTENTS MICROWAVE OVEN SAFETY 3 INSTALLATION INSTRUCTIONS 5 Unpacking 5 Location Requirements 5 Electrical Requirements 5 PARTS AND FEATURES 6 Turntable 6 MICROWAVE OVEN CONTROL 6 Display 7 Start 7 Add 30 Seconds 7 Cancel 7 Tones 7 Clock 7 Timer 7 Control Lock 7 Language 7 Weight Entry Mode 7 MICROWAVE OVEN USE 8 Food ... Menu (sensor and non-sensor 11 Weight Defrost / Timed Defrost 12 MICROWAVE OVEN CARE 13 General Cleaning 13 TROUBLESHOOTING 14 ASSISTANCE OR SERVICE 15 Replacement Parts 15 Built-In Kits 15 WARRANTY 15 2
Use & Care Guide
Page 4
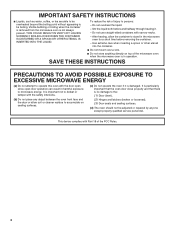
... (bent), (2) Hinges and latches (broken or loosened), (3) Door seals and sealing surfaces. (d) The oven should not be boiling. Do not use straight-sided containers with Part 18 of injury to microwave energy. Do not overheat the liquid. - It is particularly important that the oven door close properly and that there is...
... (bent), (2) Hinges and latches (broken or loosened), (3) Door seals and sealing surfaces. (d) The oven should not be boiling. Do not use straight-sided containers with Part 18 of injury to microwave energy. Do not overheat the liquid. - It is particularly important that the oven door close properly and that there is...
Use & Care Guide
Page 5
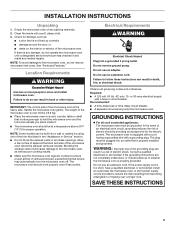
..., grounding reduces the risk of electric shock by using one of the microwave oven is over a longer cord. Do not use an extension cord. See "Parts and Features." or 20-amp electrical supply with a grounding plug. Recommended: ■ A time-delay fuse or time-delay circuit breaker. ■ A separate circuit serving only...
..., grounding reduces the risk of electric shock by using one of the microwave oven is over a longer cord. Do not use an extension cord. See "Parts and Features." or 20-amp electrical supply with a grounding plug. Recommended: ■ A time-delay fuse or time-delay circuit breaker. ■ A separate circuit serving only...
Use & Care Guide
Page 6
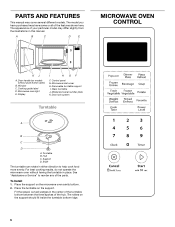
... microwave oven cavity bottom. 2. Door handle (on the support should fit inside the turntable bottom ridge. 6 To Install: 1. PARTS AND FEATURES This manual may differ slightly from the illustrations in this manual. The model you have purchased may have some or all... of the parts. Glass turntable J. Model and serial number plate K. Place the support on the support. Display I . Window C. Hub C. Microwave inlet cover H. Support D. ...
... microwave oven cavity bottom. 2. Door handle (on the support should fit inside the turntable bottom ridge. 6 To Install: 1. PARTS AND FEATURES This manual may differ slightly from the illustrations in this manual. The model you have purchased may have some or all... of the parts. Glass turntable J. Model and serial number plate K. Place the support on the support. Display I . Window C. Hub C. Microwave inlet cover H. Support D. ...

Use & Care Guide
Page 8
... cooking, the amount, size and shape, starting temperature, composition and density of food. Arranging If heating irregularly shaped or different sized foods, arrange the thinner parts and smaller sized items toward the center. Composition and Density Foods high in fat and sugar will reach a higher temperature, and will heat faster than...
... cooking, the amount, size and shape, starting temperature, composition and density of food. Arranging If heating irregularly shaped or different sized foods, arrange the thinner parts and smaller sized items toward the center. Composition and Density Foods high in fat and sugar will reach a higher temperature, and will heat faster than...
Use & Care Guide
Page 11
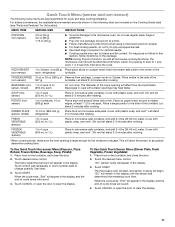
... package. Cover with plastic wrap, and vent*. For bag sizes not listed in the following menu items are included on the Cooking Guide label (see "Parts and Features" for its location).
... package. Cover with plastic wrap, and vent*. For bag sizes not listed in the following menu items are included on the Cooking Guide label (see "Parts and Features" for its location).
Use & Care Guide
Page 12
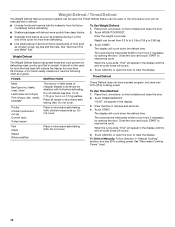
... oven can be set to defrost. ■ Unwrap foods and remove lids (for more even defrosting. ■ Use small pieces of aluminum foil to shield parts of food such as a guide. To Use Timed Defrost: 1. Enter the time in "Manual Cooking" section, and use 30% cooking power. Close the door and...
... oven can be set to defrost. ■ Unwrap foods and remove lids (for more even defrosting. ■ Use small pieces of aluminum foil to shield parts of food such as a guide. To Use Timed Defrost: 1. Enter the time in "Manual Cooking" section, and use 30% cooking power. Close the door and...
Use & Care Guide
Page 13
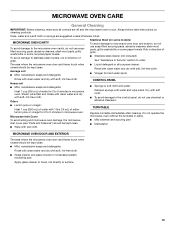
... with clean water and dry with soft, lint-free cloth. Microwave Inlet Cover To avoid arcing and microwave oven damage, the microwave inlet cover (see "Parts and Features") should be kept clean. ■ Mild, nonabrasive soaps and detergents: Rinse with clean water and dry with soft cloth. ■ To avoid damage...
... with clean water and dry with soft, lint-free cloth. Microwave Inlet Cover To avoid arcing and microwave oven damage, the microwave inlet cover (see "Parts and Features") should be kept clean. ■ Mild, nonabrasive soaps and detergents: Rinse with clean water and dry with soft cloth. ■ To avoid damage...
Use & Care Guide
Page 15
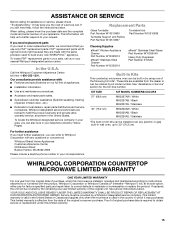
.... ■ Accessory and repair parts sales. ■ Specialized customer assistance (Spanish speaking, hearing impaired, limited vision, etc.). ■ Referrals to correct defects in by a Whirlpool designated service company. These kits are...Part Number W10355010 affresh® Stainless Steel Cleaner Part Number W10355016 affresh® Stainless Steel Wipes Part Number W10355049 Heavy Duty Degreaser Part Number 31552A Built-In Kits This countertop microwave oven can write to Whirlpool Corporation with the product, Whirlpool Corporation or Whirlpool Canada LP (hereafter "Whirlpool...
.... ■ Accessory and repair parts sales. ■ Specialized customer assistance (Spanish speaking, hearing impaired, limited vision, etc.). ■ Referrals to correct defects in by a Whirlpool designated service company. These kits are...Part Number W10355010 affresh® Stainless Steel Cleaner Part Number W10355016 affresh® Stainless Steel Wipes Part Number W10355049 Heavy Duty Degreaser Part Number 31552A Built-In Kits This countertop microwave oven can write to Whirlpool Corporation with the product, Whirlpool Corporation or Whirlpool Canada LP (hereafter "Whirlpool...
Use & Care Guide
Page 16
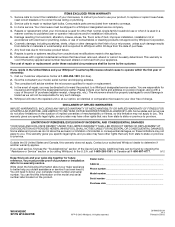
...This warranty gives you specific legal rights, and you reside in a manner contrary to a Whirlpool designated service center. LIMITATION OF REMEDIES; In Canada call 1-800-253-1301. Consumable parts are responsible for future reference. The consultant will return the repaired unit or, at 1-800-...253-1301 (toll-free). 2. WHIRLPOOL SHALL NOT BE LIABLE FOR INCIDENTAL OR CONSEQUENTIAL DAMAGES. Contact your model...
...This warranty gives you specific legal rights, and you reside in a manner contrary to a Whirlpool designated service center. LIMITATION OF REMEDIES; In Canada call 1-800-253-1301. Consumable parts are responsible for future reference. The consultant will return the repaired unit or, at 1-800-...253-1301 (toll-free). 2. WHIRLPOOL SHALL NOT BE LIABLE FOR INCIDENTAL OR CONSEQUENTIAL DAMAGES. Contact your model...

Warranty Information
Page 1
..., etc.). ■ Referrals to obtain service or replacement under this microwave is required to local dealers, repair parts distributors and service companies. Call the Whirlpool Customer eXperience Center toll free: 1-800-253-1301. FSP® replacement parts will help , follow the instructions below . ASSISTANCE OR SERVICE Before calling for the toll-free number...
..., etc.). ■ Referrals to obtain service or replacement under this microwave is required to local dealers, repair parts distributors and service companies. Call the Whirlpool Customer eXperience Center toll free: 1-800-253-1301. FSP® replacement parts will help , follow the instructions below . ASSISTANCE OR SERVICE Before calling for the toll-free number...

Warranty Information
Page 2
... Phone number Model number Serial number Purchase date W10434259C SP PN W10434279B ®/™ © 2013 Whirlpool. Damage resulting from state to state or province to parts or systems resulting from your microwave is reported to Whirlpool within the first year of the Use & Care Guide. Repairs to province. The consultant will return...
... Phone number Model number Serial number Purchase date W10434259C SP PN W10434279B ®/™ © 2013 Whirlpool. Damage resulting from state to state or province to parts or systems resulting from your microwave is reported to Whirlpool within the first year of the Use & Care Guide. Repairs to province. The consultant will return...

Installation Guide
Page 1
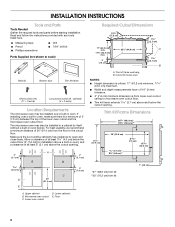
... ou à gaz, jusqu'à 30" (76,2 cm) de largeur Table of Contents / Table des matières MICROWAVE OVEN SAFETY 1 INSTALLATION INSTRUCTIONS 2 Tools and Parts 2 Location Requirements 2 Required Cutout Dimensions 2 Trim Kit Frame Dimensions 2 Electrical Requirements 3 Prepare Microwave Oven 3 Prepare Cutout/Cabinet Opening 3 Install the Microwave Oven 4 Install Trim Kit...
... ou à gaz, jusqu'à 30" (76,2 cm) de largeur Table of Contents / Table des matières MICROWAVE OVEN SAFETY 1 INSTALLATION INSTRUCTIONS 2 Tools and Parts 2 Location Requirements 2 Required Cutout Dimensions 2 Trim Kit Frame Dimensions 2 Electrical Requirements 3 Prepare Microwave Oven 3 Prepare Cutout/Cabinet Opening 3 Install the Microwave Oven 4 Install Trim Kit...
Installation Guide
Page 2
... here. ■ Measuring tape ■ Pencil ■ Phillips screwdriver ■ Drill ■ 7/64" drill bit Parts Supplied (not shown to open and close freely. INSTALLATION INSTRUCTIONS Tools and Parts Tools Needed Gather the required tools and parts before starting installation. The microwave oven may be installed in a cabinet by itself (without a built-in...
... here. ■ Measuring tape ■ Pencil ■ Phillips screwdriver ■ Drill ■ 7/64" drill bit Parts Supplied (not shown to open and close freely. INSTALLATION INSTRUCTIONS Tools and Parts Tools Needed Gather the required tools and parts before starting installation. The microwave oven may be installed in a cabinet by itself (without a built-in...


