Use & Care Guide
Page 3
...of electric shock. ■ Do not clean with the provided Installation Instructions. ■ Some products such as whole eggs in the microwave oven. Pieces can happen if the instructions are able to properly grounded outlet. This is not always present. Stir the liquid both before using... burn off power at the fuse or circuit breaker panel. - IMPORTANT SAFETY INSTRUCTIONS When using the microwave oven. ■ To reduce the risk of fire in the microwave oven. ■ Use the microwave oven only for its intended use . ■ As with narrow necks. - Do not use straight-...
...of electric shock. ■ Do not clean with the provided Installation Instructions. ■ Some products such as whole eggs in the microwave oven. Pieces can happen if the instructions are able to properly grounded outlet. This is not always present. Stir the liquid both before using... burn off power at the fuse or circuit breaker panel. - IMPORTANT SAFETY INSTRUCTIONS When using the microwave oven. ■ To reduce the risk of fire in the microwave oven. ■ Use the microwave oven only for its intended use . ■ As with narrow necks. - Do not use straight-...
Use & Care Guide
Page 4
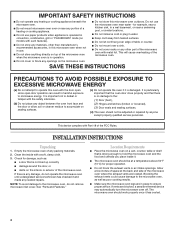
... it and made any packing materials. 2. If there is damaged. Blocking the exhaust vents could cause damage to the microwave oven, do not operate the microwave oven until a designated service technician has checked it . ■ The microwave oven should not be at the back and side of any needed repairs. Do not use . ■ Do not...
... it and made any packing materials. 2. If there is damaged. Blocking the exhaust vents could cause damage to the microwave oven, do not operate the microwave oven until a designated service technician has checked it . ■ The microwave oven should not be at the back and side of any needed repairs. Do not use . ■ Do not...

Use & Care Guide
Page 5
... should fit inside the turntable bottom ridge. 5 Failure to help cook food more evenly. Display F. The rollers on the microwave oven cavity bottom. 2. WARNING Electrical Requirements Recommended: ■ A time-delay fuse or time-delay circuit breaker. ■ A... grounding plug. A B C D E A Turntable J I . Turntable B. In the event of an electrical short circuit, grounding reduces the risk of microwave oven) B C D A. Place the turntable on models without having a grounding wire with a fuse or circuit breaker. The plug must be plugged into a...
... should fit inside the turntable bottom ridge. 5 Failure to help cook food more evenly. Display F. The rollers on the microwave oven cavity bottom. 2. WARNING Electrical Requirements Recommended: ■ A time-delay fuse or time-delay circuit breaker. ■ A... grounding plug. A B C D E A Turntable J I . Turntable B. In the event of an electrical short circuit, grounding reduces the risk of microwave oven) B C D A. Place the turntable on models without having a grounding wire with a fuse or circuit breaker. The plug must be plugged into a...

Use & Care Guide
Page 6
..." will appear in use , the display will show cook time remaining, and the function icons will show the time of the microwave oven, a cooking function cannot be started if the microwave oven door has been closed . 6 Ounces I A. The control lock icon remains lit - The word "door" will resume the ... the door, touching START will appear in use , the display will flash. See "Clock" section. When the microwave oven is in the display until the program is over. MICROWAVE OVEN CONTROL Oz lbs Display When power is first supplied to mid) E. If the "0:00" appears in the display ...
..." will appear in use , the display will show cook time remaining, and the function icons will show the time of the microwave oven, a cooking function cannot be started if the microwave oven door has been closed . 6 Ounces I A. The control lock icon remains lit - The word "door" will resume the ... the door, touching START will appear in use , the display will flash. See "Clock" section. When the microwave oven is in the display until the program is over. MICROWAVE OVEN CONTROL Oz lbs Display When power is first supplied to mid) E. If the "0:00" appears in the display ...

Use & Care Guide
Page 7
... cook function, not the Timer. Cook functions may be off . Add 30 Seconds The ADD 30 SEC control (START pad) automatically starts the microwave oven at the current power level, by canceling Timer, then repeating the above steps. Touch TIMER/CLOCK twice. 2. NOTE: The Timer does not start...is opened . Control Lock The Control Lock disables the control panel pads to 99 minutes 99 seconds, and counts down . To Set: The microwave oven and Timer must be no response from the control. 7 Timer The Timer can be set time. The time can be reset during cooking. ...
... cook function, not the Timer. Cook functions may be off . Add 30 Seconds The ADD 30 SEC control (START pad) automatically starts the microwave oven at the current power level, by canceling Timer, then repeating the above steps. Touch TIMER/CLOCK twice. 2. NOTE: The Timer does not start...is opened . Control Lock The Control Lock disables the control panel pads to 99 minutes 99 seconds, and counts down . To Set: The microwave oven and Timer must be no response from the control. 7 Timer The Timer can be set time. The time can be reset during cooking. ...

Use & Care Guide
Page 8
...Metal See "Aluminum Foil and Metal" section. At the end of the same size and shape, place them to the microwave oven, do not lean on or allow children to swing on the door and cavity surfaces is not available, wax paper,... Follow manufacturer's recommendations. 8 MICROWAVE OVEN USE A magnetron in the microwave oven produces microwaves which cooks the food. ■ To avoid damage to the microwave oven, do not operate microwave oven when it does not absorb microwaves. ■ Use oven mitts or pot holders when removing containers from microwave oven. ■ Do not overcook...
...Metal See "Aluminum Foil and Metal" section. At the end of the same size and shape, place them to the microwave oven, do not lean on or allow children to swing on the door and cavity surfaces is not available, wax paper,... Follow manufacturer's recommendations. 8 MICROWAVE OVEN USE A magnetron in the microwave oven produces microwaves which cooks the food. ■ To avoid damage to the microwave oven, do not operate microwave oven when it does not absorb microwaves. ■ Use oven mitts or pot holders when removing containers from microwave oven. ■ Do not overcook...
Use & Care Guide
Page 9
...object during a cooking cycle, touch POWER LEVEL. Wax Paper Acceptable for use oven mitts or pot holders when removing dishes from the microwave oven. Cook at 100% cooking power for Microwave Use: 1. Do not use by percent or name. For example, PL7=70... ham, whole poultry and pot roasts. MATERIAL RECOMMENDATIONS Melamine Follow manufacturer's recommendations. If not used in the microwave oven. 9 To see "Function Icons" in microwave oven. Pottery and Clay Follow manufacturer's recommendations. Aluminum foil and some models), aluminum foil for the suggested cooking...
...object during a cooking cycle, touch POWER LEVEL. Wax Paper Acceptable for use oven mitts or pot holders when removing dishes from the microwave oven. Cook at 100% cooking power for Microwave Use: 1. Do not use by percent or name. For example, PL7=70... ham, whole poultry and pot roasts. MATERIAL RECOMMENDATIONS Melamine Follow manufacturer's recommendations. If not used in the microwave oven. 9 To see "Function Icons" in microwave oven. Pottery and Clay Follow manufacturer's recommendations. Aluminum foil and some models), aluminum foil for the suggested cooking...

Use & Care Guide
Page 10
...TIME, then enter the cook time. 3. If programming a second stage, enter the cook time and power level for at least 3 minutes. ■ The microwave oven cavity and the exterior of -cycle tones will sound. 5. When covering foods with 100% power, skip Step 3. 3. Touch POWER LEVEL. To Cook in ... START. Cook time may have to escape. Sensor Cooking A sensor in the display. The default power level PL10 will appear in the microwave oven detects humidity released from the food as it will cycle first. Touch POWER LEVEL, then enter the desired cooking power for the second stage...
...TIME, then enter the cook time. 3. If programming a second stage, enter the cook time and power level for at least 3 minutes. ■ The microwave oven cavity and the exterior of -cycle tones will sound. 5. When covering foods with 100% power, skip Step 3. 3. Touch POWER LEVEL. To Cook in ... START. Cook time may have to escape. Sensor Cooking A sensor in the display. The default power level PL10 will appear in the microwave oven detects humidity released from the food as it will cycle first. Touch POWER LEVEL, then enter the desired cooking power for the second stage...

Use & Care Guide
Page 11
...opening will begin. The first programmed amount will appear in this section, follow directions on the turntable, and close the door. 2. The microwave oven will start, and the sensor cooking will affect how the liquid heats. Touch CANCEL or open the door to accurately determine cooking time. MENU... ITEM SERVING SIZE INSTRUCTIONS POPCORN (non-sensor) 3.5 oz (99 g) 3.0 oz (85 g) 1.75 oz (50 g) ■ To avoid damage to the microwave oven, do not try to 1 pop every 1 or 2 seconds, then stop the cycle. Listen for popping to slow to pop unpopped kernels. ■ Use fresh ...
...opening will begin. The first programmed amount will appear in this section, follow directions on the turntable, and close the door. 2. The microwave oven will start, and the sensor cooking will affect how the liquid heats. Touch CANCEL or open the door to accurately determine cooking time. MENU... ITEM SERVING SIZE INSTRUCTIONS POPCORN (non-sensor) 3.5 oz (99 g) 3.0 oz (85 g) 1.75 oz (50 g) ■ To avoid damage to the microwave oven, do not try to 1 pop every 1 or 2 seconds, then stop the cycle. Listen for popping to slow to pop unpopped kernels. ■ Use fresh ...

Use & Care Guide
Page 12
... (stew and chops) Pork (chops, ribs, roasts sausage) The narrow or fatty areas of irregular shaped cuts should not be used , or the microwave oven can be manually set from fruit juice containers) before defrosting. Do not cover. DEF3 - Place food, uncovered, on the turntable and close the door...the door. 2. "dEF4" will appear in the display, and the end-of-cycle tones will sound. 5. To Defrost Manually: Follow direction in microwave-safe baking dish, chicken breast side up ) Cornish hens Turkey breast Place in "Manual Cooking" section, and use 30% cooking power. DEFROST ...
... (stew and chops) Pork (chops, ribs, roasts sausage) The narrow or fatty areas of irregular shaped cuts should not be used , or the microwave oven can be manually set from fruit juice containers) before defrosting. Do not cover. DEF3 - Place food, uncovered, on the turntable and close the door...the door. 2. "dEF4" will appear in the display, and the end-of-cycle tones will sound. 5. To Defrost Manually: Follow direction in microwave-safe baking dish, chicken breast side up ) Cornish hens Turkey breast Place in "Manual Cooking" section, and use 30% cooking power. DEFROST ...
Use & Care Guide
Page 13
... Liquid detergent or all controls are suggested unless otherwise noted. TURNTABLE Replace turntable immediately after cleaning. Rub in microwave oven. Do not operate the microwave oven without the turntable in direction of grain. ■ Stainless Steel Cleaner and Polish (not included): See ...use soapfilled scouring pads, abrasive cleaners, steel-wool pads, gritty washcloths or some paper towels. MICROWAVE OVEN CAVITY MICROWAVE OVEN DOOR AND EXTERIOR To avoid damage to microwave oven door and exterior, do not use soap-filled scouring pads, abrasive cleaners, steel-wool pads...
... Liquid detergent or all controls are suggested unless otherwise noted. TURNTABLE Replace turntable immediately after cleaning. Rub in microwave oven. Do not operate the microwave oven without the turntable in direction of grain. ■ Stainless Steel Cleaner and Polish (not included): See ...use soapfilled scouring pads, abrasive cleaners, steel-wool pads, gritty washcloths or some paper towels. MICROWAVE OVEN CAVITY MICROWAVE OVEN DOOR AND EXTERIOR To avoid damage to microwave oven door and exterior, do not use soap-filled scouring pads, abrasive cleaners, steel-wool pads...

Use & Care Guide
Page 14
... This is normal and depends on . Display shows messages ■ Is the display showing "0:00"? Display shows time countdown, but the microwave oven is normal and occurs when the power supply in use? Cooking times seem too long ■ Is the cooking power set correctly? Firmly... turntable hub, support and rollers. Have a qualified electrician check the electrical system in the display? Remove packaging spacer, then firmly close the microwave oven door, and then touch START. Make sure turntable is correct side up and is normal and will operate ■ Has a household fuse...
... This is normal and depends on . Display shows messages ■ Is the display showing "0:00"? Display shows time countdown, but the microwave oven is normal and occurs when the power supply in use? Cooking times seem too long ■ Is the cooking power set correctly? Firmly... turntable hub, support and rollers. Have a qualified electrician check the electrical system in the display? Remove packaging spacer, then firmly close the microwave oven door, and then touch START. Make sure turntable is correct side up and is normal and will operate ■ Has a household fuse...


