
Warranty Information
Page 1
...Give the consultant your sales slip together for factory specified parts and repair labor to the appliance. 9. The consultant will , at its sole option, either pay for future reference. The microwave should cease to Whirlpool within the first year of ownership: 1. You must ...provide proof of purchase or installation date for repair or replacement. 4. In-home service. Your microwave must be easily determined. Repairs to parts or systems resulting from defects in...
...Give the consultant your sales slip together for factory specified parts and repair labor to the appliance. 9. The consultant will , at its sole option, either pay for future reference. The microwave should cease to Whirlpool within the first year of ownership: 1. You must ...provide proof of purchase or installation date for repair or replacement. 4. In-home service. Your microwave must be easily determined. Repairs to parts or systems resulting from defects in...

Installation Guide
Page 1
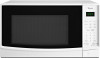
The appearance of your appliance. Table of Contents / Table des matières MICROWAVE OVEN SAFETY 1 INSTALLATION REQUIREMENTS 2 Tools and Parts 2 Location Requirements 2 Product Dimensions 2 Electrical Requirements 3 INSTALLATION INSTRUCTIONS 3 Place Cabinet Template 3 Mark and Drill Holes 4 Install the Microwave Oven 4 Complete Installation 5 SÉCURITÉ DU ...
The appearance of your appliance. Table of Contents / Table des matières MICROWAVE OVEN SAFETY 1 INSTALLATION REQUIREMENTS 2 Tools and Parts 2 Location Requirements 2 Product Dimensions 2 Electrical Requirements 3 INSTALLATION INSTRUCTIONS 3 Place Cabinet Template 3 Mark and Drill Holes 4 Install the Microwave Oven 4 Complete Installation 5 SÉCURITÉ DU ...

Installation Guide
Page 2
...; 1/2" (13 mm) wood bit or metal hole cutter (if installing under a metal cabinet) ■ Covering or microwave oven carton Parts Supplied (not shown to the normal contents of the cabinet. ■ Grounded electrical outlet inside upper cabinet. INSTALLATION REQUIREMENTS Tools and... Parts Tools Needed Gather the required tools and parts before starting installation. Read and follow the instructions provided with any items that might be hanging from the ...
...; 1/2" (13 mm) wood bit or metal hole cutter (if installing under a metal cabinet) ■ Covering or microwave oven carton Parts Supplied (not shown to the normal contents of the cabinet. ■ Grounded electrical outlet inside upper cabinet. INSTALLATION REQUIREMENTS Tools and... Parts Tools Needed Gather the required tools and parts before starting installation. Read and follow the instructions provided with any items that might be hanging from the ...

Use & Care Guide
Page 4
...around the door, or ■ dents on the microwave oven. ■ Do not store this oven with a soft, damp cloth. 3. See "Parts and Features." NOTE: This model may automatically turn the microwave oven off. Blocking the exhaust vents could cause damage to the: (1) Door (bent), (2)... service personnel. SAVE THESE INSTRUCTIONS PRECAUTIONS TO AVOID POSSIBLE EXPOSURE TO EXCESSIVE MICROWAVE ENERGY (a) Do not attempt to defeat or tamper with Part 18 of any packing materials. 2. If there is important not to operate this microwave oven outdoors. Clean the inside it. ■...
...around the door, or ■ dents on the microwave oven. ■ Do not store this oven with a soft, damp cloth. 3. See "Parts and Features." NOTE: This model may automatically turn the microwave oven off. Blocking the exhaust vents could cause damage to the: (1) Door (bent), (2)... service personnel. SAVE THESE INSTRUCTIONS PRECAUTIONS TO AVOID POSSIBLE EXPOSURE TO EXCESSIVE MICROWAVE ENERGY (a) Do not attempt to defeat or tamper with Part 18 of any packing materials. 2. If there is important not to operate this microwave oven outdoors. Clean the inside it. ■...

Use & Care Guide
Page 5
... results, do not operate the microwave oven without having a grounding wire with a fuse or circuit breaker. The appearance of the parts. Do not remove ground prong. Do not use an extension cord. Removable turntable support G. Support The turntable can result in place.... Door lock system B. Place the turntable on the microwave oven cavity bottom. 2. Model and serial number plate D. Electrical Requirements WARNING PARTS AND FEATURES This manual may have a qualified electrician or serviceman install an outlet near the microwave oven. B C D E Electrical Shock...
... results, do not operate the microwave oven without having a grounding wire with a fuse or circuit breaker. The appearance of the parts. Do not remove ground prong. Do not use an extension cord. Removable turntable support G. Support The turntable can result in place.... Door lock system B. Place the turntable on the microwave oven cavity bottom. 2. Model and serial number plate D. Electrical Requirements WARNING PARTS AND FEATURES This manual may have a qualified electrician or serviceman install an outlet near the microwave oven. B C D E Electrical Shock...

Use & Care Guide
Page 7
... pot holders when removing containers from microwave oven. ■ Do not overcook potatoes. Arranging If heating irregularly shaped or different sized foods, arrange the thinner parts and smaller sized items toward the center. Prick in whole eggs may be turned back at once, the longer the cook time needed. MICROWAVE OVEN...
... pot holders when removing containers from microwave oven. ■ Do not overcook potatoes. Arranging If heating irregularly shaped or different sized foods, arrange the thinner parts and smaller sized items toward the center. Prick in whole eggs may be turned back at once, the longer the cook time needed. MICROWAVE OVEN...
Use & Care Guide
Page 9
... the end of the cycle for cook. To Use Defrost: 1. Touch START. During defrosting, 5 tones will sound. 5. Touch CANCEL or open the door to shield parts of food such as with plastic wrap and vent. Place food on the turntable and close the door. 2. See "Microwave Cooking Power." "END" will appear...
... the end of the cycle for cook. To Use Defrost: 1. Touch START. During defrosting, 5 tones will sound. 5. Touch CANCEL or open the door to shield parts of food such as with plastic wrap and vent. Place food on the turntable and close the door. 2. See "Microwave Cooking Power." "END" will appear...

Use & Care Guide
Page 10
...? See "Turntable" section. ■ Is the turntable support operating properly? Microwave Inlet Cover To avoid arcing and microwave oven damage, the microwave inlet cover (see "Parts and Features") should be kept clean. ■ Wipe with soft cloth. ■ To avoid damage to the control panel, do not use chemical or abrasive...
...? See "Turntable" section. ■ Is the turntable support operating properly? Microwave Inlet Cover To avoid arcing and microwave oven damage, the microwave inlet cover (see "Parts and Features") should be kept clean. ■ Wipe with soft cloth. ■ To avoid damage to the control panel, do not use chemical or abrasive...

Use & Care Guide
Page 11
...cordless phone, etc. ■ Is the microwave oven plugged into the same outlet? Whirlpool Canada LP designated service technicians are trained to local dealers, repair parts distributors and service companies. See "Microwave Cooking Power" section. ■ Are large amounts...new WHIRLPOOL® appliance. Replacement Parts Glass Turntable Turntable Support/Roller Assembly Part Number W10315165 Part Number W10315166 Cleaning Supplies affresh™ Kitchen Appliance Cleaner Part Number W10355010 Heavy Duty Degreaser Part Number 31552A 11 To locate FSP® replacement parts ...
...cordless phone, etc. ■ Is the microwave oven plugged into the same outlet? Whirlpool Canada LP designated service technicians are trained to local dealers, repair parts distributors and service companies. See "Microwave Cooking Power" section. ■ Are large amounts...new WHIRLPOOL® appliance. Replacement Parts Glass Turntable Turntable Support/Roller Assembly Part Number W10315165 Part Number W10315166 Cleaning Supplies affresh™ Kitchen Appliance Cleaner Part Number W10355010 Heavy Duty Degreaser Part Number 31552A 11 To locate FSP® replacement parts ...

Use & Care Guide
Page 12
... service, first see the "Troubleshooting" section of the Use & Care Guide. Proof of original purchase date is reported to Whirlpool within the first year of ownership: 1. Consumable parts are responsible for factory specified parts and repair labor to the appliance. 9. Damage resulting from unauthorized modifications made to correct defects in a manner contrary to...
... service, first see the "Troubleshooting" section of the Use & Care Guide. Proof of original purchase date is reported to Whirlpool within the first year of ownership: 1. Consumable parts are responsible for factory specified parts and repair labor to the appliance. 9. Damage resulting from unauthorized modifications made to correct defects in a manner contrary to...


