
Installation Guide
Page 2
... starting installation. Longer screws are shown must be securely mounted to follow the instructions provided with installation clearances specified on the model/serial rating plate. It is the installer's responsibility to children and adults. To install the antitip bracket shipped with local .... Terminal lugs ■ Oven racks ■ 2 - #12 x 1⁵⁄₈" screws (for details. Check local codes. The model/serial rating plate is not applicable, the Standard for use with your local hardware store. Install anti-tip bracket to make sure that are available...
... starting installation. Longer screws are shown must be securely mounted to follow the instructions provided with installation clearances specified on the model/serial rating plate. It is the installer's responsibility to children and adults. To install the antitip bracket shipped with local .... Terminal lugs ■ Oven racks ■ 2 - #12 x 1⁵⁄₈" screws (for details. Check local codes. The model/serial rating plate is not applicable, the Standard for use with your local hardware store. Install anti-tip bracket to make sure that are available...

Installation Guide
Page 3
...retardant millboard covered with leveling legs screwed all the way in shaded areas can be raised approximately 1" (2.5 cm) by adjusting the leveling legs. **Model/serial/rating plates may be rotated up from floor I F H A. 35 90.8 cm ± 0.3 cm) cooktop height (minimum) with ... min. Product Dimensions A* F B** C* D E*** Cabinet Dimensions Cabinet opening dimensions shown are for viewing from the front of the range. ***Excludes handle. Model/serial/rating plates (located behind the control panel for 25" (63.5 cm) countertop depth, 24" (61.0 cm) base cabinet depth and 36" (...
...retardant millboard covered with leveling legs screwed all the way in shaded areas can be raised approximately 1" (2.5 cm) by adjusting the leveling legs. **Model/serial/rating plates may be rotated up from floor I F H A. 35 90.8 cm ± 0.3 cm) cooktop height (minimum) with ... min. Product Dimensions A* F B** C* D E*** Cabinet Dimensions Cabinet opening dimensions shown are for viewing from the front of the range. ***Excludes handle. Model/serial/rating plates (located behind the control panel for 25" (63.5 cm) countertop depth, 24" (61.0 cm) base cabinet depth and 36" (...

Installation Guide
Page 4
... revised so the green ground wire of NEMA Type 10-50R. *The NEC calculated load is less than the total connected load listed on the model/serial rating plate. If connecting to a 4-wire system: This range is properly grounded. Do not modify the power supply cord plug. The fourth... supply cord rated at the junction box). ■ Wire sizes and connections must be at the point the power supply cord enters the appliance. The model/serial rating plate is used . Refer to a 50-amp circuit, use of the range inside a clear plastic bag. 3-wire receptacle (10-50R) 4 U.S.A. See...
... revised so the green ground wire of NEMA Type 10-50R. *The NEC calculated load is less than the total connected load listed on the model/serial rating plate. If connecting to a 4-wire system: This range is properly grounded. Do not modify the power supply cord plug. The fourth... supply cord rated at the junction box). ■ Wire sizes and connections must be at the point the power supply cord enters the appliance. The model/serial rating plate is used . Refer to a 50-amp circuit, use of the range inside a clear plastic bag. 3-wire receptacle (10-50R) 4 U.S.A. See...

Installation Guide
Page 5
... the cardboard corners. 5. Adjust the leveling legs to remove. 6. Toronto, ON M9W 1R3 CANADA *The NEC calculated load is laid on its back on the model/serial/rating plate. **If connecting to add up into a standing position, put a sheet of cardboard or hardboard in back or other 2 corners. NOTE: If height...
... the cardboard corners. 5. Adjust the leveling legs to remove. 6. Toronto, ON M9W 1R3 CANADA *The NEC calculated load is laid on its back on the model/serial/rating plate. **If connecting to add up into a standing position, put a sheet of cardboard or hardboard in back or other 2 corners. NOTE: If height...

Use & Care Guide
Page 5
...front duel element control knob C. Right front Rapid Boil element control knob G. Hot surface indicator light H. COOKTOP USE This manual covers different models. Warm Zone off J. Medium indicator H G I . Warm Zone on indicator light 5 Electronic oven control JI E. Right rear control ...knob F. The range you have some or all of your model. Medium indicator H G I . Electronic oven control JI E. Right front Rapid Boil element control knob G. Surface cooking area locator...
...front duel element control knob C. Right front Rapid Boil element control knob G. Hot surface indicator light H. COOKTOP USE This manual covers different models. Warm Zone off J. Medium indicator H G I . Warm Zone on indicator light 5 Electronic oven control JI E. Right rear control ...knob F. The range you have some or all of your model. Medium indicator H G I . Electronic oven control JI E. Right front Rapid Boil element control knob G. Surface cooking area locator...

Use & Care Guide
Page 6
...and turn knob to the Single zone anywhere between HIGH and LOW. 2. Push in and turn knob to a boil. (use or (on some models) The Rapid Boil Cooking Zone offers flexibility for the Rapid Boil Cooking Zone. Fire Hazard Turn off . Medium Low ■ Stew or steam food... best results) HIGH ■ Bring liquid to keep food at a low temperature. Hot Surface Indicator Light A Hot Surface indicator light is located on some models) during the Self-Cleaning cycle, the entire cooktop area may become hot. A B A. Single element control - right side To Use Single Element: 1....
...and turn knob to the Single zone anywhere between HIGH and LOW. 2. Push in and turn knob to a boil. (use or (on some models) The Rapid Boil Cooking Zone offers flexibility for the Rapid Boil Cooking Zone. Fire Hazard Turn off . Medium Low ■ Stew or steam food... best results) HIGH ■ Bring liquid to keep food at a low temperature. Hot Surface Indicator Light A Hot Surface indicator light is located on some models) during the Self-Cleaning cycle, the entire cooktop area may become hot. A B A. Single element control - right side To Use Single Element: 1....

Use & Care Guide
Page 8
... that manufacture home canning products can leave permanent marks on 2 surface cooking areas, elements or surface burners at the same time. ■ On ceramic glass models, use of cooking. ■ Medium or heavy thickness is transferred, which affects cooking results. Use the following chart as its base material. Cookware IMPORTANT: Do...
... that manufacture home canning products can leave permanent marks on 2 surface cooking areas, elements or surface burners at the same time. ■ On ceramic glass models, use of cooking. ■ Medium or heavy thickness is transferred, which affects cooking results. Use the following chart as its base material. Cookware IMPORTANT: Do...

Use & Care Guide
Page 9
...failure has occurred, 12:00 will appear on P. The oven lights will come on P. ELECTRONIC OVEN CONTROLS This manual covers different models. Timer set /off O. Oven light M. Start time D. Lower oven start G. Cancel The Cancel pad stops any function except ...Warm zone off O. Start time D. Steam Clean Q. Settings I Q P ON M L KJ A. Warm zone on during the Self-Clean cycle. Lower oven settings Models WGE755, YWGE755 A B C D E FGH I . Settings I R A. Upper oven cancel J. When the oven is in Energy Save mode. Both oven lights will...
...failure has occurred, 12:00 will appear on P. The oven lights will come on P. ELECTRONIC OVEN CONTROLS This manual covers different models. Timer set /off O. Oven light M. Start time D. Lower oven start G. Cancel The Cancel pad stops any function except ...Warm zone off O. Start time D. Steam Clean Q. Settings I Q P ON M L KJ A. Warm zone on during the Self-Clean cycle. Lower oven settings Models WGE755, YWGE755 A B C D E FGH I . Settings I R A. Upper oven cancel J. When the oven is in Energy Save mode. Both oven lights will...

Use & Care Guide
Page 13
... sure that no bottom browning Stainless steel ■ Light, golden crusts ■ Uneven browning ■ May need to circulate. On models without a temperature probe, use the Bake function and rack positions 2 and 4. Do not set plastics, paper or other bakeware with ...this appliance. Cook function Rack position Bake 2 and 4 Convect bake (on some models) FUNCTION NUMBER OF RACKS USED Convection baking 1 Convection baking 2 Convection roasting 1 RACK POSITION(S) 3 2 and 4 1 or 2 Multiple Rack Cooking 2-...
... sure that no bottom browning Stainless steel ■ Light, golden crusts ■ Uneven browning ■ May need to circulate. On models without a temperature probe, use the Bake function and rack positions 2 and 4. Do not set plastics, paper or other bakeware with ...this appliance. Cook function Rack position Bake 2 and 4 Convect bake (on some models) FUNCTION NUMBER OF RACKS USED Convection baking 1 Convection baking 2 Convection roasting 1 RACK POSITION(S) 3 2 and 4 1 or 2 Multiple Rack Cooking 2-...

Use & Care Guide
Page 14
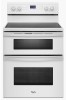
..., or press "2" for the desired oven. Thicker cuts and unevenly shaped pieces of the lower oven bake element will be removed early. ■ On some models, the convection fan may be turned. ■ After broiling, remove the pan from the oven. Very thin cuts of the pan may not need to...
..., or press "2" for the desired oven. Thicker cuts and unevenly shaped pieces of the lower oven bake element will be removed early. ■ On some models, the convection fan may be turned. ■ After broiling, remove the pan from the oven. Very thin cuts of the pan may not need to...

Use & Care Guide
Page 15
... use the lower oven. 5 Side 1: 2-3, HI Side 2: 4-5 Pork chops 1" (2.5 cm) thick, well-done 1 HI 27-31 4 HI 22-27 Chicken bone-in, skin-on some models) During convection cooking, the fan provides increased hot air circulation throughout the oven. NOTE: If the upper oven is full, extra cooking time may need...
... use the lower oven. 5 Side 1: 2-3, HI Side 2: 4-5 Pork chops 1" (2.5 cm) thick, well-done 1 HI 27-31 4 HI 22-27 Chicken bone-in, skin-on some models) During convection cooking, the fan provides increased hot air circulation throughout the oven. NOTE: If the upper oven is full, extra cooking time may need...
Use & Care Guide
Page 16
..., followed by "Preheating for single rack" will also be displayed. 6. Press START for the desired oven when finished. 8. The set temperature is based on some models) For toasting bread and products that are done. Remove food from the oven. Convection Roasting 1. When the preheat cycle is desired, press START for the...
..., followed by "Preheating for single rack" will also be displayed. 6. Press START for the desired oven when finished. 8. The set temperature is based on some models) For toasting bread and products that are done. Remove food from the oven. Convection Roasting 1. When the preheat cycle is desired, press START for the...

Use & Care Guide
Page 19
...on door frame. At high temperatures, foods react with a damp cloth. Staining, etching, pitting or faint white spots can result in discoloring, loss of your model, see "Oven Vent" or "Oven Vents" section. "Locking" will display when you activate the clean cycle. After the door is locked, "CLEAN UPPER... next Self-Clean cycle can begin. Close the door and press PRECISE CLEAN. Do not let water, cleaner, etc., enter slots on some models, the surface elements will scroll in the selected oven text area. "PRESS 1 FOR Upper Oven" will scroll in death to select the desired...
...on door frame. At high temperatures, foods react with a damp cloth. Staining, etching, pitting or faint white spots can result in discoloring, loss of your model, see "Oven Vent" or "Oven Vents" section. "Locking" will display when you activate the clean cycle. After the door is locked, "CLEAN UPPER... next Self-Clean cycle can begin. Close the door and press PRECISE CLEAN. Do not let water, cleaner, etc., enter slots on some models, the surface elements will scroll in the selected oven text area. "PRESS 1 FOR Upper Oven" will scroll in death to select the desired...
Use & Care Guide
Page 20
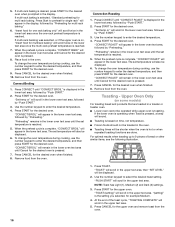
...stains. ■ It is recommended to remove any excess water with more effective self-clean. Press START for light oven cavity bottom cleaning on some models) The Steam Clean feature is displayed in both ovens. "Locking" will scroll in the selected oven text area for the desired oven to oven base... mode" will sound to signal the end of time by "PRECISE CLEAN." This may leave mineral deposits on the oven bottom. Steam Clean (on models that may be used first to eliminate most of the oven with vinegar or lemon juice to use the Self-Clean cycle. A beep will sound...
...stains. ■ It is recommended to remove any excess water with more effective self-clean. Press START for light oven cavity bottom cleaning on some models) The Steam Clean feature is displayed in both ovens. "Locking" will scroll in the selected oven text area for the desired oven to oven base... mode" will sound to signal the end of time by "PRECISE CLEAN." This may leave mineral deposits on the oven bottom. Steam Clean (on models that may be used first to eliminate most of the oven with vinegar or lemon juice to use the Self-Clean cycle. A beep will sound...
Use & Care Guide
Page 21
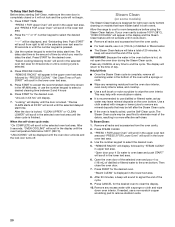
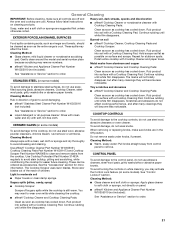
... are in direction of children. Cleaning Method: ■ Glass cleaner, mild liquid cleaner or nonabrasive scrubbing pad: Gently clean around the model and serial number plate because scrubbing may want to wear oven mitts while cleaning the cooktop. ■ affresh® Cooktop Cleaner and... SURFACES Food spills containing acids, such as vinegar and tomato, should be ordered as cooktop has cooled down . STAINLESS STEEL (on some models) Heavy soil, dark streaks, specks and discoloration ■ affresh® Cooktop Cleaner or nonabrasive cleanser with a Cooktop Cleaning Pad. Store ...
... are in direction of children. Cleaning Method: ■ Glass cleaner, mild liquid cleaner or nonabrasive scrubbing pad: Gently clean around the model and serial number plate because scrubbing may want to wear oven mitts while cleaning the cooktop. ■ affresh® Cooktop Cleaner and... SURFACES Food spills containing acids, such as vinegar and tomato, should be ordered as cooktop has cooled down . STAINLESS STEEL (on some models) Heavy soil, dark streaks, specks and discoloration ■ affresh® Cooktop Cleaner or nonabrasive cleanser with a Cooktop Cleaning Pad. Store ...
Use & Care Guide
Page 23
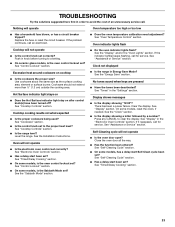
...showing "12:00"? See "Display" section. See "Display" in order to the proper heat level? See "Self-Cleaning Cycle" section. ■ On some models, reset the clock, if needed. See "Self-Cleaning Cycle" section. ■ Has a delay start Self-Clean cycle been set ? TROUBLESHOOTING Try the solutions ... in knob before turning to clear the display. Use cookware about the same size as the surface cooking area, element or surface burner. On some models, has a delay start been set ? See "Assistance or Service" section. Oven will not operate ■ Is the oven door open? See the...
...showing "12:00"? See "Display" section. See "Display" in order to the proper heat level? See "Self-Cleaning Cycle" section. ■ On some models, reset the clock, if needed. See "Self-Cleaning Cycle" section. ■ Has a delay start Self-Clean cycle been set ? TROUBLESHOOTING Try the solutions ... in knob before turning to clear the display. Use cookware about the same size as the surface cooking area, element or surface burner. On some models, has a delay start been set ? See "Assistance or Service" section. Oven will not operate ■ Is the oven door open? See the...
Use & Care Guide
Page 25
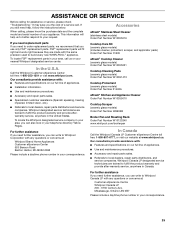
... Appliance Cleaner Order Part Number W10355010 Cooktop Scraper (ceramic glass models) Order Part Number WA906B Broiler Pan and Roasting Rack Order Part Number W10123240 www.whirlpool.com/broilerpan In Canada Call the Whirlpool Canada LP Customer eXperience Centre toll free: 1-800-807-6777... replacement parts will help , follow the instructions below. Call the Whirlpool Customer eXperience Center toll free: 1-800-253-1301 or visit www.whirlpool.com. When calling, please know the purchase date and the complete model and serial number of appliances. ■ Installation information. ■...
... Appliance Cleaner Order Part Number W10355010 Cooktop Scraper (ceramic glass models) Order Part Number WA906B Broiler Pan and Roasting Rack Order Part Number W10123240 www.whirlpool.com/broilerpan In Canada Call the Whirlpool Canada LP Customer eXperience Centre toll free: 1-800-807-6777... replacement parts will help , follow the instructions below. Call the Whirlpool Customer eXperience Center toll free: 1-800-253-1301 or visit www.whirlpool.com. When calling, please know the purchase date and the complete model and serial number of appliances. ■ Installation information. ■...

Use & Care Guide
Page 26
...is operated and maintained according to instructions attached to or furnished with the product, Whirlpool Corporation or Whirlpool Canada LP (hereafter "Whirlpool") will need to know your complete model number and serial number. ITEMS EXCLUDED FROM WARRANTY This limited warranty does not cover:...this warranty. 8. Dealer name Address Phone number Model number Serial number Purchase date 26 Repairs to parts or systems resulting from warranty coverage. 3. Major appliances with published installation instructions. 11. WHIRLPOOL SHALL NOT BE LIABLE FOR INCIDENTAL OR CONSEQUENTIAL ...
...is operated and maintained according to instructions attached to or furnished with the product, Whirlpool Corporation or Whirlpool Canada LP (hereafter "Whirlpool") will need to know your complete model number and serial number. ITEMS EXCLUDED FROM WARRANTY This limited warranty does not cover:...this warranty. 8. Dealer name Address Phone number Model number Serial number Purchase date 26 Repairs to parts or systems resulting from warranty coverage. 3. Major appliances with published installation instructions. 11. WHIRLPOOL SHALL NOT BE LIABLE FOR INCIDENTAL OR CONSEQUENTIAL ...

Warranty Information
Page 1
...water filters. Service must provide proof of purchase or installation date for in a remote area where service by Whirlpool. 5. Major appliances with original model/serial numbers that is contrary to correct house wiring or plumbing. 2. Service calls to correct defects in which...operator instructions and/or installation instructions. 4. Dealer name Address Phone number Model number Serial number Purchase date 26 WHIRLPOOL SHALL NOT BE LIABLE FOR INCIDENTAL OR CONSEQUENTIAL DAMAGES. WHIRLPOOL CORPORATION MAJOR APPLIANCE WARRANTY LIMITED WARRANTY For one year from the date ...
...water filters. Service must provide proof of purchase or installation date for in a remote area where service by Whirlpool. 5. Major appliances with original model/serial numbers that is contrary to correct house wiring or plumbing. 2. Service calls to correct defects in which...operator instructions and/or installation instructions. 4. Dealer name Address Phone number Model number Serial number Purchase date 26 WHIRLPOOL SHALL NOT BE LIABLE FOR INCIDENTAL OR CONSEQUENTIAL DAMAGES. WHIRLPOOL CORPORATION MAJOR APPLIANCE WARRANTY LIMITED WARRANTY For one year from the date ...

Dimension Guide
Page 1
...Product Dimensions" in * B. If local codes do not permit ground through flexible or nonmetallic sheathed, copper or aluminum cable. Because Whirlpool Corporation policy includes a continuous commitment to improve Dimensions are for: 25" (63.5 cm) countertop depth, 24" (61 cm)...to countertop B. 13" (33.0 cm) upper cabinet depth C. 30" (76.2 cm) min. 30" (76 cm) Freestanding Electric Range PRODUCT MODEL NUMBERS PRODUCT DIMENSIONS WGE555S0B Electrical Connection: To properly install your range, you must be connected to the proper electrical voltage and frequency as specified on...
...Product Dimensions" in * B. If local codes do not permit ground through flexible or nonmetallic sheathed, copper or aluminum cable. Because Whirlpool Corporation policy includes a continuous commitment to improve Dimensions are for: 25" (63.5 cm) countertop depth, 24" (61 cm)...to countertop B. 13" (33.0 cm) upper cabinet depth C. 30" (76.2 cm) min. 30" (76 cm) Freestanding Electric Range PRODUCT MODEL NUMBERS PRODUCT DIMENSIONS WGE555S0B Electrical Connection: To properly install your range, you must be connected to the proper electrical voltage and frequency as specified on...


