
Use and Care Guide
Page 3
.... • Do not touch any phone in this manual must be killed or seriously injured if you to prevent property damage, personal injury, or death. - DRYER SAFETY Your safety and the safety of others . This symbol alerts you don't follow instructions. All safety messages will tell you what can kill or...
.... • Do not touch any phone in this manual must be killed or seriously injured if you to prevent property damage, personal injury, or death. - DRYER SAFETY Your safety and the safety of others . This symbol alerts you don't follow instructions. All safety messages will tell you what can kill or...
Use and Care Guide
Page 4
... 54 or the Canadian Natural Gas and Propane Installation Code, CSA B149.1. IMPORTANT SAFETY INSTRUCTIONS WARNING: To reduce the risk of the dryer and exhaust vent should be cleaned periodically by the manufacturer of the fabric softener or product. ■ Do not use heat to dry... by qualified service personnel. ■ See installation instructions for grounding requirements. Close supervision of children is necessary when the dryer is used near children. ■ Before the dryer is removed from the accumulation of lint, dust, and dirt. ■ The interior of fire, electric shock, or...
... 54 or the Canadian Natural Gas and Propane Installation Code, CSA B149.1. IMPORTANT SAFETY INSTRUCTIONS WARNING: To reduce the risk of the dryer and exhaust vent should be cleaned periodically by the manufacturer of the fabric softener or product. ■ Do not use heat to dry... by qualified service personnel. ■ See installation instructions for grounding requirements. Close supervision of children is necessary when the dryer is used near children. ■ Before the dryer is removed from the accumulation of lint, dust, and dirt. ■ The interior of fire, electric shock, or...
Use and Care Guide
Page 5
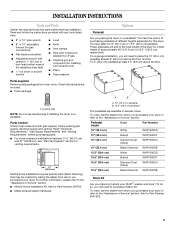
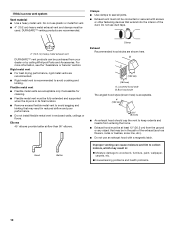
... 15.5" (39.4 cm) pedestal. Check existing gas supply, electrical supply and venting. You may be ordered by calling the dealer from whom you placing the dryer on a pedestal. A B A. 10" (25.4 cm) pedestal B. 15.5" (39.4 cm) pedestal The pedestals are included. ■ Parts package 4 Leveling legs...39.4 cm) Biscuit WHP1500ST 15.5" (39.4 cm) Diamond Dust (Silver) WHP1500SU 15.5" (39.4 cm) Black Diamond WHP1500SB Stack Kit Are you purchased your dryer. These pedestals will need to place the 10" (25.4 cm) pedestal at least 9" (22.9 cm) above the floor and the 15.5" (39.4 ...
... 15.5" (39.4 cm) pedestal. Check existing gas supply, electrical supply and venting. You may be ordered by calling the dealer from whom you placing the dryer on a pedestal. A B A. 10" (25.4 cm) pedestal B. 15.5" (39.4 cm) pedestal The pedestals are included. ■ Parts package 4 Leveling legs...39.4 cm) Biscuit WHP1500ST 15.5" (39.4 cm) Diamond Dust (Silver) WHP1500SU 15.5" (39.4 cm) Black Diamond WHP1500SB Stack Kit Are you purchased your dryer. These pedestals will need to place the 10" (25.4 cm) pedestal at least 9" (22.9 cm) above the floor and the 15.5" (39.4 ...
Use and Care Guide
Page 6
...NOTE: No other fuel-burning appliance can result in an area where it will need ■ A location that allows for a garage installation. Place dryer at least 18" (46 cm) above the floor for proper exhaust installation. See "Electrical Requirements." ■ A sturdy floor to do not permit,...elbow. See "Venting Requirements." This can purchase a Door Reversal and Stack Combination Kit. You will reduce the chance of items falling behind the dryer for spacing of 0" (0 cm) clearance on all sides of 200 lbs (90.7 kg). Installation spacing for wall, door and floor moldings...
...NOTE: No other fuel-burning appliance can result in an area where it will need ■ A location that allows for a garage installation. Place dryer at least 18" (46 cm) above the floor for proper exhaust installation. See "Electrical Requirements." ■ A sturdy floor to do not permit,...elbow. See "Venting Requirements." This can purchase a Door Reversal and Stack Combination Kit. You will reduce the chance of items falling behind the dryer for spacing of 0" (0 cm) clearance on all sides of 200 lbs (90.7 kg). Installation spacing for wall, door and floor moldings...

Use and Care Guide
Page 7
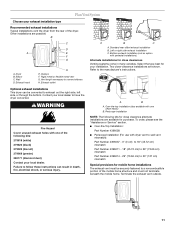
... B. closet or confined area 5"** (12.7 cm) *Required spacing **For side or bottom venting, 0" (0 cm) spacing is allowed. Closet door with stacked washer and dryer The dimensions shown are required. 7"* (17.8 cm) 7"* (17.8 cm) 9"* (22.9 cm) 5"** 31¹ ₂" 1"* 1" 27" 1" (12.7 ... spacing for recessed or closet installation, with vents *Required spacing **For side or bottom venting, 0" (0 cm) spacing is allowed. Side view - Dryer on pedestal 14" max.* (35.6 cm) 18" min.* (45.72 cm) 1" (2.5 cm) 27" (68.6 cm) 1" 1"* (2.5 cm) (2.5 cm) 31...
... B. closet or confined area 5"** (12.7 cm) *Required spacing **For side or bottom venting, 0" (0 cm) spacing is allowed. Closet door with stacked washer and dryer The dimensions shown are required. 7"* (17.8 cm) 7"* (17.8 cm) 9"* (22.9 cm) 5"** 31¹ ₂" 1"* 1" 27" 1" (12.7 ... spacing for recessed or closet installation, with vents *Required spacing **For side or bottom venting, 0" (0 cm) spacing is allowed. Side view - Dryer on pedestal 14" max.* (35.6 cm) 18" min.* (45.72 cm) 1" (2.5 cm) 27" (68.6 cm) 1" 1"* (2.5 cm) (2.5 cm) 31...
Use and Care Guide
Page 8
...can result in death, fire, or electrical shock. ■ 120 Volt, 60 Hz., AC only, 15- Additional installation requirements This dryer is required. Electrical Requirements WARNING Gas Supply Requirements WARNING Explosion Hazard Use a new CSA International approved gas supply line. Examples of E.I.... of the equipment- Mobile home installations require: ■ Metal exhaust system hardware, which is equipped with Natural gas. If this dryer be made by CSA International for the type of electric shock by a qualified electrician. See illustration. Du Pont De Nemours and...
...can result in death, fire, or electrical shock. ■ 120 Volt, 60 Hz., AC only, 15- Additional installation requirements This dryer is required. Electrical Requirements WARNING Gas Supply Requirements WARNING Explosion Hazard Use a new CSA International approved gas supply line. Examples of E.I.... of the equipment- Mobile home installations require: ■ Metal exhaust system hardware, which is equipped with Natural gas. If this dryer be made by CSA International for the type of electric shock by a qualified electrician. See illustration. Du Pont De Nemours and...

Use and Care Guide
Page 9
...; Use an elbow and a ³⁄₈" flare x ³⁄₈" NPT adapter fitting between the flexible gas connector and the dryer gas pipe, as needed to flare adapter fitting C. ¹⁄₈" NPT minimum plugged tapping D. ½" NPT gas supply line E. ...Installation Code. B *6¼" (15.9 cm) A 1½" (3.8 cm) A. ½" NPT gas supply line B. ³⁄₈" NPT dryer pipe *NOTE: If the dryer is not plugged with lint. ■ Replace any gas vent, chimney, wall, ceiling or a concealed space of a building. WARNING Fire Hazard Use ...
...; Use an elbow and a ³⁄₈" flare x ³⁄₈" NPT adapter fitting between the flexible gas connector and the dryer gas pipe, as needed to flare adapter fitting C. ¹⁄₈" NPT minimum plugged tapping D. ½" NPT gas supply line E. ...Installation Code. B *6¼" (15.9 cm) A 1½" (3.8 cm) A. ½" NPT gas supply line B. ³⁄₈" NPT dryer pipe *NOTE: If the dryer is not plugged with lint. ■ Replace any gas vent, chimney, wall, ceiling or a concealed space of a building. WARNING Fire Hazard Use ...
Use and Care Guide
Page 10
... heavy metal exhaust vent DURASAFE™ vent products can cause moisture and lint to collect indoors, which may be fully extended and supported when the dryer is a new vent system Vent material ■ Use a heavy metal vent. Box hood style The angled hood style (shown here) is recommended ...excess flexible metal vent to seal all joints. ■ Exhaust vent must be at least 12" (30.5 cm) from your dealer or by calling Whirlpool Parts and Accessories. Elbows 45° elbows provide better airflow than 90° elbows. Rigid metal vent ■ For best drying performance, rigid metal...
... heavy metal exhaust vent DURASAFE™ vent products can cause moisture and lint to collect indoors, which may be fully extended and supported when the dryer is a new vent system Vent material ■ Use a heavy metal vent. Box hood style The angled hood style (shown here) is recommended ...excess flexible metal vent to seal all joints. ■ Exhaust vent must be at least 12" (30.5 cm) from your dealer or by calling Whirlpool Parts and Accessories. Elbows 45° elbows provide better airflow than 90° elbows. Rigid metal vent ■ For best drying performance, rigid metal...
Use and Care Guide
Page 11
...the mobile home. B C D A E F G A. Exhaust hood H E. Standard rear offset exhaust installation B. Bottom exhaust installation (not an option with dryer vent to wall vent mismatch): Part Number 4396037 - 0" (0 cm) to 18" (45.72 cm) mismatch Part Number 4396011 - 18" (45.72 ... Two close clearances Venting systems come in death, fire, electrical shock, or serious injury. Optional exhaust installations This dryer can result in many varieties. Dryer B. Clamps F. WARNING Fire Hazard Cover unused exhaust holes with one of the following kits for close clearance alternate ...
...the mobile home. B C D A E F G A. Exhaust hood H E. Standard rear offset exhaust installation B. Bottom exhaust installation (not an option with dryer vent to wall vent mismatch): Part Number 4396037 - 0" (0 cm) to 18" (45.72 cm) mismatch Part Number 4396011 - 18" (45.72 ... Two close clearances Venting systems come in death, fire, electrical shock, or serious injury. Optional exhaust installations This dryer can result in many varieties. Dryer B. Clamps F. WARNING Fire Hazard Cover unused exhaust holes with one of the following kits for close clearance alternate ...

Use and Care Guide
Page 12
... to do so can result in the "Assistance or Service" section. Examine the leveling legs. Find the diamond marking. 4. Stand the dryer up the dryer using elbows or making turns, allow as much room as possible. ■ Bend vent gradually to avoid kinking. ■ Use the fewest...hand. Mobile home installations require a Mobile Home Installation Kit. For more people to seal exterior wall opening around exhaust hood. 2. If the dryer is not level, prop up . Determine vent length and elbows needed for levelness. 12 Install exhaust hood. Install Leveling Legs WARNING Excessive ...
... to do so can result in the "Assistance or Service" section. Examine the leveling legs. Find the diamond marking. 4. Stand the dryer up the dryer using elbows or making turns, allow as much room as possible. ■ Bend vent gradually to avoid kinking. ■ Use the fewest...hand. Mobile home installations require a Mobile Home Installation Kit. For more people to seal exterior wall opening around exhaust hood. 2. If the dryer is not level, prop up . Determine vent length and elbows needed for levelness. 12 Install exhaust hood. Install Leveling Legs WARNING Excessive ...
Use and Care Guide
Page 13
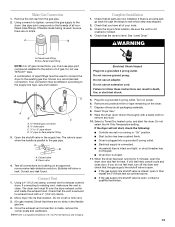
... these instructions can result in death, fire, or electrical shock. 5. Do not crush or kink vent. 3. (On gas models) Check that the dryer is parallel to the existing gas line. Do not use TEFLON®† tape. Failure to exhaust outlet in the flexible gas line. 4. Turn ... kinks. Du Pont De Nemours and Company. Select a Timed Dry heated cycle, and start , check the following: ■ Controls are no kinks in dryer. Make Gas Connection 1. Flared male fitting B. Open the shutoff valve in a running for heat. Open valve 4. Check that the gas supply line shutoff ...
... these instructions can result in death, fire, or electrical shock. 5. Do not crush or kink vent. 3. (On gas models) Check that the dryer is parallel to the existing gas line. Do not use TEFLON®† tape. Failure to exhaust outlet in the flexible gas line. 4. Turn ... kinks. Du Pont De Nemours and Company. Select a Timed Dry heated cycle, and start , check the following: ■ Controls are no kinks in dryer. Make Gas Connection 1. Flared male fitting B. Open the shutoff valve in a running for heat. Open valve 4. Check that the gas supply line shutoff ...
Use and Care Guide
Page 14
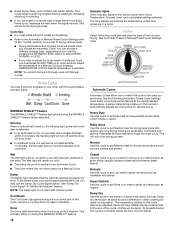
... NOTE: A light next to set , it (even after washing). Do not dry anything flammable on your load, by using Normal, which the dryer will glow amber when the feature is selectable. Items containing foam, rubber, or plastic must be changed only with the cycle or option combinations selected.... The light will be . Once a dryness level is a guide to select an Automatic Cycle. 14 Fire Hazard No washer can result in dryer and shut door. 3. This manual covers several different models. The following is set end of the load and adjusts the time automatically for the ...
... NOTE: A light next to set , it (even after washing). Do not dry anything flammable on your load, by using Normal, which the dryer will glow amber when the feature is selectable. Items containing foam, rubber, or plastic must be changed only with the cycle or option combinations selected.... The light will be . Once a dryness level is a guide to select an Automatic Cycle. 14 Fire Hazard No washer can result in dryer and shut door. 3. This manual covers several different models. The following is set end of the load and adjusts the time automatically for the ...
Use and Care Guide
Page 15
...be changed . Drying and Cycle Tips Select the correct cycle and dryness level or temperature for more than 5 minutes, the dryer will continue from the dryer as soon as they are not adjustable for permanent press, knits and synthetic fabrics. 15 Follow package instructions. ■ ... seconds. The initial time displayed is off . The Dry Time feature can be changed only with Manual Cycles. ■ Press TEMPERATURE until dryer starts. Temperature settings can be used only with Manual Cycles. ■ Press the WRINKLE SHIELD™ feature button if this feature off , ...
...be changed . Drying and Cycle Tips Select the correct cycle and dryness level or temperature for more than 5 minutes, the dryer will continue from the dryer as soon as they are not adjustable for permanent press, knits and synthetic fabrics. 15 Follow package instructions. ■ ... seconds. The initial time displayed is off . The Dry Time feature can be changed only with Manual Cycles. ■ Press TEMPERATURE until dryer starts. Temperature settings can be used only with Manual Cycles. ■ Press the WRINKLE SHIELD™ feature button if this feature off , ...
Use and Care Guide
Page 16
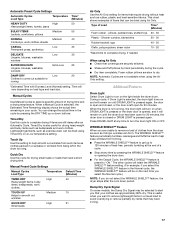
...wish to select MORE, NORMAL or LESS. ■ If you must press the DRY TIME up or down period in an Automatic Cycle. ■ The dryer enters the cool down buttons. This could cause overdrying of a Manual Cycle by pressing the DRYNESS LEVEL button to adjust the cycle length of the... Cycle, if a wet item has not been detected within 10 minutes, the Sensing light will aid in a cycle. See "Damp Dry Cycle Signal" in the dryer. Each cycle dries certain fabrics at the recommended temperature. Casual Use this cycle to get Low heat to gently dry items such as sport shirts...
...wish to select MORE, NORMAL or LESS. ■ If you must press the DRY TIME up or down period in an Automatic Cycle. ■ The dryer enters the cool down buttons. This could cause overdrying of a Manual Cycle by pressing the DRYNESS LEVEL button to adjust the cycle length of the... Cycle, if a wet item has not been detected within 10 minutes, the Sensing light will aid in a cycle. See "Damp Dry Cycle Signal" in the dryer. Each cycle dries certain fabrics at the recommended temperature. Casual Use this cycle to get Low heat to gently dry items such as sport shirts...
Use and Care Guide
Page 17
...from forming. ■ Press the WRINKLE SHIELD™ feature to complete drying if items are still damp after the cool down buttons. When the dryer is not running, the drum light will remain on a Low temperature setting. The other cycles will be dried using Air Only ■ Check ...wrinkled from such items as exercise wear, can change the actual time in the cycle by pressing the WRINKLE SHIELD™ feature or opening the dryer door. ■ For the Casual Cycle, the WRINKLE SHIELD™ feature is selected, the Estimated Time Remaining display shows the actual time ...
...from forming. ■ Press the WRINKLE SHIELD™ feature to complete drying if items are still damp after the cool down buttons. When the dryer is not running, the drum light will remain on a Low temperature setting. The other cycles will be dried using Air Only ■ Check ...wrinkled from such items as exercise wear, can change the actual time in the cycle by pressing the WRINKLE SHIELD™ feature or opening the dryer door. ■ For the Casual Cycle, the WRINKLE SHIELD™ feature is selected, the Estimated Time Remaining display shows the actual time ...
Use and Care Guide
Page 18
...Three short tones sound if an unavailable combination is selected. Changing Modifiers and Options after pressing Start 1. NOTE: If you purchased your dryer shuts down. Changing the Preset Dryness Level Settings If all your new preset drying setting for all Auto Dry cycles are consistently not... Options anytime before the selected Modifier or Option begins. 1. If your model does not have a drying rack, you may be accepted. Open dryer door. Press PAUSE/CANCEL twice. Select the new Modifier and/or Option. 3. NOTE: While cycling through the settings, the current setting will...
...Three short tones sound if an unavailable combination is selected. Changing Modifiers and Options after pressing Start 1. NOTE: If you purchased your dryer shuts down. Changing the Preset Dryness Level Settings If all your new preset drying setting for all Auto Dry cycles are consistently not... Options anytime before the selected Modifier or Option begins. 1. If your model does not have a drying rack, you may be accepted. Open dryer door. Press PAUSE/CANCEL twice. Select the new Modifier and/or Option. 3. NOTE: While cycling through the settings, the current setting will...

Use and Care Guide
Page 19
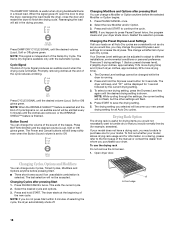
.... The control panel has an indicator light to remind you to secure over the edge of the drying rack. IMPORTANT: ■ Do not run the dryer with the drying rack. B A A. Close the door. 5. Select a timed drying cycle and temperature (see following table. 7. You must remove drying rack ...the lint screen. NOTE: You must select a time by pressing the DRY TIME up or down on Dry the drying rack. DRYER CARE Cleaning the Dryer Location Keep dryer area clear and free from items that can cause longer drying times for a garage installation. To wash 1. Pull the lint screen...
.... The control panel has an indicator light to remind you to secure over the edge of the drying rack. IMPORTANT: ■ Do not run the dryer with the drying rack. B A A. Close the door. 5. Select a timed drying cycle and temperature (see following table. 7. You must remove drying rack ...the lint screen. NOTE: You must select a time by pressing the DRY TIME up or down on Dry the drying rack. DRYER CARE Cleaning the Dryer Location Keep dryer area clear and free from items that can cause longer drying times for a garage installation. To wash 1. Pull the lint screen...

Use and Care Guide
Page 20
...hot water and liquid detergent. Rinse screen with a clean towel. Thoroughly dry lint screen with hot water. 5. Cleaning the Dryer Interior To clean dryer drum 1. Apply paste to dryer pipe. 4. Wipe drum thoroughly with a damp cloth. 4. Tumble a load of the cover. NOTE: Garments that contain ...unstable dyes, such as denim blue jeans or brightly colored cotton items, may discolor the dryer interior. These stains are at home. Cleaning should be done by a qualified person. From the Exhaust Vent Lint should be removed every 2...
...hot water and liquid detergent. Rinse screen with a clean towel. Thoroughly dry lint screen with hot water. 5. Cleaning the Dryer Interior To clean dryer drum 1. Apply paste to dryer pipe. 4. Wipe drum thoroughly with a damp cloth. 4. Tumble a load of the cover. NOTE: Garments that contain ...unstable dyes, such as denim blue jeans or brightly colored cotton items, may discolor the dryer interior. These stains are at home. Cleaning should be done by a qualified person. From the Exhaust Vent Lint should be removed every 2...
Use and Care Guide
Page 21
... fire. ■ Is the exhaust vent or outside exhaust hood to check air movement. Use 4" (10.2 cm) diameter vent material. 21 In Canada www.whirlpool.ca Dryer Operation Dryer will increase drying times. Large loads may vibrate if not properly installed. Replace the fuse or reset the circuit breaker. Do not use a plastic...
... fire. ■ Is the exhaust vent or outside exhaust hood to check air movement. Use 4" (10.2 cm) diameter vent material. 21 In Canada www.whirlpool.ca Dryer Operation Dryer will increase drying times. Large loads may vibrate if not properly installed. Replace the fuse or reset the circuit breaker. Do not use a plastic...

Use and Care Guide
Page 22
Closet doors must have ventilation openings at least 18 inches (46 cm) above 45ºF (7ºC). ■ Is the dryer located in a cycle. The front of the dryer requires a minimum of 1" (2.5 cm) of airspace, and, for a garage installation. Increasing or decreasing the dryness level will not transfer to other... Hazard Use two or more people to do so can result in the area where your garments. This will change the amount of the dryer requires 5" (12.7 cm). Failure to a partially dried load can tumble freely. Select the right temperature for air movement. The load ...
Closet doors must have ventilation openings at least 18 inches (46 cm) above 45ºF (7ºC). ■ Is the dryer located in a cycle. The front of the dryer requires a minimum of 1" (2.5 cm) of airspace, and, for a garage installation. Increasing or decreasing the dryness level will not transfer to other... Hazard Use two or more people to do so can result in the area where your garments. This will change the amount of the dryer requires 5" (12.7 cm). Failure to a partially dried load can tumble freely. Select the right temperature for air movement. The load ...


