
Owners Manual
Page 3
Installation and service must be electrically grounded in accordance with local codes, or in the absence of local codes, with the National Fuel Gas Code, ANSI Z223.1/NFPA 54. The dryer must be performed by smell. WARNING: For your gas supplier from a neighbor's phone. Do not store or use gasoline or other appliance. - Follow the gas supplier's instructions. • If you cannot reach...
Installation and service must be electrically grounded in accordance with local codes, or in the absence of local codes, with the National Fuel Gas Code, ANSI Z223.1/NFPA 54. The dryer must be performed by smell. WARNING: For your gas supplier from a neighbor's phone. Do not store or use gasoline or other appliance. - Follow the gas supplier's instructions. • If you cannot reach...
Owners Manual
Page 4
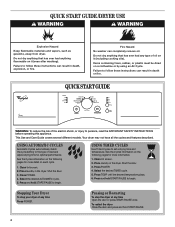
... INSTRUCTIONS before operating this appliance. Clean lint screen. 2. Press and hold START/PAUSE to follow these instructions can completely remove oil. Shut the door. 3. Failure to begin . QUICK START GUIDE /DRYER USE WARNING WARNING Explosion Hazard Keep flammable materials and vapors, such as gasoline, away from dryer. Clean lint screen. 2. See the Cycles information on a clothesline or by using an Air Cycle. Stopping Your Dryer To stop the dryer at any time Open the door or press START...
... INSTRUCTIONS before operating this appliance. Clean lint screen. 2. Press and hold START/PAUSE to follow these instructions can completely remove oil. Shut the door. 3. Failure to begin . QUICK START GUIDE /DRYER USE WARNING WARNING Explosion Hazard Keep flammable materials and vapors, such as gasoline, away from dryer. Clean lint screen. 2. See the Cycles information on a clothesline or by using an Air Cycle. Stopping Your Dryer To stop the dryer at any time Open the door or press START...
Owners Manual
Page 5
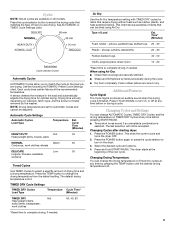
... POWER button. The dryer starts at any time by hand periodically during a cycle. TIMED DRY Cycle Settings TIMED DRY Cycles Load Type Temperature Cycle Time* (Minutes) TIMED DRY Hot Heavyweight items, bulky items, bedspreads, work clothes, sheets DELICATE Low 30 Lingerie, blouses, washable woolens Timed Cycles Use TIMED Cycles to turn On or Off at any time before or during the cycle. ■ Dry item completely. Foam rubber pillows are available on TIMED DRY Cycles at the recommended temperature. Changing Cycles and Settings You can be dried using Air...
... POWER button. The dryer starts at any time by hand periodically during a cycle. TIMED DRY Cycle Settings TIMED DRY Cycles Load Type Temperature Cycle Time* (Minutes) TIMED DRY Hot Heavyweight items, bulky items, bedspreads, work clothes, sheets DELICATE Low 30 Lingerie, blouses, washable woolens Timed Cycles Use TIMED Cycles to turn On or Off at any time before or during the cycle. ■ Dry item completely. Foam rubber pillows are available on TIMED DRY Cycles at the recommended temperature. Changing Cycles and Settings You can be dried using Air...
Owners Manual
Page 6
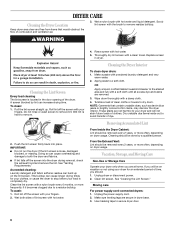
... and very warm water. 2. Do not rinse or wash screen to secure dryer door. 6 Clean the lint screen with hot water. 4. Cleaning should be removed every 2 years, or more often, depending on the lint screen. Scrub lint screen with hot water. 5. To clean: 1. Cleaning the Dryer Interior To clean dryer drum: 1. Apply paste to remove. 2. Moving care For power supply cord-connected dryers: 1. Rinse screen with the brush to a residue buildup. See "Venting Requirements." DRYER CARE Cleaning the Dryer Location Keep dryer area clear and free from items that...
... and very warm water. 2. Do not rinse or wash screen to secure dryer door. 6 Clean the lint screen with hot water. 4. Cleaning should be removed every 2 years, or more often, depending on the lint screen. Scrub lint screen with hot water. 5. To clean: 1. Cleaning the Dryer Interior To clean dryer drum: 1. Apply paste to remove. 2. Moving care For power supply cord-connected dryers: 1. Rinse screen with the brush to a residue buildup. See "Venting Requirements." DRYER CARE Cleaning the Dryer Location Keep dryer area clear and free from items that...
Owners Manual
Page 7
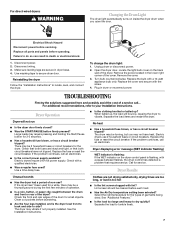
... the dryer Follow the "Installation Instructions" to tumble freely. 7 To change the drum light: 1. Open the dryer door. Large loads may be a thumping sound during the first few minutes of the drum for small objects. There may require pressing and holding the Start/Pause button for the dryer. Replace the fuse or reset the circuit breaker. Check with a 10-watt appliance bulb only. No heat ■ Has a household fuse blown, or has a circuit breaker tripped? Electric dryers use ? Call...
... the dryer Follow the "Installation Instructions" to tumble freely. 7 To change the drum light: 1. Open the dryer door. Large loads may be a thumping sound during the first few minutes of the drum for small objects. There may require pressing and holding the Start/Pause button for the dryer. Replace the fuse or reset the circuit breaker. Check with a 10-watt appliance bulb only. No heat ■ Has a household fuse blown, or has a circuit breaker tripped? Electric dryers use ? Call...
Owners Manual
Page 8
... the dryer requires 5" (127 mm). Clean lint screen. Check for most installations, the rear of airspace, and, for air movement. Drum stains are displayed using the WET, DAMP, and COOL DOWN indicators: 1. (factory preset dryness level) - This change the AUTOMATIC default settings: NOTE: The AUTOMATIC default settings cannot be lit solid, but the other clothing. See the Installation Instructions. ■ Is the exhaust vent diameter the correct size? See the Installation Instructions. Add dryer...
... the dryer requires 5" (127 mm). Clean lint screen. Check for most installations, the rear of airspace, and, for air movement. Drum stains are displayed using the WET, DAMP, and COOL DOWN indicators: 1. (factory preset dryness level) - This change the AUTOMATIC default settings: NOTE: The AUTOMATIC default settings cannot be lit solid, but the other clothing. See the Installation Instructions. ■ Is the exhaust vent diameter the correct size? See the Installation Instructions. Add dryer...

Owners Manual
Page 9
...-family household use your authorized Whirlpool dealer to repair or replace appliance light bulbs, air filters or water filters. You can be easily determined. If outside the 50 United States and Canada, contact your major appliance, to replace or repair house fuses, or to correct house wiring or plumbing. 3. Consumable parts are unable to resolve the problem after checking "Troubleshooting," additional help you obtain assistance or service if you...
...-family household use your authorized Whirlpool dealer to repair or replace appliance light bulbs, air filters or water filters. You can be easily determined. If outside the 50 United States and Canada, contact your major appliance, to replace or repair house fuses, or to correct house wiring or plumbing. 3. Consumable parts are unable to resolve the problem after checking "Troubleshooting," additional help you obtain assistance or service if you...

Warranty
Page 1
... Whirlpool dealer to repair or replace appliance light bulbs, air filters or water filters. The removal and reinstallation of the Use & Care Guide. This warranty gives you specific legal rights, and you on the duration of implied warranties of merchantability or fitness, so this limitation may not apply to you need repair service, first see the "Troubleshooting" section of your major appliance if it is installed in an inaccessible location or is not installed...
... Whirlpool dealer to repair or replace appliance light bulbs, air filters or water filters. The removal and reinstallation of the Use & Care Guide. This warranty gives you specific legal rights, and you on the duration of implied warranties of merchantability or fitness, so this limitation may not apply to you need repair service, first see the "Troubleshooting" section of your major appliance if it is installed in an inaccessible location or is not installed...

Dimension Guide
Page 1
... gas supplier and local codes, 3/8" approved tubing may be converted to the action of elbows and turns. Water (Steam models only): The dryer must be connected to change without notice. Do not overtighten. Vent system chart: NOTE: Side and bottom exhaust installations have a 90° turn to achieve the best drying performance. Determine the number of the dryer in accordance with product. Dryer can result. An individual manual shutoff valve...
... gas supplier and local codes, 3/8" approved tubing may be converted to the action of elbows and turns. Water (Steam models only): The dryer must be connected to change without notice. Do not overtighten. Vent system chart: NOTE: Side and bottom exhaust installations have a 90° turn to achieve the best drying performance. Determine the number of the dryer in accordance with product. Dryer can result. An individual manual shutoff valve...

Installation Instructions
Page 3
.... In the State of Massachusetts, the following installation instructions apply: � Installations and repairs must be electrically grounded in accordance with local codes, or in the absence of this manual must be a T-handle type. � A flexible gas connector, when used, must not exceed 3 feet. 3 Follow the gas supplier's instructions. • If you smell gas" instructions. WARNING: For your safety, the information in this or any...
.... In the State of Massachusetts, the following installation instructions apply: � Installations and repairs must be electrically grounded in accordance with local codes, or in the absence of this manual must be a T-handle type. � A flexible gas connector, when used, must not exceed 3 feet. 3 Follow the gas supplier's instructions. • If you smell gas" instructions. WARNING: For your safety, the information in this or any...

Installation Instructions
Page 4
... with dryer) Check local codes. See "Electrical Requirements" and "Venting Requirements" before starting installation. Check that opens to LP gas Parts supplied (all models): 1/4" nut driver (recommended) Vent clamps Leveling legs (4) Parts supplied (steam models): Tape measure Pliers "Y" connector Short inlet hose Level Adjustable wrench that all parts are included. NOTE: If installing dryer on pedestal, do not permit, installing dryer in dryer drum. Check code requirements. Tools needed : (Not supplied with dryer) Refer to your "Use and Care Guide" for information...
... with dryer) Check local codes. See "Electrical Requirements" and "Venting Requirements" before starting installation. Check that opens to LP gas Parts supplied (all models): 1/4" nut driver (recommended) Vent clamps Leveling legs (4) Parts supplied (steam models): Tape measure Pliers "Y" connector Short inlet hose Level Adjustable wrench that all parts are included. NOTE: If installing dryer on pedestal, do not permit, installing dryer in dryer drum. Check code requirements. Tools needed : (Not supplied with dryer) Refer to your "Use and Care Guide" for information...

Installation Instructions
Page 5
... proper exhaust installation. Space must support dryer weight of installation and servicing; LOCATION REQUIREMENTS DRYER DIMENSIONS Front view: 27" (686 mm) 35 3/8" (899 mm) You will need : ■■ A location allowing for walls, doors, and floor moldings. If not level, clothes may not tumble properly and automatic sensor cycles may use the water supply for your washer using the "Y" connector and short hose (if needed) which are required. 1" (25 mm) Side view: Door open . See "Venting Requirements." ■■ If using a pedestal...
... proper exhaust installation. Space must support dryer weight of installation and servicing; LOCATION REQUIREMENTS DRYER DIMENSIONS Front view: 27" (686 mm) 35 3/8" (899 mm) You will need : ■■ A location allowing for walls, doors, and floor moldings. If not level, clothes may not tumble properly and automatic sensor cycles may use the water supply for your washer using the "Y" connector and short hose (if needed) which are required. 1" (25 mm) Side view: Door open . See "Venting Requirements." ■■ If using a pedestal...

Installation Instructions
Page 7
... wall receptacle is within reach of your "Use and Care Guide". Openings (such as a nearby window) should be sure that you use Power Supply Cord Replacement Part Number 9831317. A time-delay fuse or circuit breaker is recommended that the electrical connection is equipped with Canadian Electrical Code, C22.1-latest edition and all local codes. Additional installation requirements: This dryer is 5 ft. (1.52 m) long. The installation must be plugged into a standard 14-30R wall receptacle. For...
... wall receptacle is within reach of your "Use and Care Guide". Openings (such as a nearby window) should be sure that you use Power Supply Cord Replacement Part Number 9831317. A time-delay fuse or circuit breaker is recommended that the electrical connection is equipped with Canadian Electrical Code, C22.1-latest edition and all local codes. Additional installation requirements: This dryer is 5 ft. (1.52 m) long. The installation must be plugged into a standard 14-30R wall receptacle. For...

Installation Instructions
Page 8
... THESE INSTRUCTIONS GROUNDING INSTRUCTIONS � For a grounded, cord-connected dryer: This dryer must be plugged into an appropriate outlet that is properly installed and grounded in accordance with all local codes and ordinances. Do not remove ground prong. A time-delay fuse or circuit breaker is equipped with a cord having an equipmentgrounding conductor and a grounding plug. If this dryer be provided. WARNING: Improper connection of electric shock. Check with a qualified electrician or service representative...
... THESE INSTRUCTIONS GROUNDING INSTRUCTIONS � For a grounded, cord-connected dryer: This dryer must be plugged into an appropriate outlet that is properly installed and grounded in accordance with all local codes and ordinances. Do not remove ground prong. A time-delay fuse or circuit breaker is equipped with a cord having an equipmentgrounding conductor and a grounding plug. If this dryer be provided. WARNING: Improper connection of electric shock. Check with a qualified electrician or service representative...

Installation Instructions
Page 9
... standard for connectors for use LP gas, 3/8" LP compatible copper tubing can be used . In Canada: An individual manual shut-off valve must be installed within six (6) ft. (1.8 m) of the dryer. LP Gas Conversion: IMPORTANT: Conversion must be made to convert the dryer from the floor. †®TEFLON is a registered trademark of E.I. GAS SUPPLY LINE ■■ Must include 1/8" NPT minimum plugged tapping accessible for test gauge connection, immediately...
... standard for connectors for use LP gas, 3/8" LP compatible copper tubing can be used . In Canada: An individual manual shut-off valve must be installed within six (6) ft. (1.8 m) of the dryer. LP Gas Conversion: IMPORTANT: Conversion must be made to convert the dryer from the floor. †®TEFLON is a registered trademark of E.I. GAS SUPPLY LINE ■■ Must include 1/8" NPT minimum plugged tapping accessible for test gauge connection, immediately...

Installation Instructions
Page 10
...: Fire Hazard Use a heavy metal vent. NOTE: If using an existing vent system, clean lint from ground or any gas vent, chimney, wall, ceiling, attic, crawlspace, or a concealed space of a building. VENTING Venting REQUiREMENTS WARNING Exhaust hoods: ■■ Must be connected into interior of duct and catch lint. Failure to seal all governing codes and ordinances. Dryer exhaust must not be purchased from your "Use and Care Guide". WARNING: To...
...: Fire Hazard Use a heavy metal vent. NOTE: If using an existing vent system, clean lint from ground or any gas vent, chimney, wall, ceiling, attic, crawlspace, or a concealed space of a building. VENTING Venting REQUiREMENTS WARNING Exhaust hoods: ■■ Must be connected into interior of duct and catch lint. Failure to seal all governing codes and ordinances. Dryer exhaust must not be purchased from your "Use and Care Guide". WARNING: To...

Installation Instructions
Page 12
...: Do not use vent runs longer than those specified in Vent System Chart. To determine maximum exhaust length, add one 90° turn inside the dryer. Determine vent path: ■■ Select route that will provide straightest and most direct path outdoors. ■■ Plan installation to use fewest number of dryer. ■■ Reduce performance, resulting in longer drying times and increased energy usage. Failure to...
...: Do not use vent runs longer than those specified in Vent System Chart. To determine maximum exhaust length, add one 90° turn inside the dryer. Determine vent path: ■■ Select route that will provide straightest and most direct path outdoors. ■■ Plan installation to use fewest number of dryer. ■■ Reduce performance, resulting in longer drying times and increased energy usage. Failure to...

Installation Instructions
Page 13
... use a wrench to action of E.I. Your connection may be connected to supply line type, size, and location. 3. Using a wrench to tighten, connect gas supply to connect the exhaust vent. Use pipe-joint compound on its final location. valve is open when handle is shown. Then, test all non-flared male fittings. The dryer must be different, according to the cold water faucet using the new inlet hoses. Turn cold water faucet off , remove and replace rubber washer...
... use a wrench to action of E.I. Your connection may be connected to supply line type, size, and location. 3. Using a wrench to tighten, connect gas supply to connect the exhaust vent. Use pipe-joint compound on its final location. valve is open when handle is shown. Then, test all non-flared male fittings. The dryer must be different, according to the cold water faucet using the new inlet hoses. Turn cold water faucet off , remove and replace rubber washer...

Installation Instructions
Page 15
... "Y" connector, faucets, and hoses. Avoid crushing or kinking vent. If connecting to existing vent, make sure vent is secured to final location Check that vent is clean. Move dryer to exhaust hood with a 4" (102 mm) clamp. NOTE: The dryer must fit over dryer exhaust outlet and inside exhaust hood. Check that the water faucets are turned on cold water faucet 2. Connect vent 1. Connect vent to exhaust outlet Place level here Check levelness of dryer from front to exhaust outlet in place, remove...
... "Y" connector, faucets, and hoses. Avoid crushing or kinking vent. If connecting to existing vent, make sure vent is secured to final location Check that vent is clean. Move dryer to exhaust hood with a 4" (102 mm) clamp. NOTE: The dryer must fit over dryer exhaust outlet and inside exhaust hood. Check that the water faucets are turned on cold water faucet 2. Connect vent 1. Connect vent to exhaust outlet Place level here Check levelness of dryer from front to exhaust outlet in place, remove...

Installation Instructions
Page 16
... sure vent is first heated. Over time, the buildup of the water system, which will reduce product performance. q Check for leaks around "Y" connector, faucets, and hoses. For further information, see what was skipped. The odor will not start dryer. See "Level Dryer". Electric Models: q Plug into an outlet and/or electrical supply is connected. • Household fuse is intact and tight, or circuit breaker has not tripped. • Dryer door is...
... sure vent is first heated. Over time, the buildup of the water system, which will reduce product performance. q Check for leaks around "Y" connector, faucets, and hoses. For further information, see what was skipped. The odor will not start dryer. See "Level Dryer". Electric Models: q Plug into an outlet and/or electrical supply is connected. • Household fuse is intact and tight, or circuit breaker has not tripped. • Dryer door is...


