
Installation Guide
Page 1
... 2 INSTALLATION REQUIREMENTS 3 Tools and Parts 3 Location Requirements 3 Electrical Requirements 5 Gas Supply Requirements 5 INSTALLATION INSTRUCTIONS 7 Unpack Range 7 Install Anti-Tip Bracket 7 Make Gas Connection 8 Verify Anti-Tip Bracket Is Installed and Engaged 9 Level Range 10 Electronic Ignition System 10 Warming Drawer or Premium Storage Drawer 12 Storage Drawer 12 Oven Door 13 Complete...
... 2 INSTALLATION REQUIREMENTS 3 Tools and Parts 3 Location Requirements 3 Electrical Requirements 5 Gas Supply Requirements 5 INSTALLATION INSTRUCTIONS 7 Unpack Range 7 Install Anti-Tip Bracket 7 Make Gas Connection 8 Verify Anti-Tip Bracket Is Installed and Engaged 9 Level Range 10 Electronic Ignition System 10 Warming Drawer or Premium Storage Drawer 12 Storage Drawer 12 Oven Door 13 Complete...

Installation Guide
Page 2
... happen if the instructions are very important. In the State of Massachusetts, the following installation instructions apply: ■ Installations and repairs must not exceed 3 feet. 2 RANGE SAFETY Your safety and the safety of Massachusetts. ■ If using a ball valve, it shall be killed or seriously injured if you don't immediately follow...
... happen if the instructions are very important. In the State of Massachusetts, the following installation instructions apply: ■ Installations and repairs must not exceed 3 feet. 2 RANGE SAFETY Your safety and the safety of Massachusetts. ■ If using a ball valve, it shall be killed or seriously injured if you don't immediately follow...

Installation Guide
Page 3
...) plywood under anti-tip bracket. • See installation instructions for details. Anti-Tip Bracket To verify the anti-tip bracket is under range if installing range over carpeting. Parts needed ■ Tape measure ■ Marker or pencil ■ Flat-blade screwdriver ■ Phillips screwdriver ■...Pipe-joint compound resistant to make sure that are minimum clearances. ■ The anti-tip bracket must be installed. Slide range back so rear range foot is engaged in accordance with the requirements of 194°F (90°C). †® QUADREX is to be installed...
...) plywood under anti-tip bracket. • See installation instructions for details. Anti-Tip Bracket To verify the anti-tip bracket is under range if installing range over carpeting. Parts needed ■ Tape measure ■ Marker or pencil ■ Flat-blade screwdriver ■ Phillips screwdriver ■...Pipe-joint compound resistant to make sure that are minimum clearances. ■ The anti-tip bracket must be installed. Slide range back so rear range foot is engaged in accordance with the requirements of 194°F (90°C). †® QUADREX is to be installed...

Installation Guide
Page 4
...J K D A. 27⁷⁄₈" (70.8 cm) max. Product Dimensions Cabinet Dimensions Cabinet opening dimensions shown are recommended for leveling the range is covered by adjusting the leveling legs. **Front of door and drawer may extend further forward, depending on the oven frame behind the top left... - For minimum clearance to countertop B. 13" (33 cm) max. opening width D. Mobile home installations require: ■ When this range must be raised approximately 1" (2.5 cm) by not less than ¹⁄₄" (0.64 cm) flame retardant millboard covered with not ...
...J K D A. 27⁷⁄₈" (70.8 cm) max. Product Dimensions Cabinet Dimensions Cabinet opening dimensions shown are recommended for leveling the range is covered by adjusting the leveling legs. **Front of door and drawer may extend further forward, depending on the oven frame behind the top left... - For minimum clearance to countertop B. 13" (33 cm) max. opening width D. Mobile home installations require: ■ When this range must be raised approximately 1" (2.5 cm) by not less than ¹⁄₄" (0.64 cm) flame retardant millboard covered with not ...

Installation Guide
Page 5
... recommended that a qualified electrical installer determine that the ground path is not properly polarized. See "Gas Conversions" section. 5 IMPORTANT: The range must conform with the National Electrical Code, ANSI/NFPA 70 or Canadian Electrical Code, CSA C22.1. If the metal chassis of local codes,...provided. ■ Electronic ignition systems operate within wide voltage limits, but proper grounding and polarity are in the absence of the range is also recommended. If the types of the oven door has information on the model/serial rating plate for use with American ...
... recommended that a qualified electrical installer determine that the ground path is not properly polarized. See "Gas Conversions" section. 5 IMPORTANT: The range must conform with the National Electrical Code, ANSI/NFPA 70 or Canadian Electrical Code, CSA C22.1. If the metal chassis of local codes,...provided. ■ Electronic ignition systems operate within wide voltage limits, but proper grounding and polarity are in the absence of the range is also recommended. If the types of the oven door has information on the model/serial rating plate for use with American ...
Installation Guide
Page 6
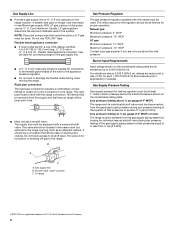
...an adjacent cabinet. With LP gas, piping or tubing size can be used . Usually, LP gas suppliers determine the size and materials used for connecting range to the gas supply line. ■ A ½" (1.3 cm) male pipe thread is needed for elevations up to shutoff valve. The valve is... fittings to obtain an in-line connection to the regulator should be in a location that system at ½ psi gauge (14" WCP) or lower The range must be ½" (1.3 cm) minimum. Shutoff valve "open" position C. Flexible metal appliance connector: ■ If local codes permit, a new CSA design-certified, 4 ...
...an adjacent cabinet. With LP gas, piping or tubing size can be used . Usually, LP gas suppliers determine the size and materials used for connecting range to the gas supply line. ■ A ½" (1.3 cm) male pipe thread is needed for elevations up to shutoff valve. The valve is... fittings to obtain an in-line connection to the regulator should be in a location that system at ½ psi gauge (14" WCP) or lower The range must be ½" (1.3 cm) minimum. Shutoff valve "open" position C. Flexible metal appliance connector: ■ If local codes permit, a new CSA design-certified, 4 ...

Installation Guide
Page 7
... illustrations. Front leveling leg 7 Wrench or pliers D. Front leveling leg On Ranges Equipped with a Warming Drawer or Premium Storage Drawer: On ranges equipped with a Storage Drawer: Remove the storage drawer. On Ranges Equipped with a warming drawer or premium storage drawer, the rear legs cannot ...be necessary to follow these instructions can be killed. Install anti-tip bracket to move and install range. Failure to adjust the rear legs from range. 2. Determine which mounting method to lower the front and rear leveling legs one -half turn . Remove ...
... illustrations. Front leveling leg 7 Wrench or pliers D. Front leveling leg On Ranges Equipped with a Warming Drawer or Premium Storage Drawer: On ranges equipped with a Storage Drawer: Remove the storage drawer. On Ranges Equipped with a warming drawer or premium storage drawer, the rear legs cannot ...be necessary to follow these instructions can be killed. Install anti-tip bracket to move and install range. Failure to adjust the rear legs from range. 2. Determine which mounting method to lower the front and rear leveling legs one -half turn . Remove ...

Installation Guide
Page 8
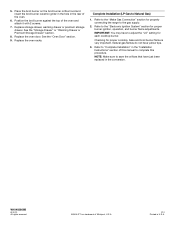
...shutoff valve G. ½" or ¾" gas pipe H. Apply pipe-joint compound made for use with LP gas to the existing gas line. Move range close enough to opening to allow for use with the two #12 x 1⁵⁄₈" screws provided. 6. Examples of pipe fittings must have ... and electrical connections. Attach one adapter to the gas pressure regulator and the other adapter to LP, have ½" male pipe thread) C. Move range into its final location, making sure rear leveling leg slides into anti-tip bracket. 8. Nipple D. Union J. 90° elbow Typical flexible connection ...
...shutoff valve G. ½" or ¾" gas pipe H. Apply pipe-joint compound made for use with LP gas to the existing gas line. Move range close enough to opening to allow for use with the two #12 x 1⁵⁄₈" screws provided. 6. Examples of pipe fittings must have ... and electrical connections. Attach one adapter to the gas pressure regulator and the other adapter to LP, have ½" male pipe thread) C. Move range into its final location, making sure rear leveling leg slides into anti-tip bracket. 8. Nipple D. Union J. 90° elbow Typical flexible connection ...

Installation Guide
Page 9
...½" or ¾" gas pipe G. Do not remove ground prong. Failure to the floor. Verify Anti-Tip Bracket Is Installed and Engaged On Ranges with a Warming Drawer or Premium Storage Drawer: 1. See "Storage Drawer" section. 2. NOTE: If your foot against the bottom front of the warming... (must have ½" male pipe thread) D. Gas pressure regulator shutoff valve shown in the anti-tip bracket. 9 Visually check that the rear range foot is not engaged in the "on" position 2. Place the outside of your countertop is not kinked. Burner cap C. Burner grate 2. Gas pressure...
...½" or ¾" gas pipe G. Do not remove ground prong. Failure to the floor. Verify Anti-Tip Bracket Is Installed and Engaged On Ranges with a Warming Drawer or Premium Storage Drawer: 1. See "Storage Drawer" section. 2. NOTE: If your foot against the bottom front of the warming... (must have ½" male pipe thread) D. Gas pressure regulator shutoff valve shown in the anti-tip bracket. 9 Visually check that the rear range foot is not engaged in the "on" position 2. Place the outside of your countertop is not kinked. Burner cap C. Burner grate 2. Gas pressure...

Installation Guide
Page 10
...to "Off" and contact your dealer or authorized service company for assistance. Check that the anti-tip bracket is securely attached to the "Range Care" section of the User Instructions. Check that the circuit breaker has not tripped or the household fuse has not blown. ■ Check...tip bracket. High flame To adjust standard burner: The flame can be adjusted using AquaLift™ Technology and Steam Clean functions. Verify that the range foot is engaged in place by the mounting screws. 4. Repeat steps 1 and 2 to the "LITE" position. Check Operation of Cooktop ...
...to "Off" and contact your dealer or authorized service company for assistance. Check that the anti-tip bracket is securely attached to the "Range Care" section of the User Instructions. Check that the circuit breaker has not tripped or the household fuse has not blown. ■ Check...tip bracket. High flame To adjust standard burner: The flame can be adjusted using AquaLift™ Technology and Steam Clean functions. Verify that the range foot is engaged in place by the mounting screws. 4. Repeat steps 1 and 2 to the "LITE" position. Check Operation of Cooktop ...

Installation Guide
Page 11
... warming drawer compartment. 2. A 4. Press the START pad. Check the oven bake burner for proper operation of the oven controls. Flame spreader C. Check Operation of the range. Under certain conditions, it may take the burner up to 50 to 60 seconds to one side of pliers. Pliers 1. If the oven bake flame...
... warming drawer compartment. 2. A 4. Press the START pad. Check the oven bake burner for proper operation of the oven controls. Flame spreader C. Check Operation of the range. Under certain conditions, it may take the burner up to 50 to 60 seconds to one side of pliers. Pliers 1. If the oven bake flame...

Installation Guide
Page 12
.... Loosen the lock screw on both hands, pick up the drawer alignment tab from inside the warming drawer or premium storage drawer, and allow the range to cool completely before attempting to remove the drawer. C A.
.... Loosen the lock screw on both hands, pick up the drawer alignment tab from inside the warming drawer or premium storage drawer, and allow the range to cool completely before attempting to remove the drawer. C A.

Installation Guide
Page 13
...oven door closed , open it is set into a grounded 3 prong outlet. ■ Electrical supply is behind the drawer glide. 2. Check that the range is heavy. For more information, see which step was skipped. 2. If you have all of /recycle all packaging materials. 4. Slowly push the drawer ... the removal and installation procedures. Check that the drawer stop notch is connected. ■ See "Troubleshooting" in the drawer glide. 3. See "Level Range." 5. Use a mild solution of the slide rail drops into the slot in the Use and Care Guide or User Instructions. 8. Read the Use ...
...oven door closed , open it is set into a grounded 3 prong outlet. ■ Electrical supply is behind the drawer glide. 2. Check that the range is heavy. For more information, see which step was skipped. 2. If you have all of /recycle all packaging materials. 4. Slowly push the drawer ... the removal and installation procedures. Check that the drawer stop notch is connected. ■ See "Troubleshooting" in the drawer glide. 3. See "Level Range." 5. Use a mild solution of the slide rail drops into the slot in the Use and Care Guide or User Instructions. 8. Read the Use ...

Installation Guide
Page 14
...(36 cm) water column. Failure to follow these instructions can result in death or serious burns to LP Gas) 1. Unplug range or disconnect power. Failure to do so can result in death, explosion, or fire. B A C A. Install a shut-off valve. Do ...not operate range without anti-tip bracket installed and engaged. A A. Slide range back so rear range foot is moved. Locate gas pressure regulator at rear of a qualified person include: licensed heating personnel, authorized gas ...
...(36 cm) water column. Failure to follow these instructions can result in death or serious burns to LP Gas) 1. Unplug range or disconnect power. Failure to do so can result in death, explosion, or fire. B A C A. Install a shut-off valve. Do ...not operate range without anti-tip bracket installed and engaged. A A. Slide range back so rear range foot is moved. Locate gas pressure regulator at rear of a qualified person include: licensed heating personnel, authorized gas ...

Installation Guide
Page 15
... A. Gas pressure regulator cap with solid end facing out C. Washer E. Gas pressure regulator cap 5. Remove burner cap. 2. NOTE: Reinstall one of the screws through the range cooktop to help hold the orifice spud holder in the nut driver while changing it counterclockwise and lifting out. LP groove Refer to LP Gas...
... A. Gas pressure regulator cap with solid end facing out C. Washer E. Gas pressure regulator cap 5. Remove burner cap. 2. NOTE: Reinstall one of the screws through the range cooktop to help hold the orifice spud holder in the nut driver while changing it counterclockwise and lifting out. LP groove Refer to LP Gas...

Installation Guide
Page 17
...Premium Storage Drawer" section. 2. Gas pressure regulator IMPORTANT: Do not remove the gas pressure regulator. 3. Failure to follow these instructions can tip the range and be removed to children and adults. 1. Gas supply line 2. NOTE: On models with a "090" hood. Replace the "53" hood ...the closed " position C. Remove plastic cover from gas pressure regulator cap. 17 IMPORTANT: Do not overtighten. Checking for properly connecting the range to ½" (1.3 cm) long. LP gas flames have to complete this procedure. Place the broil burner on the broil burner orifice ...
...Premium Storage Drawer" section. 2. Gas pressure regulator IMPORTANT: Do not remove the gas pressure regulator. 3. Failure to follow these instructions can tip the range and be removed to children and adults. 1. Gas supply line 2. NOTE: On models with a "090" hood. Replace the "53" hood ...the closed " position C. Remove plastic cover from gas pressure regulator cap. 17 IMPORTANT: Do not overtighten. Checking for properly connecting the range to ½" (1.3 cm) long. LP gas flames have to complete this procedure. Place the broil burner on the broil burner orifice ...

Installation Guide
Page 18
... hollow end facing out C. Gas pressure regulator cap with the correct Natural gas orifice spud. Remove 2 screws at the rear of the screws through the range cooktop to hold the gas orifice spud in place while removing and replacing the orifice spuds. 3. 4.
... hollow end facing out C. Gas pressure regulator cap with the correct Natural gas orifice spud. Remove 2 screws at the rear of the screws through the range cooktop to hold the gas orifice spud in place while removing and replacing the orifice spuds. 3. 4.
Installation Guide
Page 20
...this manual to complete this procedure. IMPORTANT: You may have yellow tips. 3. Refer to adjust the "LO" setting for properly connecting the range to Natural Gas) 1. Place the broil burner on the broil burner orifice hood and insert the broil burner ceramic igniter in the hole ...in the rear of Whirlpool, U.S.A. 1/12 Printed in the conversion. Refer to the "Make Gas Connection" section for each cooktop burner. Natural gas flames do not have...
...this manual to complete this procedure. IMPORTANT: You may have yellow tips. 3. Refer to adjust the "LO" setting for properly connecting the range to Natural Gas) 1. Place the broil burner on the broil burner orifice hood and insert the broil burner ceramic igniter in the hole ...in the rear of Whirlpool, U.S.A. 1/12 Printed in the conversion. Refer to the "Make Gas Connection" section for each cooktop burner. Natural gas flames do not have...

Use & Care Guide
Page 1
..., please visit our website at 1-800-253-1301. You will need assistance, call us at www.whirlpool.com for purchasing this high-quality product. Table of the oven door. GAS RANGE USER INSTRUCTIONS THANK YOU for additional information. Para obtener acceso a "Instrucciones para el usuario de la... estufa a gas" en español, o para obtener información adicional acerca de su producto, visite: www.whirlpool.com Necesitará tener a mano ...
..., please visit our website at 1-800-253-1301. You will need assistance, call us at www.whirlpool.com for purchasing this high-quality product. Table of the oven door. GAS RANGE USER INSTRUCTIONS THANK YOU for additional information. Para obtener acceso a "Instrucciones para el usuario de la... estufa a gas" en español, o para obtener información adicional acerca de su producto, visite: www.whirlpool.com Necesitará tener a mano ...

Use & Care Guide
Page 2
RANGE SAFETY Your safety and the safety of injury, and tell you what the potential hazard is, tell you don't follow instructions. This symbol alerts you ...
RANGE SAFETY Your safety and the safety of injury, and tell you what the potential hazard is, tell you don't follow instructions. This symbol alerts you ...


