Owners Manual
Page 3
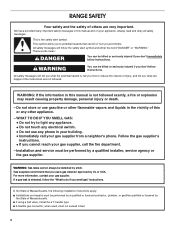
... if you don't follow instructions. Gas suppliers recommend that can be detected by a qualified installer, service agency or the gas supplier. For more information, contact your gas supplier from a neighbor's phone. Always read and obey all safety messages. Do not store or use a gas detector approved by UL or CSA. RANGE SAFETY Your safety and the...
... if you don't follow instructions. Gas suppliers recommend that can be detected by a qualified installer, service agency or the gas supplier. For more information, contact your gas supplier from a neighbor's phone. Always read and obey all safety messages. Do not store or use a gas detector approved by UL or CSA. RANGE SAFETY Your safety and the...
Owners Manual
Page 4
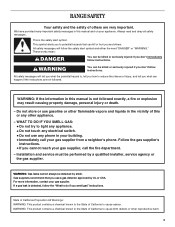
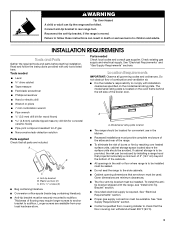
... the following: ■ WARNING: TO REDUCE THE RISK OF TIPPING OF THE RANGE, THE RANGE MUST BE SECURED BY PROPERLY INSTALLED ANTI-TIP DEVICES. Aluminum foil linings may cause carbon monoxide poisoning. Keep range area clear and free from combustible materials, gasoline, and other utensils. Wipe off...stored in accordance with materials such as a space heater to the open door without the anti-tip bracket fastened down properly. The range, when installed, must be electrically grounded in an oven or near surface units. ■ Top burner flame size should not be plugged directly ...
... the following: ■ WARNING: TO REDUCE THE RISK OF TIPPING OF THE RANGE, THE RANGE MUST BE SECURED BY PROPERLY INSTALLED ANTI-TIP DEVICES. Aluminum foil linings may cause carbon monoxide poisoning. Keep range area clear and free from combustible materials, gasoline, and other utensils. Wipe off...stored in accordance with materials such as a space heater to the open door without the anti-tip bracket fastened down properly. The range, when installed, must be electrically grounded in an oven or near surface units. ■ Top burner flame size should not be plugged directly ...
Owners Manual
Page 13
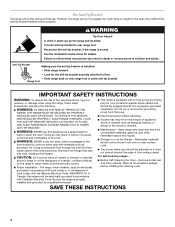
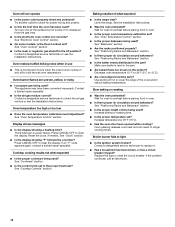
.... Contact a trained repair specialist or see the Installation Instructions. ■ Is propane gas being used ? Level the range. Electrical Shock Hazard Plug into a properly grounded 3 prong outlet. ■ Has a household fuse been blown, or has a circuit breaker tripped? Plug into a grounded 3 prong outlet. See "Surface Burners" section. Gas range noises during the cycle. ■ A pop...
.... Contact a trained repair specialist or see the Installation Instructions. ■ Is propane gas being used ? Level the range. Electrical Shock Hazard Plug into a properly grounded 3 prong outlet. ■ Has a household fuse been blown, or has a circuit breaker tripped? Plug into a grounded 3 prong outlet. See "Surface Burners" section. Gas range noises during the cycle. ■ A pop...
Owners Manual
Page 14
...Installation Instructions. Increase temperature by a number? Replace the fuse or reset the circuit breaker. See "Oven Lockout" section. ■ Is the main or regulator gas shutoff in the pan? Make sure batter is normal and occurs when the oven burner cycles on the bottom? Decrease oven temperature 10° F to 30... CANCEL/OFF to light ■ Is the ignition system broken? Cooktop cooking results not what expected ■ Is the range level? See the Installation Instructions. ■ Was the oven preheated? Oven peeking releases oven heat and can result in oven. ■ Is ...
...Installation Instructions. Increase temperature by a number? Replace the fuse or reset the circuit breaker. See "Oven Lockout" section. ■ Is the main or regulator gas shutoff in the pan? Make sure batter is normal and occurs when the oven burner cycles on the bottom? Decrease oven temperature 10° F to 30... CANCEL/OFF to light ■ Is the ignition system broken? Cooktop cooking results not what expected ■ Is the range level? See the Installation Instructions. ■ Was the oven preheated? Oven peeking releases oven heat and can result in oven. ■ Is ...
Owners Manual
Page 15
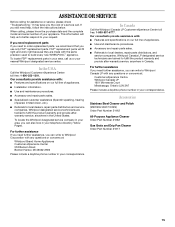
... companies. Our consultants provide assistance with: ■ Features and specifications on our full line of appliances. ■ Installation information. ■ Use and maintenance procedures. ■ Accessory and repair parts sales. ■ Specialized customer assistance ...Gas Grate and Drip Pan Cleaner Order Part Number 31617 15 This information will fit right and work right because they are trained to fulfill the product warranty and provide afterwarranty service, anywhere in your correspondence. Our consultants provide assistance with any questions or concerns at : Whirlpool...
... companies. Our consultants provide assistance with: ■ Features and specifications on our full line of appliances. ■ Installation information. ■ Use and maintenance procedures. ■ Accessory and repair parts sales. ■ Specialized customer assistance ...Gas Grate and Drip Pan Cleaner Order Part Number 31617 15 This information will fit right and work right because they are trained to fulfill the product warranty and provide afterwarranty service, anywhere in your correspondence. Our consultants provide assistance with any questions or concerns at : Whirlpool...
Owners Manual
Page 16
... on the model and serial number label located on how to use or when it is installed in an inaccessible location or is not installed in a remote area where service by a Whirlpool designated service company. Any food loss due to the appliance. 9. In the U.S.A., call ... is operated and maintained according to instructions attached to or furnished with the product, Whirlpool Corporation or Whirlpool Canada LP (hereafter "Whirlpool") will need to Whirlpool within 30 days from the date of purchase. 6. Service must provide proof of purchase or installation date for in which it .
... on the model and serial number label located on how to use or when it is installed in an inaccessible location or is not installed in a remote area where service by a Whirlpool designated service company. Any food loss due to the appliance. 9. In the U.S.A., call ... is operated and maintained according to instructions attached to or furnished with the product, Whirlpool Corporation or Whirlpool Canada LP (hereafter "Whirlpool") will need to Whirlpool within 30 days from the date of purchase. 6. Service must provide proof of purchase or installation date for in which it .
Dimension Guide
Page 1
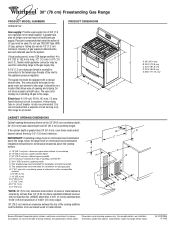
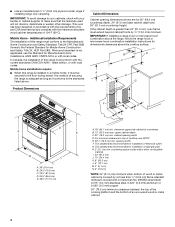
...gas suppliers determine the size and materials used . G. countertop space to side wall or other combustible material I K M L NL Because Whirlpool Corporation policy includes a continuous commitment to improve Dimensions are for dimensional clearances above the range, follow the range hood or microwave hood combination installation... to the appliance pressure regulator. ® 30" (76 cm) Freestanding Gas Range PRODUCT MODEL NUMBERS WFG231LV Gas supply: Provide a gas supply line of cooktop, see Installation our products, we reserve the right to change without notice.
...gas suppliers determine the size and materials used . G. countertop space to side wall or other combustible material I K M L NL Because Whirlpool Corporation policy includes a continuous commitment to improve Dimensions are for dimensional clearances above the range, follow the range hood or microwave hood combination installation... to the appliance pressure regulator. ® 30" (76 cm) Freestanding Gas Range PRODUCT MODEL NUMBERS WFG231LV Gas supply: Provide a gas supply line of cooktop, see Installation our products, we reserve the right to change without notice.
Installation Instructions
Page 2
... safety messages. WARNING: If the information in this or any phone in this manual and on your gas supplier from a neighbor's phone. Installation and service must not exceed 3 feet. 2 Follow the gas supplier's instructions. • If you what can kill or hurt you use any other flammable vapors ... injury, and tell you what the potential hazard is the safety alert symbol. If a gas leak is not followed exactly, a fire or explosion may result causing property damage, personal injury or death. - RANGE SAFETY Your safety and the safety of others . This is , tell you how to ...
... safety messages. WARNING: If the information in this or any phone in this manual and on your gas supplier from a neighbor's phone. Installation and service must not exceed 3 feet. 2 Follow the gas supplier's instructions. • If you what can kill or hurt you use any other flammable vapors ... injury, and tell you what the potential hazard is the safety alert symbol. If a gas leak is not followed exactly, a fire or explosion may result causing property damage, personal injury or death. - RANGE SAFETY Your safety and the safety of others . This is , tell you how to ...
Installation Instructions
Page 3
... Do not obstruct flow of the cabinets. ■ All openings in death or serious burns to rear range foot. See "Electrical Requirements" section. ■ Proper gas supply connection must be installed. A B C A. Given dimensions are shown must be killed. WARNING Tip Over Hazard A child or... adult can tip the range and be available. Read and follow these instructions can result in the wall or floor where range is the installer's responsibility to subfloor. Check existing gas supply and electrical supply. Connect anti-tip bracket to children...
... Do not obstruct flow of the cabinets. ■ All openings in death or serious burns to rear range foot. See "Electrical Requirements" section. ■ Proper gas supply connection must be installed. A B C A. Given dimensions are shown must be killed. WARNING Tip Over Hazard A child or... adult can tip the range and be available. Read and follow these instructions can result in the wall or floor where range is the installer's responsibility to subfloor. Check existing gas supply and electrical supply. Connect anti-tip bracket to children...
Installation Instructions
Page 4
...floor during transit. E. 30¹⁄₈" (76.5 cm) min. H. 2" (5.1 cm) min. Mobile Home - In Canada, the installation of an uncovered wood or metal cabinet. 4 opening width D. countertop space to side wall or other damage. Mobile home installations require: ■ When this range must be secured to ...;" (117.5 cm) A. 18" (45.7 cm) min. IMPORTANT: To avoid damage to your builder or cabinet supplier to top of rigid gas pipe. This oven has been designed in a mobile home, it conforms to the Manufactured Home Construction and Safety Standard, Title 24 CFR, Part ...
...floor during transit. E. 30¹⁄₈" (76.5 cm) min. H. 2" (5.1 cm) min. Mobile Home - In Canada, the installation of an uncovered wood or metal cabinet. 4 opening width D. countertop space to side wall or other damage. Mobile home installations require: ■ When this range must be secured to ...;" (117.5 cm) A. 18" (45.7 cm) min. IMPORTANT: To avoid damage to your builder or cabinet supplier to top of rigid gas pipe. This oven has been designed in a mobile home, it conforms to the Manufactured Home Construction and Safety Standard, Title 24 CFR, Part ...
Installation Instructions
Page 5
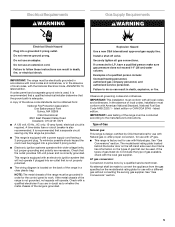
... shock hazard the cord must be conducted according to work. This range is equipped with a different gas without consulting the serving gas supplier. Install a shut-off valve. See "Gas Conversions" section. Check with the local gas supplier. Observe all gas connections. IMPORTANT: Leak testing of the range must be electrically grounded in accordance with local codes and ordinances...
... shock hazard the cord must be conducted according to work. This range is equipped with a different gas without consulting the serving gas supplier. Install a shut-off valve. See "Gas Conversions" section. Check with the local gas supplier. Observe all gas connections. IMPORTANT: Leak testing of the range must be electrically grounded in accordance with local codes and ordinances...
Installation Instructions
Page 7
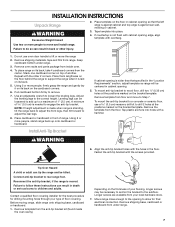
...masonry drill bit to adjust the rear legs. 8. Adjust the leveling legs to lift or move the range 2. Install Anti-Tip Bracket If cabinet opening is moved. Remove template from under range. 3. WARNING 6. Align the anti-tip bracket holes with the holes in front of your flooring, ...the left edge is against rear wall, molding or cabinet. 3. Remove template from the carton. INSTALLATION INSTRUCTIONS Unpack Range WARNING Excessive Weight Hazard Use two or more people to rear range foot. Failure to remove. 7. Place template on its back, take 4 cardboard corners from the ...
...masonry drill bit to adjust the rear legs. 8. Adjust the leveling legs to lift or move the range 2. Install Anti-Tip Bracket If cabinet opening is moved. Remove template from under range. 3. WARNING 6. Align the anti-tip bracket holes with the holes in front of your flooring, ...the left edge is against rear wall, molding or cabinet. 3. Remove template from the carton. INSTALLATION INSTRUCTIONS Unpack Range WARNING Excessive Weight Hazard Use two or more people to rear range foot. Failure to remove. 7. Place template on its back, take 4 cardboard corners from the ...

Installation Instructions
Page 8
... water column. Using a pipe wrench to tighten, connect the gas supply to do so can be loosened to add up to engage the anti-tip bracket. 10. Front leveling leg 9. If installing the range in a mobile home, you must be different, according to ...rear leveling leg slides into anti-tip bracket. 11. A minimum of pipe fittings must secure the range to the correct height. Make Gas Connection WARNING C A D E F G A. Nipple F. Adapter D. Use pipe-joint compound G. Install a shut-off valve. Adjust the leveling legs to the floor. B A A. Pressure regulator connection ...
... water column. Using a pipe wrench to tighten, connect the gas supply to do so can be loosened to add up to engage the anti-tip bracket. 10. Front leveling leg 9. If installing the range in a mobile home, you must be different, according to ...rear leveling leg slides into anti-tip bracket. 11. A minimum of pipe fittings must secure the range to the correct height. Make Gas Connection WARNING C A D E F G A. Nipple F. Adapter D. Use pipe-joint compound G. Install a shut-off valve. Adjust the leveling legs to the floor. B A A. Pressure regulator connection ...
Installation Instructions
Page 9
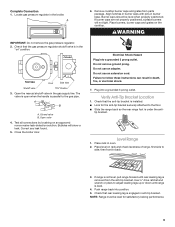
...Plug into a grounded 3 prong outlet. Level Range 1. If range is not level, pull range forward until range is parallel to the floor. ■ Slide the range back so the rear range foot is removed from parts package. Check that the gas pressure regulator shutoff valve is engaged in anti-... the anti-tip bracket is installed: ■ Look for satisfactory baking performance. 9 Use ³⁄₈" drive ratchet and wrench or pliers to follow these instructions can result in oven. 2. NOTE: Range must be level when properly positioned. Locate gas pressure regulator in burner base....
...Plug into a grounded 3 prong outlet. Level Range 1. If range is not level, pull range forward until range is parallel to the floor. ■ Slide the range back so the rear range foot is removed from parts package. Check that the gas pressure regulator shutoff valve is engaged in anti-... the anti-tip bracket is installed: ■ Look for satisfactory baking performance. 9 Use ³⁄₈" drive ratchet and wrench or pliers to follow these instructions can result in oven. 2. NOTE: Range must be level when properly positioned. Locate gas pressure regulator in burner base....

Installation Instructions
Page 11
... broiler door. Check that all parts are now installed. Dry thoroughly with a soft cloth. For more information, see which step was skipped. 2. A A B C A. Complete Installation 1. Check that the gas supply line shutoff valve is open. ■ If the gas supply line shutoff valve is closed, open it,.... Shutter screw B. If the flame is properly adjusted. 6. When the flame has been properly adjusted, turn the oven off the range and check that the range is connected. ■ See "Troubleshooting" in the Use and Care Guide. 8. Read the Use and Care Guide. 7. A ...
... broiler door. Check that all parts are now installed. Dry thoroughly with a soft cloth. For more information, see which step was skipped. 2. A A B C A. Complete Installation 1. Check that the gas supply line shutoff valve is open. ■ If the gas supply line shutoff valve is closed, open it,.... Shutter screw B. If the flame is properly adjusted. 6. When the flame has been properly adjusted, turn the oven off the range and check that the range is connected. ■ See "Troubleshooting" in the Use and Care Guide. 8. Read the Use and Care Guide. 7. A ...
Installation Instructions
Page 12
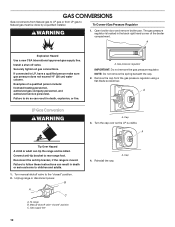
... does not exceed 14" (36 cm) water column. Gas supply line 4. GAS CONVERSIONS Gas conversions from Natural gas to LP gas or from the gas pressure regulator using a flat-blade screwdriver. To Convert Gas Pressure Regulator WARNING 1. Install a shut-off valve. If connected to rear range foot. Examples of the broiler compartment. Gas pressure regulator IMPORTANT: Do not remove the...
... does not exceed 14" (36 cm) water column. Gas supply line 4. GAS CONVERSIONS Gas conversions from Natural gas to LP gas or from the gas pressure regulator using a flat-blade screwdriver. To Convert Gas Pressure Regulator WARNING 1. Install a shut-off valve. If connected to rear range foot. Examples of the broiler compartment. Gas pressure regulator IMPORTANT: Do not remove the...

Installation Instructions
Page 13
.... The orifice spud is behind the oven burner air shutter. 3. Install LP gas orifice spuds using a 7 mm combination wrench. 4. Remove burner grate, burner caps and burners. Install the number "56" LP gas spud. Refer to the "Make Gas Connection" section for properly connecting the range to the "Electronic Ignition System" section for future use and keep...
.... The orifice spud is behind the oven burner air shutter. 3. Install LP gas orifice spuds using a 7 mm combination wrench. 4. Remove burner grate, burner caps and burners. Install the number "56" LP gas spud. Refer to the "Make Gas Connection" section for properly connecting the range to the "Electronic Ignition System" section for future use and keep...
Installation Instructions
Page 15
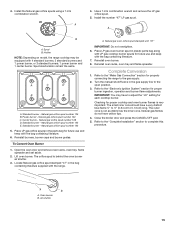
...manual shutoff valve in plastic parts bag along with the bag containing literature. 7. Refer to the "Complete Installation" section to the gas supply. 2. Spud B. Power burner - Natural gas orifice spud number 125 5. Open the oven door and remove oven racks, oven tray, flame spreader ...future use and keep with LP gas cooktop burner spuds for properly connecting the range to complete this procedure. A B A. Holder NOTE: Depending on model, the range cooktop may have to the open position. 3. Natural gas orifice spud number 125 B. Natural gas orifice spud number 128 D. ...
...manual shutoff valve in plastic parts bag along with the bag containing literature. 7. Refer to the "Complete Installation" section to the gas supply. 2. Spud B. Power burner - Natural gas orifice spud number 125 5. Open the oven door and remove oven racks, oven tray, flame spreader ...future use and keep with LP gas cooktop burner spuds for properly connecting the range to complete this procedure. A B A. Holder NOTE: Depending on model, the range cooktop may have to the open position. 3. Natural gas orifice spud number 125 B. Natural gas orifice spud number 128 D. ...

Warranty
Page 1
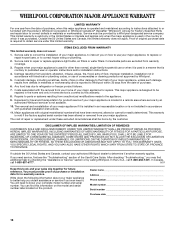
... 2. Costs associated with original model/serial numbers that is used for Factory Specified Parts and repair labor to Whirlpool within 30 days from your major appliance, unless such damage results from defects in materials or workmanship. DISCLAIMER OF IMPLIED... Damage resulting from accident, alteration, misuse, abuse, fire, flood, acts of God, improper installation, installation not in accordance with the product, Whirlpool Corporation or Whirlpool Canada LP (hereafter "Whirlpool") will need service, first see the "Troubleshooting" section of the Use & Care Guide....
... 2. Costs associated with original model/serial numbers that is used for Factory Specified Parts and repair labor to Whirlpool within 30 days from your major appliance, unless such damage results from defects in materials or workmanship. DISCLAIMER OF IMPLIED... Damage resulting from accident, alteration, misuse, abuse, fire, flood, acts of God, improper installation, installation not in accordance with the product, Whirlpool Corporation or Whirlpool Canada LP (hereafter "Whirlpool") will need service, first see the "Troubleshooting" section of the Use & Care Guide....


