
Owners Manual
Page 2
This is moved. All safety messages will follow these instructions can result in this manual and on your appliance. Verify the anti-tip bracket has been properly installed and engaged per installation instructions. Range Foot Anti-Tip Bracket To verify ...
This is moved. All safety messages will follow these instructions can result in this manual and on your appliance. Verify the anti-tip bracket has been properly installed and engaged per installation instructions. Range Foot Anti-Tip Bracket To verify ...
Owners Manual
Page 3
...and may result in ignition of clothing. Proper relationship of utensil to cover the surface unit heating element. Heating elements should be immersed in Manual. Interior surfaces of an oven become hot enough to cause burns - SAVE THESE INSTRUCTIONS 3 I Protective Liners - I Use Only Dry... near surface units may result in desired location while oven is essential for Warming or Heating the Room. I Storage in the manual. I DO NOT TOUCH SURFACE UNITS OR AREAS NEAR UNITS - Flammable materials should be hot even though they have had sufficient ...
...and may result in ignition of clothing. Proper relationship of utensil to cover the surface unit heating element. Heating elements should be immersed in Manual. Interior surfaces of an oven become hot enough to cause burns - SAVE THESE INSTRUCTIONS 3 I Protective Liners - I Use Only Dry... near surface units may result in desired location while oven is essential for Warming or Heating the Room. I Storage in the manual. I DO NOT TOUCH SURFACE UNITS OR AREAS NEAR UNITS - Flammable materials should be hot even though they have had sufficient ...
Owners Manual
Page 5
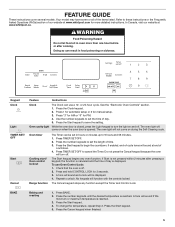
... stops any oven function. BAKE Baking and roasting 1. FEATURE GUIDE These instructions cover several models. In Canada, visit our website at www.whirlpool.com for 3 seconds. 3. Oven timer Cooking start/ Oven control lockout Range function The Timer can be displayed. 4. Press TIMER SET/OFF... 3. Press BAKE. 2. To change the temperature, repeat Step 2. See the "Electronic Oven Controls" section. 1. Press "3" for AM or "6" for manual setup. 3. Press the number keypads to set the length of day. 5. A tone will sound and a lock will sound if the minimum or maximum ...
... stops any oven function. BAKE Baking and roasting 1. FEATURE GUIDE These instructions cover several models. In Canada, visit our website at www.whirlpool.com for 3 seconds. 3. Oven timer Cooking start/ Oven control lockout Range function The Timer can be displayed. 4. Press TIMER SET/OFF... 3. Press BAKE. 2. To change the temperature, repeat Step 2. See the "Electronic Oven Controls" section. 1. Press "3" for AM or "6" for manual setup. 3. Press the number keypads to set the length of day. 5. A tone will sound and a lock will sound if the minimum or maximum ...


