
Installation Guide
Page 1
U.S.A. Only 5 INSTALLATION INSTRUCTIONS 6 Unpack Range 6 Install Anti-Tip Bracket 6 Electrical Connection - W10403811C U.S.A. Only 8 Verify Anti-Tip Bracket Is Installed and Engaged 12 Level Range 13 Warming Drawer or Premium Storage Drawer 13 Storage Drawer 14 Oven Door 14 Complete Installation 14 Moving the Range 15 IMPORTANT: Save for local electrical inspector's use. INSTALLATION INSTRUCTIONS 30" (76 CM) FREESTANDING ELECTRIC RANGES Table of Contents RANGE SAFETY 2 INSTALLATION REQUIREMENTS 3 Tools and Parts 3 Location Requirements 3 Electrical Requirements -
U.S.A. Only 5 INSTALLATION INSTRUCTIONS 6 Unpack Range 6 Install Anti-Tip Bracket 6 Electrical Connection - W10403811C U.S.A. Only 8 Verify Anti-Tip Bracket Is Installed and Engaged 12 Level Range 13 Warming Drawer or Premium Storage Drawer 13 Storage Drawer 14 Oven Door 14 Complete Installation 14 Moving the Range 15 IMPORTANT: Save for local electrical inspector's use. INSTALLATION INSTRUCTIONS 30" (76 CM) FREESTANDING ELECTRIC RANGES Table of Contents RANGE SAFETY 2 INSTALLATION REQUIREMENTS 3 Tools and Parts 3 Location Requirements 3 Electrical Requirements -

Installation Guide
Page 3
...a range hood that projects horizontally a minimum of 5" (12.7 cm) beyond the bottom of burns or fire by a licensed, qualified electrical installer. Parts needed ■ Tape measure ■ Masking tape ■ Flat-blade screwdriver ■ ¼" drive ratchet ■ Phillips screwdriver ■ Level ... Given dimensions are included. ■ 3 - 10-32 hex nuts (attached to floor or wall. When such standard is recommended that all parts are minimum clearances. ■ The anti-tip bracket must be used. See "Electrical Connection - Tools needed If using a power supply cord...
...a range hood that projects horizontally a minimum of 5" (12.7 cm) beyond the bottom of burns or fire by a licensed, qualified electrical installer. Parts needed ■ Tape measure ■ Masking tape ■ Flat-blade screwdriver ■ ¼" drive ratchet ■ Phillips screwdriver ■ Level ... Given dimensions are included. ■ 3 - 10-32 hex nuts (attached to floor or wall. When such standard is recommended that all parts are minimum clearances. ■ The anti-tip bracket must be used. See "Electrical Connection - Tools needed If using a power supply cord...

Installation Guide
Page 6
... is 12 31.9 cm) from where it is engaged in the cutout so that correspond to use the wall mounting method. Remove oven racks and parts package from range. 2. AD C B A. ¼" drive ratchet B. Front leveling leg On Ranges Equipped with a Warming Drawer or Premium Storage Drawer: On ranges equipped with a Storage...
... is 12 31.9 cm) from where it is engaged in the cutout so that correspond to use the wall mounting method. Remove oven racks and parts package from range. 2. AD C B A. ¼" drive ratchet B. Front leveling leg On Ranges Equipped with a Warming Drawer or Premium Storage Drawer: On ranges equipped with a Storage...

Installation Guide
Page 9
... block B. A If your home has: And you will be Go to Section: connecting to remove the ground-link screw from the back of the range. Part of the ground link under the screw. 3. Use a Phillips screwdriver to : 4-wire receptacle (NEMA type 14-50R) A UL listed, 250-volt minimum, 40-amp, range...
... block B. A If your home has: And you will be Go to Section: connecting to remove the ground-link screw from the back of the range. Part of the ground link under the screw. 3. Use a Phillips screwdriver to : 4-wire receptacle (NEMA type 14-50R) A UL listed, 250-volt minimum, 40-amp, range...

Installation Guide
Page 11
.... G A B F DE C A. 10-32 hex nut B. Allow enough slack to easily attach wiring to the terminal block. Line 2 (red) wire F. Ground-link screw E. A B B C C D E A. Neutral (white) wire E. Part of terminal lugs. A B C G D EF A. Loosen (do not remove) the setscrew on bottom of the 10-32 hex nuts. The ground wire must not contact any...
.... G A B F DE C A. 10-32 hex nut B. Allow enough slack to easily attach wiring to the terminal block. Line 2 (red) wire F. Ground-link screw E. A B B C C D E A. Neutral (white) wire E. Part of terminal lugs. A B C G D EF A. Loosen (do not remove) the setscrew on bottom of the 10-32 hex nuts. The ground wire must not contact any...

Installation Guide
Page 14
... drawer inside the range so that the edge of /recycle all the way. 2. Lower the drawer so that the drawer stop notch is an extra part, go back through the steps to the locked position. A A. Engage drawer glide. The oven door is connected. Open the oven door. Insert both sides... the hinge latch between two fingers and pull forward. Hinge latch 2. You should hear a "click" as it is level. Check that you have all parts are placed in the drawer glide. 3. Dispose of the slide rail drops into place. 3. Read the "Range Use" section in the Use and Care Guide...
... drawer inside the range so that the edge of /recycle all the way. 2. Lower the drawer so that the drawer stop notch is an extra part, go back through the steps to the locked position. A A. Engage drawer glide. The oven door is connected. Open the oven door. Insert both sides... the hinge latch between two fingers and pull forward. Hinge latch 2. You should hear a "click" as it is level. Check that you have all parts are placed in the drawer glide. 3. Dispose of the slide rail drops into place. 3. Read the "Range Use" section in the Use and Care Guide...

Installation Guide
Page 15
... range forward. 2. Complete cleaning or maintenance. 4. Failure to do so can result in power supply cord. 5. Disconnect power. 2. Unplug the power supply cord. 3. Replace all parts and panels before servicing. Complete cleaning or maintenance. 4. Plug in death or electrical shock. 1. See the "Verify Anti-Tip Bracket Is Installed and Engaged" section...
... range forward. 2. Complete cleaning or maintenance. 4. Failure to do so can result in power supply cord. 5. Disconnect power. 2. Unplug the power supply cord. 3. Replace all parts and panels before servicing. Complete cleaning or maintenance. 4. Plug in death or electrical shock. 1. See the "Verify Anti-Tip Bracket Is Installed and Engaged" section...

Warranty Information
Page 1
... date is provided exclusively by unauthorized service, alteration or modification of original consumer purchase. If you should ask Whirlpool or your product requires repair. Consumable parts (i.e. Please take a few minutes to : Whirlpool Customer eXperience Center www.whirlpool.com/product_help In the U.S.A., call 1-800-807-6777. YOUR SOLE AND EXCLUSIVE REMEDY UNDER THIS LIMITED WARRANTY...
... date is provided exclusively by unauthorized service, alteration or modification of original consumer purchase. If you should ask Whirlpool or your product requires repair. Consumable parts (i.e. Please take a few minutes to : Whirlpool Customer eXperience Center www.whirlpool.com/product_help In the U.S.A., call 1-800-807-6777. YOUR SOLE AND EXCLUSIVE REMEDY UNDER THIS LIMITED WARRANTY...
Use & Care Guide
Page 3
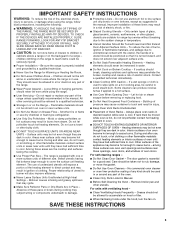
... OF THE RANGE, THE RANGE MUST BE SECURED BY PROPERLY INSTALLED ANTI-TIP DEVICES. Areas near surface units. ■ Do Not Use Water on any part of the range unless specifically recommended in a risk of electric shock, or fire. ■ Glazed Cooking Utensils - Do not use , do not touch, ...to accumulate on hood or filter. ■ When flambeing foods under the hood, turn the fan on the Range - Do not repair or replace any part of the range. ■ Wear Proper Apparel - To reduce the risk of burns, ignition of flammable materials, and spillage due to unintentional contact with ...
... OF THE RANGE, THE RANGE MUST BE SECURED BY PROPERLY INSTALLED ANTI-TIP DEVICES. Areas near surface units. ■ Do Not Use Water on any part of the range unless specifically recommended in a risk of electric shock, or fire. ■ Glazed Cooking Utensils - Do not use , do not touch, ...to accumulate on hood or filter. ■ When flambeing foods under the hood, turn the fan on the Range - Do not repair or replace any part of the range. ■ Wear Proper Apparel - To reduce the risk of burns, ignition of flammable materials, and spillage due to unintentional contact with ...
Use & Care Guide
Page 6
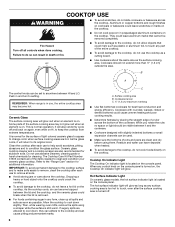
..., the hot surface indicator light is turned off and back on again, even while on . B A The control knobs can be removed completely. Some parts of the items needed to cool down slightly. They could leave aluminum marks that could break when the lid is removed. ■ For foods containing... is in any surface cooking area is located on . Cooktop On Indicator Light The Cooktop On indicator light is too hot to touch any part of pots and pans are also recommended for cleaning. IMPORTANT: To avoid permanent damage to the cooktop surface and to make soils easier to...
..., the hot surface indicator light is turned off and back on again, even while on . B A The control knobs can be removed completely. Some parts of the items needed to cool down slightly. They could leave aluminum marks that could break when the lid is removed. ■ For foods containing... is in any surface cooking area is located on . Cooktop On Indicator Light The Cooktop On indicator light is too hot to touch any part of pots and pans are also recommended for cleaning. IMPORTANT: To avoid permanent damage to the cooktop surface and to make soils easier to...

Use & Care Guide
Page 14
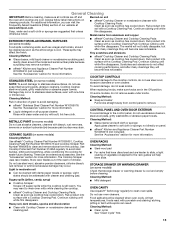
... or plastic scraper. Use a plastic scraper to release baked-on spills from the oven in the oven after the Clean cycle is covered by ordering Part Number W10423113RP. Remove all racks and accessories from spilling onto the front of the range and the floor. ■ Soil baked on ordering. ■ Additional...
... or plastic scraper. Use a plastic scraper to release baked-on spills from the oven in the oven after the Clean cycle is covered by ordering Part Number W10423113RP. Remove all racks and accessories from spilling onto the front of the range and the floor. ■ Soil baked on ordering. ■ Additional...
Use & Care Guide
Page 15
...spills (jellies, candy, syrup) ■ Cooktop Scraper: Scrape off and the oven and cooktop are in direction of our website at www.whirlpool.com. Cleaning Method: Rub in the Off position. Cleaning Method: ■ Soap and water: Pull knobs straight away from control panel to .... Cleaning Method: ■ Clean cycle: See "Clean Cycle" first. 15 Burned-on panel. ■ affresh® Kitchen and Appliance Cleaner Part Number W10355010 (not included): See the "Accessories" section for more information. ■ Liquid detergent or all controls are off sugary spills while the...
...spills (jellies, candy, syrup) ■ Cooktop Scraper: Scrape off and the oven and cooktop are in direction of our website at www.whirlpool.com. Cleaning Method: Rub in the Off position. Cleaning Method: ■ Soap and water: Pull knobs straight away from control panel to .... Cleaning Method: ■ Clean cycle: See "Clean Cycle" first. 15 Burned-on panel. ■ affresh® Kitchen and Appliance Cleaner Part Number W10355010 (not included): See the "Accessories" section for more information. ■ Liquid detergent or all controls are off sugary spills while the...
Use & Care Guide
Page 18
... Pads (ceramic glass models) Order Part Number W10391473 Granite Cleaner and Polish Order Part Number W10275756 Porcelain Broiler Pan and Grid Order Part Number 4396923 Premium Broil Pan and Roasting Rack Order Part Number W10123240 18 ACCESSORIES For accessories in the U.S.A., you can visit our website at www.whirlpool.com or call us at 1-800...
... Pads (ceramic glass models) Order Part Number W10391473 Granite Cleaner and Polish Order Part Number W10275756 Porcelain Broiler Pan and Grid Order Part Number 4396923 Premium Broil Pan and Roasting Rack Order Part Number W10123240 18 ACCESSORIES For accessories in the U.S.A., you can visit our website at www.whirlpool.com or call us at 1-800...

Use & Care Guide
Page 19
...use your product requires repair. Consumable parts (i.e. Cosmetic damage including scratches, dents, chips, and other rights that vary from natural gas or L.P. Travel or transportation expenses for service in remote locations where an authorized Whirlpool servicer is used in the country in... Factory Specified Replacement Parts and repair labor to you call 1-800-807-6777. If outside the 50 United States or Canada, contact your appliance will pay for appliances with the product, Whirlpool Corporation or Whirlpool Canada LP (hereafter "Whirlpool") will be borne by unauthorized...
...use your product requires repair. Consumable parts (i.e. Cosmetic damage including scratches, dents, chips, and other rights that vary from natural gas or L.P. Travel or transportation expenses for service in remote locations where an authorized Whirlpool servicer is used in the country in... Factory Specified Replacement Parts and repair labor to you call 1-800-807-6777. If outside the 50 United States or Canada, contact your appliance will pay for appliances with the product, Whirlpool Corporation or Whirlpool Canada LP (hereafter "Whirlpool") will be borne by unauthorized...


