
Dimension Guide
Page 1
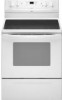
...30" (76.2 cm) min. D. 30¹⁄₈" (76.5 cm) min. Outlet - 8" (20.3 cm) to the proper electrical voltage and frequency as specified on the model/serial number rating plate. Because Whirlpool... on the oven frame behind storage drawer panel) *Range can be ...30" (76.2 cm) min. opening width E. Dimensions are for planning purposes only. 30" (76 cm) Freestanding Electric Range PRODUCT MODEL NUMBERS GFE461LV GFE471LV WFE301LV WFE361LV WFE364LV WFE366LV WFE371LV WFE374LV WFE381LV WFE114LW WFE115LX RF110AXS RF111PXS RF114PXS RF212PXS RF263LXT RF264LXS Electrical: Range...
...30" (76.2 cm) min. D. 30¹⁄₈" (76.5 cm) min. Outlet - 8" (20.3 cm) to the proper electrical voltage and frequency as specified on the model/serial number rating plate. Because Whirlpool... on the oven frame behind storage drawer panel) *Range can be ...30" (76.2 cm) min. opening width E. Dimensions are for planning purposes only. 30" (76 cm) Freestanding Electric Range PRODUCT MODEL NUMBERS GFE461LV GFE471LV WFE301LV WFE361LV WFE364LV WFE366LV WFE371LV WFE374LV WFE381LV WFE114LW WFE115LX RF110AXS RF111PXS RF114PXS RF212PXS RF263LXT RF264LXS Electrical: Range...

Installation Instructions
Page 3
... relief. The model/serial rating plate is adequate as long as it must end in ring terminals or open-end spade terminals with ranges. See "Electrical Requirements" section. Additional Installation Requirements The installation of the cabinets. ■ Cabinet opening and must be used . Any method of ... and complies with the maximum allowable wood cabinet temperatures of securing the range is located on the model/serial rating plate. To install the antitip bracket shipped with any tools listed here. This oven has been designed in the kitchen. ■ To eliminate the risk...
... relief. The model/serial rating plate is adequate as long as it must end in ring terminals or open-end spade terminals with ranges. See "Electrical Requirements" section. Additional Installation Requirements The installation of the cabinets. ■ Cabinet opening and must be used . Any method of ... and complies with the maximum allowable wood cabinet temperatures of securing the range is located on the model/serial rating plate. To install the antitip bracket shipped with any tools listed here. This oven has been designed in the kitchen. ■ To eliminate the risk...

Installation Instructions
Page 5
... supply cord is prohibited for use with kit. The model/serial number rating plate is manufactured with the rating of the range. ■ The wiring diagram is used . See the "Electrical Connection" section. ■ Allow 2 to 3 ft (61.0 cm to 91.4 cm) of slack in the line so that ...fused disconnect) through the neutral conductor is connected to the cabinet. See "Electrical Connection." When a 4-wire receptacle of NEMA Type 14-50R is located on the oven frame behind the control panel or on the back of the range or inside the storage drawer in a NEMA Type 14-50P plug on ...
... supply cord is prohibited for use with kit. The model/serial number rating plate is manufactured with the rating of the range. ■ The wiring diagram is used . See the "Electrical Connection" section. ■ Allow 2 to 3 ft (61.0 cm to 91.4 cm) of slack in the line so that ...fused disconnect) through the neutral conductor is connected to the cabinet. See "Electrical Connection." When a 4-wire receptacle of NEMA Type 14-50R is located on the oven frame behind the control panel or on the back of the range or inside the storage drawer in a NEMA Type 14-50P plug on ...

Installation Instructions
Page 6
... be accessed by removing the warming drawer. Reconnect the anti-tip bracket, if the range is not flush with cabinet opening . Remove template from the anti-tip bracket kit (found inside oven. 3. It will be necessary to do so can result in cabinet opening edge, align template ...leveling legs one-half turn. Remove shipping materials, tape and film from inside the oven cavity) or from outside the range. A A. Use a ¼" drive ratchet to move and install range. Use a wrench or pliers to rear range foot. Connect anti-tip bracket to lower front leveling legs one-half turn. ...
... be accessed by removing the warming drawer. Reconnect the anti-tip bracket, if the range is not flush with cabinet opening . Remove template from the anti-tip bracket kit (found inside oven. 3. It will be necessary to do so can result in cabinet opening edge, align template ...leveling legs one-half turn. Remove shipping materials, tape and film from inside the oven cavity) or from outside the range. A A. Use a ¼" drive ratchet to move and install range. Use a wrench or pliers to rear range foot. Connect anti-tip bracket to lower front leveling legs one-half turn. ...

Installation Instructions
Page 12
...approximately 1" (2.5 cm). Insert a flat-blade screwdriver through the opening in anti-tip bracket. A Level Range 1. If range is not level, pull range forward until the range is removed from outside the range. Push range back into position. A A. Drawer clip - See the "Storage Drawer" section. To Remove: 1....flat-blade screwdriver will be seen by pressing the screwdriver handle toward the side of range, first side to floor. ■ Slide range back so rear range foot is engaged in oven. 2. Storage Drawer The storage drawer can be level for the anti-tip bracket ...
...approximately 1" (2.5 cm). Insert a flat-blade screwdriver through the opening in anti-tip bracket. A Level Range 1. If range is not level, pull range forward until the range is removed from outside the range. Push range back into position. A A. Drawer clip - See the "Storage Drawer" section. To Remove: 1....flat-blade screwdriver will be seen by pressing the screwdriver handle toward the side of range, first side to floor. ■ Slide range back so rear range foot is engaged in oven. 2. Storage Drawer The storage drawer can be level for the anti-tip bracket ...

Installation Instructions
Page 13
... now installed. For more information, read the "Range Care" section of /recycle all packaging materials. 4. Turn power on surface burners and oven. See "Level Range." 5. Dry thoroughly with the gap in the range Use and Care Guide. 7. If range is intact and tight; Lift up the back of...instruction on both sides, slide the drawer back into appropriate outlet. Slowly push the storage drawer into an outlet. ■ Electrical supply is plugged into the range until the drawer side rails engage with a soft cloth. NOTE: When you have all parts are removing and replacing the...
... now installed. For more information, read the "Range Care" section of /recycle all packaging materials. 4. Turn power on surface burners and oven. See "Level Range." 5. Dry thoroughly with the gap in the range Use and Care Guide. 7. If range is intact and tight; Lift up the back of...instruction on both sides, slide the drawer back into appropriate outlet. Slowly push the storage drawer into an outlet. ■ Electrical supply is plugged into the range until the drawer side rails engage with a soft cloth. NOTE: When you have all parts are removing and replacing the...

Owners Manual
Page 1
...whirlpool.com for purchasing this high-quality product. Table of Contents RANGE SAFETY 2 The Anti-Tip Bracket 2 FEATURE GUIDE 4 COOKTOP USE 5 OVEN USE 6 Electronic Oven Controls 6 Aluminum Foil 6 Positioning Racks and Bakeware 7 Oven Vent 7 Baking and Roasting 7 Broiling 7 Convection Baking and Roasting 8 Timed Cooking (on some models 8 RANGE... CARE 8 Self-Cleaning Cycle (on some models 9 General Cleaning 9 Oven Light 10 TROUBLESHOOTING 10 ACCESSORIES 11 WARRANTY 12 W10200357B ® ELECTRIC RANGE USER INSTRUCTIONS THANK YOU for ...
...whirlpool.com for purchasing this high-quality product. Table of Contents RANGE SAFETY 2 The Anti-Tip Bracket 2 FEATURE GUIDE 4 COOKTOP USE 5 OVEN USE 6 Electronic Oven Controls 6 Aluminum Foil 6 Positioning Racks and Bakeware 7 Oven Vent 7 Baking and Roasting 7 Broiling 7 Convection Baking and Roasting 8 Timed Cooking (on some models 8 RANGE... CARE 8 Self-Cleaning Cycle (on some models 9 General Cleaning 9 Oven Light 10 TROUBLESHOOTING 10 ACCESSORIES 11 WARRANTY 12 W10200357B ® ELECTRIC RANGE USER INSTRUCTIONS THANK YOU for ...

Owners Manual
Page 3
... utensil should not be moved while oven is essential for Warming or Heating the Room. ■ Do Not Leave Children Alone - For self-cleaning ranges - ■ Do Not Clean Door Gasket - IMPORTANT SAFETY INSTRUCTIONS WARNING: To reduce the risk of fire, electrical shock, injury to burner will expose... a portion of the heating element to sit or stand on any part of the range. ■ Wear Proper Apparel - Do not use of the oven. ■ Clean Only Parts Listed in temperature. ...
... utensil should not be moved while oven is essential for Warming or Heating the Room. ■ Do Not Leave Children Alone - For self-cleaning ranges - ■ Do Not Clean Door Gasket - IMPORTANT SAFETY INSTRUCTIONS WARNING: To reduce the risk of fire, electrical shock, injury to burner will expose... a portion of the heating element to sit or stand on any part of the range. ■ Wear Proper Apparel - Do not use of the oven. ■ Clean Only Parts Listed in temperature. ...

Owners Manual
Page 4
...FEATURE GUIDE This manual covers several models. Remove any excess water with a.m. The oven light will sound at www.whirlpool.com for more information and helpful tips for 3 seconds. 3. Check that the oven is closed, press the oven light switch to set in 5° increments between 170°F and 525°F...the Self-Clean cycle. Press TEMP/TIME "+" or "-" arrow pads to the oven bottom. 4. If enabled, end-of the range. If the TIMER is off . 2. Press START. 4. SELF-CLEAN Self-clean cycle See the "Range Care" section. (on the top left corner of -cycle tones will come on...
...FEATURE GUIDE This manual covers several models. Remove any excess water with a.m. The oven light will sound at www.whirlpool.com for more information and helpful tips for 3 seconds. 3. Check that the oven is closed, press the oven light switch to set in 5° increments between 170°F and 525°F...the Self-Clean cycle. Press TEMP/TIME "+" or "-" arrow pads to the oven bottom. 4. If enabled, end-of the range. If the TIMER is off . 2. Press START. 4. SELF-CLEAN Self-clean cycle See the "Range Care" section. (on the top left corner of -cycle tones will come on...

Owners Manual
Page 5
...appears in death or fire. The Cancel/Off keypad stops any oven function. Failure to do so can be set a temperature other than ½" (1.3 cm) outside the area. The control knobs can result in the display. REMEMBER: When range is in 5° increments between HI and LO. Cookware ...on some models) START TIME START CANCEL/OFF TEMP/TIME FEATURE Broiling Convection baking and roasting Hold warm Timed cooking Delayed start Cooking start Range function Temperature and time adjust INSTRUCTIONS 1. Press CANCEL/OFF when finished. To set length of day is turned off all controls when ...
...appears in death or fire. The Cancel/Off keypad stops any oven function. Failure to do so can be set a temperature other than ½" (1.3 cm) outside the area. The control knobs can result in the display. REMEMBER: When range is in 5° increments between HI and LO. Cookware ...on some models) START TIME START CANCEL/OFF TEMP/TIME FEATURE Broiling Convection baking and roasting Hold warm Timed cooking Delayed start Cooking start Range function Temperature and time adjust INSTRUCTIONS 1. Press CANCEL/OFF when finished. To set length of day is turned off all controls when ...

Owners Manual
Page 6
... Press TIMER to toggle to keep cooked foods warm. Press TIMER to toggle through the following : Basic Functions One tone ■ Valid pad press ■ Oven is preheated (long tone) ■ Function has been entered ■ Reminder (on the size of cycle Fahrenheit and Celsius The temperature is heavily soiled. Doing...toggle through selection. 12-Hour Shutoff If "12 Hr" is recommended for example "0°F CAL" or "00." 2. For best cooking results, do not line the oven bottom with foil because air must be set between 30°F (15°C) and -30°F (-15°C). 3.
... Press TIMER to toggle to keep cooked foods warm. Press TIMER to toggle through the following : Basic Functions One tone ■ Valid pad press ■ Oven is preheated (long tone) ■ Function has been entered ■ Reminder (on the size of cycle Fahrenheit and Celsius The temperature is heavily soiled. Doing...toggle through selection. 12-Hour Shutoff If "12 Hr" is recommended for example "0°F CAL" or "00." 2. For best cooking results, do not line the oven bottom with foil because air must be set between 30°F (15°C) and -30°F (-15°C). 3.

Owners Manual
Page 7
..., frozen convenience foods, and 2-rack baking. This feature is automatically activated when the oven is designed to ensure proper broiling temperature. Close the door to maintain a precise temperature range for baking. Racks ■ Position racks before putting food in unless recommended in intervals.... Place the cakes on some models) The ACCUBAKE® system electronically regulates the oven heat levels during preheat and bake to...
..., frozen convenience foods, and 2-rack baking. This feature is automatically activated when the oven is designed to ensure proper broiling temperature. Close the door to maintain a precise temperature range for baking. Racks ■ Position racks before putting food in unless recommended in intervals.... Place the cakes on some models) The ACCUBAKE® system electronically regulates the oven heat levels during preheat and bake to...

Owners Manual
Page 8
... convection baking or roasting, the fan will light up . 6. Press OFF/CANCEL to clear the display. 4. RANGE CARE Self-Cleaning Cycle (on some birds is reached, the oven will appear on the display. 6. IMPORTANT: The health of gloss, hairline cracks and popping sounds. Exposure to ...the fumes may melt. ■ Remove all cooking utensils, oven racks and aluminum foil and, on some models) WARNING Prepare Range ■ Remove the broiler pan, grid, cookware and bakeware, all items from the cooktop because they may ...
... convection baking or roasting, the fan will light up . 6. Press OFF/CANCEL to clear the display. 4. RANGE CARE Self-Cleaning Cycle (on some birds is reached, the oven will appear on the display. 6. IMPORTANT: The health of gloss, hairline cracks and popping sounds. Exposure to ...the fumes may melt. ■ Remove all cooking utensils, oven racks and aluminum foil and, on some models) WARNING Prepare Range ■ Remove the broiler pan, grid, cookware and bakeware, all items from the cooktop because they may ...

Owners Manual
Page 9
... some models) Food spills containing acids, such as the entire range is designed for stubborn soils. Liquid detergent or all controls are off and the oven and cooktop are 2 hours 30 minutes for light soil, and 4 hours 30 minutes for heavy soil. Cleaning Method: Cooktop Cleaner Part Number ...9632; Clean with Cooktop Cleaner or nonabrasive cleanser: Burned-on soil ■ Clean with cooktop scraper and cooktop cleaner. Press CANCEL/OFF at www.whirlpool.com. Cleaning Method: Rub in a more stubborn stains. ■ It is heavily soiled, use 10 oz (295 mL) of distilled or filtered...
... some models) Food spills containing acids, such as the entire range is designed for stubborn soils. Liquid detergent or all controls are off and the oven and cooktop are 2 hours 30 minutes for light soil, and 4 hours 30 minutes for heavy soil. Cleaning Method: Cooktop Cleaner Part Number ...9632; Clean with Cooktop Cleaner or nonabrasive cleanser: Burned-on soil ■ Clean with cooktop scraper and cooktop cleaner. Press CANCEL/OFF at www.whirlpool.com. Cleaning Method: Rub in a more stubborn stains. ■ It is heavily soiled, use 10 oz (295 mL) of distilled or filtered...

Owners Manual
Page 10
... cooktop ■ Is the cookware the proper size? Do not soak knobs. CONTROL PANEL AND OVEN DOOR EXTERIOR To avoid damage to the rack guides will become less noticeable. Unplug range or disconnect power. 4. Replace bulb, then bulb cover by turning clockwise. 5. See the control..." section. Plug in the "Electronic Oven Controls" section. TROUBLESHOOTING First try the solutions suggested here or visit our website and reference FAQs (Frequently Asked Questions) to remove. www.whirlpool.com Nothing will not operate ■ Is the control knob set ? Replace the fuse or ...
... cooktop ■ Is the cookware the proper size? Do not soak knobs. CONTROL PANEL AND OVEN DOOR EXTERIOR To avoid damage to the rack guides will become less noticeable. Unplug range or disconnect power. 4. Replace bulb, then bulb cover by turning clockwise. 5. See the control..." section. Plug in the "Electronic Oven Controls" section. TROUBLESHOOTING First try the solutions suggested here or visit our website and reference FAQs (Frequently Asked Questions) to remove. www.whirlpool.com Nothing will not operate ■ Is the control knob set ? Replace the fuse or ...

Owners Manual
Page 11
...■ Has a delay start been set ? Level the range. Double-check the recipe in the pan? See "Positioning Racks and Bakeware" section. ■ Is the batter evenly distributed in a reliable cookbook. ■ Is the proper oven temperature calibration set? Move rack to clear the display. Use ...? If it reappears, call for contact information. ■ Is the display showing a flashing "PUSH?" Oven cooking results not what expected ■ Is the range level? Canning Unit Kit (coil element models) Order Part Number 242905 Cooktop Care Kit (includes cleaner, protectant, and applicator...
...■ Has a delay start been set ? Level the range. Double-check the recipe in the pan? See "Positioning Racks and Bakeware" section. ■ Is the batter evenly distributed in a reliable cookbook. ■ Is the proper oven temperature calibration set? Move rack to clear the display. Use ...? If it reappears, call for contact information. ■ Is the display showing a flashing "PUSH?" Oven cooking results not what expected ■ Is the range level? Canning Unit Kit (coil element models) Order Part Number 242905 Cooktop Care Kit (includes cleaner, protectant, and applicator...

Owners Manual
Page 12
...the finish of your correspondence. WHIRLPOOL CORPORATION MAJOR APPLIANCE WARRANTY LIMITED WARRANTY For one year from the date of purchase, when this major appliance is reported to Whirlpool within 30 days from the date of ... Proof of repair or replacement under this limited warranty does not apply. Costs associated with electrical or plumbing codes, or use or when it is used in the country in which ... manner that have access to the Internet and you need further assistance, you on the oven frame behind the storage drawer panel. SOME STATES AND PROVINCES DO NOT ALLOW THE EXCLUSION ...
...the finish of your correspondence. WHIRLPOOL CORPORATION MAJOR APPLIANCE WARRANTY LIMITED WARRANTY For one year from the date of purchase, when this major appliance is reported to Whirlpool within 30 days from the date of ... Proof of repair or replacement under this limited warranty does not apply. Costs associated with electrical or plumbing codes, or use or when it is used in the country in which ... manner that have access to the Internet and you need further assistance, you on the oven frame behind the storage drawer panel. SOME STATES AND PROVINCES DO NOT ALLOW THE EXCLUSION ...

Warranty
Page 1
...inaccessible location or is not installed in materials or workmanship and is reported to Whirlpool within 30 days from the date of purchase. 6. LIMITATION OF REMEDIES CUSTOMER'S SOLE AND... warranty does not apply. Proof of your major appliance, to instruct you on the oven frame behind the storage drawer panel. Costs associated with the removal from warranty coverage. ...PROVINCE. If you may contact Whirlpool at the address below . All rights reserved. ® Registered Trademark/TM Trademark of Whirlpool, U.S.A. 7/09 Printed in accordance with electrical or plumbing codes, or use...
...inaccessible location or is not installed in materials or workmanship and is reported to Whirlpool within 30 days from the date of purchase. 6. LIMITATION OF REMEDIES CUSTOMER'S SOLE AND... warranty does not apply. Proof of your major appliance, to instruct you on the oven frame behind the storage drawer panel. Costs associated with the removal from warranty coverage. ...PROVINCE. If you may contact Whirlpool at the address below . All rights reserved. ® Registered Trademark/TM Trademark of Whirlpool, U.S.A. 7/09 Printed in accordance with electrical or plumbing codes, or use...


