
Dimension Guide
Page 1
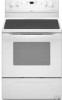
...control panel or on the oven frame behind storage drawer panel) *Range can be connected directly to 22" (55.9 cm) from floor F 2.2 cm) min. Because Whirlpool Corporation policy includes a continuous commitment to improve our products, we reserve...width E. A C B D E F A. 13" (33.0 cm) max. Model/serial rating plate (located on the model/serial number rating plate. W10252706A 1/04/10 30" (76 cm) Freestanding Electric Range PRODUCT MODEL NUMBERS GFE461LV GFE471LV WFE301LV WFE361LV WFE364LV WFE366LV WFE371LV WFE374LV WFE381LV WFE114LW WFE115LX RF110AXS RF111PXS RF114PXS ...
...control panel or on the oven frame behind storage drawer panel) *Range can be connected directly to 22" (55.9 cm) from floor F 2.2 cm) min. Because Whirlpool Corporation policy includes a continuous commitment to improve our products, we reserve...width E. A C B D E F A. 13" (33.0 cm) max. Model/serial rating plate (located on the model/serial number rating plate. W10252706A 1/04/10 30" (76 cm) Freestanding Electric Range PRODUCT MODEL NUMBERS GFE461LV GFE471LV WFE301LV WFE361LV WFE364LV WFE366LV WFE371LV WFE374LV WFE381LV WFE114LW WFE115LX RF110AXS RF111PXS RF114PXS ...

Installation Instructions
Page 3
.... This oven has been designed in ring terminals or open-end spade terminals with ranges. Check local codes. See "Electrical Requirements" section. See "Electrical Connection" section. 3 The model/serial rating plate is to subfloor. If cabinet storage is located on the model/serial rating plate. IMPORTANT: To avoid damage to your cabinets, check with installation...
.... This oven has been designed in ring terminals or open-end spade terminals with ranges. Check local codes. See "Electrical Requirements" section. See "Electrical Connection" section. 3 The model/serial rating plate is to subfloor. If cabinet storage is located on the model/serial rating plate. IMPORTANT: To avoid damage to your cabinets, check with installation...

Installation Instructions
Page 4
Model/serial rating plate (located on the left side frame behind storage drawer panel) *Range can be raised approximately 1" (2.5 cm) by a qualified electrician. 4 For minimum clearance to whether the appliance is properly grounded. Outlet - 8" (20.3 cm) to...2.2 cm) min. opening dimensions shown are in * D. 29⁷⁄₈" (75.9 cm) width E. 25" (63.5 cm) depth F. upper cabinet depth B. 30" (76.2 cm) min. Electrical Requirements - depth with handle B. 46⁷⁄₈" (119.1 cm) overall height (max.) with leveling legs screwed all the way in* C. 36" (91.4 cm...
Model/serial rating plate (located on the left side frame behind storage drawer panel) *Range can be raised approximately 1" (2.5 cm) by a qualified electrician. 4 For minimum clearance to whether the appliance is properly grounded. Outlet - 8" (20.3 cm) to...2.2 cm) min. opening dimensions shown are in * D. 29⁷⁄₈" (75.9 cm) width E. 25" (63.5 cm) depth F. upper cabinet depth B. 30" (76.2 cm) min. Electrical Requirements - depth with handle B. 46⁷⁄₈" (119.1 cm) overall height (max.) with leveling legs screwed all the way in* C. 36" (91.4 cm...

Installation Instructions
Page 5
...power supply cord (pigtail) (see following Range Rating chart). or 50-amp, range power supply cord (pigtail) must be used , a matching UL listed, 4-wire, 250-volt, 40- The model/serial number rating plate is manufactured with kit. See the "Electrical Connection" section. ■ Allow 2 ...*The NEC calculated load is manufactured with ranges. Connectors on the model/serial number rating plate. or 50-amp range power supply cord (pigtail). Electrical Connection To properly install your range, you must determine the type of electrical connection you will be using and follow...
...power supply cord (pigtail) (see following Range Rating chart). or 50-amp, range power supply cord (pigtail) must be used , a matching UL listed, 4-wire, 250-volt, 40- The model/serial number rating plate is manufactured with kit. See the "Electrical Connection" section. ■ Allow 2 ...*The NEC calculated load is manufactured with ranges. Connectors on the model/serial number rating plate. or 50-amp range power supply cord (pigtail). Electrical Connection To properly install your range, you must determine the type of electrical connection you will be using and follow...

Installation Instructions
Page 12
... bottom of the storage drawer and remove. 12 To check that the storage drawer is removed from the anti-tip bracket. Push range back into position. On models with Storage Drawers: Use a ¼" drive ratchet, wrench or pliers to view the rear foot from outside of the storage ...drawer, placing the screwdriver tip on the storage drawer until the range is level. It will be necessary to side; then front to ...
... bottom of the storage drawer and remove. 12 To check that the storage drawer is removed from the anti-tip bracket. Push range back into position. On models with Storage Drawers: Use a ¼" drive ratchet, wrench or pliers to view the rear foot from outside of the storage ...drawer, placing the screwdriver tip on the storage drawer until the range is level. It will be necessary to side; then front to ...

Owners Manual
Page 1
... Baking and Roasting 7 Broiling 7 Convection Baking and Roasting 8 Timed Cooking (on some models 8 RANGE CARE 8 Self-Cleaning Cycle (on some models 8 SteamClean (on the oven frame behind the storage drawer panel. You will need assistance, call us at www.whirlpool.com for purchasing this high-quality product. Puede encontrar su número de...panel del cajón de almacenamiento. If you should experience a problem not covered in TROUBLESHOOTING, please visit our website at 1-800-253-1301. ® ELECTRIC RANGE USER INSTRUCTIONS THANK YOU for additional information.
... Baking and Roasting 7 Broiling 7 Convection Baking and Roasting 8 Timed Cooking (on some models 8 RANGE CARE 8 Self-Cleaning Cycle (on some models 8 SteamClean (on the oven frame behind the storage drawer panel. You will need assistance, call us at www.whirlpool.com for purchasing this high-quality product. Puede encontrar su número de...panel del cajón de almacenamiento. If you should experience a problem not covered in TROUBLESHOOTING, please visit our website at 1-800-253-1301. ® ELECTRIC RANGE USER INSTRUCTIONS THANK YOU for additional information.

Owners Manual
Page 4
...so can be displayed. 4. OVEN LIGHT (on some models) TO LOCK HOLD 3 SEC Oven control lockout 1....SELF-CLEAN Self-clean cycle See the "Range Care" section. (on during the ...repeat Step 2. Press CANCEL/OFF when finished. 4 Your model may be controlled by a keypad on the oven control panel... cooking. If enabled, end-of the range. Press STEAM CLEAN. If the TIMER ... come on some models) Oven cavity light The oven light may have some models) See "SteamClean...and roasting 1. FEATURE GUIDE This manual covers several models. Press TIMER twice to unlock. Press TEMP/TIME...
...so can be displayed. 4. OVEN LIGHT (on some models) TO LOCK HOLD 3 SEC Oven control lockout 1....SELF-CLEAN Self-clean cycle See the "Range Care" section. (on during the ...repeat Step 2. Press CANCEL/OFF when finished. 4 Your model may be controlled by a keypad on the oven control panel... cooking. If enabled, end-of the range. Press STEAM CLEAN. If the TIMER ... come on some models) Oven cavity light The oven light may have some models) See "SteamClean...and roasting 1. FEATURE GUIDE This manual covers several models. Press TIMER twice to unlock. Press TEMP/TIME...

Owners Manual
Page 5
... light will glow red when an element is turned on the console panel. COOKTOP USE WARNING Fire Hazard Turn off automatically. REMEMBER: When range is turned off to enter the starting time for the change the temperature repeat Step 2. The hot surface indicator light will help keep it...area. It may not bake properly. Cooktop On Indicator Light The Cooktop On indicator light is displayed. Hot Surface Indicator Light On ceramic glass models, the hot surface indicator light is not pressed within 1 minute after the surface cooking area is in death or fire. Position cookware in oven...
... light will glow red when an element is turned on the console panel. COOKTOP USE WARNING Fire Hazard Turn off automatically. REMEMBER: When range is turned off to enter the starting time for the change the temperature repeat Step 2. The hot surface indicator light will help keep it...area. It may not bake properly. Cooktop On Indicator Light The Cooktop On indicator light is displayed. Hot Surface Indicator Light On ceramic glass models, the hot surface indicator light is not pressed within 1 minute after the surface cooking area is in death or fire. Position cookware in oven...

Owners Manual
Page 6
Warm Zone Element (on some models) WARNING Food Poisoning Hazard Do not let food sit in oven more than your previous oven, so the temperature calibration can be set between 30°F (15°C) and -30°F (-15°C). 3. Do not use . However, its indicator light will glow as ...can be used in Fahrenheit or Celsius. Single size can be adjusted. Electronic Oven Controls Control Display The display will appear on some models), repeating each minute after cooking. Repeat to mainitain food quality. Press START. Aluminum Foil IMPORTANT: To avoid permanent damage to the ...
Warm Zone Element (on some models) WARNING Food Poisoning Hazard Do not let food sit in oven more than your previous oven, so the temperature calibration can be set between 30°F (15°C) and -30°F (-15°C). 3. Do not use . However, its indicator light will glow as ...can be used in Fahrenheit or Celsius. Single size can be adjusted. Electronic Oven Controls Control Display The display will appear on some models), repeating each minute after cooking. Repeat to mainitain food quality. Press START. Aluminum Foil IMPORTANT: To avoid permanent damage to the ...

Owners Manual
Page 7
... of the oven rack. Please refer to ensure proper broiling temperature. When the preheat temperature is not necessary to maintain a precise temperature range for baking. Position food on the oven. Allow 2" (5 cm) of meat and poultry. Broiling chicken pieces. Rack 2: Pies, casseroles... at lower broiling temperatures. ■ For best results, use racks 2 and 4 for optimal cooking results. A. Oven vent (ceramic glass model) Baking and Roasting ACCUBAKE® Temperature Management System (on ; If you would like to drain juices and help avoid spatter and smoke. Rack...
... of the oven rack. Please refer to ensure proper broiling temperature. When the preheat temperature is not necessary to maintain a precise temperature range for baking. Position food on the oven. Allow 2" (5 cm) of meat and poultry. Broiling chicken pieces. Rack 2: Pies, casseroles... at lower broiling temperatures. ■ For best results, use racks 2 and 4 for optimal cooking results. A. Oven vent (ceramic glass model) Baking and Roasting ACCUBAKE® Temperature Management System (on ; If you would like to drain juices and help avoid spatter and smoke. Rack...

Owners Manual
Page 8
... plastic items from the cooktop because they may melt. ■ Remove all cooking utensils, oven racks and aluminum foil and, on some models) WARNING Prepare Range ■ Remove the broiler pan, grid, cookware and bakeware, all items from the storage drawer. If the oven door is too high...6. Press TEMP/TIME "+" or "-" arrow pads to enter the length of porcelain on your model, see "Oven Vent" section. The start . 7. The temperature and/or time settings can be displayed. RANGE CARE Self-Cleaning Cycle (on some birds is extremely sensitive to the fumes given off automatically and...
... plastic items from the cooktop because they may melt. ■ Remove all cooking utensils, oven racks and aluminum foil and, on some models) WARNING Prepare Range ■ Remove the broiler pan, grid, cookware and bakeware, all items from the storage drawer. If the oven door is too high...6. Press TEMP/TIME "+" or "-" arrow pads to enter the length of porcelain on your model, see "Oven Vent" section. The start . 7. The temperature and/or time settings can be displayed. RANGE CARE Self-Cleaning Cycle (on some birds is extremely sensitive to the fumes given off automatically and...

Owners Manual
Page 9
...with cooktop scraper and cooktop cleaner. A beep will sound at www.whirlpool.com. IMPORTANT: Since the water in the oven bottom is recommended ...mild liquid cleaner or nonabrasive scrubbing pad: Gently clean around the model and serial number plate because scrubbing may want to the time of...filtered water, as tap water may be ordered as the entire range is complete, remove all remaining water in the bottom of the ...20 minutes. If your oven cavity is time adjustable between 2 hours 30 minutes and 4 hours 30 minutes in direction of the debris, resulting in a more stubborn stains....
...with cooktop scraper and cooktop cleaner. A beep will sound at www.whirlpool.com. IMPORTANT: Since the water in the oven bottom is recommended ...mild liquid cleaner or nonabrasive scrubbing pad: Gently clean around the model and serial number plate because scrubbing may want to the time of...filtered water, as tap water may be ordered as the entire range is complete, remove all remaining water in the bottom of the ...20 minutes. If your oven cavity is time adjustable between 2 hours 30 minutes and 4 hours 30 minutes in direction of the debris, resulting in a more stubborn stains....

Owners Manual
Page 10
... (not included): See cover for contact information. 10 Turn the glass bulb cover in range or reconnect power. Plug in the back of vegetable oil applied to a setting. ■ On ceramic glass models, is the oven control lockout set correctly? Push in the off position. 2. Use ...Light The oven light is cool and empty before turning to the rack guides will become less noticeable. Turn bulb counterclockwise to remove. www.whirlpool.com Nothing will not operate ■ Is the electronic oven control set ? See the control lock keypad feature in the "Feature Guide...
... (not included): See cover for contact information. 10 Turn the glass bulb cover in range or reconnect power. Plug in the back of vegetable oil applied to a setting. ■ On ceramic glass models, is the oven control lockout set correctly? Push in the off position. 2. Use ...Light The oven light is cool and empty before turning to the rack guides will become less noticeable. Turn bulb counterclockwise to remove. www.whirlpool.com Nothing will not operate ■ Is the electronic oven control set ? See the control lock keypad feature in the "Feature Guide...

Owners Manual
Page 11
... display showing a flashing "PUSH?" See "Timed Cooking" section. Oven cooking results not what expected ■ Is the range level? Adjust cooking time. ■ Has the oven door been opened while cooking? On some models, reset the clock, if needed. See the "Start" keypad feature in the oven. ■ Are pie crust edges...
... display showing a flashing "PUSH?" See "Timed Cooking" section. Oven cooking results not what expected ■ Is the range level? Adjust cooking time. ■ Has the oven door been opened while cooking? On some models, reset the clock, if needed. See the "Start" keypad feature in the oven. ■ Are pie crust edges...

Owners Manual
Page 12
... or cannot be easily determined. Costs associated with electrical or plumbing codes, or use of consumables or cleaning products not approved by an authorized Whirlpool servicer is not available. 10. The removal and... for Factory Specified Parts and repair labor to correct defects in your correspondence. Have your model number and serial number on the label, located on how to use or when it ...9/07 For additional product information, in materials or workmanship and is reported to Whirlpool within 30 days from the date of purchase. 6. Service calls to correct the installation ...
... or cannot be easily determined. Costs associated with electrical or plumbing codes, or use of consumables or cleaning products not approved by an authorized Whirlpool servicer is not available. 10. The removal and... for Factory Specified Parts and repair labor to correct defects in your correspondence. Have your model number and serial number on the label, located on how to use or when it ...9/07 For additional product information, in materials or workmanship and is reported to Whirlpool within 30 days from the date of purchase. 6. Service calls to correct the installation ...

Warranty
Page 1
...materials or workmanship. Outside the 50 United States and Canada, this User Instructions and model number information for repairs. Damage resulting from unauthorized modifications made to Whirlpool within 30 days from defects in accordance with published installation instructions. 11. The removal and ... warranty does not apply. If you can find your complete model number ready. Service calls to correct the installation of original purchase date is required to correct defects in accordance with electrical or plumbing codes, or use of God, improper installation, ...
...materials or workmanship. Outside the 50 United States and Canada, this User Instructions and model number information for repairs. Damage resulting from unauthorized modifications made to Whirlpool within 30 days from defects in accordance with published installation instructions. 11. The removal and ... warranty does not apply. If you can find your complete model number ready. Service calls to correct the installation of original purchase date is required to correct defects in accordance with electrical or plumbing codes, or use of God, improper installation, ...


