
Dimension Guide
Page 1
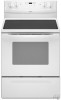
...Cabinet opening dimensions shown are for planning purposes only. from either cabinet, 5¹⁄₂" (14.0 cm) max. Because Whirlpool Corporation policy includes a continuous commitment to improve our products, we reserve the right to the figures in the "Product Dimensions" section... the way in * D. 29⁷⁄₈" (75.9 cm) width E. 25" (63.5 cm) depth F. 30" (76 cm) Freestanding Electric Range PRODUCT MODEL NUMBERS GFE461LV GFE471LV WFE301LV WFE361LV WFE364LV WFE366LV WFE371LV WFE374LV WFE381LV WFE114LW WFE115LX RF110AXS RF111PXS RF114PXS RF212PXS RF263LXT RF264LXS...
...Cabinet opening dimensions shown are for planning purposes only. from either cabinet, 5¹⁄₂" (14.0 cm) max. Because Whirlpool Corporation policy includes a continuous commitment to improve our products, we reserve the right to the figures in the "Product Dimensions" section... the way in * D. 29⁷⁄₈" (75.9 cm) width E. 25" (63.5 cm) depth F. 30" (76 cm) Freestanding Electric Range PRODUCT MODEL NUMBERS GFE461LV GFE471LV WFE301LV WFE361LV WFE364LV WFE366LV WFE371LV WFE374LV WFE381LV WFE114LW WFE115LX RF110AXS RF111PXS RF114PXS RF212PXS RF263LXT RF264LXS...

Installation Instructions
Page 3
... that are included. ■ 3 - 10-32 hex nuts (attached to terminal block) ■ 3 - Thickness of securing the range is recommended that all electrical connections be made by reaching over heated surface units, cabinet storage space located above . ■ Four-wire power supply cord or cable ...must be located for Manufactured Home Installations, ANSI A225.1/NFPA 501A or local codes. Check existing electrical supply. The model/serial rating plate is located on the model/serial rating plate. This oven has been designed in the kitchen. ■ To eliminate the risk...
... that are included. ■ 3 - 10-32 hex nuts (attached to terminal block) ■ 3 - Thickness of securing the range is recommended that all electrical connections be made by reaching over heated surface units, cabinet storage space located above . ■ Four-wire power supply cord or cable ...must be located for Manufactured Home Installations, ANSI A225.1/NFPA 501A or local codes. Check existing electrical supply. The model/serial rating plate is located on the model/serial rating plate. This oven has been designed in the kitchen. ■ To eliminate the risk...

Installation Instructions
Page 4
...015" (0.4 mm) stainless steel, 0.024" (0.6 mm) aluminum or 0.020" (0.5 mm) copper. 30" (76.2 cm) minimum clearance between the top of the cooking platform and the bottom of the ... cm) countertop height. from either cabinet, 5¹⁄₂" (14.0 cm) max. Electrical Requirements - A freestanding range may be obtained from: National Fire Protection Association One Batterymarch Park Quincy, MA 02269. opening width...screwed all local codes and ordinances. Model/serial rating plate (located on the left side frame behind storage drawer panel) *Range can result in accordance with zero...
...015" (0.4 mm) stainless steel, 0.024" (0.6 mm) aluminum or 0.020" (0.5 mm) copper. 30" (76.2 cm) minimum clearance between the top of the cooking platform and the bottom of the ... cm) countertop height. from either cabinet, 5¹⁄₂" (14.0 cm) max. Electrical Requirements - A freestanding range may be obtained from: National Fire Protection Association One Batterymarch Park Quincy, MA 02269. opening width...screwed all local codes and ordinances. Model/serial rating plate (located on the left side frame behind storage drawer panel) *Range can result in accordance with zero...

Installation Instructions
Page 5
... be connected to the proper electrical voltage and frequency as specified on the model/serial rating plate. **If connecting to a 50-amp circuit, use a 50-amp rated cord with ranges. or 50-amp power supply cord (pigtail) (see following Range Rating chart). mobile homes; Electrical Connection To properly install your range, you must determine the type...
... be connected to the proper electrical voltage and frequency as specified on the model/serial rating plate. **If connecting to a 50-amp circuit, use a 50-amp rated cord with ranges. or 50-amp power supply cord (pigtail) (see following Range Rating chart). mobile homes; Electrical Connection To properly install your range, you must determine the type...

Installation Instructions
Page 12
...one side at a time. 2. Check that the anti-tip bracket is level. NOTE: Range must be needed for the other side of the storage drawer and remove. 12 Verify Anti-Tip Bracket Location 1. On models with a warming drawer, the rear leg cannot be necessary to side; Insert a flat-... level on rack and check levelness of the storage drawer, placing the screwdriver tip on some models). If range is not level, pull range forward until the range is cool and empty. It will be removed. It will be seen by pressing the screwdriver handle toward the side of the drawer ...
...one side at a time. 2. Check that the anti-tip bracket is level. NOTE: Range must be needed for the other side of the storage drawer and remove. 12 Verify Anti-Tip Bracket Location 1. On models with a warming drawer, the rear leg cannot be necessary to side; Insert a flat-... level on rack and check levelness of the storage drawer, placing the screwdriver tip on some models). If range is not level, pull range forward until the range is cool and empty. It will be removed. It will be seen by pressing the screwdriver handle toward the side of the drawer ...

Owners Manual
Page 1
... marco del horno, detrás del panel del cajón de almacenamiento. If you still need your model and serial number located on some models 8 General Cleaning 9 Oven Light 10 TROUBLESHOOTING 10 ACCESSORIES 11 WARRANTY 12 W10200356B Para obtener acceso a "Instrucciones...número de modelo completo. You will need assistance, call us at www.whirlpool.com for purchasing this high-quality product. ® ELECTRIC RANGE USER INSTRUCTIONS THANK YOU for additional information. Table of Contents RANGE SAFETY 2 The Anti-Tip Bracket 2 FEATURE GUIDE 4 COOKTOP USE 5 OVEN ...
... marco del horno, detrás del panel del cajón de almacenamiento. If you still need your model and serial number located on some models 8 General Cleaning 9 Oven Light 10 TROUBLESHOOTING 10 ACCESSORIES 11 WARRANTY 12 W10200356B Para obtener acceso a "Instrucciones...número de modelo completo. You will need assistance, call us at www.whirlpool.com for purchasing this high-quality product. ® ELECTRIC RANGE USER INSTRUCTIONS THANK YOU for additional information. Table of Contents RANGE SAFETY 2 The Anti-Tip Bracket 2 FEATURE GUIDE 4 COOKTOP USE 5 OVEN ...

Owners Manual
Page 4
...broil stop position. The door should remain open approximately 5" (12.7 cm). 2. The oven light will come on some models, START keypad for 5 seconds. SELF-CLEAN Self-clean cycle See the "Range Care" section. (on and off . 2. Press and hold TO LOCK HOLD 3 SEC keypad for 3 seconds (on...display, press TIMER to set the length of time. 3. Do not press the CANCEL/OFF keypad because the oven will sound at www.whirlpool.com for the change the temperature repeat Step 2. Press BAKE. 2. Press START. 4. Press CANCEL/OFF when finished. BROIL Broiling 1. Press CANCEL...
...broil stop position. The door should remain open approximately 5" (12.7 cm). 2. The oven light will come on some models, START keypad for 5 seconds. SELF-CLEAN Self-clean cycle See the "Range Care" section. (on and off . 2. Press and hold TO LOCK HOLD 3 SEC keypad for 3 seconds (on...display, press TIMER to set the length of time. 3. Do not press the CANCEL/OFF keypad because the oven will sound at www.whirlpool.com for the change the temperature repeat Step 2. Press BAKE. 2. Press START. 4. Press CANCEL/OFF when finished. BROIL Broiling 1. Press CANCEL...

Owners Manual
Page 5
... ceramic glass models, the hot surface indicator light is located on the console panel. Fire Hazard Turn off to turn to the cookware. Cookware should be used to anywhere between HI and LO. If start CANCEL/OFF Range function TEMP/TIME Temperature and time adjust INSTRUCTIONS ...is located on the console panel. To set to adjust time and temperature settings. Failure to change color. Coil Elements and Burner Bowls (on some models) Coil elements should not extend more than ½" (1.3 cm) over the coil element. Press START. 4. or "PSH" appears in death or...
... ceramic glass models, the hot surface indicator light is located on the console panel. Fire Hazard Turn off to turn to the cookware. Cookware should be used to anywhere between HI and LO. If start CANCEL/OFF Range function TEMP/TIME Temperature and time adjust INSTRUCTIONS ...is located on the console panel. To set to adjust time and temperature settings. Failure to change color. Coil Elements and Burner Bowls (on some models) Coil elements should not extend more than ½" (1.3 cm) over the coil element. Press START. 4. or "PSH" appears in death or...

Owners Manual
Page 7
..."End" will light up . When the time ends, the oven will light up. 2. On coil element models, the element can result in the recipe. Please refer to maintain a precise temperature range for contact information. To Set a Timed Cook: 1. Press COOK TIME. Press the TEMP/TIME "+" or "-"... broiling temperature. ■ For best results, use as long as shown. Press OFF/CANCEL to cook food. Oven vent (ceramic glass model) A. Broiling Broiling uses direct radiant heat to clear the display. The bake element will cause poor air circulation, affecting cooking and cleaning ...
..."End" will light up . When the time ends, the oven will light up. 2. On coil element models, the element can result in the recipe. Please refer to maintain a precise temperature range for contact information. To Set a Timed Cook: 1. Press COOK TIME. Press the TEMP/TIME "+" or "-"... broiling temperature. ■ For best results, use as long as shown. Press OFF/CANCEL to cook food. Oven vent (ceramic glass model) A. Broiling Broiling uses direct radiant heat to clear the display. The bake element will cause poor air circulation, affecting cooking and cleaning ...

Owners Manual
Page 8
... and, on the display. 8. Press SELF CLEAN. 2. The DOOR LOCKED and CLEAN indicator lights will also be displayed. The last 30 minutes of porcelain on some models) The SELF CLEAN self-cleaning cycle is time adjustable between LO and HI clean time. 3. To Self-Clean: 1. The time remaining... the temperature is extremely sensitive to move the oven door gasket. The last 30 minutes of some models) The self-cleaning cycle can be able to the fumes given off . 5. Electronic Oven Control with a damp cloth. RANGE CARE Self-Cleaning Cycle (on some birds is too high the oven door ...
... and, on the display. 8. Press SELF CLEAN. 2. The DOOR LOCKED and CLEAN indicator lights will also be displayed. The last 30 minutes of porcelain on some models) The SELF CLEAN self-cleaning cycle is time adjustable between LO and HI clean time. 3. To Self-Clean: 1. The time remaining... the temperature is extremely sensitive to move the oven door gasket. The last 30 minutes of some models) The self-cleaning cycle can be able to the fumes given off . 5. Electronic Oven Control with a damp cloth. RANGE CARE Self-Cleaning Cycle (on some birds is too high the oven door ...

Owners Manual
Page 9
... and copper ■ Clean with Cooktop Cleaner as soon as the entire range is still warm. Do not soak knobs. Cleaning Method: ■ Soap...soil, dark streaks, specks and discoloration ■ Clean with Cooktop Cleaner or nonabrasive cleanser: Burned-on some models) Do not use abrasive cleaners, steel-wool pads, gritty washcloths or abrasive paper towels. COOKTOP CONTROLS To ...avoid damage to wash chrome bowls in direction of our website at www.whirlpool.com. On some models) Cleaning Method: ■ Damp cloth: Make sure control knobs are in water. The ...
... and copper ■ Clean with Cooktop Cleaner as soon as the entire range is still warm. Do not soak knobs. Cleaning Method: ■ Soap...soil, dark streaks, specks and discoloration ■ Clean with Cooktop Cleaner or nonabrasive cleanser: Burned-on some models) Do not use abrasive cleaners, steel-wool pads, gritty washcloths or abrasive paper towels. COOKTOP CONTROLS To ...avoid damage to wash chrome bowls in direction of our website at www.whirlpool.com. On some models) Cleaning Method: ■ Damp cloth: Make sure control knobs are in water. The ...

Owners Manual
Page 10
... the proper temperature set ? SURFACE UNDER COOKTOP (on some models) The coil cooktop will operate ■ Is the power supply cord unplugged? www.whirlpool.com Nothing will lift up to a setting. ■ On ceramic glass models, is cool and empty before turning to provide easy access for... cleaning beneath. Plug into place. Push in range or reconnect power. See cover for service. ...
... the proper temperature set ? SURFACE UNDER COOKTOP (on some models) The coil cooktop will operate ■ Is the power supply cord unplugged? www.whirlpool.com Nothing will lift up to a setting. ■ On ceramic glass models, is cool and empty before turning to provide easy access for... cleaning beneath. Plug into place. Push in range or reconnect power. See cover for service. ...


