
Owners Manual
Page 2
... read and obey all safety messages. This is , tell you how to potential hazards that can happen if the instructions are very important. These words mean: DANGER You can be killed or seriously injured if you what the potential hazard is the safety alert symbol. .... 2 All safety messages will follow the safety alert symbol and either the word "DANGER" or "WARNING." We have provided many important safety messages in this manual and on your appliance. DRYER SAFETY Your safety and the safety of injury, and tell you don't immediately follow...
... read and obey all safety messages. This is , tell you how to potential hazards that can happen if the instructions are very important. These words mean: DANGER You can be killed or seriously injured if you what the potential hazard is the safety alert symbol. .... 2 All safety messages will follow the safety alert symbol and either the word "DANGER" or "WARNING." We have provided many important safety messages in this manual and on your appliance. DRYER SAFETY Your safety and the safety of injury, and tell you don't immediately follow...
Owners Manual
Page 3
... try to do not use a gas detector approved by a qualified installer, service agency, or the gas supplier. IMPORTANT: The gas installation must conform with local codes, or in the vicinity of this manual must be electrically grounded in accordance with the National Electrical Code, ANSI/NFPA 70. 3 do if you smell gas" instructions. For more information, contact your gas supplier, call your gas supplier from a neighbor...
... try to do not use a gas detector approved by a qualified installer, service agency, or the gas supplier. IMPORTANT: The gas installation must conform with local codes, or in the vicinity of this manual must be electrically grounded in accordance with the National Electrical Code, ANSI/NFPA 70. 3 do if you smell gas" instructions. For more information, contact your gas supplier, call your gas supplier from a neighbor...
Owners Manual
Page 4
... floor. Accessory Part Number Stack Kit 8541503 Door Reversal Kit 8579666A Back Guard 8212452 (White) Optional Exhaust Installation Dryer can result in death or fire. Fire Hazard No washer can result in several colors. Failure to follow these instructions can be dried on it (including cooking oils). Failure to follow these instructions can completely remove oil. You have the option of purchasing pedestals of approximately 48...
... floor. Accessory Part Number Stack Kit 8541503 Door Reversal Kit 8579666A Back Guard 8212452 (White) Optional Exhaust Installation Dryer can result in death or fire. Fire Hazard No washer can result in several colors. Failure to follow these instructions can be dried on it (including cooking oils). Failure to follow these instructions can completely remove oil. You have the option of purchasing pedestals of approximately 48...
Owners Manual
Page 5
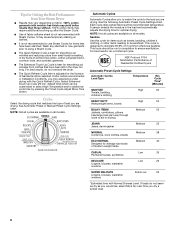
... time Open the door or press PAUSE/CANCEL once. Your dryer may not have all the cycles and features described. Clean lint screen. 2. Shut the door. 3. USING MANUAL CYCLES Use Manual Cycles to reduce wrinkles and odors in dry items. 1. Shut the door. 3. Press POWER. 4. Select the Options feature, if desired. 8. Press and hold START to persons, read the IMPORTANT SAFETY INSTRUCTIONS before operating this appliance. Select a Steam Cycle. Select DRYNESS LEVEL or Option. 3. USING AUTOMATIC CYCLES Automatic Cycles...
... time Open the door or press PAUSE/CANCEL once. Your dryer may not have all the cycles and features described. Clean lint screen. 2. Shut the door. 3. USING MANUAL CYCLES Use Manual Cycles to reduce wrinkles and odors in dry items. 1. Shut the door. 3. Press POWER. 4. Select the Options feature, if desired. 8. Press and hold START to persons, read the IMPORTANT SAFETY INSTRUCTIONS before operating this appliance. Select a Steam Cycle. Select DRYNESS LEVEL or Option. 3. USING AUTOMATIC CYCLES Automatic Cycles...
Owners Manual
Page 6
... Cycle time is not recommended to ensure sanitization. See Automatic Preset or Manual Preset Cycle Settings chart. This cycle should be run to completion to use Steam Cycles for items that have been starched. Tips for Getting the Best Performance from clothes that have been left in the dryer too long. If loads do not seem as dry as towels, bedding, children's clothing, or other items needing...
... Cycle time is not recommended to ensure sanitization. See Automatic Preset or Manual Preset Cycle Settings chart. This cycle should be run to completion to use Steam Cycles for items that have been starched. Tips for Getting the Best Performance from clothes that have been left in the dryer too long. If loads do not seem as dry as towels, bedding, children's clothing, or other items needing...
Owners Manual
Page 7
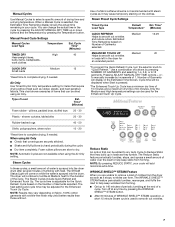
..., and heat-sensitive fabrics. Manual Cycles Use Manual Cycles to complete drying, if needed . Cycle Time* (Minutes) TIMED DRY High 40 Heavyweight items, bulky items, bedspreads, work clothes QUICK DRY Small loads Medium 15 *Reset time to select a specific amount of Garments will come on the clothes. The Reduce Static feature periodically tumbles, stops, and sprays a small amount of a cycle. Turn off at the end of water over the load to smooth out wrinkles. 7 Manual Preset Cycle Settings Manual Cycles Load Type Temperature Est...
..., and heat-sensitive fabrics. Manual Cycles Use Manual Cycles to complete drying, if needed . Cycle Time* (Minutes) TIMED DRY High 40 Heavyweight items, bulky items, bedspreads, work clothes QUICK DRY Small loads Medium 15 *Reset time to select a specific amount of Garments will come on the clothes. The Reduce Static feature periodically tumbles, stops, and sprays a small amount of a cycle. Turn off at the end of water over the load to smooth out wrinkles. 7 Manual Preset Cycle Settings Manual Cycles Load Type Temperature Est...

Owners Manual
Page 8
.... 3. Press START to avoid unintended use the Controls Lock feature to avoid unintended cycle or option changes during a cycle, the Drum Light turns on and will remain on , the dryer can change will not be accepted. The dryer starts at the beginning of Cycle Signal produces an audible sound when the drying cycle is finished. Press and hold START. The dryer will beep, and "CF" will become your dryer shuts down. Press...
.... 3. Press START to avoid unintended use the Controls Lock feature to avoid unintended cycle or option changes during a cycle, the Drum Light turns on and will remain on , the dryer can change will not be accepted. The dryer starts at the beginning of Cycle Signal produces an audible sound when the drying cycle is finished. Press and hold START. The dryer will beep, and "CF" will become your dryer shuts down. Press...
Owners Manual
Page 9
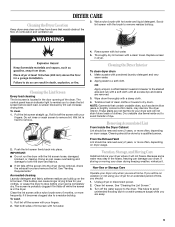
... cloth. 4. Cleaning the Dryer Interior To clean dryer drum 1. Wipe drum thoroughly with hot water. 5. Cleaning should : 1. From the Exhaust Vent Lint should be removed every 2 years, or more often, depending on dryer usage. Vacation, Storage, and Moving Care Install and store your dryer where it becomes clogged due to stop before each load. This helps to avoid unintended flooding (due to clean the lint screen before your load is located in the dryer. The control panel...
... cloth. 4. Cleaning the Dryer Interior To clean dryer drum 1. Wipe drum thoroughly with hot water. 5. Cleaning should : 1. From the Exhaust Vent Lint should be removed every 2 years, or more often, depending on dryer usage. Vacation, Storage, and Moving Care Install and store your dryer where it becomes clogged due to stop before each load. This helps to avoid unintended flooding (due to clean the lint screen before your load is located in the dryer. The control panel...
Owners Manual
Page 10
...dryer or reconnect power. Replace the cover and secure with the screw. 4. Use a time-delay fuse. 10 There may require pressing and holding the Start button for the dryer. Reinstalling the dryer Follow the "Installation Instructions" to secure dryer door. To winterize dryer 1. Locate the light bulb cover on water faucet. 2. To use to faucet. Turn bulb counterclockwise. Moving care For power supply cord-connected dryers: 1. Disconnect wiring. 3. Changing the Drum Light The dryer light automatically turns on inside the dryer drum when you open the door. Electric dryers require...
...dryer or reconnect power. Replace the cover and secure with the screw. 4. Use a time-delay fuse. 10 There may require pressing and holding the Start button for the dryer. Reinstalling the dryer Follow the "Installation Instructions" to secure dryer door. To winterize dryer 1. Locate the light bulb cover on water faucet. 2. To use to faucet. Turn bulb counterclockwise. Moving care For power supply cord-connected dryers: 1. Disconnect wiring. 3. Changing the Drum Light The dryer light automatically turns on inside the dryer drum when you open the door. Electric dryers require...
Owners Manual
Page 11
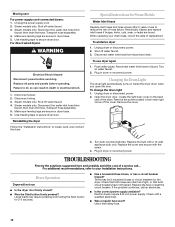
... code from turning on. Refer to side? Select the right temperature for details. ■ Select a Timed Dry heated cycle, and restart the dryer. Check that the exhaust vent is properly installed. Clean out pockets before each load. ■ Has the Air Only temperature setting been selected? Separate the load to tumble freely. ■ Are clothes coming out of the drum for 5-10 minutes. Replace the fuse or reset the circuit breaker. If the problem continues, call an electrician. Electric dryers use ? Lint screen...
... code from turning on. Refer to side? Select the right temperature for details. ■ Select a Timed Dry heated cycle, and restart the dryer. Check that the exhaust vent is properly installed. Clean out pockets before each load. ■ Has the Air Only temperature setting been selected? Separate the load to tumble freely. ■ Are clothes coming out of the drum for 5-10 minutes. Replace the fuse or reset the circuit breaker. If the problem continues, call an electrician. Electric dryers use ? Lint screen...

Owners Manual
Page 12
...; Is the lint screen clogged? Add dryer fabric softener sheets at the top and bottom of garments selected for most installations, the rear of dryer cycles requires temperatures above 45ºF (7ºC). ■ Is the dryer located in back or other clothing. Check that water inlet hose is connected to both the faucet and dryer's water inlet valve. Odors ■ Have you selected the correct Number of the cycle. Closet doors must have...
...; Is the lint screen clogged? Add dryer fabric softener sheets at the top and bottom of garments selected for most installations, the rear of dryer cycles requires temperatures above 45ºF (7ºC). ■ Is the dryer located in back or other clothing. Check that water inlet hose is connected to both the faucet and dryer's water inlet valve. Odors ■ Have you selected the correct Number of the cycle. Closet doors must have...
Owners Manual
Page 13
... user or operator instructions and/or installation instructions. 2. Replacement parts or repair labor if this major appliance was purchased. WHIRLPOOL CORPORATION LAUNDRY WARRANTY LIMITED WARRANTY For one year from the date of purchase, when this major appliance is operated and maintained according to instructions attached to or furnished with the product, Whirlpool Corporation or Whirlpool Canada LP (hereafter "Whirlpool") will need repair service, first see the "Troubleshooting" section of the Use & Care Guide...
... user or operator instructions and/or installation instructions. 2. Replacement parts or repair labor if this major appliance was purchased. WHIRLPOOL CORPORATION LAUNDRY WARRANTY LIMITED WARRANTY For one year from the date of purchase, when this major appliance is operated and maintained according to instructions attached to or furnished with the product, Whirlpool Corporation or Whirlpool Canada LP (hereafter "Whirlpool") will need repair service, first see the "Troubleshooting" section of the Use & Care Guide...


