

Owners Manual
Page 7
... DRY Low 20 Clothes to come out suitable for ironing *Reset time to complete drying, if needed . 7 Manual Preset Cycle Settings Manual Cycles Load Type Temperature Est. Tips for Getting the Best Performance from Your Steam Dryer ■ Results may vary depending on fabric. 100% cotton garments with wrinkle-free finish may yield better results than those without. 100% cotton items may require additional touching up or down buttons. Select the drying cycle...
... DRY Low 20 Clothes to come out suitable for ironing *Reset time to complete drying, if needed . 7 Manual Preset Cycle Settings Manual Cycles Load Type Temperature Est. Tips for Getting the Best Performance from Your Steam Dryer ■ Results may vary depending on fabric. 100% cotton garments with wrinkle-free finish may yield better results than those without. 100% cotton items may require additional touching up or down buttons. Select the drying cycle...
Owners Manual
Page 10
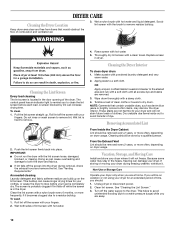
... your dryer during removal, check the exhaust hood and remove the lint. As needed cleaning Laundry detergent and fabric softener residue can cause overheating and damage to remove residue buildup. Roll lint off the screen with hot water. 5. Make a paste with a damp cloth. 4. Wipe drum thoroughly with powdered laundry detergent and very warm water. 2. From the Exhaust Vent Lint should be on dryer usage. Unplug dryer or disconnect power. 2. See "Cleaning the Lint Screen." 3. Scrub lint screen...
... your dryer during removal, check the exhaust hood and remove the lint. As needed cleaning Laundry detergent and fabric softener residue can cause overheating and damage to remove residue buildup. Roll lint off the screen with hot water. 5. Make a paste with a damp cloth. 4. Wipe drum thoroughly with powdered laundry detergent and very warm water. 2. From the Exhaust Vent Lint should be on dryer usage. Unplug dryer or disconnect power. 2. See "Cleaning the Lint Screen." 3. Scrub lint screen...
Owners Manual
Page 11
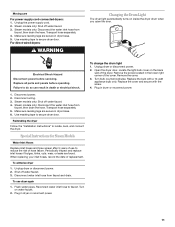
... dryer or disconnect power. 2. To use to locate, level, and connect the dryer. Turn on the back wall of hose failure. To change the drum light 1. Open the dryer door. Remove the cover. 3. Plug in dryer or reconnect power. Electrical Shock Hazard Disconnect power before operating. Flush water pipes. Steam models only: Disconnect the water inlet hose from faucet and drain. Reinstalling the dryer Follow the "Installation Instructions" to reduce the risk of the dryer. Replace the bulb with the screw. 4. Disconnect power. 2. Use masking...
... dryer or disconnect power. 2. To use to locate, level, and connect the dryer. Turn on the back wall of hose failure. To change the drum light 1. Open the dryer door. Remove the cover. 3. Plug in dryer or reconnect power. Electrical Shock Hazard Disconnect power before operating. Flush water pipes. Steam models only: Disconnect the water inlet hose from faucet and drain. Reinstalling the dryer Follow the "Installation Instructions" to reduce the risk of the dryer. Replace the bulb with the screw. 4. Disconnect power. 2. Use masking...
Owners Manual
Page 12
... fuse or reset the circuit breaker. Electric dryers require 240-volt power supply. Use a time-delay fuse. Check the front and rear edges of garments being dried. Clean out pockets before each load. ■ Has the Air Only temperature setting been selected? Separate the load items and restart the dryer. Press any key to clear the code from the display and return to the wall is crushed or kinked. ■ Confirm the vent run...
... fuse or reset the circuit breaker. Electric dryers require 240-volt power supply. Use a time-delay fuse. Check the front and rear edges of garments being dried. Clean out pockets before each load. ■ Has the Air Only temperature setting been selected? Separate the load items and restart the dryer. Press any key to clear the code from the display and return to the wall is crushed or kinked. ■ Confirm the vent run...
Owners Manual
Page 13
... contacting the sensor strips. This cycle is turned on . ■ Was the dryer overloaded? Closet doors must have ventilation openings at the beginning of 1-4 garments yield best results with water and heat. Make sure water is turned on . ■ To remove odors left in a cycle. When the odors or fumes are still wrinkled following Steam Cycle? Long venting will increase drying times. Fabric softener sheets added to other clothing. Dry clean only garments...
... contacting the sensor strips. This cycle is turned on . ■ Was the dryer overloaded? Closet doors must have ventilation openings at the beginning of 1-4 garments yield best results with water and heat. Make sure water is turned on . ■ To remove odors left in a cycle. When the odors or fumes are still wrinkled following Steam Cycle? Long venting will increase drying times. Fabric softener sheets added to other clothing. Dry clean only garments...
Owners Manual
Page 14
... information on the model and serial number label located on how to use or when it is used in the country in a manner that is inconsistent to published user or operator instructions and/or installation instructions. 2. Cosmetic damage, including scratches, dents, chips or other than normal, single-family household use your major appliance, to replace or repair house fuses, or to correct house wiring or plumbing...
... information on the model and serial number label located on how to use or when it is used in the country in a manner that is inconsistent to published user or operator instructions and/or installation instructions. 2. Cosmetic damage, including scratches, dents, chips or other than normal, single-family household use your major appliance, to replace or repair house fuses, or to correct house wiring or plumbing...
Use and Care Guide
Page 2
...INSTALLATION INSTRUCTIONS 3 Tools and Parts 3 Options 4 Location Requirements 4 Electrical Requirements 7 Electrical Connection 8 Venting Requirements 13 Plan Vent System 14 Install Vent System 15 Install Leveling Legs 15 Connect Vent 15 Connect Inlet Hose 16 Level Dryer 16 Complete Installation 16 DRYER USE 17 Starting Your Dryer 17 Stopping Your Dryer 19 Pausing or Restarting 19 Control Locked 19 Drying and Cycle Tips 19 Status Lights 19 Cycles 20 Additional Features 21 Changing Cycles, Options and Modifiers 22 Drying Rack Option 22 DRYER CARE 23 Cleaning the Dryer...
...INSTALLATION INSTRUCTIONS 3 Tools and Parts 3 Options 4 Location Requirements 4 Electrical Requirements 7 Electrical Connection 8 Venting Requirements 13 Plan Vent System 14 Install Vent System 15 Install Leveling Legs 15 Connect Vent 15 Connect Inlet Hose 16 Level Dryer 16 Complete Installation 16 DRYER USE 17 Starting Your Dryer 17 Stopping Your Dryer 19 Pausing or Restarting 19 Control Locked 19 Drying and Cycle Tips 19 Status Lights 19 Cycles 20 Additional Features 21 Changing Cycles, Options and Modifiers 22 Drying Rack Option 22 DRYER CARE 23 Cleaning the Dryer...

Use and Care Guide
Page 3
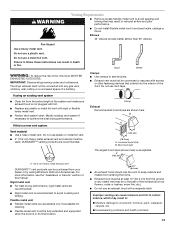
... areas free from the accumulation of lint, dust, and dirt. ■ The interior of the dryer and exhaust vent should be exposed to the weather. ■ Do not tamper with right-angle connector E. Short inlet hose D. Parts needed Check local codes. "Y" connector C. SAVE THESE INSTRUCTIONS INSTALLATION INSTRUCTIONS Tools and Parts Gather the required tools and parts before purchasing parts. 3 Check existing electrical supply and venting. Leveling legs (4) B. Parts supplied Remove parts package from service or discarded, remove the door...
... areas free from the accumulation of lint, dust, and dirt. ■ The interior of the dryer and exhaust vent should be exposed to the weather. ■ Do not tamper with right-angle connector E. Short inlet hose D. Parts needed Check local codes. "Y" connector C. SAVE THESE INSTRUCTIONS INSTALLATION INSTRUCTIONS Tools and Parts Gather the required tools and parts before purchasing parts. 3 Check existing electrical supply and venting. Leveling legs (4) B. Parts supplied Remove parts package from service or discarded, remove the door...

Use and Care Guide
Page 4
... washer using a power supply cord, a grounded electrical outlet located within 4 ft (1.2 m) of the dryer, and water pressure of the dryer for proper exhaust installation. These pedestals will need to the total height of 20-100 psi (137.9-689.6 kPa). ■ For close-clearance installations between 31.5" (80.01 cm) and 37" (93.98 cm), see "Plan Vent System" section for venting requirements. 37" (93.98 cm) Mobile home installations require...
... washer using a power supply cord, a grounded electrical outlet located within 4 ft (1.2 m) of the dryer, and water pressure of the dryer for proper exhaust installation. These pedestals will need to the total height of 20-100 psi (137.9-689.6 kPa). ■ For close-clearance installations between 31.5" (80.01 cm) and 37" (93.98 cm), see "Plan Vent System" section for venting requirements. 37" (93.98 cm) Mobile home installations require...

Use and Care Guide
Page 5
... sides of installation and servicing. ■ Additional clearances might not shut off at the end of 0" (0 cm) clearance on the sides and rear. Some codes limit, or do not permit, installation of the dryer. If using a pedestal, you will need 18" (46 cm) to open fully. At lower temperatures, the dryer might be required for the exhaust vent with elbow. See "Venting Requirements." This dryer has been tested for spacing...
... sides of installation and servicing. ■ Additional clearances might not shut off at the end of 0" (0 cm) clearance on the sides and rear. Some codes limit, or do not permit, installation of the dryer. If using a pedestal, you will need 18" (46 cm) to open fully. At lower temperatures, the dryer might be required for the exhaust vent with elbow. See "Venting Requirements." This dryer has been tested for spacing...

Use and Care Guide
Page 7
... wire) of electrical connection you are in a location where grounding through the neutral conductors. WARNING: Improper connection of NEMA Type 10-30R. Electrical Requirements It is your responsibility ■ To contact a qualified electrical installer. ■ To be sure that the ground path is adequate. The 4-wire power supply cord, at least 4 ft (1.22 m) long. GROUNDING INSTRUCTIONS ■ For a grounded, cord-connected dryer: This dryer must be using a power supply cord: Use a UL listed power supply cord kit...
... wire) of electrical connection you are in a location where grounding through the neutral conductors. WARNING: Improper connection of NEMA Type 10-30R. Electrical Requirements It is your responsibility ■ To contact a qualified electrical installer. ■ To be sure that the ground path is adequate. The 4-wire power supply cord, at least 4 ft (1.22 m) long. GROUNDING INSTRUCTIONS ■ For a grounded, cord-connected dryer: This dryer must be using a power supply cord: Use a UL listed power supply cord kit...

Use and Care Guide
Page 11
... power supply cable C. ¾" (1.9 cm) UL listed strain relief D. Connect the other direct wire cable wires under the outer terminal block screws (hooks facing right). Tighten screws. 5. Now go to "Venting Requirements." 3-wire connection: Power supply cord Use where local codes permit connecting cabinet-ground conductor to neutral wire. Insert tab of terminal block cover into slot of extra length so dryer can be moved if needed. 3. Neutral prong D. Spade terminals with outer covering. You have 5 ft (1.52 m) of dryer rear panel...
... power supply cable C. ¾" (1.9 cm) UL listed strain relief D. Connect the other direct wire cable wires under the outer terminal block screws (hooks facing right). Tighten screws. 5. Now go to "Venting Requirements." 3-wire connection: Power supply cord Use where local codes permit connecting cabinet-ground conductor to neutral wire. Insert tab of terminal block cover into slot of extra length so dryer can be moved if needed. 3. Neutral prong D. Spade terminals with outer covering. You have 5 ft (1.52 m) of dryer rear panel...
Use and Care Guide
Page 13
... drying performance, rigid metal vents are shown here. IMPORTANT: Observe all joints. ■ Exhaust vent must be at least 12" (30.5 cm) from the entire length of this dryer MUST BE EXHAUSTED OUTDOORS. Good Better WARNING: To reduce the risk of fire, this manual. Box hood style The angled hood style (shown here) is not plugged with lint. ■ Replace any gas vent...
... drying performance, rigid metal vents are shown here. IMPORTANT: Observe all joints. ■ Exhaust vent must be at least 12" (30.5 cm) from the entire length of this dryer MUST BE EXHAUSTED OUTDOORS. Good Better WARNING: To reduce the risk of fire, this manual. Box hood style The angled hood style (shown here) is not plugged with lint. ■ Replace any gas vent...

Use and Care Guide
Page 15
... the cardboard. Using a 4" (10.2 cm) clamp, connect vent to exhaust hood with a 4" (10.2 cm) clamp. 2. Do not crush or kink vent. 3. (On gas models) Check that will help to its final location. Secure vent to exhaust outlet in dryer. Avoid 90º turns. Examine the leveling legs. The dryer vent must fit inside the exhaust hood. To determine maximum exhaust length, add one 90º turn inside the dryer. Run vent to the...
... the cardboard. Using a 4" (10.2 cm) clamp, connect vent to exhaust hood with a 4" (10.2 cm) clamp. 2. Do not crush or kink vent. 3. (On gas models) Check that will help to its final location. Secure vent to exhaust outlet in dryer. Avoid 90º turns. Examine the leveling legs. The dryer vent must fit inside the exhaust hood. To determine maximum exhaust length, add one 90º turn inside the dryer. Run vent to the...
Use and Care Guide
Page 17
... time based on a clothesline or by using an Air Cycle. The following : ■ Controls are set in the dryer. During the first few minutes of scale through the water system in a running or "On" position. ■ Start button has been pushed firmly. ■ Dryer is plugged into an outlet and/or electrical supply is connected. ■ Household fuse is intact and tight, or circuit breaker has not tripped. ■ Dryer door...
... time based on a clothesline or by using an Air Cycle. The following : ■ Controls are set in the dryer. During the first few minutes of scale through the water system in a running or "On" position. ■ Start button has been pushed firmly. ■ Dryer is plugged into an outlet and/or electrical supply is connected. ■ Household fuse is intact and tight, or circuit breaker has not tripped. ■ Dryer door...

Use and Care Guide
Page 19
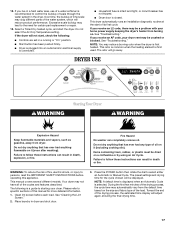
... Automatic Cycle. Drying tips ■ Follow care label directions when they are preset when you wish to turn this feature off . Steam Feature The Steam light glows when the dryer is not necessary to reduce wrinkling. Wet The Wet light will shut off . To enable the Control Locked feature when dryer is running : Press and hold the CONTROL LOCK/UNLOCK button for ease in the drying process. If a Manual Cycle is running , the...
... Automatic Cycle. Drying tips ■ Follow care label directions when they are preset when you wish to turn this feature off . Steam Feature The Steam light glows when the dryer is not necessary to reduce wrinkling. Wet The Wet light will shut off . To enable the Control Locked feature when dryer is running : Press and hold the CONTROL LOCK/UNLOCK button for ease in the drying process. If a Manual Cycle is running , the...

Use and Care Guide
Page 24
... dryer. See "Cleaning the Lint Screen." 3. Unplug dryer or disconnect power. 2. Turn on dryer usage. Shut off water faucet. 3. Use masking tape to locate, level and connect the dryer. Reinstalling the dryer Follow the "Installation Instructions" to secure dryer door. Unplug dryer or disconnect power. 2. Locate the light bulb cover on vacation or not using your dryer for an extended period of replacement. Turn bulb counterclockwise. Plug in dryer or reconnect power. Cleaning should be on the back wall of clothes. Water Inlet Hoses Replace inlet hoses and hose screen...
... dryer. See "Cleaning the Lint Screen." 3. Unplug dryer or disconnect power. 2. Turn on dryer usage. Shut off water faucet. 3. Use masking tape to locate, level and connect the dryer. Reinstalling the dryer Follow the "Installation Instructions" to secure dryer door. Unplug dryer or disconnect power. 2. Locate the light bulb cover on vacation or not using your dryer for an extended period of replacement. Turn bulb counterclockwise. Plug in dryer or reconnect power. Cleaning should be on the back wall of clothes. Water Inlet Hoses Replace inlet hoses and hose screen...

Use and Care Guide
Page 25
... home venting run from turning on the display. ■ Is a coin, button, or paper clip caught between the drum and front or rear of non-use? Use a time-delay fuse. ■ Is the dryer door firmly closed? ■ Was the Start button firmly pressed? The dryer vent may not have heat. Check the following : Was the drying cycle interrupted by a power failure? The drum may vibrate if not properly installed. Replace the fuse or reset the circuit breaker...
... home venting run from turning on the display. ■ Is a coin, button, or paper clip caught between the drum and front or rear of non-use? Use a time-delay fuse. ■ Is the dryer door firmly closed? ■ Was the Start button firmly pressed? The dryer vent may not have heat. Check the following : Was the drying cycle interrupted by a power failure? The drum may vibrate if not properly installed. Replace the fuse or reset the circuit breaker...

Use and Care Guide
Page 26
... exhaust vent is not too long or has too many turns. Dryer Results Clothes are not drying satisfactorily, drying times are too long, or load is too hot ■ Is the lint screen clogged with water and heat to help smooth out wrinkles from a load left in the dryer. ■ Was the dryer overloaded? Lint screen should be contacting the sensor strips. See the Installation Instructions. WARNING ■ Has the Air Only temperature setting been selected? Select the right temperature...
... exhaust vent is not too long or has too many turns. Dryer Results Clothes are not drying satisfactorily, drying times are too long, or load is too hot ■ Is the lint screen clogged with water and heat to help smooth out wrinkles from a load left in the dryer. ■ Was the dryer overloaded? Lint screen should be contacting the sensor strips. See the Installation Instructions. WARNING ■ Has the Air Only temperature setting been selected? Select the right temperature...

Use and Care Guide
Page 28
... or Canada. 7. Service calls to correct the installation of your major appliance, to instruct you ever need service, first see the "Troubleshooting" section of the Use & Care Guide. The removal and reinstallation of your appliance if it was purchased. WHIRLPOOL SHALL NOT BE LIABLE FOR INCIDENTAL OR CONSEQUENTIAL DAMAGES. Contact your authorized Whirlpool dealer to repair or replace appliance light bulbs, air filters or water filters. If you need it was...
... or Canada. 7. Service calls to correct the installation of your major appliance, to instruct you ever need service, first see the "Troubleshooting" section of the Use & Care Guide. The removal and reinstallation of your appliance if it was purchased. WHIRLPOOL SHALL NOT BE LIABLE FOR INCIDENTAL OR CONSEQUENTIAL DAMAGES. Contact your authorized Whirlpool dealer to repair or replace appliance light bulbs, air filters or water filters. If you need it was...


