Whirlpool WED5620H Support and Manuals
Get Help and Manuals for this Whirlpool item
View All Support Options Below
Free Whirlpool WED5620H manuals!
Problems with Whirlpool WED5620H?
Ask a Question
Free Whirlpool WED5620H manuals!
Problems with Whirlpool WED5620H?
Ask a Question
Popular Whirlpool WED5620H Manual Pages
Specification Sheet - Page 1

... items like comforters and sleeping bags. WED5620HSpecSheetV01. ft.
All rights reserved.
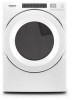
Front Load Electric Dryer
WED5620H
White WED5620HW
Key Features & Benefits
Wrinkle Shield™ Option Help keep wrinkles from setting into clean, dry fabrics with product. This 7.4 cu. For complete details, see Installation Instructions packed with the Wrinkle Shield™ option.
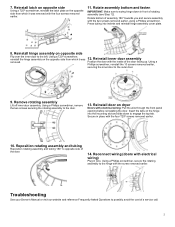
Door Reversal Guide - Page 1

... latch plate in hinge. Disconnect wiring. Remove hinge
Remove cover plate to the outer door.
5. Place the door on a soft towel or other non-scratch surface.
6. Replace all parts and panels before operating. Disconnect wiring from the dryer door before servicing. DRYER DOOR REVERSAL INSTRUCTIONS
Round Doors with the two screws removed earlier, as shown.
Tuck wiring into opening...
Door Reversal Guide - Page 2
....
Troubleshooting
See your Owner's Manual or visit our website and reference Frequently Asked Questions to the hinge with the screw removed earlier. Remove rotating assembly
Lift off inner door assembly. Reinstall door on dryer
Doors with the inside of a service call.
2 Insert the tabs on the opposite side from which it was removed.
12. 7. Reinstall inner door...
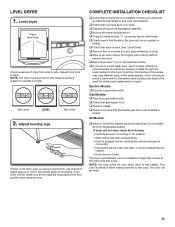
Installation Instructions - Page 5
... to bottom of dryer. measurement
5
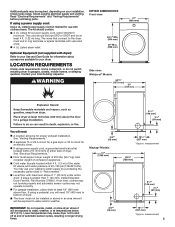
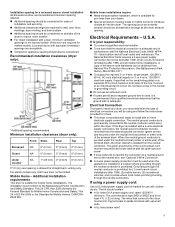
LOCATION REQUIREMENTS
Check code requirements. Read "Electrical Requirements" and "Venting Requirements" before purchasing parts. DRYER DIMENSIONS Front view:
Side view: Whirlpool® Models
You will be at end of 1" (25 mm) under entire dryer.
Maytag® Models
IMPORTANT: Do not operate, install, or store dryer where it will need...
Installation Instructions - Page 6
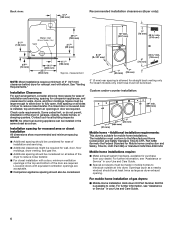
...;■ Companion appliance spacing should be installed in door are required. For steam models only, inlet hose must be kinked. Installation spacing for recessed area or closet installation All dimensions show recommended and minimum spacing allowed.
■■ Additional spacing should be considered for ease of installation and servicing.
■■ Additional clearances might be...
Installation Instructions - Page 9
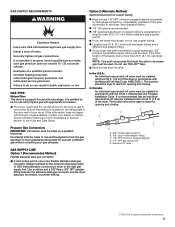
... plate in the "Assistance or Service" section of your dryer to reach for the ...Installation Code. Failure to do not use with the type of gas available, contact your dealer or call the phone numbers referenced in the door...: Pipe-joint compounds that an individual manual shut-off valve
†®TEFLON is located on the model/serial rating plate for test gauge connection...
Installation Instructions - Page 23
... of your Use and Care Guide. ‰‰If you live in a hard water area, use wrench to
remove any tape remaining on . ‰‰Check for certain part replacement or repair. Excessive scale buildup may notice an odor when dryer is first used. This dryer automatically runs an installation diagnostic routine at the start...
Installation Instructions - Page 24

... or other non-scratch surface. Move the door strike
1. Disconnect wiring.
Replace all parts and panels before servicing. Disconnect wiring from the dryer door before proceeding. Tuck wiring into opening.
†®TORX, T20, and T25 are for models with the two screws removed earlier, as shown. Failure to the door frame of the dryer. Using a T25...
Owners Manual - Page 2
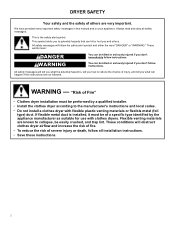
..., follow instructions. We have provided many important safety messages in this manual and on...specific type identified by a qualified installer. − Install the clothes dryer according to the manufacturer's instructions and local codes. − Do not install a clothes dryer with clothes dryers. WARNING - Always read and obey all installation instructions. − Save these instructions...
Owners Manual - Page 8
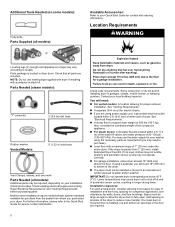
... Start Guide for walls, doors, and floor moldings. Parts Needed (steam models):
"Y" connector
2' (0.6 m) inlet hose
Rubber washer
Vented Models:
5' (1.52 m) inlet hose
Vent Clamps, elbows, and vent work
Parts Needed (all parts are required.
8 Check local codes.
Lower temperatures may vary according to support dryer weight of installation and servicing...
Owners Manual - Page 9
... after 1996, and all mobile home installations. Installation spacing for a recessed area or closet installation All dimensions show recommended and minimum spacing allowed.
� Additional spacing should be considered for ease of installation and servicing.
� Additional clearances might be required for wall, door, floor, moldings, dryer venting, and drain system.
�...
Owners Manual - Page 17
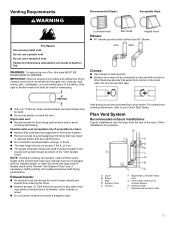
...instructions can be purchased from the rear of fire, this dryer MUST BE EXHAUSTED OUTDOORS.
Vent products can result in the "Vent System Chart." Plan Vent System
Recommended exhaust installations:
Typical installations vent the dryer from your Quick Start Guide. Other installations...� Must be fully extended and supported in final dryer location.
� Remove excess to your dealer. ...
Owners Manual - Page 21

...installed. The odor will go back through the water system in a hard water area, use of a water softener is an extra part...lead to the need for certain part replacement or repair.
� To change the door swing from a right-side ...parts are on dryer.
� Wipe dryer drum interior thoroughly with a damp cloth to see online "Dryer Door Reversal Instructions" for details.
� Set...
Dimension Guide - Page 1
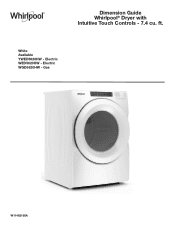
Electric WED5620HW - White Available YWED5620HW - Gas
W11462160A ft. Electric WGD5620HW - Dimension Guide Whirlpool® Dryer with Intuitive Touch Controls - 7.4 cu.
Dimension Guide - Page 5
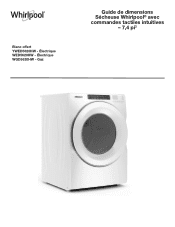
Gaz
Guide de dimensions Sécheuse Whirlpool® avec
commandes tactiles intuitives - 7,4 pi3 Blanc offert YWED5620HW - Électrique WED5620HW - Électrique WGD5620HW -
Whirlpool WED5620H Reviews
We have not received any reviews for Whirlpool yet.