User Instructions
Page 1
... obtain assistance or service if you need assistance or service, first see the "Troubleshooting" section. You will need it. Please include a daytime phone number in your correspondence. Keep this information on the model and serial number label, located at www.whirlpool.com. Dealer name Serial number Address Phone number Model number Purchase date 8578183 ® DRYER USER INSTRUCTIONS INSTRUCCIONES PARA EL USUARIO DE LA SECADORA Table of purchase or installation date for...
... obtain assistance or service if you need assistance or service, first see the "Troubleshooting" section. You will need it. Please include a daytime phone number in your correspondence. Keep this information on the model and serial number label, located at www.whirlpool.com. Dealer name Serial number Address Phone number Model number Purchase date 8578183 ® DRYER USER INSTRUCTIONS INSTRUCCIONES PARA EL USUARIO DE LA SECADORA Table of purchase or installation date for...
User Instructions
Page 2
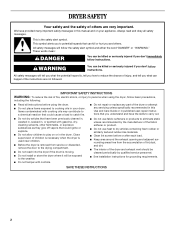
... not repair or replace any part of the dryer or attempt any servicing unless specifically recommended in this manual and on your dryer. SAVE THESE INSTRUCTIONS 2 All safety messages will follow instructions. Always read and obey all instructions before using the dryer, follow instructions. This is , tell you how to eliminate static unless recommended by qualified service personnel. ■ See installation instructions for grounding requirements. IMPORTANT SAFETY INSTRUCTIONS WARNING...
... not repair or replace any part of the dryer or attempt any servicing unless specifically recommended in this manual and on your dryer. SAVE THESE INSTRUCTIONS 2 All safety messages will follow instructions. Always read and obey all instructions before using the dryer, follow instructions. This is , tell you how to eliminate static unless recommended by qualified service personnel. ■ See installation instructions for grounding requirements. IMPORTANT SAFETY INSTRUCTIONS WARNING...
User Instructions
Page 3
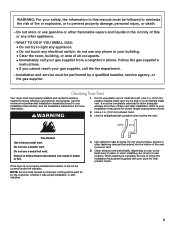
... adequate exhaust air to flow. If the dryer is complete, be covered under the warranty. When cleaning is not properly installed and vented, it was a paid installation or selfinstalled. 4. Do not store or use gasoline or other flammable vapors and liquids in your dryer for proper length requirements of all joints. do not use duct tape, screws or other appliance. - See the Installation Instructions for by a qualified installer, service agency...
... adequate exhaust air to flow. If the dryer is complete, be covered under the warranty. When cleaning is not properly installed and vented, it was a paid installation or selfinstalled. 4. Do not store or use gasoline or other flammable vapors and liquids in your dryer for proper length requirements of all joints. do not use duct tape, screws or other appliance. - See the Installation Instructions for by a qualified installer, service agency...
User Instructions
Page 4
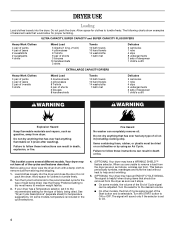
... dryer. Use the Energy Preferred setting to dry most heavy to ON or OFF. See "Dryer Cycle Descriptions" (separate sheet) for clothes to follow these instructions can completely remove oil. Allow space for temperature suggestions. Items containing foam, rubber, or plastic must be dried on a clothesline or by using your dryer has a Temperature selector, set to the desired volume. ■ On other models, the End of Cycle signal is part...
... dryer. Use the Energy Preferred setting to dry most heavy to ON or OFF. See "Dryer Cycle Descriptions" (separate sheet) for clothes to follow these instructions can completely remove oil. Allow space for temperature suggestions. Items containing foam, rubber, or plastic must be dried on a clothesline or by using your dryer has a Temperature selector, set to the desired volume. ■ On other models, the End of Cycle signal is part...
User Instructions
Page 5
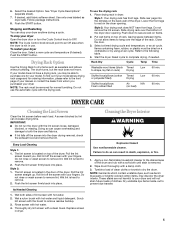
... the dryer door opening . Style 1: Your drying rack has front legs. Reset cycle to hang over the bottom of the dryer. The lint screen is not in death, explosion, or fire. 1. Wet a nylon brush with hot water. 2. Replace screen in dryer. If your model does not have front legs. Do not remove the lint screen. Put wet items on top of lint screen with hot water and liquid detergent. DRYER CARE Cleaning the Lint Screen Clean the lint screen before each load...
... the dryer door opening . Style 1: Your drying rack has front legs. Reset cycle to hang over the bottom of the dryer. The lint screen is not in death, explosion, or fire. 1. Wet a nylon brush with hot water. 2. Replace screen in dryer. If your model does not have front legs. Do not remove the lint screen. Put wet items on top of lint screen with hot water and liquid detergent. DRYER CARE Cleaning the Lint Screen Clean the lint screen before each load...
User Instructions
Page 6
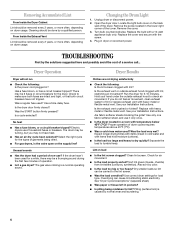
... dryer located in cold water and with lint, restricting air movement? Check to tumble freely. Is a cycle selected? Clean lint screen. Use correct dryer settings for a while, there may be removed every 2 years, or more often, depending on dryer usage. Open the dryer door. Locate the light bulb cover on load ■ Is the lint screen clogged? Was the START button firmly pressed? Is the exhaust vent or outside exhaust hood to dry quickly? See your Installation Instructions. Was the load very wet? Turn bulb counterclockwise. Replace...
... dryer located in cold water and with lint, restricting air movement? Check to tumble freely. Is a cycle selected? Clean lint screen. Use correct dryer settings for a while, there may be removed every 2 years, or more often, depending on dryer usage. Open the dryer door. Locate the light bulb cover on load ■ Is the lint screen clogged? Was the START button firmly pressed? Is the exhaust vent or outside exhaust hood to dry quickly? See your Installation Instructions. Was the load very wet? Turn bulb counterclockwise. Replace...
User Instructions
Page 7
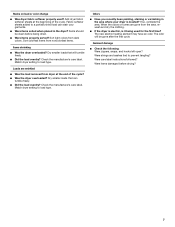
... from dark colors. Were strings and sashes tied to load type. Check the manufacturer's care label. Were care label instructions followed? The new electric heating element may have an odor. Match dryer setting to a partially-dried load can tumble freely. ■ Did the load overdry? Items should be gone after the first cycle. Stains on load or color change ■ Was dryer fabric softener properly used for the first time?
... from dark colors. Were strings and sashes tied to load type. Check the manufacturer's care label. Were care label instructions followed? The new electric heating element may have an odor. Match dryer setting to a partially-dried load can tumble freely. ■ Did the load overdry? Items should be gone after the first cycle. Stains on load or color change ■ Was dryer fabric softener properly used for the first time?
User Instructions
Page 8
.... Those consumable parts are made to or furnished with published installation instructions. The removal and reinstallation of your major appliance, to replace or repair house fuses or to repair or replace appliance light bulbs, air filters or water filters. For information on how to contact Whirlpool Corporation, please see the "Troubleshooting" section of the Use & Care Guide. After checking "Troubleshooting," additio nal help can be provided by Whirlpool. 5. WHIRLPOOL CORPORATION MAJOR APPLIANCE WARRANTY ONE YEAR...
.... Those consumable parts are made to or furnished with published installation instructions. The removal and reinstallation of your major appliance, to replace or repair house fuses or to repair or replace appliance light bulbs, air filters or water filters. For information on how to contact Whirlpool Corporation, please see the "Troubleshooting" section of the Use & Care Guide. After checking "Troubleshooting," additio nal help can be provided by Whirlpool. 5. WHIRLPOOL CORPORATION MAJOR APPLIANCE WARRANTY ONE YEAR...


