Whirlpool WCG55US6HW Support and Manuals
Get Help and Manuals for this Whirlpool item
View All Support Options Below
Free Whirlpool WCG55US6HW manuals!
Problems with Whirlpool WCG55US6HW?
Ask a Question
Free Whirlpool WCG55US6HW manuals!
Problems with Whirlpool WCG55US6HW?
Ask a Question
Whirlpool WCG55US6HW Videos

Whirlpool WCG55US6HW Surfaces de cuisson
Duration: :50
Total Views: 2
Duration: :50
Total Views: 2
Whirlpool WCG55US6HW Cooktop
Duration: :54
Total Views: 9
Duration: :54
Total Views: 9
Popular Whirlpool WCG55US6HW Manual Pages
Installation Instructions - Page 2
... you don't immediately follow instructions.
If a gas leak ...problems with this gas cooking appliance resulting in this manual ...is , tell you how to light any appliance. • Do not touch any electrical switch. • Do not use any other flammable vapors and liquids in this gas cooking appliance. WARNING: Gas leaks cannot always be performed by a qualified installer, service...
Installation Instructions - Page 7

... outlet.
It is factory set for use with the local gas supplier. Securely tighten all local codes and ordinances.
IMPORTANT: This installation must be made to LP gas, see the "LP Gas Conversion" instructions provided in death, explosion, or fire.
The model/serial rating plate located on the underside of local codes, installation must be conducted according...
Installation Instructions - Page 8
... the system. Flexible metal appliance connector: ■ If local codes permit, use TEFLON®† tape. flexible stainless steel tubing...; psi gauge (14" WCP) The cooktop and its individual manual shutoff valve during any pressure testing of the gas supply piping ... on the model/serial rating plate. Line pressure testing above the manifold pressure shown on the model/serial rating ...
Owners Manual - Page 3

... SAFETY INSTRUCTIONS
WARNING: To reduce the risk of California to install the ...Code, ANSI/NFPA70 or the Canadian Electrical Code, Part 1.
Disconnect the electrical supply before servicing the cooktop. Lighting the Burners
IMPORTANT: All burners will light only if the knob is properly installed and grounded by a qualified technician. Turn the knob counterclockwise to the desired
setting...
Owners Manual - Page 5

... the grate angled above the cooktop to avoid scratching the cooktop until the grate is complete.
Set the knob to hold a simmer. SpeedHeat™ Burner
Use the SpeedHeat™ burner for ... Burners The Even-Heat™ Simmer burner is available on WCG9 series models only. Remove the small burner cap and replace it with hinged grates for preparing large quantities of food or to boil...
Owners Manual - Page 6

... ordering, call 1-800-807-6777 or visit us at: www.whirlpool.com/accessories. These spills may be cleaned with the controls. Remove any burnt on "Service and Support" and then "Replacement Parts."
The holes in the dishwasher. Gray grates: order Part Number W10594440 for model number WCG51US0DW or Part Number W10594443 for cooking meats, pancakes, sandwiches, etc. Use...
Owners Manual - Page 8

...
WARNING
Electrical Shock Hazard Plug into a grounded 3 prong outlet.
■■ Replace the fuse or reset the circuit breaker. Do not use an adapter. If the problem continues, call , refer to the installation instructions. Be sure the control knob is properly connected to a setting.
Refer to release air from the gas lines.
Refer to the...
Owners Manual - Page 10

...Model number and serial number ■■ A clear, detailed description of the problem ■■ Proof of non-genuine Whirlpool parts or accessories.
6. operated and maintained according to review the Troubleshooting or Problem...in -home repair. In the U.S. instructions attached to you.
This product is installed,
installation instructions. Service or parts for Factory...
Instruction Sheet - Page 1

...
For WCG, MGC, KCGS and ICS5/6 Model Series
INSTRUCTIONS DE CONVERSION - Homeowner: Keep installation instructions for future reference. IMPORTANT :
Installateur : Remettre les instructions d'installation au propriétaire. Propriétaire : Conserver les instructions d'installation pour référence ultérieure. allumage 18 Réglage de la taille des flammes 19 Achever...
Instruction Sheet - Page 3

...mm nut driver
■ 7.0 mm wrench ■ T10 Torx®† adapter
Parts needed ■ Flat-blade screwdriver 0 [2.0 mm]) flat-blade screwdriver (screwdriver shaft
must be installed by a qualified service agency in the manufacturer's instructions supplied with the manufacturer's instructions and all other models use the following parts: ■ Part Number W10679114 - Turn manual...
Instruction Sheet - Page 4

...into regulator with the burner location and model being converted. Gasket C. Gas pressure regulator
... cm) W.C.P.
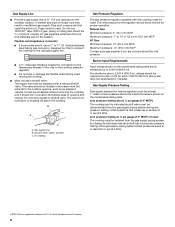
The gas pressure regulator has 2 settings that system at test pressures in excess of &#... system by closing its individual manual shutoff valve during any pressure ..." is showing on either side of that are installed, remove them. Gas Supply Pressure Testing
Line pressure...
Instruction Sheet - Page 5

... Dual Tier Ultra Torch burners use a Torx® T10 driver to loosen and remove the orifice spud (A). ■ Set gas orifice spud aside. ■ Replace with correct LP gas orifice spuds. See the LP gas orifice spud charts. Burner base D. Inner burner base C. Burner support E. To Convert Standard Burner: ■ Use 7.0 mm wrench to...
Instruction Sheet - Page 6

...Replace sheet of cooktop C. Replace burner bases and burner caps.
Burner base
12. Plug in the gas supply line. Gas pressure regulator D. 9. Turn manual...valve is open when the handle is shown in plastic parts bag for leaks by brushing on it. Correct any ...the outer orifice spud (B).
■ Set gas orifice spuds aside.
■ Replace with correct LP gas orifice spud. Outer orifice...
Instruction Sheet - Page 8

...parts bag for future use a Torx® T10 driver to loosen and remove the inner orifice spud (A) and the outer orifice spud (B). ■ Set gas orifice spuds aside. ■ Replace with package containing literature.
9. Inner orifice spud B. Replace...-detection solution.
Igniter electrode C. Outer burner base D.
Burner support E. To Convert Dual Tier Ultra and Dual Flame Burners: ...
Instruction Sheet - Page 9

...knob stem with KGCS5 or KGCS9, call service, as this point, see the User
Guide for Single Valve
1. Control knob stem opening . Adjustment for information on each setting. Using needle-nose pliers, remove the...Remove the control knob. 3. Set the inner crown flame to HI, checking
the flame at this operation will require opening the unit. NOTE: If your model number begins with a pair of...
Whirlpool WCG55US6HW Reviews
We have not received any reviews for Whirlpool yet.