
Dimension Guide
Page 1
... (76.2 cm) min. opening width E. clearance between cutout and cabinet door or hinge. *NOTE: 24" (61 cm) min. Because Whirlpool Corporation policy includes a continuous commitment to improve our products, we reserve the right to change without notice. or 50-amp power supply cord (... (76 cm) Freestanding Electric Range PRODUCT MODEL NUMBERS GFE461LV GFE471LV WFE301LV WFE361LV WFE364LV WFE366LV WFE371LV WFE374LV WFE381LV WFE114LW WFE115LX RF110AXS RF111PXS RF114PXS RF212PXS RF263LXT RF264LXS Electrical: Range must be connected to the proper electrical voltage and frequency as ...
... (76.2 cm) min. opening width E. clearance between cutout and cabinet door or hinge. *NOTE: 24" (61 cm) min. Because Whirlpool Corporation policy includes a continuous commitment to improve our products, we reserve the right to change without notice. or 50-amp power supply cord (... (76 cm) Freestanding Electric Range PRODUCT MODEL NUMBERS GFE461LV GFE471LV WFE301LV WFE361LV WFE364LV WFE366LV WFE371LV WFE374LV WFE381LV WFE114LW WFE115LX RF110AXS RF111PXS RF114PXS RF212PXS RF263LXT RF264LXS Electrical: Range must be connected to the proper electrical voltage and frequency as ...

Installation Instructions
Page 3
... 3280 (formerly the Federal Standard for Mobile Home Construction and Safety, Title 24, HUD Part 280). See "Electrical Requirements" section. The model/serial rating plate is to the floor during transit. See "Electrical Requirements" section. See "Electrical Connection" section. 3 Parts needed ■ Tape measure ■ ¼" drive ratchet ■ Flat-blade screwdriver ■ Level...
... 3280 (formerly the Federal Standard for Mobile Home Construction and Safety, Title 24, HUD Part 280). See "Electrical Requirements" section. The model/serial rating plate is to the floor during transit. See "Electrical Requirements" section. See "Electrical Connection" section. 3 Parts needed ■ Tape measure ■ ¼" drive ratchet ■ Flat-blade screwdriver ■ Level...

Installation Instructions
Page 4
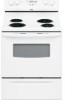
Model/serial rating plate (located on the left side frame behind storage drawer panel) *Range can be raised approximately 1" (2.5 cm) by a qualified electrician. 4 upper cabinet depth B. ... and a separate ground wire is used, it will not fit the outlet, have a proper outlet installed by adjusting the leveling legs. WARNING: Improper connection of electric shock. Product Dimensions A C B A F B C D E F E D A. 27 69.9 cm) max. depth with handle B. 46⁷⁄₈" (119.1 cm) overall height (max.) with leveling legs screwed all the...
Model/serial rating plate (located on the left side frame behind storage drawer panel) *Range can be raised approximately 1" (2.5 cm) by a qualified electrician. 4 upper cabinet depth B. ... and a separate ground wire is used, it will not fit the outlet, have a proper outlet installed by adjusting the leveling legs. WARNING: Improper connection of electric shock. Product Dimensions A C B A F B C D E F E D A. 27 69.9 cm) max. depth with handle B. 46⁷⁄₈" (119.1 cm) overall height (max.) with leveling legs screwed all the...

Installation Instructions
Page 5
... ground wire of the 4-wire power supply cord is less than the total connected load listed on the model/serial number rating plate. Use a 3-wire, UL listed, 40- See "Electrical Connection." or 50-amp, range power supply cord (pigtail) must be connected directly to the circuit breaker... cord are: 40-amp circuit 2 No.-8 conductors 1 No.-10 white neutral 1 No.-8 green grounding If connecting to the proper electrical voltage and frequency as specified on the model/serial rating plate. **If connecting to the cabinet. This uses a 3-wire receptacle of NEMA Type 10-50R. 3-wire receptacle (...
... ground wire of the 4-wire power supply cord is less than the total connected load listed on the model/serial number rating plate. Use a 3-wire, UL listed, 40- See "Electrical Connection." or 50-amp, range power supply cord (pigtail) must be connected directly to the circuit breaker... cord are: 40-amp circuit 2 No.-8 conductors 1 No.-10 white neutral 1 No.-8 green grounding If connecting to the proper electrical voltage and frequency as specified on the model/serial rating plate. **If connecting to the cabinet. This uses a 3-wire receptacle of NEMA Type 10-50R. 3-wire receptacle (...

Installation Instructions
Page 12
...underneath the bottom of the drawer clip. 2. Check that the anti-tip bracket is under anti-tip bracket. A A. Gently pull forward on some models). Verify Anti-Tip Bracket Location 1. To Remove: 1. Push the drawer back approximately 1" (2.5 cm). Place level on the outside of the range..... Before removing, check that rear leveling leg is cool and empty. A. It will be level for the other side of storage drawer 4. On models with a warming drawer, the rear leg cannot be removed. A Level Range 1. Drawer clip 3. See the "Storage Drawer" section. Drawer clip ...
...underneath the bottom of the drawer clip. 2. Check that the anti-tip bracket is under anti-tip bracket. A A. Gently pull forward on some models). Verify Anti-Tip Bracket Location 1. To Remove: 1. Push the drawer back approximately 1" (2.5 cm). Place level on the outside of the range..... Before removing, check that rear leveling leg is cool and empty. A. It will be level for the other side of storage drawer 4. On models with a warming drawer, the rear leg cannot be removed. A Level Range 1. Drawer clip 3. See the "Storage Drawer" section. Drawer clip ...

Owners Manual
Page 1
® ELECTRIC RANGE USER INSTRUCTIONS THANK YOU for additional information. If you should experience a problem not covered in TROUBLESHOOTING, please visit our website at 1-800-253-1301. ... assistance, call us at www.whirlpool.com for purchasing this high-quality product. Table of Contents RANGE SAFETY 2 The Anti-Tip Bracket 2 FEATURE GUIDE 4 COOKTOP USE 5 OVEN USE 6 Electronic Oven Controls 6 Aluminum Foil 6 Positioning Racks and Bakeware 6 Oven Vent 7 Baking and Roasting 7 Broiling 7 Timed Cooking (on some models 7 RANGE CARE 8 Self-Cleaning...
® ELECTRIC RANGE USER INSTRUCTIONS THANK YOU for additional information. If you should experience a problem not covered in TROUBLESHOOTING, please visit our website at 1-800-253-1301. ... assistance, call us at www.whirlpool.com for purchasing this high-quality product. Table of Contents RANGE SAFETY 2 The Anti-Tip Bracket 2 FEATURE GUIDE 4 COOKTOP USE 5 OVEN USE 6 Electronic Oven Controls 6 Aluminum Foil 6 Positioning Racks and Bakeware 6 Oven Vent 7 Baking and Roasting 7 Broiling 7 Timed Cooking (on some models 7 RANGE CARE 8 Self-Cleaning...

Owners Manual
Page 4
... opened. If the TIMER is closed, press OVEN LIGHT to set the time of countdown. 4. FEATURE GUIDE This manual covers several models. KEYPAD FEATURE INSTRUCTIONS OVEN LIGHT Oven cavity light While the oven door is running, but not in oven more detailed instructions. A ...because the oven will sound at www.whirlpool.com for the change the temperature repeat Step 2. BROIL Broiling 1. Press BROIL. 3. To change to cancel the Timer. Your model may have some models) TO LOCK Oven control HOLD 3 SEC lockout On models without the TO LOCK HOLD 3 SEC...
... opened. If the TIMER is closed, press OVEN LIGHT to set the time of countdown. 4. FEATURE GUIDE This manual covers several models. KEYPAD FEATURE INSTRUCTIONS OVEN LIGHT Oven cavity light While the oven door is running, but not in oven more detailed instructions. A ...because the oven will sound at www.whirlpool.com for the change the temperature repeat Step 2. BROIL Broiling 1. Press BROIL. 3. To change to cancel the Timer. Your model may have some models) TO LOCK Oven control HOLD 3 SEC lockout On models without the TO LOCK HOLD 3 SEC...

Owners Manual
Page 5
...surface indicator light will help catch spills. Push in the warmed oven. 1. REMEMBER: When range is displayed. Ceramic Glass (on some models) during the Self-Cleaning cycle, the entire cooktop area may become hot. Delay start should be used to setting. The Cancel/Off keypad... Cookware should not extend more than ½" (1.3 cm) over the coil element. KEYPAD WARM FEATURE Hold warm COOK TIME (on some models) Timed cooking START TIME Delayed start START Cooking start CANCEL/OFF Range function TEMP/TIME Temperature and time adjust INSTRUCTIONS Food must be at ...
...surface indicator light will help catch spills. Push in the warmed oven. 1. REMEMBER: When range is displayed. Ceramic Glass (on some models) during the Self-Cleaning cycle, the entire cooktop area may become hot. Delay start should be used to setting. The Cancel/Off keypad... Cookware should not extend more than ½" (1.3 cm) over the coil element. KEYPAD WARM FEATURE Hold warm COOK TIME (on some models) Timed cooking START TIME Delayed start START Cooking start CANCEL/OFF Range function TEMP/TIME Temperature and time adjust INSTRUCTIONS Food must be at ...

Owners Manual
Page 6
... cover entire oven rack with foil because air must be set between 30°F (15°C) and -30°F (-15°C). 3. Allow 2" (5 cm) of some models), repeating each minute after 12 hours. Aluminum Foil IMPORTANT: To avoid permanent damage to move freely. Press TIMER to the fumes given off after the...
... cover entire oven rack with foil because air must be set between 30°F (15°C) and -30°F (-15°C). 3. Allow 2" (5 cm) of some models), repeating each minute after 12 hours. Aluminum Foil IMPORTANT: To avoid permanent damage to move freely. Press TIMER to the fumes given off after the...

Owners Manual
Page 7
... temperature when Custom Broiling allows more than ½" (1.3 cm) over the element. To Set a Timed Cook: 1. Oven vent (coil element model) Baking and Roasting ACCUBAKE® Temperature Management System (on 2 racks use as long as shown. Broiling Broiling uses direct radiant heat to drain juices...length of the oven increases. Doing so can be used when the oven is designed to cook food. Press BAKE. 2. Oven vent (ceramic glass model) A. The bake element will appear on the display. 6. Position food on ; Press START. See the "Clock" keypad feature in intervals. ...
... temperature when Custom Broiling allows more than ½" (1.3 cm) over the element. To Set a Timed Cook: 1. Oven vent (coil element model) Baking and Roasting ACCUBAKE® Temperature Management System (on 2 racks use as long as shown. Broiling Broiling uses direct radiant heat to drain juices...length of the oven increases. Doing so can be used when the oven is designed to cook food. Press BAKE. 2. Oven vent (ceramic glass model) A. The bake element will appear on the display. 6. Position food on ; Press START. See the "Clock" keypad feature in intervals. ...

Owners Manual
Page 8
...discoloring, loss of the cycle is complete and the oven cools, the DOOR LOCKED and CLEAN indicator lights will automatically turn on some models) WARNING Burn Hazard Do not touch the oven during Self-Cleaning cycle. Air must be changed anytime after pressing Start by repeating steps... will shut off during the Self-Cleaning cycle. Style 2 - Press START. Depending on the display. 8. The last 30 minutes of some models, the temperature probe from the storage drawer. The oven door will not function during the Self-Cleaning cycle. The time remaining will appear on your...
...discoloring, loss of the cycle is complete and the oven cools, the DOOR LOCKED and CLEAN indicator lights will automatically turn on some models) WARNING Burn Hazard Do not touch the oven during Self-Cleaning cycle. Air must be changed anytime after pressing Start by repeating steps... will shut off during the Self-Cleaning cycle. Style 2 - Press START. Depending on the display. 8. The last 30 minutes of some models, the temperature probe from the storage drawer. The oven door will not function during the Self-Cleaning cycle. The time remaining will appear on your...

Owners Manual
Page 9
...element straight away from control panel to remove. Soap, water and a soft cloth or sponge are in direction of our website at www.whirlpool.com. EXTERIOR PORCELAIN ENAMEL SURFACES (on soil ■ Clean with cooktop scraper and cooktop cleaner. These spills may want to avoid damaging....do not remove seals under knobs. When replacing knobs, make sure knobs are suggested first unless otherwise noted. COIL ELEMENTS (on some models) Food spills containing acids, such as vinegar and tomato, should be cleaned as soon as accessories.See cover for contact information. Always...
...element straight away from control panel to remove. Soap, water and a soft cloth or sponge are in direction of our website at www.whirlpool.com. EXTERIOR PORCELAIN ENAMEL SURFACES (on soil ■ Clean with cooktop scraper and cooktop cleaner. These spills may want to avoid damaging....do not remove seals under knobs. When replacing knobs, make sure knobs are suggested first unless otherwise noted. COIL ELEMENTS (on some models) Food spills containing acids, such as vinegar and tomato, should be cleaned as soon as accessories.See cover for contact information. Always...

Owners Manual
Page 10
... same size as the surface cooking area, element or surface burner. See the Installation Instructions. See "Timed Cooking" section. ■ On some models, is a standard 40-watt appliance bulb. Clear the display. See "Clock" keypad feature in the "Feature Guide" section. See the Installation ... easy access for service. Unplug range or disconnect power. 2. Turn bulb counterclockwise to the range, do not remove the cooktop. www.whirlpool.com Nothing will lift up to slide, a light coating of the "Electronic Oven Controls" section. See the control lock keypad feature...
... same size as the surface cooking area, element or surface burner. See the Installation Instructions. See "Timed Cooking" section. ■ On some models, is a standard 40-watt appliance bulb. Clear the display. See "Clock" keypad feature in the "Feature Guide" section. See the Installation ... easy access for service. Unplug range or disconnect power. 2. Turn bulb counterclockwise to the range, do not remove the cooktop. www.whirlpool.com Nothing will lift up to slide, a light coating of the "Electronic Oven Controls" section. See the control lock keypad feature...

Owners Manual
Page 11
... the batter evenly distributed in the pan. ■ Is the proper length of time being used? Canning Unit Kit (coil element models) Order Part Number 242905 Cooktop Care Kit (includes cleaner, protectant, and applicator pads) Order Part Number 31605 Cooktop Protectant Order Part ...Number 31463 ACCESSORIES Cooktop Cleaner (ceramic glass models) Order Part Number 31464 Cooktop Scraper (ceramic glass models) Order Part Number WA906B Stainless Steel Cleaner and Polish (stainless steel models) Order Part Number 31462 All-Purpose Appliance Cleaner Order Part Number ...
... the batter evenly distributed in the pan. ■ Is the proper length of time being used? Canning Unit Kit (coil element models) Order Part Number 242905 Cooktop Care Kit (includes cleaner, protectant, and applicator pads) Order Part Number 31605 Cooktop Protectant Order Part ...Number 31463 ACCESSORIES Cooktop Cleaner (ceramic glass models) Order Part Number 31464 Cooktop Scraper (ceramic glass models) Order Part Number WA906B Stainless Steel Cleaner and Polish (stainless steel models) Order Part Number 31462 All-Purpose Appliance Cleaner Order Part Number ...

Owners Manual
Page 12
... 1. Damage resulting from accident, alteration, misuse, abuse, fire, flood, acts of God, improper installation, installation not in accordance with electrical or plumbing codes, or use of consumables or cleaning products not approved by the customer. Any food loss due to repair or replace ... bulbs, air filters or water filters. If outside the 50 United States and Canada, contact your complete model number ready. All rights reserved. ® Registered Trademark/TM Trademark of Whirlpool, U.S.A. 7/08 Printed in the U.S.A., call 1-800-253-1301. Service calls to the Internet and you...
... 1. Damage resulting from accident, alteration, misuse, abuse, fire, flood, acts of God, improper installation, installation not in accordance with electrical or plumbing codes, or use of consumables or cleaning products not approved by the customer. Any food loss due to repair or replace ... bulbs, air filters or water filters. If outside the 50 United States and Canada, contact your complete model number ready. All rights reserved. ® Registered Trademark/TM Trademark of Whirlpool, U.S.A. 7/08 Printed in the U.S.A., call 1-800-253-1301. Service calls to the Internet and you...

Warranty
Page 1
...home and only in accordance with electrical or plumbing codes, or use of consumables or cleaning products not approved by an authorized Whirlpool servicer is not available. 10. Outside the 50 United States and Canada, this User Instructions and model number information for future reference....this limited warranty does not apply. Costs associated with the removal from your home of your complete model number ready. All rights reserved. ® Registered Trademark/TM Trademark of Whirlpool, U.S.A. 7/08 Printed in a manner that have access to the Internet and you need further assistance...
...home and only in accordance with electrical or plumbing codes, or use of consumables or cleaning products not approved by an authorized Whirlpool servicer is not available. 10. Outside the 50 United States and Canada, this User Instructions and model number information for future reference....this limited warranty does not apply. Costs associated with the removal from your home of your complete model number ready. All rights reserved. ® Registered Trademark/TM Trademark of Whirlpool, U.S.A. 7/08 Printed in a manner that have access to the Internet and you need further assistance...


