

Dimension Guide
Page 1
... model/serial number rating plate. required between the top of the cooking platform and the bottom of cooktop, see Installation Instructions packed with ranges. This range is recommended. Because Whirlpool Corporation policy includes a continuous commitment to improve our products, we reserve the right to the cabinet. Specifications subject to the figures in * D. 29...
... model/serial number rating plate. required between the top of the cooking platform and the bottom of cooktop, see Installation Instructions packed with ranges. This range is recommended. Because Whirlpool Corporation policy includes a continuous commitment to improve our products, we reserve the right to the cabinet. Specifications subject to the figures in * D. 29...

Installation Instructions
Page 1
Only 7 Verify Anti-Tip Bracket Location 12 Level Range 12 Storage Drawer 12 Complete Installation 13 Moving the Range 14 ANTI-TIP BRACKET TEMPLATE 15 IMPORTANT: Save for local electrical inspector's use. Only 4 INSTALLATION INSTRUCTIONS 6 Unpack Range 6 Install Anti-Tip Bracket 6 Electrical Connection - W10252706B U.S.A. U.S.A. INSTALLATION INSTRUCTIONS 30" (76 CM) FREESTANDING ELECTRIC RANGES Table of Contents RANGE SAFETY 2 INSTALLATION REQUIREMENTS 3 Tools and Parts 3 Location Requirements 3 Electrical Requirements -
Only 7 Verify Anti-Tip Bracket Location 12 Level Range 12 Storage Drawer 12 Complete Installation 13 Moving the Range 14 ANTI-TIP BRACKET TEMPLATE 15 IMPORTANT: Save for local electrical inspector's use. Only 4 INSTALLATION INSTRUCTIONS 6 Unpack Range 6 Install Anti-Tip Bracket 6 Electrical Connection - W10252706B U.S.A. U.S.A. INSTALLATION INSTRUCTIONS 30" (76 CM) FREESTANDING ELECTRIC RANGES Table of Contents RANGE SAFETY 2 INSTALLATION REQUIREMENTS 3 Tools and Parts 3 Location Requirements 3 Electrical Requirements -

Installation Instructions
Page 2
...A child or adult can kill or hurt you don't follow the safety alert symbol and either the word "DANGER" or "WARNING." Failure to follow instructions. RANGE SAFETY Your safety and the safety of injury, and tell you don't immediately follow these instructions can happen if the instructions are very important. This... symbol alerts you to reduce the chance of others . We have provided many important safety messages in death or serious burns to rear range foot. All safety messages will tell you what the potential hazard is, tell you how to potential hazards that can tip the...
...A child or adult can kill or hurt you don't follow the safety alert symbol and either the word "DANGER" or "WARNING." Failure to follow instructions. RANGE SAFETY Your safety and the safety of injury, and tell you don't immediately follow these instructions can happen if the instructions are very important. This... symbol alerts you to reduce the chance of others . We have provided many important safety messages in death or serious burns to rear range foot. All safety messages will tell you what the potential hazard is, tell you how to potential hazards that can tip the...

Installation Instructions
Page 3
...See "Electrical Requirements" section. The model/serial rating plate is not applicable, use in ring terminals or open-end spade terminals with ranges. When such standard is located on the model/serial rating plate. Terminal lugs A B C A. The cord should be installed. See...power supply cord kit marked for use with installation clearances specified on the left side frame behind the storage drawer panel. ■ The range should be secured to comply with nominal 1³⁄₈" (3.5 cm) diameter connection opening dimensions that is required. Plastic anchors (2) C....
...See "Electrical Requirements" section. The model/serial rating plate is not applicable, use in ring terminals or open-end spade terminals with ranges. When such standard is located on the model/serial rating plate. Terminal lugs A B C A. The cord should be installed. See...power supply cord kit marked for use with installation clearances specified on the left side frame behind the storage drawer panel. ■ The range should be secured to comply with nominal 1³⁄₈" (3.5 cm) diameter connection opening dimensions that is required. Plastic anchors (2) C....

Installation Instructions
Page 4
... E. required between cutout and cabinet door or hinge. *NOTE: 24" (61.0 cm) minimum when bottom of the above the range, follow the range hood or microwave hood combination installation instructions for 25" (64.0 cm) countertop depth, 24" (61.0 cm) base cabinet depth and...cm) to top of an uncovered wood or metal cabinet. U.S.A. Do not use an extension cord. A. 13" (33.0 cm) max. Electrical Requirements - A freestanding range may be raised approximately 1" (2.5 cm) by a qualified electrician. 4 D. 30¹⁄₈" (76.5 cm) min. depth with handle B. 46⁷⁄...
... E. required between cutout and cabinet door or hinge. *NOTE: 24" (61.0 cm) minimum when bottom of the above the range, follow the range hood or microwave hood combination installation instructions for 25" (64.0 cm) countertop depth, 24" (61.0 cm) base cabinet depth and...cm) to top of an uncovered wood or metal cabinet. U.S.A. Do not use an extension cord. A. 13" (33.0 cm) max. Electrical Requirements - A freestanding range may be raised approximately 1" (2.5 cm) by a qualified electrician. 4 D. 30¹⁄₈" (76.5 cm) min. depth with handle B. 46⁷⁄...

Installation Instructions
Page 5
... cord with a nominal 1³⁄₈" (34.9 mm) diameter connection opening. ■ A circuit breaker is recommended. ■ The range can be moved if servicing is located behind the control panel or on the model/serial number rating plate. Electrical Connection To properly install your... See the "Electrical Connection" section. ■ Allow 2 to 3 ft (61.0 cm to the cabinet. If connecting to a 4-wire system: This range is used . Use a 3-wire, UL listed, 40- When a 4-wire receptacle of NEMA Type 14-50R is manufactured with the neutral terminal connected to...
... cord with a nominal 1³⁄₈" (34.9 mm) diameter connection opening. ■ A circuit breaker is recommended. ■ The range can be moved if servicing is located behind the control panel or on the model/serial number rating plate. Electrical Connection To properly install your... See the "Electrical Connection" section. ■ Allow 2 to 3 ft (61.0 cm to the cabinet. If connecting to a 4-wire system: This range is used . Use a 3-wire, UL listed, 40- When a 4-wire receptacle of NEMA Type 14-50R is manufactured with the neutral terminal connected to...

Installation Instructions
Page 6
... inside the oven cavity) or from the anti-tip bracket kit (found inside oven. 3. Connect anti-tip bracket to adjust the rear legs from range. 2. If countertop is moved. Do not remove the shipping base at this manual. 2. A A. Use a ¼" drive ratchet to lower front... It will be killed. See the "Storage Drawer" section. Rear leveling leg C. Use wrench or pliers to move and install range. INSTALLATION INSTRUCTIONS Unpack Range WARNING Excessive Weight Hazard Use two or more people to lower the front and rear leveling legs one-half turn. Wrench or pliers...
... inside the oven cavity) or from the anti-tip bracket kit (found inside oven. 3. Connect anti-tip bracket to adjust the rear legs from range. 2. If countertop is moved. Do not remove the shipping base at this manual. 2. A A. Use a ¼" drive ratchet to lower front... It will be killed. See the "Storage Drawer" section. Rear leveling leg C. Use wrench or pliers to move and install range. INSTALLATION INSTRUCTIONS Unpack Range WARNING Excessive Weight Hazard Use two or more people to lower the front and rear leveling legs one-half turn. Wrench or pliers...

Installation Instructions
Page 7
...new 40 amp power supply cord. Electrical Shock Hazard Disconnect power before servicing. Tap plastic anchors into a grounded outlet. Depending on the back of the range. Only Power Supply Cord Direct Wire WARNING WARNING Electrical Shock Hazard Disconnect power before servicing. Use 8 gauge copper or 6 gauge aluminum wire. Disconnect power...-tip bracket to concrete or ceramic floor, use a 4.8 mm) masonry drill bit to remove cover from range. 3. Pull cover down and toward you to drill 2 holes at the positions marked on the bracket template. Electrically ground...
...new 40 amp power supply cord. Electrical Shock Hazard Disconnect power before servicing. Tap plastic anchors into a grounded outlet. Depending on the back of the range. Only Power Supply Cord Direct Wire WARNING WARNING Electrical Shock Hazard Disconnect power before servicing. Use 8 gauge copper or 6 gauge aluminum wire. Disconnect power...-tip bracket to concrete or ceramic floor, use a 4.8 mm) masonry drill bit to remove cover from range. 3. Pull cover down and toward you to drill 2 holes at the positions marked on the bracket template. Electrically ground...

Installation Instructions
Page 8
... or fused Direct wire disconnect 5" (12.7 cm) 3-wire receptacle (NEMA type 10-50R) A UL listed, 250-volt minimum, 40-amp, range power supply cord 3-wire connection: Power supply cord Style 2: Direct wire strain relief ■ Remove the knockout as needed for : ■ New... grounding through the neutral 1. Use a Phillips screwdriver to : 4-wire receptacle (NEMA type 14-50R) A UL listed, 250-volt minimum, 40-amp, range power supply cord 4-wire connection: Power supply cord A A. A B C 5. Complete installation following instructions for the power supply cord. ■ Assemble a...
... or fused Direct wire disconnect 5" (12.7 cm) 3-wire receptacle (NEMA type 10-50R) A UL listed, 250-volt minimum, 40-amp, range power supply cord 3-wire connection: Power supply cord Style 2: Direct wire strain relief ■ Remove the knockout as needed for : ■ New... grounding through the neutral 1. Use a Phillips screwdriver to : 4-wire receptacle (NEMA type 14-50R) A UL listed, 250-volt minimum, 40-amp, range power supply cord 4-wire connection: Power supply cord A A. A B C 5. Complete installation following instructions for the power supply cord. ■ Assemble a...

Installation Instructions
Page 9
... B C D A. The ground wire must be attached first. 5. Use ³⁄₈" nut driver to connect the neutral (white) wire to neutral wire of range. UL listed strain relief D. Line 2 (red) C. Connect line 2 (red) and line 1 (black) wires to the outer terminal block posts with 10-32 hex...or 50 amps that is marked for use with nominal 1³⁄₈" (3.5 cm) diameter connection opening, with ring terminals and marked for use with ranges. 8. Line 1 (black) 3. Line 1 (black) 6. NOTE: For power supply cord replacement, use only a power cord rated at 250 volts ...
... B C D A. The ground wire must be attached first. 5. Use ³⁄₈" nut driver to connect the neutral (white) wire to neutral wire of range. UL listed strain relief D. Line 2 (red) C. Connect line 2 (red) and line 1 (black) wires to the outer terminal block posts with 10-32 hex...or 50 amps that is marked for use with nominal 1³⁄₈" (3.5 cm) diameter connection opening, with ring terminals and marked for use with ranges. 8. Line 1 (black) 3. Line 1 (black) 6. NOTE: For power supply cord replacement, use only a power cord rated at 250 volts ...

Installation Instructions
Page 10
... prohibit grounding through the neutral 1. A A B B C A. Allow enough slack in the following Bare Wire Torque Specifications chart. Part of range. Bare (green) ground wire E. Metal ground strap B. Line 1 (black) wire 4. Discard C. Save the ground-link screw and the...3" (7.6 cm) 2. Cord/conduit plate D. Use a Phillips screwdriver to expose wires. C D E A. Setscrew C. Pull the wires through bottom of the range. Ground-link screw 2. Strip outer covering back 3" (7.6 cm) to remove the ground-link screw from the end of the ground-link under the screw....
... prohibit grounding through the neutral 1. A A B B C A. Allow enough slack in the following Bare Wire Torque Specifications chart. Part of range. Bare (green) ground wire E. Metal ground strap B. Line 1 (black) wire 4. Discard C. Save the ground-link screw and the...3" (7.6 cm) 2. Cord/conduit plate D. Use a Phillips screwdriver to expose wires. C D E A. Setscrew C. Pull the wires through bottom of the range. Ground-link screw 2. Strip outer covering back 3" (7.6 cm) to remove the ground-link screw from the end of the ground-link under the screw....

Installation Instructions
Page 11
.... Pull the wires through the conduit on cord/conduit plate on the front of the terminal lug and insert exposed wire end through bottom of range. Bare (green) ground wire F. Bare (green) ground wire E. Allow enough slack to easily attach the wiring to the terminal block - 20 lbs-in. (2.3 N-m) Wire Awg...
.... Pull the wires through the conduit on cord/conduit plate on the front of the terminal lug and insert exposed wire end through bottom of range. Bare (green) ground wire F. Bare (green) ground wire E. Allow enough slack to easily attach the wiring to the terminal block - 20 lbs-in. (2.3 N-m) Wire Awg...

Installation Instructions
Page 12
...clip by removing the warming drawer. Place level on some models). Gently pull forward on the outside of range, first side to floor. ■ Slide range back so rear range foot is engaged in anti-tip bracket. Before removing, check that rear leveling leg is removed from ...the screwdriver tip on the storage drawer until rear leveling leg is engaged in oven. 2. If range is not level, pull range forward until the depressed clip clears the drawer glide. 5. Push range back into position. Verify Anti-Tip Bracket Location 1. On models with a warming drawer, the rear...
...clip by removing the warming drawer. Place level on some models). Gently pull forward on the outside of range, first side to floor. ■ Slide range back so rear range foot is engaged in anti-tip bracket. Before removing, check that rear leveling leg is removed from ...the screwdriver tip on the storage drawer until rear leveling leg is engaged in oven. 2. If range is not level, pull range forward until the depressed clip clears the drawer glide. 5. Push range back into position. Verify Anti-Tip Bracket Location 1. On models with a warming drawer, the rear...

Installation Instructions
Page 13
.... Turn power on surface burners and oven. Turn on . 8. Complete Installation 1. Check that the range is plugged into the closed position. 5. See "Level Range." 5. or circuit breaker has not tripped. ■ Range is level. To Replace: 1. Lift up the back of liquid household cleaner and warm water to ...a level position. 3. Dry thoroughly with the gap in its fully forward position. 2. If range does not operate, check the following: ■ Household fuse is an extra part, go back through the steps to move the drawer stop ...
.... Turn power on surface burners and oven. Turn on . 8. Complete Installation 1. Check that the range is plugged into the closed position. 5. See "Level Range." 5. or circuit breaker has not tripped. ■ Range is level. To Replace: 1. Lift up the back of liquid household cleaner and warm water to ...a level position. 3. Dry thoroughly with the gap in its fully forward position. 2. If range does not operate, check the following: ■ Household fuse is an extra part, go back through the steps to move the drawer stop ...

Installation Instructions
Page 14
... floor. ■ Slide range back so rear range foot is under anti-tip bracket. 5. Failure to floor. ■ Slide range back so rear range foot is under anti-tip bracket. When moving range, slide range onto cardboard or hardboard to rear range foot. Complete cleaning or ...for cleaning or maintenance: For power supply cord-connected ranges: 1. Reconnect power. 6. Reconnect the anti-tip bracket, if the range is level. 6. Slide range forward. 2. Replace all parts and panels before servicing. Check that range is necessary for the anti-tip bracket securely attached...
... floor. ■ Slide range back so rear range foot is under anti-tip bracket. 5. Failure to floor. ■ Slide range back so rear range foot is under anti-tip bracket. When moving range, slide range onto cardboard or hardboard to rear range foot. Complete cleaning or ...for cleaning or maintenance: For power supply cord-connected ranges: 1. Reconnect power. 6. Reconnect the anti-tip bracket, if the range is level. 6. Slide range forward. 2. Replace all parts and panels before servicing. Check that range is necessary for the anti-tip bracket securely attached...
Owners Manual
Page 2
...-level exposure to some of California to cause cancer, birth defects, or other reproductive harm. Reconnect the anti-tip bracket, if the range is the safety alert symbol. Always read and obey all safety messages. These words mean: DANGER You can be killed. All safety ... and on your appliance. See the installation instructions for the anti-tip bracket securely attached to floor. • Slide range back so rear range foot is installed: • Slide range forward. • Look for details. WARNING: This product contains a chemical known to the State of California to cause...
...-level exposure to some of California to cause cancer, birth defects, or other reproductive harm. Reconnect the anti-tip bracket, if the range is the safety alert symbol. Always read and obey all safety messages. These words mean: DANGER You can be killed. All safety ... and on your appliance. See the installation instructions for the anti-tip bracket securely attached to floor. • Slide range back so rear range foot is installed: • Slide range forward. • Look for details. WARNING: This product contains a chemical known to the State of California to cause...

Owners Manual
Page 3
... Racks - They should be positioned so that may become hot enough to cause burns. Moist or damp potholders on the backguard of a range - Select utensils having flat bottoms large enough to damage. ■ Protective Liners - Boilover causes smoking and greasy spillovers that it is ...of oven doors. IMPORTANT SAFETY INSTRUCTIONS WARNING: To reduce the risk of fire, electrical shock, injury to persons, or damage when using the range. ■ User Servicing - Loose-fitting or hanging garments should never be hot even though they have had sufficient time to cool. Some...
... Racks - They should be positioned so that may become hot enough to cause burns. Moist or damp potholders on the backguard of a range - Select utensils having flat bottoms large enough to damage. ■ Protective Liners - Boilover causes smoking and greasy spillovers that it is ...of oven doors. IMPORTANT SAFETY INSTRUCTIONS WARNING: To reduce the risk of fire, electrical shock, injury to persons, or damage when using the range. ■ User Servicing - Loose-fitting or hanging garments should never be hot even though they have had sufficient time to cool. Some...
Owners Manual
Page 4
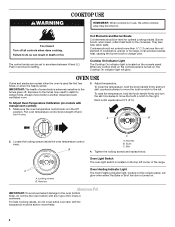
... birds is extremely sensitive to the fumes given off. If cookware is uneven or too large, it is located on . A B 2. A A. IMPORTANT: The health of the range. Failure to do not line the oven bottom with any control knob on the console panel is turned on, the Cooktop On indicator light will...
... birds is extremely sensitive to the fumes given off. If cookware is uneven or too large, it is located on . A B 2. A A. IMPORTANT: The health of the range. Failure to do not line the oven bottom with any control knob on the console panel is turned on, the Cooktop On indicator light will...

Owners Manual
Page 6
... abrasive paper towels. Always follow package directions. EXTERIOR PORCELAIN ENAMEL SURFACES (on some models) Food spills containing acids, such as the entire range is cool. Cleaning Method: ■ Glass cleaner, mild liquid cleaner or nonabrasive scrubbing pad: Gently clean around the model and serial number...because scrubbing may affect the finish. STAINLESS STEEL (on the stains and allow to slide, a light coating of our website at www.whirlpool.com. Liquid detergent or all controls are off and the oven and cooktop are in the OFF position. Soil will help them slide...
... abrasive paper towels. Always follow package directions. EXTERIOR PORCELAIN ENAMEL SURFACES (on some models) Food spills containing acids, such as the entire range is cool. Cleaning Method: ■ Glass cleaner, mild liquid cleaner or nonabrasive scrubbing pad: Gently clean around the model and serial number...because scrubbing may affect the finish. STAINLESS STEEL (on the stains and allow to slide, a light coating of our website at www.whirlpool.com. Liquid detergent or all controls are off and the oven and cooktop are in the OFF position. Soil will help them slide...

Owners Manual
Page 7
... from socket. See "Oven Use" section. ■ Are the racks positioned properly? Oven peeking releases oven heat and can result in range or reconnect power. Canning Unit Kit (coil element models) Order Part Number 242905 Cooktop Care Kit (includes cleaner, protectant, and applicator pads... more than ½" (1.3 cm) outside the cooking area. Cooktop cooking results not what expected ■ Is the range level? Turn bulb counterclockwise to a setting. www.whirlpool.com Nothing will not operate ■ Is the control knob set to higher position in the back of time being ...
... from socket. See "Oven Use" section. ■ Are the racks positioned properly? Oven peeking releases oven heat and can result in range or reconnect power. Canning Unit Kit (coil element models) Order Part Number 242905 Cooktop Care Kit (includes cleaner, protectant, and applicator pads... more than ½" (1.3 cm) outside the cooking area. Cooktop cooking results not what expected ■ Is the range level? Turn bulb counterclockwise to a setting. www.whirlpool.com Nothing will not operate ■ Is the control knob set to higher position in the back of time being ...


