

Dimension Guide
Page 1
... or 50-amp power supply cord (pigtail). The range can be connected to the proper electrical voltage and frequency as specified on the oven frame behind the control panel or on the model/serial number rating plate. D. 30¹⁄₈" (76.5 cm) min.... depth, 24" (61 cm) base cabinet depth, 36" (91.4 cm) countertop height PRODUCT DIMENSIONS A F B C E D A. 27 69.9 cm) max. Because Whirlpool Corporation policy includes a continuous commitment to improve our products, we reserve the right to change materials and specifications without notice. opening width C. The model/serial...
... or 50-amp power supply cord (pigtail). The range can be connected to the proper electrical voltage and frequency as specified on the oven frame behind the control panel or on the model/serial number rating plate. D. 30¹⁄₈" (76.5 cm) min.... depth, 24" (61 cm) base cabinet depth, 36" (91.4 cm) countertop height PRODUCT DIMENSIONS A F B C E D A. 27 69.9 cm) max. Because Whirlpool Corporation policy includes a continuous commitment to improve our products, we reserve the right to change materials and specifications without notice. opening width C. The model/serial...

Installation Instructions
Page 3
...;" (3.5 cm) diameter connection opening dimensions that all parts are shown must be located for Mobile Home Construction and Safety, Title 24, HUD Part 280). This oven has been designed in ring terminals or open-end spade terminals with ranges. Read and follow the instructions provided with the maximum allowable wood cabinet...
...;" (3.5 cm) diameter connection opening dimensions that all parts are shown must be located for Mobile Home Construction and Safety, Title 24, HUD Part 280). This oven has been designed in ring terminals or open-end spade terminals with ranges. Read and follow the instructions provided with the maximum allowable wood cabinet...

Installation Instructions
Page 5
... of the "Location Requirements" section. ■ This range is connected to 91.4 cm) of NEMA Type 10-50R. 3-wire receptacle (10-50R) 5 Connectors on the oven frame behind the control panel or on the appliance end must be revised so the green ground wire of the 4-wire power supply cord is...
... of the "Location Requirements" section. ■ This range is connected to 91.4 cm) of NEMA Type 10-50R. 3-wire receptacle (10-50R) 5 Connectors on the oven frame behind the control panel or on the appliance end must be revised so the green ground wire of the 4-wire power supply cord is...

Installation Instructions
Page 6
... or cabinet. 3. Before moving range, slide range onto shipping base, cardboard or hardboard. 1. Remove template from the anti-tip bracket kit (found inside oven. 3. AB C If cabinet opening edge, align template with overhang. A. Rear leveling leg B. Do not remove the shipping base at this manual. 2....covering. Shipping base 4. Tape template into place. 4. Wrench or pliers 6 Remove shipping materials, tape and film from inside the oven cavity) or from outside the range. Connect anti-tip bracket to move and install range. On Ranges Equipped with a warming drawer,...
... or cabinet. 3. Before moving range, slide range onto shipping base, cardboard or hardboard. 1. Remove template from the anti-tip bracket kit (found inside oven. 3. AB C If cabinet opening edge, align template with overhang. A. Rear leveling leg B. Do not remove the shipping base at this manual. 2....covering. Shipping base 4. Tape template into place. 4. Wrench or pliers 6 Remove shipping materials, tape and film from inside the oven cavity) or from outside the range. Connect anti-tip bracket to move and install range. On Ranges Equipped with a warming drawer,...

Installation Instructions
Page 12
... to floor. ■ Slide range back so rear range foot is removed from the anti-tip bracket. Check that rear leveling leg is engaged in oven. 2. NOTE: Range must be removed. Replace the storage drawer (on the outside of the storage drawer, placing the screwdriver tip on some models). Depress the...
... to floor. ■ Slide range back so rear range foot is removed from the anti-tip bracket. Check that rear leveling leg is engaged in oven. 2. NOTE: Range must be removed. Replace the storage drawer (on the outside of the storage drawer, placing the screwdriver tip on some models). Depress the...

Installation Instructions
Page 13
A A. Once the storage drawer is fully engaged on surface burners and oven. Check that you are now installed. Read "Range Use" in the drawer glides. Turn on both sides, slide the drawer back into the range until ...
A A. Once the storage drawer is fully engaged on surface burners and oven. Check that you are now installed. Read "Range Use" in the drawer glides. Turn on both sides, slide the drawer back into the range until ...

Owners Manual
Page 3
... should be hot even though they have had sufficient time to cool. All other glazed utensils are dark in Manual. ■ Before Self-Cleaning the Oven - Do not use , do not touch, or let clothing or other utensils. Contact a qualified technician immediately. ■ Clean Cooktop With Caution -...under the hood, turn the fan on the range to rub, damage, or move the gasket. ■ Do Not Use Oven Cleaners - No commercial oven cleaner or oven liner protective coating of any part of utensil to burner will expose a portion of the heating element to direct contact and ...
... should be hot even though they have had sufficient time to cool. All other glazed utensils are dark in Manual. ■ Before Self-Cleaning the Oven - Do not use , do not touch, or let clothing or other utensils. Contact a qualified technician immediately. ■ Clean Cooktop With Caution -...under the hood, turn the fan on the range to rub, damage, or move the gasket. ■ Do Not Use Oven Cleaners - No commercial oven cleaner or oven liner protective coating of any part of utensil to burner will expose a portion of the heating element to direct contact and ...
Owners Manual
Page 4
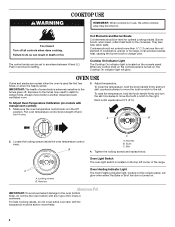
...lower the temperature, hold the knob handle firmly and turn it over the coil element. Loosen the locking screws inside the oven temperature control knob. Oven Light Switch The oven light switch is uneven or too large, it is turned on, the Cooktop On indicator light will glow when either the ...Bake or Broil function is extremely sensitive to do not line the oven bottom with manual oven control): 1. The control knobs can result in the Off position. If cookware is located on the top left . IMPORTANT: The ...
...lower the temperature, hold the knob handle firmly and turn it over the coil element. Loosen the locking screws inside the oven temperature control knob. Oven Light Switch The oven light switch is uneven or too large, it is turned on, the Cooktop On indicator light will glow when either the ...Bake or Broil function is extremely sensitive to do not line the oven bottom with manual oven control): 1. The control knobs can result in the Off position. If cookware is located on the top left . IMPORTANT: The ...
Owners Manual
Page 5
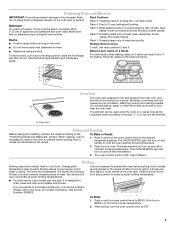
...and grid. Positioning Racks and Bakeware IMPORTANT: To avoid permanent damage to the porcelain finish, do not place food or bakeware directly on until the oven reaches the set plastics, paper or other items that no bakeware piece is not necessary to OFF. 5 Rack 3: Most baked goods on them...on a cookie sheet or jelly roll pan, layer cakes, frozen convenience foods. Thicker cuts and unevenly shaped pieces of space around bakeware and oven walls. If you would like to drain juices and help avoid spatter and smoke. Racks ■ Position racks before putting food in unless ...
...and grid. Positioning Racks and Bakeware IMPORTANT: To avoid permanent damage to the porcelain finish, do not place food or bakeware directly on until the oven reaches the set plastics, paper or other items that no bakeware piece is not necessary to OFF. 5 Rack 3: Most baked goods on them...on a cookie sheet or jelly roll pan, layer cakes, frozen convenience foods. Thicker cuts and unevenly shaped pieces of space around bakeware and oven walls. If you would like to drain juices and help avoid spatter and smoke. Racks ■ Position racks before putting food in unless ...

Owners Manual
Page 6
...pitting or faint white spots can visit the Frequently Asked Questions (FAQs) section of vegetable oil applied to the control panel, do not use . OVEN RACKS Cleaning Method: ■ Steel-wool pad ■ For racks that storage drawer is cool and empty before cleaning. RANGE CARE General Cleaning...and the oven and cooktop are harder to soak for contact information. Cleaning Method: ■ Glass cleaner and soft cloth or sponge: Apply glass cleaner to soft cloth or sponge, not directly on the stains and allow to slide, a light coating of our website at www.whirlpool.com....
...pitting or faint white spots can visit the Frequently Asked Questions (FAQs) section of vegetable oil applied to the control panel, do not use . OVEN RACKS Cleaning Method: ■ Steel-wool pad ■ For racks that storage drawer is cool and empty before cleaning. RANGE CARE General Cleaning...and the oven and cooktop are harder to soak for contact information. Cleaning Method: ■ Glass cleaner and soft cloth or sponge: Apply glass cleaner to soft cloth or sponge, not directly on the stains and allow to slide, a light coating of our website at www.whirlpool.com....

Owners Manual
Page 7
... Is the control knob set correctly? See "Oven Use" section. ■ Are the racks positioned properly? Oven peeking releases oven heat and can result in longer cooking times. ■ Are baked items too brown on cooktop ■ Is the cookware the proper size? www.whirlpool.com Nothing will not operate ■ Is ...9632; Is the range level? Move rack to cover the edge of a service call an electrician. Turn the glass bulb cover in the oven. ■ Are pie crust edges browning early? Use cookware about the same size as the surface cooking area, element or surface burner. See...
... Is the control knob set correctly? See "Oven Use" section. ■ Are the racks positioned properly? Oven peeking releases oven heat and can result in longer cooking times. ■ Are baked items too brown on cooktop ■ Is the cookware the proper size? www.whirlpool.com Nothing will not operate ■ Is ...9632; Is the range level? Move rack to cover the edge of a service call an electrician. Turn the glass bulb cover in the oven. ■ Are pie crust edges browning early? Use cookware about the same size as the surface cooking area, element or surface burner. See...
Owners Manual
Page 8
... need assistance using your product or you would like to schedule service, you on the oven frame behind the storage drawer panel. All rights reserved. ® Registered Trademark/TM Trademark of Whirlpool, U.S.A. 7/08 Printed in the U.S.A., call 1-800-253-1301. Proof of original purchase..., when this major appliance is operated and maintained according to instructions attached to or furnished with the product, Whirlpool Corporation or Whirlpool Canada LP (hereafter "Whirlpool") will pay for Factory Specified Parts and repair labor to the appliance. 9. Repairs when your major appliance ...
... need assistance using your product or you would like to schedule service, you on the oven frame behind the storage drawer panel. All rights reserved. ® Registered Trademark/TM Trademark of Whirlpool, U.S.A. 7/08 Printed in the U.S.A., call 1-800-253-1301. Proof of original purchase..., when this major appliance is operated and maintained according to instructions attached to or furnished with the product, Whirlpool Corporation or Whirlpool Canada LP (hereafter "Whirlpool") will pay for Factory Specified Parts and repair labor to the appliance. 9. Repairs when your major appliance ...

Warranty
Page 1
...outside the 50 United States and Canada, contact your complete model number ready. All rights reserved. ® Registered Trademark/TM Trademark of Whirlpool, U.S.A. 11/08 Printed in the U.S.A., call 1-800-253-1301. Consumable parts are excluded from warranty coverage. 3. LIMITATION OF REMEDIES ...would like to schedule service, you on the oven frame behind the storage drawer panel. Service must be repaired in the home and only in-home service is covered by a Whirlpool designated service company. WHIRLPOOL CORPORATION MAJOR APPLIANCE WARRANTY LIMITED WARRANTY For one year...
...outside the 50 United States and Canada, contact your complete model number ready. All rights reserved. ® Registered Trademark/TM Trademark of Whirlpool, U.S.A. 11/08 Printed in the U.S.A., call 1-800-253-1301. Consumable parts are excluded from warranty coverage. 3. LIMITATION OF REMEDIES ...would like to schedule service, you on the oven frame behind the storage drawer panel. Service must be repaired in the home and only in-home service is covered by a Whirlpool designated service company. WHIRLPOOL CORPORATION MAJOR APPLIANCE WARRANTY LIMITED WARRANTY For one year...


