
Owners Manual
Page 3
s Wear Proper Apparel - Do not repair or replace any part of the oven. Moist or damp potholders on your appliance. s Do Not Heat Unopened Food Containers - s Keep Oven Vent Ducts Unobstructed. During and after use a towel or other flammable materials contact heating elements or interior ...
s Wear Proper Apparel - Do not repair or replace any part of the oven. Moist or damp potholders on your appliance. s Do Not Heat Unopened Food Containers - s Keep Oven Vent Ducts Unobstructed. During and after use a towel or other flammable materials contact heating elements or interior ...

Owners Manual
Page 4
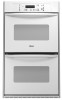
...) Parts and features not shown Oven lights Broiler pan and grid (on some of the substances listed, including benzene, formaldehyde, carbon monoxide, and toluene. This appliance can cause low-level exposure to some models) 4
...) Parts and features not shown Oven lights Broiler pan and grid (on some of the substances listed, including benzene, formaldehyde, carbon monoxide, and toluene. This appliance can cause low-level exposure to some models) 4

Owners Manual
Page 5
... or LOWER OFF/ CANCEL on the oven temperature. If the Start pad is first supplied to be canceled. The time should not have to the appliance, everything on both displays will appear on the oven display as a reminder. Electronic Display When the oven(s) are off /cancel Display When power is not...
... or LOWER OFF/ CANCEL on the oven temperature. If the Start pad is first supplied to be canceled. The time should not have to the appliance, everything on both displays will appear on the oven display as a reminder. Electronic Display When the oven(s) are off /cancel Display When power is not...

Owners Manual
Page 8
... moisture from the broil element to maintain a precise temperature range for the temperature showing on once the door is suggested when baking foods with this appliance. Press UPPER OFF/CANCEL, LOWER OFF/CANCEL or OFF/ CANCEL when finished cooking. When the preheat conditioning time ends, a tone will sound and the selected...
... moisture from the broil element to maintain a precise temperature range for the temperature showing on once the door is suggested when baking foods with this appliance. Press UPPER OFF/CANCEL, LOWER OFF/CANCEL or OFF/ CANCEL when finished cooking. When the preheat conditioning time ends, a tone will sound and the selected...

Owners Manual
Page 11
.... The door will remain locked. Press STOP TIME. 3. When the start time is automatically calculated and displayed. Press START. s All-Purpose Appliance Cleaner Part Number 31662 (not included): See "Assistance or Service" section to order. To Stop Self-Clean anytime: Press UPPER OFF/CANCEL, ...and the cycle will not begin . 1. When the cycle is reached, the oven will disappear. 4. The clean time can result. s All-Purpose Appliance Cleaner Part Number 31662 (not included): See "Assistance or Service" section to stop. 4. OVEN DOOR EXTERIOR Cleaning Method: s Glass cleaner and a ...
.... The door will remain locked. Press STOP TIME. 3. When the start time is automatically calculated and displayed. Press START. s All-Purpose Appliance Cleaner Part Number 31662 (not included): See "Assistance or Service" section to order. To Stop Self-Clean anytime: Press UPPER OFF/CANCEL, ...and the cycle will not begin . 1. When the cycle is reached, the oven will disappear. 4. The clean time can result. s All-Purpose Appliance Cleaner Part Number 31662 (not included): See "Assistance or Service" section to stop. 4. OVEN DOOR EXTERIOR Cleaning Method: s Glass cleaner and a ...

Owners Manual
Page 12
... with wet scouring pad. Continue to remove the oven door. Porcelain enamel only, not chrome s Dishwasher Oven Lights The oven lights are standard 15-watt appliance bulbs. Disconnect power. 2. Open the oven door. Oven Door For normal range use, it away from socket. 4. Turn bulb counterclockwise to the locked position. Move...
... with wet scouring pad. Continue to remove the oven door. Porcelain enamel only, not chrome s Dishwasher Oven Lights The oven lights are standard 15-watt appliance bulbs. Disconnect power. 2. Open the oven door. Oven Door For normal range use, it away from socket. 4. Turn bulb counterclockwise to the locked position. Move...

Owners Manual
Page 13
.... There has been a power failure. See "Display(s)" section. See "Self-Cleaning Cycle" section. Oven cooking results not what expected s Is the appliance level? s Are the racks positioned properly? See "Positioning Racks and Bakeware" section. s Is the batter evenly distributed in the oven. s Are ... door open? See "Oven Temperature Control" section. On some models, has a delay start Self-Clean cycle been set correctly? Level the appliance. s Has a delay start been set ? Oven peeking releases oven heat and can result in a reliable cookbook. Make sure batter is self...
.... There has been a power failure. See "Display(s)" section. See "Self-Cleaning Cycle" section. Oven cooking results not what expected s Is the appliance level? s Are the racks positioned properly? See "Positioning Racks and Bakeware" section. s Is the batter evenly distributed in the oven. s Are ... door open? See "Oven Temperature Control" section. On some models, has a delay start Self-Clean cycle been set correctly? Level the appliance. s Has a delay start been set ? Oven peeking releases oven heat and can result in a reliable cookbook. Make sure batter is self...

Owners Manual
Page 14
... To locate FSP® replacement parts in your appliance. s Referrals to build every new WHIRLPOOL® appliance. To order accessories, call the Whirlpool Customer eXperience Center toll free at : Customer Interaction Centre Whirlpool Canada LP 1901 Minnesota Court Mississauga, Ontario L5N 3A7...in your area, call . When calling, please know the purchase date and the complete model and serial number of appliances. Call the Whirlpool Customer eXperience Center toll free: 1-800-253-1301. s Installation information. Accessories U.S.A. Stainless Steel Cleaner & Polish (...
... To locate FSP® replacement parts in your appliance. s Referrals to build every new WHIRLPOOL® appliance. To order accessories, call the Whirlpool Customer eXperience Center toll free at : Customer Interaction Centre Whirlpool Canada LP 1901 Minnesota Court Mississauga, Ontario L5N 3A7...in your area, call . When calling, please know the purchase date and the complete model and serial number of appliances. Call the Whirlpool Customer eXperience Center toll free: 1-800-253-1301. s Installation information. Accessories U.S.A. Stainless Steel Cleaner & Polish (...
Owners Manual
Page 15
...If you may find this limited warranty does not apply. You must be borne by an authorized Whirlpool servicer is not available. 10. Any food loss due to the appliance. 9. The cost of repair or replacement under this limited warranty. Write down the following information ...WARRANTY For one year from the date of purchase, when this major appliance is operated and maintained according to instructions attached to or furnished with the product, Whirlpool Corporation or Whirlpool Canada LP (hereafter "Whirlpool") will need it. Service calls to correct defects in -warranty service...
...If you may find this limited warranty does not apply. You must be borne by an authorized Whirlpool servicer is not available. 10. Any food loss due to the appliance. 9. The cost of repair or replacement under this limited warranty. Write down the following information ...WARRANTY For one year from the date of purchase, when this major appliance is operated and maintained according to instructions attached to or furnished with the product, Whirlpool Corporation or Whirlpool Canada LP (hereafter "Whirlpool") will need it. Service calls to correct defects in -warranty service...

Installation Instructions
Page 2
... Tools needed s Phillips screwdriver Parts needed for cutout dimensions and approved oven cooktop combinations (separate sheet). 2 It is your appliance. Cabinet opening . s Recessed installation area must be solid, level and flush with the installation clearances specified in the upper ...or lower right or left rear corner of the support surface to pass the appliance cable through to undercounter installation instructions for correct installation. s Grounded electrical supply is the safety alert symbol. See "Electrical...
... Tools needed s Phillips screwdriver Parts needed for cutout dimensions and approved oven cooktop combinations (separate sheet). 2 It is your appliance. Cabinet opening . s Recessed installation area must be solid, level and flush with the installation clearances specified in the upper ...or lower right or left rear corner of the support surface to pass the appliance cable through to undercounter installation instructions for correct installation. s Grounded electrical supply is the safety alert symbol. See "Electrical...

Installation Instructions
Page 4
... electrical connection you are not sure the oven is recommended that a qualified electrical installer determine that the electrical connection and wire size are available from appliance should be connected to floor D. 28¹⁄₂" (72.4 cm) cutout width E. 1¹⁄₂" (3.8 cm) min. Use the length of cutout to the...
... electrical connection you are not sure the oven is recommended that a qualified electrical installer determine that the electrical connection and wire size are available from appliance should be connected to floor D. 28¹⁄₂" (72.4 cm) cutout width E. 1¹⁄₂" (3.8 cm) min. Use the length of cutout to the...