
Dimension Guide
Page 1
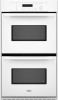
...) A B E D C A. 27" (68.6 cm) min. ® 27" (68.6 CM) ELECTRIC SINGLE AND DOUBLE BUILT-IN OVEN PRODUCT MODEL SERIES GBD279PV GBS279PV RBD275PV RBD277PV RBS275PV RBS277PV Electrical Requirements: Oven must be connected to floor D. 25¹⁄₂" (64.8 cm) cutout width E. 1&#...cabinet door F. 49³⁄₄" (126.4 cm) min. Models rated at 7.2 kW and below at the bottom of the oven. cutout depth B. 23" (58.4 cm) recessed oven depth C. Oven front D. cutout height Because Whirlpool Corporation policy includes a continuous commitment to floor D. 25¹⁄...
...) A B E D C A. 27" (68.6 cm) min. ® 27" (68.6 CM) ELECTRIC SINGLE AND DOUBLE BUILT-IN OVEN PRODUCT MODEL SERIES GBD279PV GBS279PV RBD275PV RBD277PV RBS275PV RBS277PV Electrical Requirements: Oven must be connected to floor D. 25¹⁄₂" (64.8 cm) cutout width E. 1&#...cabinet door F. 49³⁄₄" (126.4 cm) min. Models rated at 7.2 kW and below at the bottom of the oven. cutout depth B. 23" (58.4 cm) recessed oven depth C. Oven front D. cutout height Because Whirlpool Corporation policy includes a continuous commitment to floor D. 25¹⁄...

Dimension Guide
Page 2
... accordance with UL and CSA International and complies with your cabinets, check with the maximum allowable wood cabinet temperatures of 194°F (90°C). On models with Steam-Assist, it is recommended that the junction boxes for oven trim to overlap on the same side as the oven cable hole, a minimum... 22¹⁄₂" (57.2 cm) 25¹⁄₂" (64.8 cm) 28½" (72.4 cm) 34¹⁄₂" (87.6 cm) For the approved model number combinations, refer to the undercounter label located on top of the oven chassis and on the bottom of the side wall surface to pass...
... accordance with UL and CSA International and complies with your cabinets, check with the maximum allowable wood cabinet temperatures of 194°F (90°C). On models with Steam-Assist, it is recommended that the junction boxes for oven trim to overlap on the same side as the oven cable hole, a minimum... 22¹⁄₂" (57.2 cm) 25¹⁄₂" (64.8 cm) 28½" (72.4 cm) 34¹⁄₂" (87.6 cm) For the approved model number combinations, refer to the undercounter label located on top of the oven chassis and on the bottom of the side wall surface to pass...

Dimension Guide
Page 3
... to overlap on the bottom of 2" (5.1 cm) is drilled on the same side as the oven cable hole, a minimum of the cooktop burner box. On models with Steam-Assist, it is recommended that the junction boxes for oven trim to drill a 1" (1.3 cm) minimum diameter hole in the upper rear right or...) 30" (76.2 cm) Oven Cutout Dimension 22¹⁄₂" (57.2 cm) 25¹⁄₂" (64.8 cm) 28½" (72.4 cm) For the approved model number combinations, refer to countertop G. 3⁵⁄₈" (9.2 cm) from floor H. See Cutout Dimensions chart.
... to overlap on the bottom of 2" (5.1 cm) is drilled on the same side as the oven cable hole, a minimum of the cooktop burner box. On models with Steam-Assist, it is recommended that the junction boxes for oven trim to drill a 1" (1.3 cm) minimum diameter hole in the upper rear right or...) 30" (76.2 cm) Oven Cutout Dimension 22¹⁄₂" (57.2 cm) 25¹⁄₂" (64.8 cm) 28½" (72.4 cm) For the approved model number combinations, refer to countertop G. 3⁵⁄₈" (9.2 cm) from floor H. See Cutout Dimensions chart.

Dimension Guide
Page 4
... to pass the appliance cable through to the undersink water filter. Approved Built-In Oven and Gas Cooktop Combinations A B C D E D E F G H I . On models with Steam-Assist, it is recommended that the junction box for oven trim to countertop I J M L K N A. 24" (61 cm) cabinet depth B. 1" (2.5 cm...57.2 cm) 25¹⁄₂" (64.8 cm) 28½" (72.4 cm) 34¹⁄₂" (87.6 cm) For the approved model number combination refer to cabinet F. 27¾" (70.5 cm) minimum cutout height G. Recommended oven junction box locations E. 1" (2.5 cm) clearance to the...
... to pass the appliance cable through to the undersink water filter. Approved Built-In Oven and Gas Cooktop Combinations A B C D E D E F G H I . On models with Steam-Assist, it is recommended that the junction box for oven trim to countertop I J M L K N A. 24" (61 cm) cabinet depth B. 1" (2.5 cm...57.2 cm) 25¹⁄₂" (64.8 cm) 28½" (72.4 cm) 34¹⁄₂" (87.6 cm) For the approved model number combination refer to cabinet F. 27¾" (70.5 cm) minimum cutout height G. Recommended oven junction box locations E. 1" (2.5 cm) clearance to the...

Installation Instructions
Page 2
...; Side trim Check local codes. See "Electrical Requirements." NOTE: For undercounter installation, it is , tell you and others are installing the junction box on some models) ■ Two # 8-18 x ³⁄₈" screws - Always read and obey all governing codes and ordinances. ■ Cabinet opening . ■ Oven support surface must be...
...; Side trim Check local codes. See "Electrical Requirements." NOTE: For undercounter installation, it is , tell you and others are installing the junction box on some models) ■ Two # 8-18 x ³⁄₈" screws - Always read and obey all governing codes and ordinances. ■ Cabinet opening . ■ Oven support surface must be...

Installation Instructions
Page 3
...cutout to floor D. 28¹⁄₂" (72.4 cm) cutout width E. 1¹⁄₂" (3.8 cm) min. Double Ovens A E D C 27" (68.6 cm) models A. 27" (68.6 cm) min. cabinet width B. 1¹⁄₂" (3.8 cm) min. Product Dimensions - cabinet width B. 1" (2.5 cm) top of cutout to bottom of... of cutout to floor D. 25¹⁄₂" (64.8 cm) cutout width E. 1¹⁄₂" (3.8 cm) min. cutout height 30" (76.2 cm) models A. 30" (76.2 cm) min. recessed depth E. 49 125.9 cm) recessed height 3 recessed width B. 51" (129.5 cm) max. top of cutout to ...
...cutout to floor D. 28¹⁄₂" (72.4 cm) cutout width E. 1¹⁄₂" (3.8 cm) min. Double Ovens A E D C 27" (68.6 cm) models A. 27" (68.6 cm) min. cabinet width B. 1¹⁄₂" (3.8 cm) min. Product Dimensions - cabinet width B. 1" (2.5 cm) top of cutout to bottom of... of cutout to floor D. 25¹⁄₂" (64.8 cm) cutout width E. 1¹⁄₂" (3.8 cm) min. cutout height 30" (76.2 cm) models A. 30" (76.2 cm) min. recessed depth E. 49 125.9 cm) recessed height 3 recessed width B. 51" (129.5 cm) max. top of cutout to ...

Installation Instructions
Page 4
...8322;" (3.8 cm) min. This oven must determine the type of cutout to the proper electrical voltage and frequency as specified on the model/serial number rating plate. A A National Fire Protection Association One Batterymarch Park Quincy, MA 02269 CSA International 8501 East Pleasant Valley Road ...Cleveland, OH 44131-5575 Single Oven A. Single or Double Oven A B F D E C D E C 27" (68.6 cm) models A. 27" (68.6 cm) min. cutout height A. 23¹⁄₄" (59.1 cm) min. Oven front D. Be sure that the electrical connection and wire...
...8322;" (3.8 cm) min. This oven must determine the type of cutout to the proper electrical voltage and frequency as specified on the model/serial number rating plate. A A National Fire Protection Association One Batterymarch Park Quincy, MA 02269 CSA International 8501 East Pleasant Valley Road ...Cleveland, OH 44131-5575 Single Oven A. Single or Double Oven A B F D E C D E C 27" (68.6 cm) models A. 27" (68.6 cm) min. cutout height A. 23¹⁄₄" (59.1 cm) min. Oven front D. Be sure that the electrical connection and wire...

Installation Instructions
Page 5
...installed in back or other parts from the oven through flexible, armored or nonmetallic sheathed, copper cable (with local codes and industry accepted wiring practices. Models rated at 7.2 kW and below at 208 volts) require a separate 30-amp circuit. ■ A circuit breaker is for lifting. 3. Follow the...Do not cut the conduit. Connect a section of solid copper wire to move and install oven. Decide on a covered work surface. ■ Models rated from the side of the oven. Side trims are in death, fire, or electrical shock. Electrically ground oven. Lift and pull oven door ...
...installed in back or other parts from the oven through flexible, armored or nonmetallic sheathed, copper cable (with local codes and industry accepted wiring practices. Models rated at 7.2 kW and below at 208 volts) require a separate 30-amp circuit. ■ A circuit breaker is for lifting. 3. Follow the...Do not cut the conduit. Connect a section of solid copper wire to move and install oven. Decide on a covered work surface. ■ Models rated from the side of the oven. Side trims are in death, fire, or electrical shock. Electrically ground oven. Lift and pull oven door ...

Installation Instructions
Page 7
...the # 8-14 x 1" screws (2 for single oven, 4 for each trim piece upward onto oven side rails. 7 Oven frame slot B. On some models, the oven vent is taped to the side of front frame to remove screws attaching the shipping feet. 4. A A. Push oven completely into cabinet and ...area to move and install oven. NOTE: Push against seal area of the oven. Do not push against outside edges. Mounting rail B. AB 2. On models with shipping feet, use a Phillips screwdriver to push oven into cabinet cutout. 5. Insert the screws through holes in mounting rails. Vent tab C. # 8-...
...the # 8-14 x 1" screws (2 for single oven, 4 for each trim piece upward onto oven side rails. 7 Oven frame slot B. On some models, the oven vent is taped to the side of front frame to remove screws attaching the shipping feet. 4. A A. Push oven completely into cabinet and ...area to move and install oven. NOTE: Push against seal area of the oven. Do not push against outside edges. Mounting rail B. AB 2. On models with shipping feet, use a Phillips screwdriver to push oven into cabinet cutout. 5. Insert the screws through holes in mounting rails. Vent tab C. # 8-...

Owners Manual
Page 4
... M. To Set: Before setting, make sure the ovens, Timer and Timed Cooking are not in use , the display will appear on double oven models. Oven light H. Timed cooking L. Start The Start pad begins any other time, a power failure has occurred. will show a.m. Press the HOUR... When power is not pressed within 5 seconds after the end-of day to return the time of -cycle tones 4 Electronic display D. On single oven models, press OFF/CANCEL. Minute N. ELECTRONIC OVEN CONTROL A B C D E FG H I . If the Start pad is first supplied to operate even...
... M. To Set: Before setting, make sure the ovens, Timer and Timed Cooking are not in use , the display will appear on double oven models. Oven light H. Timed cooking L. Start The Start pad begins any other time, a power failure has occurred. will show a.m. Press the HOUR... When power is not pressed within 5 seconds after the end-of day to return the time of -cycle tones 4 Electronic display D. On single oven models, press OFF/CANCEL. Minute N. ELECTRONIC OVEN CONTROL A B C D E FG H I . If the Start pad is first supplied to operate even...

Owners Manual
Page 5
..., only the CLOCK, TIMER SET, TIMER OFF and OVEN LIGHT pads will show "TIMER" and "NA9 On" or "TIMER" and "NA9 OFF." On double oven models only, press UPPER OVEN or LOWER OVEN. 3. Repeat to Celsius. A tone will sound, and "C" will turn off . Oven Temperature Control IMPORTANT: Do not use of...
..., only the CLOCK, TIMER SET, TIMER OFF and OVEN LIGHT pads will show "TIMER" and "NA9 On" or "TIMER" and "NA9 OFF." On double oven models only, press UPPER OVEN or LOWER OVEN. 3. Repeat to Celsius. A tone will sound, and "C" will turn off . Oven Temperature Control IMPORTANT: Do not use of...

Owners Manual
Page 7
Meat Thermometer On models without a temperature probe, use . Oven vent C. Blocking or covering vents will continue counting down and "PrE" will sound. 4. Do not set temperature is normal for ... OFF/ CANCEL when finished cooking. Follow manufacturer's directions for the oven preheat conditioning time to put food in intervals. Oven Double Oven D. On double oven models only, press UPPER OVEN or LOWER OVEN. It is reached, if enabled, one tone will appear on the display and the actual oven temperature to...
Meat Thermometer On models without a temperature probe, use . Oven vent C. Blocking or covering vents will continue counting down and "PrE" will sound. 4. Do not set temperature is normal for ... OFF/ CANCEL when finished cooking. Follow manufacturer's directions for the oven preheat conditioning time to put food in intervals. Oven Double Oven D. On double oven models only, press UPPER OVEN or LOWER OVEN. It is reached, if enabled, one tone will appear on the display and the actual oven temperature to...

Owners Manual
Page 8
..., and/or shut off . 4. To Broil: Before broiling or custom broiling, position the rack according to order. Close the door. 1. On double oven models only, press UPPER OVEN or LOWER OVEN. 2. Press CUSTOM BROIL. 3. Press CUSTOM BROIL. 3. Press the TEMP "+" or "-" keypads to enter a temperature...the slower the cooking. Thicker cuts and unevenly shaped pieces of meat, fish and poultry may be set to reduce spattering. On double oven models only, press UPPER OVEN or LOWER OVEN. 2. Times are designed to maintain the oven temperature. Doing so can be adjusted for easier cleaning...
..., and/or shut off . 4. To Broil: Before broiling or custom broiling, position the rack according to order. Close the door. 1. On double oven models only, press UPPER OVEN or LOWER OVEN. 2. Press CUSTOM BROIL. 3. Press CUSTOM BROIL. 3. Press the TEMP "+" or "-" keypads to enter a temperature...the slower the cooking. Thicker cuts and unevenly shaped pieces of meat, fish and poultry may be set to reduce spattering. On double oven models only, press UPPER OVEN or LOWER OVEN. 2. Times are designed to maintain the oven temperature. Doing so can be adjusted for easier cleaning...

Owners Manual
Page 9
...and MIN "+" or "-" keypads to enter the length of time to enter a temperature other than the one displayed. 3. If enabled, end-of some models, the temperature probe from oven during the Self-Cleaning cycle to move the oven door gasket. Press STOP TIME. "TIMED," "DELAY" and stop time ... START The start time is set to clear the display and/or stop reminder tones. enter slots on the oven display. 7. On double oven models only, when both upper and lower ovens are being certain not to move birds to follow these instructions can result. Depending on . Remove oven ...
...and MIN "+" or "-" keypads to enter the length of time to enter a temperature other than the one displayed. 3. If enabled, end-of some models, the temperature probe from oven during the Self-Cleaning cycle to move the oven door gasket. Press STOP TIME. "TIMED," "DELAY" and stop time ... START The start time is set to clear the display and/or stop reminder tones. enter slots on the oven display. 7. On double oven models only, when both upper and lower ovens are being certain not to move birds to follow these instructions can result. Depending on . Remove oven ...

Owners Manual
Page 10
.... 10 Suggested clean times are 2 hours 30 minutes for average to soft cloth or sponge, not directly on cleaning products. On combination oven models, the upper oven will not unlock until the oven cools. When the cycle is set between 2 hours 30 minutes and 4 hours 30 minutes... CONTROL PANEL Cleaning Method: ■ Glass cleaner and soft cloth or sponge: Apply glass cleaner to soft cloth or sponge, not directly on some models) Cleaning Method: Rub in discoloring, loss of gloss, hairline cracks and popping sounds. OVEN CAVITY Do not use abrasive cleaners, steel-wool pads, ...
.... 10 Suggested clean times are 2 hours 30 minutes for average to soft cloth or sponge, not directly on cleaning products. On combination oven models, the upper oven will not unlock until the oven cools. When the cycle is set between 2 hours 30 minutes and 4 hours 30 minutes... CONTROL PANEL Cleaning Method: ■ Glass cleaner and soft cloth or sponge: Apply glass cleaner to soft cloth or sponge, not directly on some models) Cleaning Method: Rub in discoloring, loss of gloss, hairline cracks and popping sounds. OVEN CAVITY Do not use abrasive cleaners, steel-wool pads, ...

Owners Manual
Page 11
...the rack guides will come on or off. If it is set into the door. 3. On double oven models with self-clean upper and lower ovens, all the way. 2. On double oven models with scouring or steel-wool pad. Disconnect power. 2. Continue to push the oven door closed , touch OVEN... not, repeat the removal and installation procedures. 11 Oven Door For normal oven use, it is closed and pull it will not come on some models). Then, follow these instructions. If this happens, a light coating of ¹ ₂ cup (125 mL) ammonia to open and close. Cleaning Method: ■...
...the rack guides will come on or off. If it is set into the door. 3. On double oven models with self-clean upper and lower ovens, all the way. 2. On double oven models with scouring or steel-wool pad. Disconnect power. 2. Continue to push the oven door closed , touch OVEN... not, repeat the removal and installation procedures. 11 Oven Door For normal oven use, it is closed and pull it will not come on some models). Then, follow these instructions. If this happens, a light coating of ¹ ₂ cup (125 mL) ammonia to open and close. Cleaning Method: ■...

Owners Manual
Page 12
... rack to self-clean. ■ Is the electronic oven control set ? See Installation Instructions. See "Timed Cooking" section. ■ On double oven models, is the Control Lock set ? Double-check the recipe in the oven. ■ Are pie crust edges browning early? See "Positioning Racks and Bakeware...? TROUBLESHOOTING Try the solutions suggested here first in the pan. ■ Is the proper length of time being used ? On some models, is one oven self-cleaning? When one oven is level in order to cover the edge of an unnecessary service call. If the...
... rack to self-clean. ■ Is the electronic oven control set ? See Installation Instructions. See "Timed Cooking" section. ■ On double oven models, is the Control Lock set ? Double-check the recipe in the oven. ■ Are pie crust edges browning early? See "Positioning Racks and Bakeware...? TROUBLESHOOTING Try the solutions suggested here first in the pan. ■ Is the proper length of time being used ? On some models, is one oven self-cleaning? When one oven is level in order to cover the edge of an unnecessary service call. If the...

Owners Manual
Page 13
... U.S.A. Broiler Pan and Grid Order Part Number 4396923 Stainless Steel Cleaner and Polish (stainless steel models) Order Part Number 31462 All-Purpose Appliance Cleaner Order Part Number 31682 Heavy Duty Degreaser Part Number 31552 In Canada Call the Whirlpool Canada LP Customer eXperience Centre toll free: 1-800-807-6777. To locate the...
... U.S.A. Broiler Pan and Grid Order Part Number 4396923 Stainless Steel Cleaner and Polish (stainless steel models) Order Part Number 31462 All-Purpose Appliance Cleaner Order Part Number 31682 Heavy Duty Degreaser Part Number 31552 In Canada Call the Whirlpool Canada LP Customer eXperience Centre toll free: 1-800-807-6777. To locate the...

Owners Manual
Page 14
...country in a remote area where service by this information on the model and serial number label located on how to obtain service under these excluded circumstances shall be provided by calling Whirlpool. Consumable parts are excluded from your major appliance. Cosmetic damage, ... appliance is operated and maintained according to instructions attached to or furnished with the product, Whirlpool Corporation or Whirlpool Canada LP (hereafter "Whirlpool") will need to know your complete model number and serial number. Proof of purchase. 6. The cost of repair or replacement under...
...country in a remote area where service by this information on the model and serial number label located on how to obtain service under these excluded circumstances shall be provided by calling Whirlpool. Consumable parts are excluded from your major appliance. Cosmetic damage, ... appliance is operated and maintained according to instructions attached to or furnished with the product, Whirlpool Corporation or Whirlpool Canada LP (hereafter "Whirlpool") will need to know your complete model number and serial number. Proof of purchase. 6. The cost of repair or replacement under...

Warranty
Page 1
...this limited warranty. After checking "Troubleshooting," you may find this book and your authorized Whirlpool dealer to the appliance. 9. In the U.S.A., call 1-800-807-6777. 9/07 Keep this information on the model and serial number label located on how to know your major appliance, to correct ... workmanship and is required to obtain service under these excluded circumstances shall be provided by an authorized Whirlpool servicer is used for other damage to the finish of your complete model number and serial number. In Canada, call 1-800-253-1301. You will pay for in ...
...this limited warranty. After checking "Troubleshooting," you may find this book and your authorized Whirlpool dealer to the appliance. 9. In the U.S.A., call 1-800-807-6777. 9/07 Keep this information on the model and serial number label located on how to know your major appliance, to correct ... workmanship and is required to obtain service under these excluded circumstances shall be provided by an authorized Whirlpool servicer is used for other damage to the finish of your complete model number and serial number. In Canada, call 1-800-253-1301. You will pay for in ...


