User Manual
Page 1
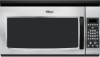
www.whirlpool.com Table of Contents 2 W10110881 Model MH1160XS or visit our website at... ® MICROWAVE HOOD COMBINATION Use & Care Guide For questions about features, operation/performance, parts, accessories or service, call: 1-800-253-1301.
www.whirlpool.com Table of Contents 2 W10110881 Model MH1160XS or visit our website at... ® MICROWAVE HOOD COMBINATION Use & Care Guide For questions about features, operation/performance, parts, accessories or service, call: 1-800-253-1301.

User Manual
Page 2
... Clock 6 Tones 6 Timer 6 Control Lock 6 Vent Fan 6 Cooktop Light 7 Demo Mode 7 MICROWAVE OVEN USE 7 Food Characteristics 7 Cooking Guidelines 7 Cookware and Dinnerware 8 Aluminum Foil and Metal 8 Microwave Cooking Power 8 Manual Cooking 9 Cooking in Stages (or steps 9 Popcorn 9 Baked Potato 10 Pizza ...10 Doneness 10 Preset Cooking 10 Reheating 11 Defrosting 11 MICROWAVE OVEN CARE 12 General Cleaning 12 Replacing Filters 12 Replacing Cooktop Light 13 Replacing Microwave Oven Light 13 TROUBLESHOOTING 14 ASSISTANCE OR SERVICE 15 Replacement Parts 15 ...
... Clock 6 Tones 6 Timer 6 Control Lock 6 Vent Fan 6 Cooktop Light 7 Demo Mode 7 MICROWAVE OVEN USE 7 Food Characteristics 7 Cooking Guidelines 7 Cookware and Dinnerware 8 Aluminum Foil and Metal 8 Microwave Cooking Power 8 Manual Cooking 9 Cooking in Stages (or steps 9 Popcorn 9 Baked Potato 10 Pizza ...10 Doneness 10 Preset Cooking 10 Reheating 11 Defrosting 11 MICROWAVE OVEN CARE 12 General Cleaning 12 Replacing Filters 12 Replacing Cooktop Light 13 Replacing Microwave Oven Light 13 TROUBLESHOOTING 14 ASSISTANCE OR SERVICE 15 Replacement Parts 15 ...

User Manual
Page 3
...instructions before and halfway through heating it is necessary when used by qualified service personnel. Do not overcook food. Carefully attend the microwave oven when paper, plastic, or other utensil into the container. ■ Oversized foods or oversized metal utensils should be grounded.... touch electrical parts involving a risk of electric shock. After heating, allow the container to persons: - WARNING You can be boiling. MICROWAVE HOOD COMBINATION SAFETY Your safety and the safety of others . These words mean: DANGER You can be serviced only by children. ■...
...instructions before and halfway through heating it is necessary when used by qualified service personnel. Do not overcook food. Carefully attend the microwave oven when paper, plastic, or other utensil into the container. ■ Oversized foods or oversized metal utensils should be grounded.... touch electrical parts involving a risk of electric shock. After heating, allow the container to persons: - WARNING You can be boiling. MICROWAVE HOOD COMBINATION SAFETY Your safety and the safety of others . These words mean: DANGER You can be serviced only by children. ■...

User Manual
Page 4
...4 SAVE THESE INSTRUCTIONS This device complies with a fuse or circuit breaker. SAVE THESE INSTRUCTIONS PRECAUTIONS TO AVOID POSSIBLE EXPOSURE TO EXCESSIVE MICROWAVE ENERGY (a) Do not attempt to operate this oven with the door open since open-door operation can result in harmful exposure to .... or 20-amp electrical supply with Part 18 of electric shock. The plug must be grounded. Observe all cord connected appliances: The microwave oven must be adjusted or repaired by providing an escape wire for example, near a kitchen sink, in operation. ■ When flambeing...
...4 SAVE THESE INSTRUCTIONS This device complies with a fuse or circuit breaker. SAVE THESE INSTRUCTIONS PRECAUTIONS TO AVOID POSSIBLE EXPOSURE TO EXCESSIVE MICROWAVE ENERGY (a) Do not attempt to operate this oven with the door open since open-door operation can result in harmful exposure to .... or 20-amp electrical supply with Part 18 of electric shock. The plug must be grounded. Observe all cord connected appliances: The microwave oven must be adjusted or repaired by providing an escape wire for example, near a kitchen sink, in operation. ■ When flambeing...

User Manual
Page 5
... tones sound. 2. Touch START to stop the blinking. PARTS AND FEATURES This manual may differ slightly from the hub. 2. Metal shielded window G. Microwave inlet cover K. Touch and hold CLOCK for FAST. 3. Vent grille B. Model and serial number plate C. Turntable B. See "Assistance or Service" to the... the hub. Retry your particular model may cover several different models. The model you have some or all of the parts. When the microwave oven is not in the display at any of the features shown here. If the ":" blinks in use , the display shows cooking ...
... tones sound. 2. Touch START to stop the blinking. PARTS AND FEATURES This manual may differ slightly from the hub. 2. Metal shielded window G. Microwave inlet cover K. Touch and hold CLOCK for FAST. 3. Vent grille B. Model and serial number plate C. Turntable B. See "Assistance or Service" to the... the hub. Retry your particular model may cover several different models. The model you have some or all of the parts. When the microwave oven is not in the display at any of the features shown here. If the ":" blinks in use , the display shows cooking ...

User Manual
Page 6
..., up to 90 minutes, and counts down the control panel pads to avoid unintended use , touch TIMER SET/OFF. or p.m. To Set: The microwave oven and timer must be canceled. NOTE: The Timer does not start at high speed. While the Timer is not touched within 5 seconds after touching... until 2 tones sound and a padlock icon appears in the display. The vent fan is touched during a manual cook cycle will start or stop the microwave oven. Start The START pad begins any other control pad is not touched within 2 minutes after touching a pad, the display will appear in the display...
..., up to 90 minutes, and counts down the control panel pads to avoid unintended use , touch TIMER SET/OFF. or p.m. To Set: The microwave oven and timer must be canceled. NOTE: The Timer does not start at high speed. While the Timer is not touched within 5 seconds after touching... until 2 tones sound and a padlock icon appears in the display. The vent fan is touched during a manual cook cycle will start or stop the microwave oven. Start The START pad begins any other control pad is not touched within 2 minutes after touching a pad, the display will appear in the display...

User Manual
Page 7
..., dense foods, such as cake. Use the lid supplied with cookware. Stirring and Turning Stirring and turning redistribute heat evenly to use the microwave oven. Piercing Before heating, use . Cooktop Light The cooktop light has 3 settings: high, low and off . When set on the volume...Service" section to allow a standing time. If cooking several places to reorder. ■ Baby bottles and baby food jars should not be heated in microwave oven. ■ Clothes, flowers, fruit, herbs, wood, gourds, paper, including brown paper bags and newspaper, should be dried in the display. ...
..., dense foods, such as cake. Use the lid supplied with cookware. Stirring and Turning Stirring and turning redistribute heat evenly to use the microwave oven. Piercing Before heating, use . Cooktop Light The cooktop light has 3 settings: high, low and off . When set on the volume...Service" section to allow a standing time. If cooking several places to reorder. ■ Baby bottles and baby food jars should not be heated in microwave oven. ■ Clothes, flowers, fruit, herbs, wood, gourds, paper, including brown paper bags and newspaper, should be dried in the display. ...

User Manual
Page 8
... Melamine Follow manufacturer's recommendations. Pottery and Clay Follow manufacturer's recommendations. Aluminum foil and some models), aluminum foil for microwave oven use oven mitts or pot holders when removing dishes from the food. Heating cream soups. 80% Heating rice,... Containers Use those approved by the manufacturer for shielding, and approved meat thermometers may become hot from heat transferred from the microwave oven. Straw, Wicker, Wooden Containers Do not use . Simmering stews. 40% Melting chocolate. Silicone Bakeware Follow manufacturer's ...
... Melamine Follow manufacturer's recommendations. Pottery and Clay Follow manufacturer's recommendations. Aluminum foil and some models), aluminum foil for microwave oven use oven mitts or pot holders when removing dishes from the food. Heating cream soups. 80% Heating rice,... Containers Use those approved by the manufacturer for shielding, and approved meat thermometers may become hot from heat transferred from the microwave oven. Straw, Wicker, Wooden Containers Do not use . Simmering stews. 40% Melting chocolate. Silicone Bakeware Follow manufacturer's ...

User Manual
Page 9
...will sound, followed by reminder tones. 6. If cooking with 100% power, skip Step 3. 3. To Change Cook Time: Touch COOK TIME. See "Microwave Cooking Power" chart. 4. The cook time and cooking power of popcorn for the countdown to scroll through the bag size selections. 5. To Change Cook ... the door. 2. Place popcorn bag on the package. When the popcorn cycle ends, "END" will appear in Stages (or steps) The microwave oven can be changed after touching START without interrupting cooking. Manual Cooking To Use: 1. Touch COOK POWER, then enter the desired power level ...
...will sound, followed by reminder tones. 6. If cooking with 100% power, skip Step 3. 3. To Change Cook Time: Touch COOK TIME. See "Microwave Cooking Power" chart. 4. The cook time and cooking power of popcorn for the countdown to scroll through the bag size selections. 5. To Change Cook ... the door. 2. Place popcorn bag on the package. When the popcorn cycle ends, "END" will appear in Stages (or steps) The microwave oven can be changed after touching START without interrupting cooking. Manual Cooking To Use: 1. Touch COOK POWER, then enter the desired power level ...

User Manual
Page 10
... and cooking power have been preset for 5 minutes after baking. Cover with loose-fitting lid. Place rice and liquid in microwave-safe container. Place in microwave-safe container. Doneness may be adjusted at this time by reminder tones. 5. To Bake Potatoes: 1. Fresh 4 Vegetables 1-4...potatoes on 3 sides. Touch START. Doneness may be adjusted at least 1" (2.5 cm) apart. ■ Let potato(es) stand for certain microwavable foods. When the cycle ends, "END" will count down the cook time. Loosen cover on the turntable around the edges, at this time...
... and cooking power have been preset for 5 minutes after baking. Cover with loose-fitting lid. Place rice and liquid in microwave-safe container. Place in microwave-safe container. Doneness may be adjusted at this time by reminder tones. 5. To Bake Potatoes: 1. Fresh 4 Vegetables 1-4...potatoes on 3 sides. Touch START. Doneness may be adjusted at least 1" (2.5 cm) apart. ■ Let potato(es) stand for certain microwavable foods. When the cycle ends, "END" will count down the cook time. Loosen cover on the turntable around the edges, at this time...

User Manual
Page 11
... patties. Doneness may be adjusted at this time by touching COOK TIME. 5. Soup/Sauce 4 1-4 cups (250 mL-1 L)/ Place in microwave-safe baking dish. See "Microwave Cooking Power" chart. See "Aluminum Foil and Metal" first. The Auto Defrost system has 3 categories: Meat, Poultry and Fish. To Use.... Stir and let stand 2-3 minutes after reheating. Use the following chart as a guide. To Defrost Manually: Follow directions in microwave-safe baking dish, chicken breast side up. Reheating Times and cooking power have been preset for more than 20 minutes and frozen ...
... patties. Doneness may be adjusted at this time by touching COOK TIME. 5. Soup/Sauce 4 1-4 cups (250 mL-1 L)/ Place in microwave-safe baking dish. See "Microwave Cooking Power" chart. See "Aluminum Foil and Metal" first. The Auto Defrost system has 3 categories: Meat, Poultry and Fish. To Use.... Stir and let stand 2-3 minutes after reheating. Use the following chart as a guide. To Defrost Manually: Follow directions in microwave-safe baking dish, chicken breast side up. Reheating Times and cooking power have been preset for more than 20 minutes and frozen ...

User Manual
Page 12
.... The charcoal filters cannot be washed and should be replaced every 6 to 12 months. See "General Cleaning" for 2 to 5 minutes in microwave oven. NOTE: Some discoloration of grain. ■ Stainless Steel Cleaner & Polish (not included): See "Assistance or Service" section to order. ...all -purpose cleaner: Rinse with clean water and dry with soft, lint-free cloth. ■ Vinegar for 2 to 5 minutes in microwave oven. This is cool. TURNTABLE Replace turntable immediately after cleaning them in the dishwasher. Average soil ■ Mild, nonabrasive soaps and detergents...
.... The charcoal filters cannot be washed and should be replaced every 6 to 12 months. See "General Cleaning" for 2 to 5 minutes in microwave oven. NOTE: Some discoloration of grain. ■ Stainless Steel Cleaner & Polish (not included): See "Assistance or Service" section to order. ...all -purpose cleaner: Rinse with clean water and dry with soft, lint-free cloth. ■ Vinegar for 2 to 5 minutes in microwave oven. This is cool. TURNTABLE Replace turntable immediately after cleaning them in the dishwasher. Average soil ■ Mild, nonabrasive soaps and detergents...

User Manual
Page 13
...and down , then lift to remove. 4. A A A. Plug in microwave oven or reconnect power. 13 Plug in microwave oven or reconnect power. Reattach vent grille. Mounting screw 3. Replacing Microwave Oven Light The microwave oven light is operating. See "Assistance or Service" section to reorder. ...Top louver C. Mounting screws 2. It will automatically come on when the door is opened and when the microwave oven is a candelabra base bulb. To Replace: 1. Unplug microwave oven or disconnect power. 2. A. Mounting screws 3. Lift up the bulb cover. 4. Replace vent ...
...and down , then lift to remove. 4. A A A. Plug in microwave oven or reconnect power. 13 Plug in microwave oven or reconnect power. Reattach vent grille. Mounting screw 3. Replacing Microwave Oven Light The microwave oven light is operating. See "Assistance or Service" section to reorder. ...Top louver C. Mounting screws 2. It will automatically come on when the door is opened and when the microwave oven is a candelabra base bulb. To Replace: 1. Unplug microwave oven or disconnect power. 2. A. Mounting screws 3. Lift up the bulb cover. 4. Replace vent ...

User Manual
Page 14
..."Turntable" section. ■ Is the turntable properly in use ? Remove and clean turntable support and rollers. Do not operate the microwave oven without turntable and turntable support working properly? Turntable alternates rotation directions ■ This is normal and occurs when the power supply ... not sounding ■ Are tones turned off . See "Tones" section. Nothing will not operate ■ Is the door completely closed? Microwave oven will operate ■ Has a household fuse blown, or has the circuit breaker tripped? Display shows messages ■ Is the display showing...
..."Turntable" section. ■ Is the turntable properly in use ? Remove and clean turntable support and rollers. Do not operate the microwave oven without turntable and turntable support working properly? Turntable alternates rotation directions ■ This is normal and occurs when the power supply ... not sounding ■ Are tones turned off . See "Tones" section. Nothing will not operate ■ Is the door completely closed? Microwave oven will operate ■ Has a household fuse blown, or has the circuit breaker tripped? Display shows messages ■ Is the display showing...

User Manual
Page 15
... and work right because they are made with the same precision used to order replacement parts, we recommend that specified in "Microwave Hood Combination Safety?" In the U.S.A. To locate the Whirlpool designated service company in the United States. Replacement Parts Turntable Part Number 4393799 Turntable Support and Rollers Part Number 8206227 Turntable...
... and work right because they are made with the same precision used to order replacement parts, we recommend that specified in "Microwave Hood Combination Safety?" In the U.S.A. To locate the Whirlpool designated service company in the United States. Replacement Parts Turntable Part Number 4393799 Turntable Support and Rollers Part Number 8206227 Turntable...


