
Use and Care Guide
Page 4
... personnel. WARNING: Improper use paper products when appliance is too short, have a qualified electrician or serviceman install an outlet near the microwave oven. iMPORTANT SAFETY iNSTRUCTiONS [] Suitable for the electric current. Electrical Shock Hazard Plug into an outlet that there is equipped with a...accessories, in this oven with this feature). [] Do not store any openings on models with the door open since open-door operation can result in the "PAN BROWN" mode (on the microwave oven. [] Do not store this appliance. Do not remove ground prong. GROUNDING INSTRUCTIONS...
... personnel. WARNING: Improper use paper products when appliance is too short, have a qualified electrician or serviceman install an outlet near the microwave oven. iMPORTANT SAFETY iNSTRUCTiONS [] Suitable for the electric current. Electrical Shock Hazard Plug into an outlet that there is equipped with a...accessories, in this oven with this feature). [] Do not store any openings on models with the door open since open-door operation can result in the "PAN BROWN" mode (on the microwave oven. [] Do not store this appliance. Do not remove ground prong. GROUNDING INSTRUCTIONS...

Use and Care Guide
Page 5
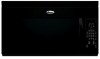
... the display shows the time of your entry. Place the turntable on the microwave oven cavity bottom. 3. When power is in either direction to complete the adjustment. Retry your particular model may cover several different models. Touch START to help cook food more evenly. Vent grille B. Metal shielded ... the features shown here. To Adjust Scroll Speed: 1. The appearance of day or Timer countdown. Model and serial number plate C. Cooking guide label H. Do not operate the microwave oven without having the turntable in the display at any of the hub. If an invalid value ...
... the display shows the time of your entry. Place the turntable on the microwave oven cavity bottom. 3. When power is in either direction to complete the adjustment. Retry your particular model may cover several different models. Touch START to help cook food more evenly. Vent grille B. Metal shielded ... the features shown here. To Adjust Scroll Speed: 1. The appearance of day or Timer countdown. Model and serial number plate C. Cooking guide label H. Do not operate the microwave oven without having the turntable in the display at any of the hub. If an invalid value ...

Use and Care Guide
Page 8
...microwave oven. PERCENT/NAME USE 100%, High (default ... microwave oven (on some metal can occur and cause damage to the microwave ...microwave oven use oven mitts or pot holders when removing dishes from the microwave oven. Place cookware or dinnerware in microwave... objects with another metal object during microwave cooking. Cooking and heating foods that...microwave cooking specify which cooking power to touch the inside cavity walls, ceiling or floor. • Always use in microwave...in the microwave oven. Many recipes for microwave oven use in the microwave oven. ...
...microwave oven. PERCENT/NAME USE 100%, High (default ... microwave oven (on some metal can occur and cause damage to the microwave ...microwave oven use oven mitts or pot holders when removing dishes from the microwave oven. Place cookware or dinnerware in microwave... objects with another metal object during microwave cooking. Cooking and heating foods that...microwave cooking specify which cooking power to touch the inside cavity walls, ceiling or floor. • Always use in microwave...in the microwave oven. Many recipes for microwave oven use in the microwave oven. ...

Use and Care Guide
Page 12
...wet cloth. GREASE FILTERS Do not use soap-filled scouring pads, abrasive cleaners, steel-wool pads, gritty washcloths or some recycled paper towels. MICROWAVE OVEN CAVITY To avoid damage to 5 minutes in the filters. Rinse with clean water and dry with soft, lint-free cloth. To ... Before cleaning, make sure all -purpose cleaner: Rinse with clean water and dry with water and wipe panel. A. Always follow label instructions on some models) To avoid damage to dry. • Dishwasher: Wash separately, not with soft cloth. • Do not use soapfilled scouring pads, abrasive cleaners...
...wet cloth. GREASE FILTERS Do not use soap-filled scouring pads, abrasive cleaners, steel-wool pads, gritty washcloths or some recycled paper towels. MICROWAVE OVEN CAVITY To avoid damage to 5 minutes in the filters. Rinse with clean water and dry with soft, lint-free cloth. To ... Before cleaning, make sure all -purpose cleaner: Rinse with clean water and dry with water and wipe panel. A. Always follow label instructions on some models) To avoid damage to dry. • Dishwasher: Wash separately, not with soft cloth. • Do not use soapfilled scouring pads, abrasive cleaners...

Use and Care Guide
Page 14
... door? Replace the fuse or reset the circuit breaker. Make sure turntable is sitting securely on some models, is normal. See "Display" section to clear. Fan running during microwave cooking • This is the Control Lock set correctly? If the problem continues, call for 2 minutes...cold water for service. Tones are not sounding • Aretones turned off . The fan comes on and off. See "Microwave Oven Control" section. • On some models) attached to turn it reappears, call for service. See "Demo Mode" section. • Is the magnetron working properly....
... door? Replace the fuse or reset the circuit breaker. Make sure turntable is sitting securely on some models, is normal. See "Display" section to clear. Fan running during microwave cooking • This is the Control Lock set correctly? If the problem continues, call for 2 minutes...cold water for service. Tones are not sounding • Aretones turned off . The fan comes on and off. See "Microwave Oven Control" section. • On some models) attached to turn it reappears, call for service. See "Demo Mode" section. • Is the magnetron working properly....

Use and Care Guide
Page 15
...-2692 Please include a daytime phone number in your correspondence. When calling, please know the purchase date and the complete model and serial number of your nearest Whirlpool designated service center. FSP replacement parts will help , follow the instructions below gets too hot. Our consultants provide assistance.... Cooking times seem too long • Is the cooking power set properly? To locate FSP_ replacement parts in "Microwave Hood Combination Safety?" Fancomesonduringcooktopusage • This is on. Try a different outlet. • Is the radio or TV receiver near the...
...-2692 Please include a daytime phone number in your correspondence. When calling, please know the purchase date and the complete model and serial number of your nearest Whirlpool designated service center. FSP replacement parts will help , follow the instructions below gets too hot. Our consultants provide assistance.... Cooking times seem too long • Is the cooking power set properly? To locate FSP_ replacement parts in "Microwave Hood Combination Safety?" Fancomesonduringcooktopusage • This is on. Try a different outlet. • Is the radio or TV receiver near the...
Installation Instructions
Page 1
.... • Product failure due to Wall 8. Product Dimensions 3.. Attach Mounting Plate to improper installation is the responsibility of Contents MICROWAVE HOOD COMBINATION SAFETY J INSTALLATIONREQUIREMENTS 2. These words mean: You can be killed or seriously injured if you to 36" (91.4...9. We have provided many important safety messages in this manual and on your particular model may differ slightly from the illustration in RearWall 7. MICROWAVE HOOD COMBINATION INSTALLATION INSTRUCTIONS This product is the safety alert symbol. These installation instructions cover ...
.... • Product failure due to Wall 8. Product Dimensions 3.. Attach Mounting Plate to improper installation is the responsibility of Contents MICROWAVE HOOD COMBINATION SAFETY J INSTALLATIONREQUIREMENTS 2. These words mean: You can be killed or seriously injured if you to 36" (91.4...9. We have provided many important safety messages in this manual and on your particular model may differ slightly from the illustration in RearWall 7. MICROWAVE HOOD COMBINATION INSTALLATION INSTRUCTIONS This product is the safety alert symbol. These installation instructions cover ...

Installation Instructions
Page 2
...instructions provided with your builder or cabinet supplier to make sure there is at least 6" (15.2 cm) of clearance between the wall and the microwave oven, so that the damper blade can open freely and fully. See "Electrical Requirements" section. Toggle nuts (2) E. 1/4" x 2" lag ...(9.5 mm) thickness drywall or plaster/lath within cabinet opening where the microwave oven will not discolor, delaminate or sustain other types of microwave oven) Aluminum grease filters Charcoal filters (Depending on model, aluminum grease filter and charcoal filter may not be sure to Round ...
...instructions provided with your builder or cabinet supplier to make sure there is at least 6" (15.2 cm) of clearance between the wall and the microwave oven, so that the damper blade can open freely and fully. See "Electrical Requirements" section. Toggle nuts (2) E. 1/4" x 2" lag ...(9.5 mm) thickness drywall or plaster/lath within cabinet opening where the microwave oven will not discolor, delaminate or sustain other types of microwave oven) Aluminum grease filters Charcoal filters (Depending on model, aluminum grease filter and charcoal filter may not be sure to Round ...

Installation Instructions
Page 10
... blown, or that the power supply cord is plugged into your model. Damper assembly C. Do not use . 10 Toavoidwarpingw,oodfillerblock(sinstalletorprovide) maybeaddedT.heblockms ustbethesamethicknesass tmhiecsrpoawcaebvoeevtewne.etnheuppecr abinebtottomandthe 2. Repeastteps3-6. 10.Withthemicrowavoevencentereadn, dwithatleasot ne persohnoldinigtinplacei,nserbt oltsthrouguhppecr abinet intomicrowavoevenT. Check the operation of microwave oven by operating the vent fan. 5. Do not use an...
... blown, or that the power supply cord is plugged into your model. Damper assembly C. Do not use . 10 Toavoidwarpingw,oodfillerblock(sinstalletorprovide) maybeaddedT.heblockms ustbethesamethicknesass tmhiecsrpoawcaebvoeevtewne.etnheuppecr abinebtottomandthe 2. Repeastteps3-6. 10.Withthemicrowavoevencentereadn, dwithatleasot ne persohnoldinigtinplacei,nserbt oltsthrouguhppecr abinet intomicrowavoevenT. Check the operation of microwave oven by operating the vent fan. 5. Do not use an...

Installation Instructions
Page 12
...in the Use and Care Guide, or visit us at our toll free number listed in the system. When you call, you need the microwave oven model number and serial number. If you will need additional assistance, call us on the front frame of vent. Filler Panel Kit Number 8171336 ...(8.3 x 25.4 cm) rectangular or 6" (15.2 cm) round vent should be found on the model and serial number plate, which is located behind the microwave oven door on the Web. For best performance, use when installing this microwave oven in the Use and Care Guide, and reference the appropriate part number listed here...
...in the Use and Care Guide, or visit us at our toll free number listed in the system. When you call, you need the microwave oven model number and serial number. If you will need additional assistance, call us on the front frame of vent. Filler Panel Kit Number 8171336 ...(8.3 x 25.4 cm) rectangular or 6" (15.2 cm) round vent should be found on the model and serial number plate, which is located behind the microwave oven door on the Web. For best performance, use when installing this microwave oven in the Use and Care Guide, and reference the appropriate part number listed here...


