
Use and Care Guide
Page 1
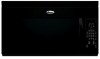
www.whirlpool.com Table of Contents 2 W10110881 Model MH1160XS or visit our website at... MICROWAVEHOOD COMBINATION Forquestionsabout features,operationlperformance, parts, accessories or service, call: 1-800-253-1301.
www.whirlpool.com Table of Contents 2 W10110881 Model MH1160XS or visit our website at... MICROWAVEHOOD COMBINATION Forquestionsabout features,operationlperformance, parts, accessories or service, call: 1-800-253-1301.

Use and Care Guide
Page 2
TABLEOF CONTENTS MICROWAVE HOOD COMBINATION SAFETY 3 Electrical Requirements 4 PARTS AND FEATURES 5 Turntable 5 MICROWAVE OVEN CONTROL 5 Display 5 Start 6 Cancel Off 6 Add 30 Seconds 6 Clock 6 Tones 6 Timer 6 Control Lock 6 Vent Fan 6 Cooktop Light 7 Demo Mode 7 MICROWAVE ... OVEN CARE 12 General Cleaning 12 Replacing Filters 12 Replacing Cooktop Light 13 Replacing Microwave Oven Light 13 TROUBLESHOOTING 14 ASSISTANCE OR SERVICE 15 Replacement Parts 15 WAR RANTY 16
TABLEOF CONTENTS MICROWAVE HOOD COMBINATION SAFETY 3 Electrical Requirements 4 PARTS AND FEATURES 5 Turntable 5 MICROWAVE OVEN CONTROL 5 Display 5 Start 6 Cancel Off 6 Add 30 Seconds 6 Clock 6 Tones 6 Timer 6 Control Lock 6 Vent Fan 6 Cooktop Light 7 Demo Mode 7 MICROWAVE ... OVEN CARE 12 General Cleaning 12 Replacing Filters 12 Replacing Cooktop Light 13 Replacing Microwave Oven Light 13 TROUBLESHOOTING 14 ASSISTANCE OR SERVICE 15 Replacement Parts 15 WAR RANTY 16

Use and Care Guide
Page 3
... oven. - Call an authorized service company for example, closed , turn oven off, and disconnect the power cord, or shut off the pad and touch electrical parts involving a risk of electric shock. Remove wire twist-ties from the microwave oven is removed from paper or plastic bags before and halfway through heating...
... oven. - Call an authorized service company for example, closed , turn oven off, and disconnect the power cord, or shut off the pad and touch electrical parts involving a risk of electric shock. Remove wire twist-ties from the microwave oven is removed from paper or plastic bags before and halfway through heating...

Use and Care Guide
Page 4
...: The microwave oven must be adjusted or repaired by providing an escape wire for the electric current. SAVE THESE INSTRUCTIONS i This device complies with Part 18 of 36" (91.44 cm). [] Clean Ventilating Hoods Frequently - Corrosive cleaning agents, such as to whether the microwave oven is equipped ...not let cord hang over edge of table or counter. [] Do not mount over a sink. [] Do not cover racks or any materials, other part of the microwave oven when the microwave oven is too short, have a qualified electrician or serviceman install an outlet near a swimming pool, or similar ...
...: The microwave oven must be adjusted or repaired by providing an escape wire for the electric current. SAVE THESE INSTRUCTIONS i This device complies with Part 18 of 36" (91.44 cm). [] Clean Ventilating Hoods Frequently - Corrosive cleaning agents, such as to whether the microwave oven is equipped ...not let cord hang over edge of table or counter. [] Do not mount over a sink. [] Do not cover racks or any materials, other part of the microwave oven when the microwave oven is too short, have a qualified electrician or serviceman install an outlet near a swimming pool, or similar ...

Use and Care Guide
Page 5
...or Timer countdown. Touch number pad "1" for SLOW, "2" for NORMAL or "3" for 3 seconds until 2 tones sound. 2. Microwave oven light E. Control panel Parts and Features not shown Turntable O COOK POWER CLOCK TIMER DEFROST Set/Off ® VENTFAN Hi.Lo*Off _ _H)toolldoc3kSec OFF Q LIGHT Ni.Lo-Off A....invalid value has been entered, the invalid entry tones will sound, and the input prompt will blink in the display at any of the parts. Grease filters (shipped in place. Place the turntable on the support. Metal shielded window G. See "Assistance or Service" to complete the ...
...or Timer countdown. Touch number pad "1" for SLOW, "2" for NORMAL or "3" for 3 seconds until 2 tones sound. 2. Microwave oven light E. Control panel Parts and Features not shown Turntable O COOK POWER CLOCK TIMER DEFROST Set/Off ® VENTFAN Hi.Lo*Off _ _H)toolldoc3kSec OFF Q LIGHT Ni.Lo-Off A....invalid value has been entered, the invalid entry tones will sound, and the input prompt will blink in the display at any of the parts. Grease filters (shipped in place. Place the turntable on the support. Metal shielded window G. See "Assistance or Service" to complete the ...

Use and Care Guide
Page 7
... and newspaper, should not be heated in microwave oven. • Do not use . Arranging If heating irregularly shaped or different sized foods, arrange the thinner parts and smaller sized items toward the center. ToTurnLightOn/OffT: ouchLIGHTpadonceforhight,wicefor lowor3timesforoff. ToTurnOn/OffT: hemicrowavoevenmusbt einstandbmy ode. Amount of food. Stirring and Turning Stirring and...
... and newspaper, should not be heated in microwave oven. • Do not use . Arranging If heating irregularly shaped or different sized foods, arrange the thinner parts and smaller sized items toward the center. ToTurnLightOn/OffT: ouchLIGHTpadonceforhight,wicefor lowor3timesforoff. ToTurnOn/OffT: hemicrowavoevenmusbt einstandbmy ode. Amount of food. Stirring and Turning Stirring and...
Use and Care Guide
Page 11
... the door to 3 kg). Enter the weight in microwave-safe baking dish. Doneness may be shielded with smaller openings may be manually set to shield parts of irregular shaped cuts should not be set from the chart or Touch REHEAT repeatedly to scroll through food selections. 4. See "Microwave Cooking Power" chart...
... the door to 3 kg). Enter the weight in microwave-safe baking dish. Doneness may be shielded with smaller openings may be manually set to shield parts of irregular shaped cuts should not be set from the chart or Touch REHEAT repeatedly to scroll through food selections. 4. See "Microwave Cooking Power" chart...

Use and Care Guide
Page 12
... cleaners, steel-wool pads, gritty washcloths or some paper towels. Microwave Inlet Cover To avoid arcing and microwave oven damage, the microwave inlet cover (see "Parts and Features") should be kept clean. Do not operate the microwave oven without the grease filters in direction of the filters may occur after cleaning...
... cleaners, steel-wool pads, gritty washcloths or some paper towels. Microwave Inlet Cover To avoid arcing and microwave oven damage, the microwave inlet cover (see "Parts and Features") should be kept clean. Do not operate the microwave oven without the grease filters in direction of the filters may occur after cleaning...

Use and Care Guide
Page 15
...in your area, you the cost of food being heated? Referrals to order replacement parts, we recommend that specified in your area, call . To locate the Whirlpool designated service company in your request. Use a corded phone, a different frequency cordless...Pages. Whirlpool designated service technicians are clean. Turntable Part Number 4393799 Turntable Support and Rollers Part Number 8206227 Turntable Hub Part Number 8206228 Grease Filters Part Number 8206229 Charcoal Filter Part Number 8206230 Cooktop Light Bulb Part Number 8206232 Microwave Oven Light Bulb Part Number ...
...in your area, you the cost of food being heated? Referrals to order replacement parts, we recommend that specified in your area, call . To locate the Whirlpool designated service company in your request. Use a corded phone, a different frequency cordless...Pages. Whirlpool designated service technicians are clean. Turntable Part Number 4393799 Turntable Support and Rollers Part Number 8206227 Turntable Hub Part Number 8206228 Grease Filters Part Number 8206229 Charcoal Filter Part Number 8206230 Cooktop Light Bulb Part Number 8206232 Microwave Oven Light Bulb Part Number ...

Use and Care Guide
Page 16
... model number and serial number. Dealer name Address Phone number Model number Serial number Purchase date W10110881 © 2006 Whirlpool Corporation. Those consumable parts are excluded from accident, alteration, misuse, abuse, fire, flood, acts of God, improper installation, installation not in...can find this book and your sales slip together for product service in accordance with the product, Whirlpool Corporation or Whirlpool Canada LP (hereafter "Whirlpool") will need service, first see the "Troubleshooting" section of purchase or installation date for units operated...
... model number and serial number. Dealer name Address Phone number Model number Serial number Purchase date W10110881 © 2006 Whirlpool Corporation. Those consumable parts are excluded from accident, alteration, misuse, abuse, fire, flood, acts of God, improper installation, installation not in...can find this book and your sales slip together for product service in accordance with the product, Whirlpool Corporation or Whirlpool Canada LP (hereafter "Whirlpool") will need service, first see the "Troubleshooting" section of purchase or installation date for units operated...
Installation Instructions
Page 1
... you and others are not followed. These installation instructions cover different models. Location Requirements 2.. Electrical Requirements 3.. This symbol alerts you don't follow instructions. Tools and Parts 2.. Prepare Upper Cabinet 8.. You can be killed or seriously injured if you don't immediately follow instructions. INSTALLATIONINSTRUCTIONS 4. Install the Microwave Oven 9. IMPORTANT: Read Installation Instructions...
... you and others are not followed. These installation instructions cover different models. Location Requirements 2.. Electrical Requirements 3.. This symbol alerts you don't follow instructions. Tools and Parts 2.. Prepare Upper Cabinet 8.. You can be killed or seriously injured if you don't immediately follow instructions. INSTALLATIONINSTRUCTIONS 4. Install the Microwave Oven 9. IMPORTANT: Read Installation Instructions...

Installation Instructions
Page 2
...) • 3/4" (19 mm) hole saw • Caulking gun and weatherproof caulking compound • Duct tape Parts Supplied For reorder information, see "Replacement Parts" section. Damper assembly (for wood studs. INSTALLATIONREQUIREMENTS Tools Needed Gather the required tools and parts before starting installation. A Loccion } Ieqt i emenfs Check the opening . • Support for 1/4" x 2" • Masking tape...
...) • 3/4" (19 mm) hole saw • Caulking gun and weatherproof caulking compound • Duct tape Parts Supplied For reorder information, see "Replacement Parts" section. Damper assembly (for wood studs. INSTALLATIONREQUIREMENTS Tools Needed Gather the required tools and parts before starting installation. A Loccion } Ieqt i emenfs Check the opening . • Support for 1/4" x 2" • Masking tape...

Installation Instructions
Page 12
... is round, a rectangular to use no more than three 90 ° elbows. For best performance, use when installing this microwave oven in "Parts Supplied" section) Part Number 8206614 OamperAssembly Mounting Plate UPaprpteNr uCmabbeinret82T0e5m87p1late Filler Panel Kits are available from sticking. One 3 _" x !0" (8.3 x 25.4 cm) 90 °... 4619-656-17424 6/06 Printed in pairs. To calculate the length of the microwave oven. Mounting Screw Kit (includes Part Number 8206442 Part Number W10110277 parts A-G in a 36" (91.4 cm) or 42" (106.7 cm) wide opening. If any of the installation...
... is round, a rectangular to use no more than three 90 ° elbows. For best performance, use when installing this microwave oven in "Parts Supplied" section) Part Number 8206614 OamperAssembly Mounting Plate UPaprpteNr uCmabbeinret82T0e5m87p1late Filler Panel Kits are available from sticking. One 3 _" x !0" (8.3 x 25.4 cm) 90 °... 4619-656-17424 6/06 Printed in pairs. To calculate the length of the microwave oven. Mounting Screw Kit (includes Part Number 8206442 Part Number W10110277 parts A-G in a 36" (91.4 cm) or 42" (106.7 cm) wide opening. If any of the installation...


