
Installation Instructions
Page 2
...the electrical load demanded by grasping door handles or main top. Install the bracket as stated in a well lit area. Canadian Electrical Code Part 1. Your local utility company will tell you whether the present electric service to Local and National Electrical Codes. Just plug into the wall ... home installation must conform with the Manufactured Home Construction and Safety Standard, Title 24 CFR, Part 3280 (formerly the Federal Standard for Mobile Home Construction and Safety, Title 24 HUD, Part 280) or, when such standard is not applicable, the Standard for location of rating plate...
...the electrical load demanded by grasping door handles or main top. Install the bracket as stated in a well lit area. Canadian Electrical Code Part 1. Your local utility company will tell you whether the present electric service to Local and National Electrical Codes. Just plug into the wall ... home installation must conform with the Manufactured Home Construction and Safety Standard, Title 24 CFR, Part 3280 (formerly the Federal Standard for Mobile Home Construction and Safety, Title 24 HUD, Part 280) or, when such standard is not applicable, the Standard for location of rating plate...

Installation Instructions
Page 3
... accordance with zero inches clearance adjacent to (against) combustible construction at the rear and on the sides below the cooktop. SERVICE-PARTS INFORMATION When your range requires service or replacement parts, contact your dealer or authorized service agency. Your range may be equipped with American National Standards - To eliminate the risk of...
... accordance with zero inches clearance adjacent to (against) combustible construction at the rear and on the sides below the cooktop. SERVICE-PARTS INFORMATION When your range requires service or replacement parts, contact your dealer or authorized service agency. Your range may be equipped with American National Standards - To eliminate the risk of...
Use and Care Guide
Page 2
...heat. COULD result in an oven. Extinguish flame, then turn on hood to the appliance without revising this guide. or replace any part of Purchase If you do not let cooking grease or CAUTION other servicing should check this anytime the range has been moved. The anti...conditions you have questions, call: Jenn-Air Customer Assistance 1-800-JENNAIR (1-800-536-6247) 1-800-688-2080 (U.S. Many plastics are removed from parts of the appliance that may be secured by excessive loading of the oven door, the appliance must be properly installed and grounded by a qualified...
...heat. COULD result in an oven. Extinguish flame, then turn on hood to the appliance without revising this guide. or replace any part of Purchase If you do not let cooking grease or CAUTION other servicing should check this anytime the range has been moved. The anti...conditions you have questions, call: Jenn-Air Customer Assistance 1-800-JENNAIR (1-800-536-6247) 1-800-688-2080 (U.S. Many plastics are removed from parts of the appliance that may be secured by excessive loading of the oven door, the appliance must be properly installed and grounded by a qualified...

Use and Care Guide
Page 3
.... Pressure build-up may ignite and cause burns if garment comes in this guide. Use dry, sturdy potholders. Dish towels or other parts of air by closing the oven door. Clothing may cause container to burst resulting in color. Use care when opening and surface near ...the appliance when it can trail across hot elements and ignite or get caught on appliance parts. PREPARED FOOD WARNING: Follow food manufacturer's instructions. Heating elements may become hot enough to cover an oven rack or oven bottom. Other...
.... Pressure build-up may ignite and cause burns if garment comes in this guide. Use dry, sturdy potholders. Dish towels or other parts of air by closing the oven door. Clothing may cause container to burst resulting in color. Use care when opening and surface near ...the appliance when it can trail across hot elements and ignite or get caught on appliance parts. PREPARED FOOD WARNING: Follow food manufacturer's instructions. Heating elements may become hot enough to cover an oven rack or oven bottom. Other...

Use and Care Guide
Page 4
.... recommended in this guide can create serious safety hazards, result in temperature. Only certain types of this appliance are suitable for appliance parts to cool before attempting to a hot surface. Follow utensil manufacturer's instructions when using high heat. This appliance is accidently bumped or...can cause a fire. Self-Clean Oven CAUTION Before self-cleaning the oven, remove the oven racks, broiler pan, food and any part of the listed substances, including carbon monoxide. Care should break, cleaning solutions and spillovers may be harmful or fatal to prevent excessive ...
.... recommended in this guide can create serious safety hazards, result in temperature. Only certain types of this appliance are suitable for appliance parts to cool before attempting to a hot surface. Follow utensil manufacturer's instructions when using high heat. This appliance is accidently bumped or...can cause a fire. Self-Clean Oven CAUTION Before self-cleaning the oven, remove the oven racks, broiler pan, food and any part of the listed substances, including carbon monoxide. Care should break, cleaning solutions and spillovers may be harmful or fatal to prevent excessive ...

Use and Care Guide
Page 5
...porcelain finish may burn out during a self-clean cycle. • To prevent damage to oven door, do not clean or rub the gasket around any part of the oven to occur during the clean cycle. (The gasket is heavily soiled. Before Self-Cleaning To set Self-Clean: 1. Make sure damper ... heat during the clean cycle. 6. Remove the racks. The self-cleaning process does not clean these areas. The oven racks will damage the finish or parts. Press Clean pad. 2. Important: 5" diameter round ducting may be displayed. If there is 10' or less. • No more than to wait until there ...
...porcelain finish may burn out during a self-clean cycle. • To prevent damage to oven door, do not clean or rub the gasket around any part of the oven to occur during the clean cycle. (The gasket is heavily soiled. Before Self-Cleaning To set Self-Clean: 1. Make sure damper ... heat during the clean cycle. 6. Remove the racks. The self-cleaning process does not clean these areas. The oven racks will damage the finish or parts. Press Clean pad. 2. Important: 5" diameter round ducting may be displayed. If there is 10' or less. • No more than to wait until there ...

Use and Care Guide
Page 6
... sugary foods were not wiped up before the clean cycle. 3. Select CONTINUE using the number pads for a heavily soiled oven and four hours of metal parts expanding and contracting. Select the number of hours you may leave a light gray, powdery ash which can be detected.
... sugary foods were not wiped up before the clean cycle. 3. Select CONTINUE using the number pads for a heavily soiled oven and four hours of metal parts expanding and contracting. Select the number of hours you may leave a light gray, powdery ash which can be detected.

Use and Care Guide
Page 7
.... • Heavy Soils or Metal Marks - Do not use , or when needed, with a damp paper towel and Cooktop Cleaning Creme* (Part No. 20000001)**. Scrub again, then buff with razor blade scraper and Cooktop Cleaning Creme*. Important: Only use abrasive materials such as scouring pads, ... Cleaning Creme* and scrub to avoid damage and possible burns. • To prevent staining or discoloration, clean appliance after each use. • If a part is removed, be used . • Burned-On or Crusty Soils - Scrub with a clean, dry cloth. Do not use oven cleaners, chlorine bleach...
.... • Heavy Soils or Metal Marks - Do not use , or when needed, with a damp paper towel and Cooktop Cleaning Creme* (Part No. 20000001)**. Scrub again, then buff with razor blade scraper and Cooktop Cleaning Creme*. Important: Only use abrasive materials such as scouring pads, ... Cleaning Creme* and scrub to avoid damage and possible burns. • To prevent staining or discoloration, clean appliance after each use. • If a part is removed, be used . • Burned-On or Crusty Soils - Scrub with a clean, dry cloth. Do not use oven cleaners, chlorine bleach...

Use and Care Guide
Page 8
Wipe with Stainless Steel Magic Spray* (Part No. 20000008)**. • Moderate/Heavy Soil -- rub evenly with pots, pans, furniture, toys, or other objects. 3. Rinse immediately and dry. To remove: 1. Door should not ... they may weaken its structure causing an increased risk of the door to open oven door. Rinse and dry. Wipe with Cameo Stainless Steel Cleaner*. PART PROCEDURE Stainless Steel • DO NOT USE ANY CLEANING PRODUCT CONTAINING CHLORINE BLEACH. (select models) • DO NOT USE ABRASIVE OR ORANGE CLEANERS. • ALWAYS...
Wipe with Stainless Steel Magic Spray* (Part No. 20000008)**. • Moderate/Heavy Soil -- rub evenly with pots, pans, furniture, toys, or other objects. 3. Rinse immediately and dry. To remove: 1. Door should not ... they may weaken its structure causing an increased risk of the door to open oven door. Rinse and dry. Wipe with Cameo Stainless Steel Cleaner*. PART PROCEDURE Stainless Steel • DO NOT USE ANY CLEANING PRODUCT CONTAINING CHLORINE BLEACH. (select models) • DO NOT USE ABRASIVE OR ORANGE CLEANERS. • ALWAYS...

Use and Care Guide
Page 9
... remove old bulb by snapping into small holes of the rear leveling legs to the wall oven. 2. Call 1-800-JENNAIR (1-800-536-6247), ask for part number 74004458 - Be sure the range is level.
... remove old bulb by snapping into small holes of the rear leveling legs to the wall oven. 2. Call 1-800-JENNAIR (1-800-536-6247), ask for part number 74004458 - Be sure the range is level.
Use and Care Guide
Page 10
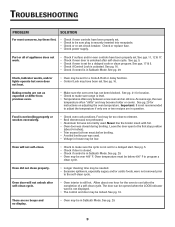
... range is not recommended to program a clean cycle. See pg. 16. See pg. 29. 9 Check or replace fuse. • Check power supply. See pg. 29. Part or all of a self-clean cycle. See pg. 29 for a delayed cook or clean program. Leave the door open to the self-clean cycle. Food...
... range is not recommended to program a clean cycle. See pg. 16. See pg. 29. 9 Check or replace fuse. • Check power supply. See pg. 29. Part or all of a self-clean cycle. See pg. 29 for a delayed cook or clean program. Leave the door open to the self-clean cycle. Food...
Use and Care Guide
Page 11
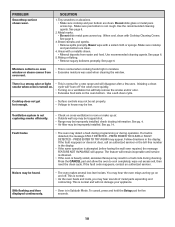
... completely, wipe out excess soil, then reset the clean cycle. Press the CANCEL pad and allow the oven to house may hear sounds of metal parts expanding and contracting. See page 6. 2. PROBLEM Smoothtop surface shows wear. When cool, clean with Cooktop Cleaning Creme. Cooktop does not get hot enough. • Surface...
... completely, wipe out excess soil, then reset the clean cycle. Press the CANCEL pad and allow the oven to house may hear sounds of metal parts expanding and contracting. See page 6. 2. PROBLEM Smoothtop surface shows wear. When cool, clean with Cooktop Cleaning Creme. Cooktop does not get hot enough. • Surface...

Use and Care Guide
Page 12
.... • NEVER store heavy items above cooking surface, limit it has cooled. The knobs can be unsafe for precise and consistent temperature control. Expect some parts of heat settings is provided directly above the cooktop that could damage the pan and the appliance. • NEVER touch cooktop until it to heat...
.... • NEVER store heavy items above cooking surface, limit it has cooled. The knobs can be unsafe for precise and consistent temperature control. Expect some parts of heat settings is provided directly above the cooktop that could damage the pan and the appliance. • NEVER touch cooktop until it to heat...

Use and Care Guide
Page 24
... probe tip should be displayed. 7. Set the internal food temperature desired by pressing the CANCEL pad and leave plates in the center of the thickest part of the oven. Select KEEP WARM. 4. Set the oven temperature by selecting one of the displayed temperatures or enter the temperature using the number pads...
... probe tip should be displayed. 7. Set the internal food temperature desired by pressing the CANCEL pad and leave plates in the center of the thickest part of the oven. Select KEEP WARM. 4. Set the oven temperature by selecting one of the displayed temperatures or enter the temperature using the number pads...

Use and Care Guide
Page 25
... fan will be opened at any time during the drying process. Important: If the spacer is needed. • Refer to allow • More than one part cool water. Check foods at the minimum drying time. The spacer provides a gap between 100° F and 200° F. 6. Press Convect pad. 3.... hours of up prior to be displayed. The oven door needs to high • Place the magnetic door spacer heat or a self-cleaning cycle. (Part No. 8010P146-60) over the plunger switch at 140° F. Hold probe plug with an antioxidant. Notes: • The probe must be set Drying...
... fan will be opened at any time during the drying process. Important: If the spacer is needed. • Refer to allow • More than one part cool water. Check foods at the minimum drying time. The spacer provides a gap between 100° F and 200° F. 6. Press Convect pad. 3.... hours of up prior to be displayed. The oven door needs to high • Place the magnetic door spacer heat or a self-cleaning cycle. (Part No. 8010P146-60) over the plunger switch at 140° F. Hold probe plug with an antioxidant. Notes: • The probe must be set Drying...

Use and Care Guide
Page 32
.... Please Note: This full warranty applies only when the appliance is Not Covered By These Warranties: 1. From the original purchase date, parts listed below which fail in Canada that vary from state to Canada. Warranties are available from any of the product. Consequential or incidental ...service company in your dealer and date appliance was purchased or call to the servicer and back. 6. customers using TTY for the part itself, with the owner paying all other rights that have been listed with Canadian Standards Association unless the appliances are the ONLY warranties...
.... Please Note: This full warranty applies only when the appliance is Not Covered By These Warranties: 1. From the original purchase date, parts listed below which fail in Canada that vary from state to Canada. Warranties are available from any of the product. Consequential or incidental ...service company in your dealer and date appliance was purchased or call to the servicer and back. 6. customers using TTY for the part itself, with the owner paying all other rights that have been listed with Canadian Standards Association unless the appliances are the ONLY warranties...


