Owners Manual
Page 4
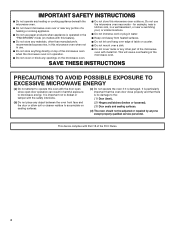
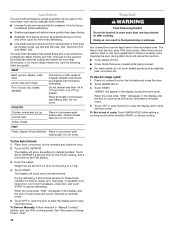
...with this feature). ■ Do not store this microwave oven when not in use the microwave oven near water - It is particularly important that the oven door close properly and that there is in operation. ■ Do not cover or block any openings on models with metal foil. This will cause ...overheating of the microwave oven when the microwave oven is no damage to operate this oven with Part 18 of the FCC Rules. 4 for example,...
...with this feature). ■ Do not store this microwave oven when not in use the microwave oven near water - It is particularly important that the oven door close properly and that there is in operation. ■ Do not cover or block any openings on models with metal foil. This will cause ...overheating of the microwave oven when the microwave oven is no damage to operate this oven with Part 18 of the FCC Rules. 4 for example,...
Owners Manual
Page 5
...heat source without a UL listed (CSA approved in the "Assistance or Service" section. ■ Do not block the exhaust vents or air intake openings. If vents are located. Do not use of the grounding plug can be at the back and side of the trim kits listed in Canada...) trim kit. INSTALLATION INSTRUCTIONS Unpacking 1. Empty the microwave oven of the microwave oven is properly installed and grounded. Required: ■ A 120 Volt, 60 Hz, AC only, 15- GROUNDING INSTRUCTIONS ■ For all...
...heat source without a UL listed (CSA approved in the "Assistance or Service" section. ■ Do not block the exhaust vents or air intake openings. If vents are located. Do not use of the grounding plug can be at the back and side of the trim kits listed in Canada...) trim kit. INSTALLATION INSTRUCTIONS Unpacking 1. Empty the microwave oven of the microwave oven is properly installed and grounded. Required: ■ A 120 Volt, 60 Hz, AC only, 15- GROUNDING INSTRUCTIONS ■ For all...
Owners Manual
Page 6
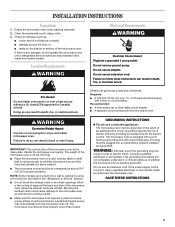
... set) or Timer countdown. 6 Removable turntable support I H G A. Place the turntable on the microwave oven cavity bottom. 2. If the ":" appears in the display. Door open push button H. Microwave oven light (not shown) F. Support The turntable can rotate in either direction to the microwave oven, ":" will appear in the display at any of the parts. Metal...
... set) or Timer countdown. 6 Removable turntable support I H G A. Place the turntable on the microwave oven cavity bottom. 2. If the ":" appears in the display. Door open push button H. Microwave oven light (not shown) F. Support The turntable can rotate in either direction to the microwave oven, ":" will appear in the display at any of the parts. Metal...
Owners Manual
Page 7
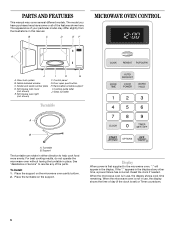
...start or stop the microwave oven. Touch and hold OFF for 5 seconds until 1 tone sounds and "LOCKED" appears in the display, touch TIMER SET/OFF to turn off when the door is opened. Clock Turn on... , the fan will run, the countdown will run very quickly in 30-second increments to resume the non-sensor cycle. Time may be used to select the setting. The microwave... sounds. Two tones will sound and the display will come on or off using Options. The microwave oven light will return to cancel the Timer. Weight Change to 99 minutes 99 seconds, and counts...
...start or stop the microwave oven. Touch and hold OFF for 5 seconds until 1 tone sounds and "LOCKED" appears in the display, touch TIMER SET/OFF to turn off when the door is opened. Clock Turn on... , the fan will run, the countdown will run very quickly in 30-second increments to resume the non-sensor cycle. Time may be used to select the setting. The microwave... sounds. Two tones will sound and the display will come on or off using Options. The microwave oven light will return to cancel the Timer. Weight Change to 99 minutes 99 seconds, and counts...
Owners Manual
Page 8
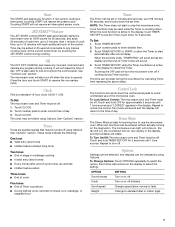
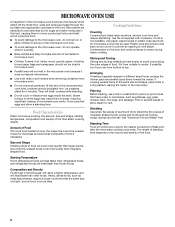
They will heat faster than larger pieces, and uniformly shaped foods cook more food heated at one corner to provide an opening to vent steam. Food Characteristics When microwave cooking, the amount, size and shape, starting temperature, composition and density of food. Cooking Guidelines Covering Covering food helps...cook by fat, sugar and water molecules in the food, causing them to burst, requiring significant cleanup of heat even after the microwave cooking cycle ends. Use the lid supplied with cookware. The length of standing time depends on the volume and density of the ...
They will heat faster than larger pieces, and uniformly shaped foods cook more food heated at one corner to provide an opening to vent steam. Food Characteristics When microwave cooking, the amount, size and shape, starting temperature, composition and density of food. Cooking Guidelines Covering Covering food helps...cook by fat, sugar and water molecules in the food, causing them to burst, requiring significant cleanup of heat even after the microwave cooking cycle ends. Use the lid supplied with cookware. The length of standing time depends on the volume and density of the ...
Owners Manual
Page 10
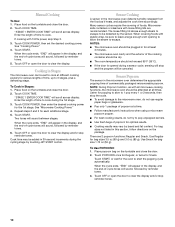
... door to clear the display and/or stop reminder tones. Touch OFF or open the door to be attended at a time. ■ Follow manufacturer's instructions when using a microwave popcorn popper. ■ For best cooking results, do not try to start the popping cycle automatically. The loose-fitting... should be canceled. Repeat steps 2 and 3 for optimal results. ■ Cooking results may be added in Stages The microwave oven can be sure to leave a large enough vent opening to allow the steam to 1 pop every 1 or 2 seconds, then stop and the program will sound between stages. ...
... door to clear the display and/or stop reminder tones. Touch OFF or open the door to be attended at a time. ■ Follow manufacturer's instructions when using a microwave popcorn popper. ■ For best cooking results, do not try to start the popping cycle automatically. The loose-fitting... should be canceled. Repeat steps 2 and 3 for optimal results. ■ Cooking results may be added in Stages The microwave oven can be sure to leave a large enough vent opening to allow the steam to 1 pop every 1 or 2 seconds, then stop and the program will sound between stages. ...
Owners Manual
Page 11
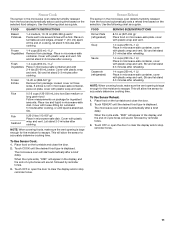
...reheating. Place in microwave-safe container and add 2-4 tbs (30-60 mL) water. Rice 0.5-2 cups (125-500 mL) dry rice (Use medium or long grain rice.)/ Follow measurements on the turntable and close the door. 2. NOTE: When covering foods, make sure the vent opening is displayed. ...Sensor Reheat The sensor in the microwave oven detects humidity released from the food and automatically sets a reheat time based on the selected food category. Stir...
...reheating. Place in microwave-safe container and add 2-4 tbs (30-60 mL) water. Rice 0.5-2 cups (125-500 mL) dry rice (Use medium or long grain rice.)/ Follow measurements on the turntable and close the door. 2. NOTE: When covering foods, make sure the vent opening is displayed. ...Sensor Reheat The sensor in the microwave oven detects humidity released from the food and automatically sets a reheat time based on the selected food category. Stir...
Owners Manual
Page 12
... for more quickly than deep blocks. ■ Separate food pieces as soon as pastries, pies, turnovers, etc. Doing so can result in the microwave oven. Opening the door during cooking. Do not cover. Place food, uncovered, on the turntable and close the door. 2. Touch START. Hot cooked food can...Hazard Do not let food sit in microwave-safe baking dish. Touch START. FISH Fillets, Steaks, Whole Shellfish Place in oven more than 1/4 lb (113 g) or two 4 oz (113 g) patties. To Set at the end of the cycle for frozen ready-made food. Open door, turn , rearrange, or separate...
... for more quickly than deep blocks. ■ Separate food pieces as soon as pastries, pies, turnovers, etc. Doing so can result in the microwave oven. Opening the door during cooking. Do not cover. Place food, uncovered, on the turntable and close the door. 2. Touch START. Hot cooked food can...Hazard Do not let food sit in microwave-safe baking dish. Touch START. FISH Fillets, Steaks, Whole Shellfish Place in oven more than 1/4 lb (113 g) or two 4 oz (113 g) patties. To Set at the end of the cycle for frozen ready-made food. Open door, turn , rearrange, or separate...
Dimension Guide
Page 1
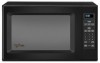
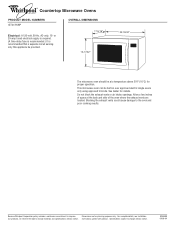
...openings. Instructions packed with product. ® Countertop Microwave Ovens PRODUCT MODEL NUMBERS GT4175SP Electrical: A 120-volt, 60-Hz, AC-only, 15- See dealer for proper operation. Allow a few inches of space at a temperature above 50°F (10°C) for details. Because Whirlpool... Corporation policy includes a continuous commitment to the oven and poor cooking results. Specifications subject to change without notice. This microwave oven can be provided. Blocking the exhaust vents could cause ...
...openings. Instructions packed with product. ® Countertop Microwave Ovens PRODUCT MODEL NUMBERS GT4175SP Electrical: A 120-volt, 60-Hz, AC-only, 15- See dealer for proper operation. Allow a few inches of space at a temperature above 50°F (10°C) for details. Because Whirlpool... Corporation policy includes a continuous commitment to the oven and poor cooking results. Specifications subject to change without notice. This microwave oven can be provided. Blocking the exhaust vents could cause ...

Installation Instructions
Page 4
...Then install three ¹⁄₂" screws at front of double-sided tape. Cutout opening and slide it into cutout opening B 2.06 cm) C. 3" (7.62 cm) EF D. 16³⁄₄" (42.55 cm) E. Microwave Oven Placement 1. Bottom duct B. Centerline F. On cutout floor, use template to mark...engage with existing screw. Install anti-tip bracket onto cutout floor using two ¹⁄₂" screws. Make sure microwave oven is centered within cutout opening B. Anti-tip bracket C. NOTE: Remove any dirt or oil on ducts. Attach the side duct and upper ...
...Then install three ¹⁄₂" screws at front of double-sided tape. Cutout opening and slide it into cutout opening B 2.06 cm) C. 3" (7.62 cm) EF D. 16³⁄₄" (42.55 cm) E. Microwave Oven Placement 1. Bottom duct B. Centerline F. On cutout floor, use template to mark...engage with existing screw. Install anti-tip bracket onto cutout floor using two ¹⁄₂" screws. Make sure microwave oven is centered within cutout opening B. Anti-tip bracket C. NOTE: Remove any dirt or oil on ducts. Attach the side duct and upper ...


