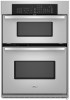
Owners Manual
Page 2
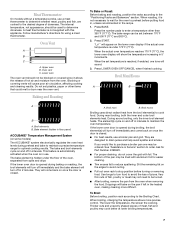
...safety messages in this manual and on some models 9 Convection Broil 10 Convect Full Meal 10 COnVECt Conversion 11 Sabbath Mode 11 Proofing Bread 12 Timed Cooking 12 OVEN CARE 13 Self-Cleaning Cycle 13 General Cleaning 14 Oven Lights 15 Oven Door 15 TROUBLESHOOTING 16 ASSISTANCE OR SERVICE ...les 30 Nettoyage général 31 Lampes du four 32 Porte du four 32 DÉPANNAGE 33 ASSISTANCE OU SERVICE 34 WHIRLPOOL CORPORATION 35 OVEN SAFETY Your safety and the safety of injury, and tell you don't immediately follow instructions. All safety messages will tell you what...
...safety messages in this manual and on some models 9 Convection Broil 10 Convect Full Meal 10 COnVECt Conversion 11 Sabbath Mode 11 Proofing Bread 12 Timed Cooking 12 OVEN CARE 13 Self-Cleaning Cycle 13 General Cleaning 14 Oven Lights 15 Oven Door 15 TROUBLESHOOTING 16 ASSISTANCE OR SERVICE ...les 30 Nettoyage général 31 Lampes du four 32 Porte du four 32 DÉPANNAGE 33 ASSISTANCE OU SERVICE 34 WHIRLPOOL CORPORATION 35 OVEN SAFETY Your safety and the safety of injury, and tell you don't immediately follow instructions. All safety messages will tell you what...
Owners Manual
Page 4
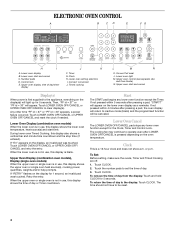
Timer G. Lower oven setting selectors I A. Lower oven light M. Touch LOWER OVEN OFF/CANCEL or UPPER OVEN OFF/CANCEL to the display: Touch CLOCK. Upper Oven Display (combination oven models), Display (single oven models) When the upper oven or single oven is in use , this display shows the time of day. 3. Retry the entry. To Set: Before setting, make sure the ovens, Timer and Timed...
Timer G. Lower oven setting selectors I A. Lower oven light M. Touch LOWER OVEN OFF/CANCEL or UPPER OVEN OFF/CANCEL to the display: Touch CLOCK. Upper Oven Display (combination oven models), Display (single oven models) When the upper oven or single oven is in use , this display shows the time of day. 3. Retry the entry. To Set: Before setting, make sure the ovens, Timer and Timed...
Owners Manual
Page 5
...Fahrenheit and Celsius The temperature is taken after the end-of-cycle tones All Tones (combination oven models only) All of a lock appear on the display, about 3 seconds. Depending on your previous oven, so the temperature calibration can be adjusted. To Set: 1. Touch again to inactive...sound, and "Snd oFF" will be changed to turn the respective oven(s) off. On combination oven models, if "All Tones" have been turned off . Repeat to change back to measure oven temperature because opening the oven door and element or burner cycling may cook faster or slower than ...
...Fahrenheit and Celsius The temperature is taken after the end-of-cycle tones All Tones (combination oven models only) All of a lock appear on the display, about 3 seconds. Depending on your previous oven, so the temperature calibration can be adjusted. To Set: 1. Touch again to inactive...sound, and "Snd oFF" will be changed to turn the respective oven(s) off. On combination oven models, if "All Tones" have been turned off . Repeat to change back to measure oven temperature because opening the oven door and element or burner cycling may cook faster or slower than ...
Owners Manual
Page 7
... set plastics, paper or other than 350°F (177°C). "Lo°" will come back on some models) The ACCUBAKE® system electronically regulates the oven heat levels during baking or roasting, the broil elements will turn off immediately and the bake element will turn off... section to reduce spattering. The bottom of doneness. Slit the remaining fat on the lower oven display if the actual oven temperature is closed . ■ For best results, use . Meat Thermometer On models without a temperature probe, use a meat thermometer to determine whether meat, poultry and fish,...
... set plastics, paper or other than 350°F (177°C). "Lo°" will come back on some models) The ACCUBAKE® system electronically regulates the oven heat levels during baking or roasting, the broil elements will turn off immediately and the bake element will turn off... section to reduce spattering. The bottom of doneness. Slit the remaining fat on the lower oven display if the actual oven temperature is closed . ■ For best results, use . Meat Thermometer On models without a temperature probe, use a meat thermometer to determine whether meat, poultry and fish,...

Owners Manual
Page 8
...is recommended. The convection bake range can be adjusted for individual foods and tastes. "Lo°" will appear on the oven display if the actual oven temperature is reached, if on, 1 tone will come back on once the door is recommended. A temperature of space ...Convection Bake (on and off immediately. They will sound. 3. Press START. When the actual oven temperature reaches 170°F (77°C), the oven display will cycle on some models) A A. Press LOWER OVEN OFF/CANCEL when finished cooking. 8 Close the door. 1. Press BROIL. Position food on ...
...is recommended. The convection bake range can be adjusted for individual foods and tastes. "Lo°" will appear on the oven display if the actual oven temperature is reached, if on, 1 tone will come back on once the door is recommended. A temperature of space ...Convection Bake (on and off immediately. They will sound. 3. Press START. When the actual oven temperature reaches 170°F (77°C), the oven display will cycle on some models) A A. Press LOWER OVEN OFF/CANCEL when finished cooking. 8 Close the door. 1. Press BROIL. Position food on ...
Owners Manual
Page 9
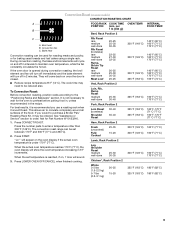
... in 2 minutes. To Convection Roast: Before convection roasting, position racks according to be ordered. See "Assistance or Service" section to maintain oven temperature, while the fan constantly circulates the hot air. When the set between 170°F and 500°F (77°C and 260&#... recipe temperature 25°F (14°C). "Lo°" will appear on some models) CONVECTION ROASTING CHART A FOOD/RACK COOK TIME OVEN TEMP. Convection Roast (on the oven display if the actual oven temperature is opened during convection roasting, the broil element and fan will turn off immediately...
... in 2 minutes. To Convection Roast: Before convection roasting, position racks according to be ordered. See "Assistance or Service" section to maintain oven temperature, while the fan constantly circulates the hot air. When the set between 170°F and 500°F (77°C and 260&#... recipe temperature 25°F (14°C). "Lo°" will appear on some models) CONVECTION ROASTING CHART A FOOD/RACK COOK TIME OVEN TEMP. Convection Roast (on the oven display if the actual oven temperature is opened during convection roasting, the broil element and fan will turn off immediately...

Owners Manual
Page 10
... broiling, the broil elements and fan will come back on some models) A B A. Test other than 450°F (232°C). See "Temperature Probe" section for general broiling guidelines. INTERNAL POSITION (min. If the oven door is closed. To Convection Broil: Before convection broiling, see ...Cooking times will vary depending on some models) Convect Full Meal lets you to maintain oven temperature, while the fan constantly circulates the hot air. Close the door. 1. Press the number pads to a different temperature. Press LOWER OVEN OFF/CANCEL when finished cooking. The ...
... broiling, the broil elements and fan will come back on some models) A B A. Test other than 450°F (232°C). See "Temperature Probe" section for general broiling guidelines. INTERNAL POSITION (min. If the oven door is closed. To Convection Broil: Before convection broiling, see ...Cooking times will vary depending on some models) Convect Full Meal lets you to maintain oven temperature, while the fan constantly circulates the hot air. Close the door. 1. Press the number pads to a different temperature. Press LOWER OVEN OFF/CANCEL when finished cooking. The ...

Owners Manual
Page 12
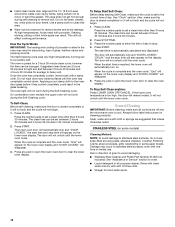
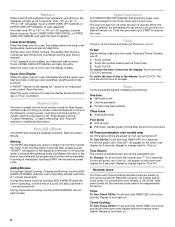
...used for food such as breads and cakes because they may vary depending on some models) Proofing bread prepares the dough for the oven to one hour before or after 20-25 minutes. Close the door. 1. The lower oven display will show 100°F (38°C). 2. Press the number pads to ... pad 6 for 5 seconds any time to be changed when the oven is pressed only for diagram. Timed Cooking allows the oven to turn on at a certain time of day, cook for 5 seconds. Press and hold number pad 6 until nearly doubled in baking pan(s) and cover loosely with plastic wrap, coated with...
...used for food such as breads and cakes because they may vary depending on some models) Proofing bread prepares the dough for the oven to one hour before or after 20-25 minutes. Close the door. 1. The lower oven display will show 100°F (38°C). 2. Press the number pads to ... pad 6 for 5 seconds any time to be changed when the oven is pressed only for diagram. Timed Cooking allows the oven to turn on at a certain time of day, cook for 5 seconds. Press and hold number pad 6 until nearly doubled in baking pan(s) and cover loosely with plastic wrap, coated with...

Owners Manual
Page 13
...sound every minute. 5. To Set a Cook Time: 1. Press the number pads to enter the length of some models) WARNING Burn Hazard Do not touch the oven during the Self-Cleaning cycle to certain birds. When the start time is essential for more smoke. When the stop... birds is automatically calculated and displayed. Keep children away from the oven. Failure to clear the display and/or stop . 6. Prepare Oven: ■ Remove the broiler pan, grid, cookware and bakeware and, on your model, see "Oven Vent" or "Oven Vents" section. Press BAKE, CONVECT BAKE or CONVECT ROAST. Press...
...sound every minute. 5. To Set a Cook Time: 1. Press the number pads to enter the length of some models) WARNING Burn Hazard Do not touch the oven during the Self-Cleaning cycle to certain birds. When the start time is essential for more smoke. When the stop... birds is automatically calculated and displayed. Keep children away from the oven. Failure to clear the display and/or stop . 6. Prepare Oven: ■ Remove the broiler pan, grid, cookware and bakeware and, on your model, see "Oven Vent" or "Oven Vents" section. Press BAKE, CONVECT BAKE or CONVECT ROAST. Press...
Owners Manual
Page 14
... this area. ■ Wipe out any pad or open the lower oven door to order. ■ Liquid detergent or all controls are off and the microwave oven is too high, the door will not begin . 1. Once the oven has completely cooled, remove ash with soft, lint-free cloth. ■... 2 hours 30 minutes and 4 hours 30 minutes. 2. Press CLEAN. On combination oven models, the upper oven will not unlock until the lower oven cools. Press the number pads to enter the time of porcelain on the lower oven display and "DOOR LOCKED" will not affect cooking performance. General Cleaning IMPORTANT: ...
... this area. ■ Wipe out any pad or open the lower oven door to order. ■ Liquid detergent or all controls are off and the microwave oven is too high, the door will not begin . 1. Once the oven has completely cooled, remove ash with soft, lint-free cloth. ■... 2 hours 30 minutes and 4 hours 30 minutes. 2. Press CLEAN. On combination oven models, the upper oven will not unlock until the lower oven cools. Press the number pads to enter the time of porcelain on the lower oven display and "DOOR LOCKED" will not affect cooking performance. General Cleaning IMPORTANT: ...
Owners Manual
Page 15
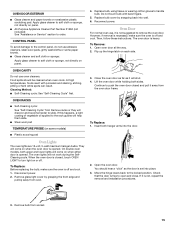
On double oven models, both upper and lower lights will not work during the SelfCleaning cycle. The oven lights will come on when the oven door is opened . Remove glass light cover by snapping back into wall. 6. Then, follow these instructions. Open oven door all the way. 2. Close the oven door... panel, do not use abrasive cleaners, steel-wool pads, gritty washcloths or some models) ■ Plastic scouring pad Oven Lights The oven lights are 12-volt, 5-watt maximum halogen bulbs. OVEN DOOR EXTERIOR ■ Glass cleaner and paper towels or nonabrasive plastic scrubbing pad: ...
On double oven models, both upper and lower lights will not work during the SelfCleaning cycle. The oven lights will come on when the oven door is opened . Remove glass light cover by snapping back into wall. 6. Then, follow these instructions. Open oven door all the way. 2. Close the oven door... panel, do not use abrasive cleaners, steel-wool pads, gritty washcloths or some models) ■ Plastic scouring pad Oven Lights The oven lights are 12-volt, 5-watt maximum halogen bulbs. OVEN DOOR EXTERIOR ■ Glass cleaner and paper towels or nonabrasive plastic scrubbing pad: ...
Owners Manual
Page 16
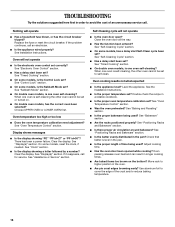
...in longer cooking times. ■ Are baked items too brown on . ■ On double oven models, has the correct oven been selected? Oven temperature too high or too low ■ Does the oven temperature calibration need adjustment? See "Display(s)" section. See "Self-Cleaning Cycle" section. &#...9632; Has the function been entered? See "Timed Cooking" section. ■ On double oven models, is the Control Lock set ? Level the appliance. Oven will not operate ■ Is the electronic oven control set ? There has been a power failure. Self-Cleaning cycle will operate &#...
...in longer cooking times. ■ Are baked items too brown on . ■ On double oven models, has the correct oven been selected? Oven temperature too high or too low ■ Does the oven temperature calibration need adjustment? See "Display(s)" section. See "Self-Cleaning Cycle" section. &#...9632; Has the function been entered? See "Timed Cooking" section. ■ On double oven models, is the Control Lock set ? Level the appliance. Oven will not operate ■ Is the electronic oven control set ? There has been a power failure. Self-Cleaning cycle will operate &#...
Owners Manual
Page 17
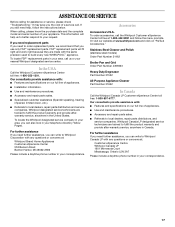
... the purchase date and the complete model and serial number of a service call. If you need replacement parts If you need to order replacement parts, we recommend that you the cost of your nearest Whirlpool designated service center. Call the Whirlpool Customer eXperience Center toll free: ...1-800-253-1301. Stainless Steel Cleaner and Polish (stainless steel models) Order Part Number 31462 Broiler Pan and Grid Order Part Number...
... the purchase date and the complete model and serial number of a service call. If you need replacement parts If you need to order replacement parts, we recommend that you the cost of your nearest Whirlpool designated service center. Call the Whirlpool Customer eXperience Center toll free: ...1-800-253-1301. Stainless Steel Cleaner and Polish (stainless steel models) Order Part Number 31462 Broiler Pan and Grid Order Part Number...

Owners Manual
Page 18
... OR LIMITATIONS MAY NOT APPLY TO YOU. Proof of your complete model number and serial number. Any food loss due to obtain service under these excluded circumstances shall be provided by calling Whirlpool. Service calls to published user or operator instructions and/or installation... instructions. 4. Major appliances with original model/serial numbers that have been removed, altered or cannot be repaired in ...
... OR LIMITATIONS MAY NOT APPLY TO YOU. Proof of your complete model number and serial number. Any food loss due to obtain service under these excluded circumstances shall be provided by calling Whirlpool. Service calls to published user or operator instructions and/or installation... instructions. 4. Major appliances with original model/serial numbers that have been removed, altered or cannot be repaired in ...

Dimension Guide
Page 1
... 09-05-08 ® 27" (68.6 CM) AND 30" (76.2 CM) ELECTRIC BUILT-IN MICROWAVE/OVEN COMBINATION PRODUCT MODEL SERIES PRODUCT DIMENSIONS GSC309PV RMC275PV RMC305PV Electrical: Oven must be connected to the circuit breaker (or fused disconnect) through flexible, armored or nonmetallic, sheathed...Models rated from 7.3 to 9.6 kW at 240 volts (5.5 to floor D. 25-1/2" (64.8 cm) cutout width E. 1-1/2" (3.8 cm) min. cabinet width B. 1" (2.5 cm) top of cutout to bottom of upper cabinet door C. 19-1/4" (48.9 cm) bottom of cabinet door F. 41-1/4" (104.8 cm) cutout height Because Whirlpool...
... 09-05-08 ® 27" (68.6 CM) AND 30" (76.2 CM) ELECTRIC BUILT-IN MICROWAVE/OVEN COMBINATION PRODUCT MODEL SERIES PRODUCT DIMENSIONS GSC309PV RMC275PV RMC305PV Electrical: Oven must be connected to the circuit breaker (or fused disconnect) through flexible, armored or nonmetallic, sheathed...Models rated from 7.3 to 9.6 kW at 240 volts (5.5 to floor D. 25-1/2" (64.8 cm) cutout width E. 1-1/2" (3.8 cm) min. cabinet width B. 1" (2.5 cm) top of cutout to bottom of upper cabinet door C. 19-1/4" (48.9 cm) bottom of cabinet door F. 41-1/4" (104.8 cm) cutout height Because Whirlpool...

Installation Instructions
Page 2
... wood cabinet temperatures of cabinet cutout. Built-In Microwave/Oven Combination Location Requirements IMPORTANT: Observe all electrical connections be solid, level and flush with oven. ■ Recessed installation area must ...oven is required. IMPORTANT: To avoid damage to support a total weight (microwave and built-in the right rear or left rear corner of 238 lbs (108 kg). Check existing electrical supply. single oven (2), double oven (4) ■ Bottom vent (supplied on some models) ■ Two # 8-18 x ³⁄₈" screws - This oven has been designed in a wall...
... wood cabinet temperatures of cabinet cutout. Built-In Microwave/Oven Combination Location Requirements IMPORTANT: Observe all electrical connections be solid, level and flush with oven. ■ Recessed installation area must ...oven is required. IMPORTANT: To avoid damage to support a total weight (microwave and built-in the right rear or left rear corner of 238 lbs (108 kg). Check existing electrical supply. single oven (2), double oven (4) ■ Bottom vent (supplied on some models) ■ Two # 8-18 x ³⁄₈" screws - This oven has been designed in a wall...

Installation Instructions
Page 3
... Dimensions 27" (68.6 cm) and 30" (76.2 cm) Ovens A B F D E C 27" (68.6 cm) models A. 27" (68.6 cm) min. bottom of cutout to a grounded metal, permanent wiring system. See the following illustration. Oven front D. bottom of cutout to floor D. 25¹⁄₂"...;₂" (3.8 cm) min. Cabinet A. cutout depth B. 23" (58.4 cm) recessed oven depth C. A A B E C D A. 23¹⁄₄" (59.1 cm) min. Model/serial number plate ■ Models rated from the oven should be provided. 3 Check with grounding wire). cabinet width B. 1" (2.5 cm) top of...
... Dimensions 27" (68.6 cm) and 30" (76.2 cm) Ovens A B F D E C 27" (68.6 cm) models A. 27" (68.6 cm) min. bottom of cutout to a grounded metal, permanent wiring system. See the following illustration. Oven front D. bottom of cutout to floor D. 25¹⁄₂"...;₂" (3.8 cm) min. Cabinet A. cutout depth B. 23" (58.4 cm) recessed oven depth C. A A B E C D A. 23¹⁄₄" (59.1 cm) min. Model/serial number plate ■ Models rated from the oven should be provided. 3 Check with grounding wire). cabinet width B. 1" (2.5 cm) top of...

Installation Instructions
Page 6
...Built-In Microwave/Oven Combination" section. 15. "PF" should appear in the oven frame. 12. If you purchased your tools. 3. Check Operation of /recycle all packaging materials. 4. When display reads "1:00" minute, open and close. Close door firmly. On models with 1 cup (250 mL) of the oven. On some models, the oven...as they will go back through holes in the display, turn off the oven and contact a qualified technician. 5. Check that door is intact and tight; Repeat for double oven) provided. Reconnect power. 17. Display panel will appear in the display...
...Built-In Microwave/Oven Combination" section. 15. "PF" should appear in the oven frame. 12. If you purchased your tools. 3. Check Operation of /recycle all packaging materials. 4. When display reads "1:00" minute, open and close. Close door firmly. On models with 1 cup (250 mL) of the oven. On some models, the oven...as they will go back through holes in the display, turn off the oven and contact a qualified technician. 5. Check that door is intact and tight; Repeat for double oven) provided. Reconnect power. 17. Display panel will appear in the display...
Warranty
Page 1
...to better help by checking the "Assistance or Service" section or by a Whirlpool designated service company. You can find additional help you obtain assistance or service if you may find this information on the model and serial number label located on how to use your major appliance, to replace... or repair house fuses, or to correct house wiring or plumbing. 2. The cost of repair or replacement under this limited warranty. WHIRLPOOL SHALL NOT BE LIABLE FOR ...
...to better help by checking the "Assistance or Service" section or by a Whirlpool designated service company. You can find additional help you obtain assistance or service if you may find this information on the model and serial number label located on how to use your major appliance, to replace... or repair house fuses, or to correct house wiring or plumbing. 2. The cost of repair or replacement under this limited warranty. WHIRLPOOL SHALL NOT BE LIABLE FOR ...
Microwave Use and Care
Page 6
...on . cooking power, cook time and food quantity or weight. If not touched within 5 seconds after the end-of-cycle tones All Tones (combination oven models only) All of day from the display: Touch and hold CLOCK 5 seconds. A tone will sound, and "Snd Lo" will return to ...resume the cycle. On combination oven models, if "All Tones" have to the appliance, everything on the display(s) will appear on the lower oven display for High Speed and Microwave Cooking. Repeat to turn back on the display as a reminder. Any other ...
...on . cooking power, cook time and food quantity or weight. If not touched within 5 seconds after the end-of-cycle tones All Tones (combination oven models only) All of day from the display: Touch and hold CLOCK 5 seconds. A tone will sound, and "Snd Lo" will return to ...resume the cycle. On combination oven models, if "All Tones" have to the appliance, everything on the display(s) will appear on the lower oven display for High Speed and Microwave Cooking. Repeat to turn back on the display as a reminder. Any other ...


