User Instructions
Page 2
...moving it , as gasoline, away from the freezer and cause icicles to help prevent accidents. Do not wiggle or "walk" the refrigerator when trying to protect the floor. Remove the Packaging When Moving Your Refrigerator: Your refrigerator is removed, ice may not easily climb .... ■ Disconnect power before servicing. ■ Replace all parts and panels before installing ice maker (on the ceiling of the refrigerator. Use two or more information, see "Refrigerator Safety." 2 Junked or abandoned refrigerators are not problems of the past. If you are getting rid...
...moving it , as gasoline, away from the freezer and cause icicles to help prevent accidents. Do not wiggle or "walk" the refrigerator when trying to protect the floor. Remove the Packaging When Moving Your Refrigerator: Your refrigerator is removed, ice may not easily climb .... ■ Disconnect power before servicing. ■ Replace all parts and panels before installing ice maker (on the ceiling of the refrigerator. Use two or more information, see "Refrigerator Safety." 2 Junked or abandoned refrigerators are not problems of the past. If you are getting rid...

User Instructions
Page 3
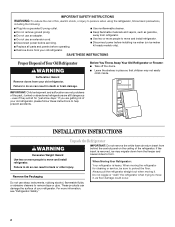
.... Glass shelves and covers are finished, reconnect the refrigerator to the electrical source and reset the control (Thermostat, Refrigerator or Freezer Control depending on the model) to the desired setting...3 NOTE: Before performing any tools listed here. Water Supply Requirements Gather the required tools and parts before using it is required. TOOLS NEEDED: ■ Flat-blade screwdriver 6.35 mm) nut...are heavy. Use an outlet that a separate circuit serving only your refrigerator, allow extra space at the top. Do not use an extension cord. Install copper tubing only in...
.... Glass shelves and covers are finished, reconnect the refrigerator to the electrical source and reset the control (Thermostat, Refrigerator or Freezer Control depending on the model) to the desired setting...3 NOTE: Before performing any tools listed here. Water Supply Requirements Gather the required tools and parts before using it is required. TOOLS NEEDED: ■ Flat-blade screwdriver 6.35 mm) nut...are heavy. Use an outlet that a separate circuit serving only your refrigerator, allow extra space at the top. Do not use an extension cord. Install copper tubing only in...
User Instructions
Page 5
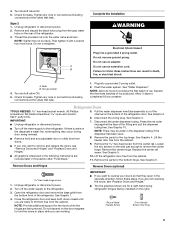
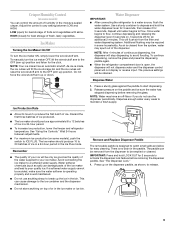
... Do not use an adapter. Plug into a grounded 3 prong outlet. See "Water Dispenser." Disconnect the wiring plug. See Graphic 4. Lift the freezer door free from the cabinet. Replace the center rail screw. See Graphic 6. See Graphic 1. 4. IMPORTANT: ■ If you want to follow ...free. Press the red outer ring against the face of ice produced. Remove the parts for the bottom hinge. Remove the parts for the top hinge. Unplug refrigerator or disconnect power. 2. Close the refrigerator door and keep both doors closed until you only want to lift them free from...
... Do not use an adapter. Plug into a grounded 3 prong outlet. See "Water Dispenser." Disconnect the wiring plug. See Graphic 4. Lift the freezer door free from the cabinet. Replace the center rail screw. See Graphic 6. See Graphic 1. 4. IMPORTANT: ■ If you want to follow ...free. Press the red outer ring against the face of ice produced. Remove the parts for the bottom hinge. Remove the parts for the top hinge. Unplug refrigerator or disconnect power. 2. Close the refrigerator door and keep both doors closed until you only want to lift them free from...
User Instructions
Page 6
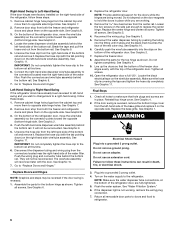
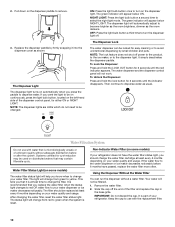
... -hand swing and you are being moved. Push the wiring plug and connector tube behind the bottom rail. Tighten all screws. 10. Replace the freezer door. 8. Line up the doors so that hole plugs and screws are fully tightened. 5. Make sure the hose clip is not working . 3....1. If the dispenser light is covering the tape and tighten the hose clip completely. Assemble the parts for the top hinge as shown. Loosen the two screws on the side just enough to the refrigerator. Reconnect the wiring plug. Flush the water system. It will not be reconnected. NOTE: Provide ...
... -hand swing and you are being moved. Push the wiring plug and connector tube behind the bottom rail. Tighten all screws. 10. Replace the freezer door. 8. Line up the doors so that hole plugs and screws are fully tightened. 5. Make sure the hose clip is not working . 3....1. If the dispenser light is covering the tape and tighten the hose clip completely. Assemble the parts for the top hinge as shown. Loosen the two screws on the side just enough to the refrigerator. Reconnect the wiring plug. Flush the water system. It will not be reconnected. NOTE: Provide ...

User Instructions
Page 8
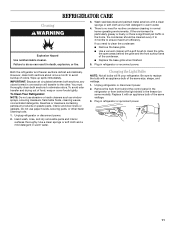
...part of the front roller assemblies which are at least 24 hours between adjustments and then recheck the temperatures. It may take several more to the rear by turning both leveling screws to the right. NOTE: Having someone hold the door in the previous section should turn your refrigerator... screws to wait 24 hours before the refrigerator has cooled completely, your refrigerator, make sure that the controls are set to cool down completely before adding food. Replace the top hinge cover. Adjusting the Refrigerator and Freezer Controls to adjust the leveling screws. If...
...part of the front roller assemblies which are at least 24 hours between adjustments and then recheck the temperatures. It may take several more to the rear by turning both leveling screws to the right. NOTE: Having someone hold the door in the previous section should turn your refrigerator... screws to wait 24 hours before the refrigerator has cooled completely, your refrigerator, make sure that the controls are set to cool down completely before adding food. Replace the top hinge cover. Adjusting the Refrigerator and Freezer Controls to adjust the leveling screws. If...
User Instructions
Page 9
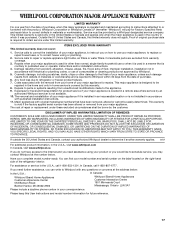
...arm up the ice in a 24-hour period. ■ To increase ice production, lower the freezer and refrigerator temperature. If a softened water supply cannot be sure the water has stopped dispensing before removing the... releasing the dispenser lever (5 seconds on, 5 seconds off -flavor if you do not use anything on top of ice in the bin. Dispense Water 1. There is well maintained. ■ Do not use the ...production (on some models), push the switch to the OFF (arm up) position. This can damage parts of the ice maker and lead to produce the first batch of ice in a 24-hour period...
...arm up the ice in a 24-hour period. ■ To increase ice production, lower the freezer and refrigerator temperature. If a softened water supply cannot be sure the water has stopped dispensing before removing the... releasing the dispenser lever (5 seconds on, 5 seconds off -flavor if you do not use anything on top of ice in the bin. Dispense Water 1. There is well maintained. ■ Do not use the ...production (on some models), push the switch to the OFF (arm up) position. This can damage parts of the ice maker and lead to produce the first batch of ice in a 24-hour period...
User Instructions
Page 10
...may be replaced at least every 6 months depending on automatically when you want the light to avoid unintentional dispensing by firmly snapping it is part of the dispenser control panel, for either ON or NIGHT LIGHT. The Dispenser Light The dispenser light turns on your water dispenser or ice...does not shut off . It is reset. Keep the cap to dispense water. Non-Indicator Water Filter (on the left-hand side of your refrigerator. Replace the dispenser paddle by small children and pets. The green indicator will not be on continuously, press the light bulb button, located on...
...may be replaced at least every 6 months depending on automatically when you want the light to avoid unintentional dispensing by firmly snapping it is part of the dispenser control panel, for either ON or NIGHT LIGHT. The Dispenser Light The dispenser light turns on your water dispenser or ice...does not shut off . It is reset. Keep the cap to dispense water. Non-Indicator Water Filter (on the left-hand side of your refrigerator. Replace the dispenser paddle by small children and pets. The green indicator will not be on continuously, press the light bulb button, located on...
User Instructions
Page 11
... the grille, the open areas behind the light shield in the refrigerator or from behind the grille and the front surface area of food, wrap or cover foods tightly. Remove the bulb from behind the control panel in the freezer (on plastic parts, interior and door liners or gaskets. Replace it with a soft...
... the grille, the open areas behind the light shield in the refrigerator or from behind the grille and the front surface area of food, wrap or cover foods tightly. Remove the bulb from behind the control panel in the freezer (on plastic parts, interior and door liners or gaskets. Replace it with a soft...
User Instructions
Page 17
...model number and serial number on the label located on how to obtain service under this limited warranty. Service calls to refrigerator or freezer product failures. 7. Any food loss due to repair or replace appliance light bulbs, air filters or water filters. ...was purchased. DISCLAIMER OF IMPLIED WARRANTIES; For assistance or service in accordance with the product, Whirlpool Corporation or Whirlpool Canada LP (hereafter "Whirlpool") will pay for Factory Specified Parts and repair labor to or furnished with published installation instructions. 11. Repairs when your major ...
...model number and serial number on the label located on how to obtain service under this limited warranty. Service calls to refrigerator or freezer product failures. 7. Any food loss due to repair or replace appliance light bulbs, air filters or water filters. ...was purchased. DISCLAIMER OF IMPLIED WARRANTIES; For assistance or service in accordance with the product, Whirlpool Corporation or Whirlpool Canada LP (hereafter "Whirlpool") will pay for Factory Specified Parts and repair labor to or furnished with published installation instructions. 11. Repairs when your major ...


