
Installation Instructions
Page 8
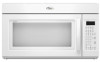
...One End Hole (Figure 3) 1. Spring toggle nut 3. Wall Stud at Both End Holes (Figure 4) 1. The template has trim lines to use as guides. ■ If the wall behind the microwave oven (as at both end holes of the microwave oven. Mounting plate C. Refer to make sure toggle ... NOTE: Secure the mounting plate to make sure toggle nut has opened against drywall. 5. Push the 2 bolts with the holes in Rear Wall" section. 7. If installing on a second wall stud, drill a 3/16" (5 mm) hole into both ends. 1. Wall Studs at One End Hole (Figure 3) 1. Check alignment of the...
...One End Hole (Figure 3) 1. Spring toggle nut 3. Wall Stud at Both End Holes (Figure 4) 1. The template has trim lines to use as guides. ■ If the wall behind the microwave oven (as at both end holes of the microwave oven. Mounting plate C. Refer to make sure toggle ... NOTE: Secure the mounting plate to make sure toggle nut has opened against drywall. 5. Push the 2 bolts with the holes in Rear Wall" section. 7. If installing on a second wall stud, drill a 3/16" (5 mm) hole into both ends. 1. Wall Studs at One End Hole (Figure 3) 1. Check alignment of the...

