Installation Instructions
Page 1
...À conserver pour consultation par l'inspecteur local des installations électriques. 8286066A IMPORTANT: Save for local electrical inspector's use. All safety messages will follow instructions. WARNING You can happen if the instructions are very ...ÉLECTRIQUE Table of Contents / Table des matières COOKTOP SAFETY 1 INSTALLATION INSTRUCTIONS 2 Tools and Parts 2 Location Requirements 2 Electrical Requirements 3 Prepare Cooktop 4 Install Cooktop 5 Make Electrical Connection 6 Attach Cooktop to Countertop 8 Complete Installation 8 SÉCURITÉ DE LA...
...À conserver pour consultation par l'inspecteur local des installations électriques. 8286066A IMPORTANT: Save for local electrical inspector's use. All safety messages will follow instructions. WARNING You can happen if the instructions are very ...ÉLECTRIQUE Table of Contents / Table des matières COOKTOP SAFETY 1 INSTALLATION INSTRUCTIONS 2 Tools and Parts 2 Location Requirements 2 Electrical Requirements 3 Prepare Cooktop 4 Install Cooktop 5 Make Electrical Connection 6 Attach Cooktop to Countertop 8 Complete Installation 8 SÉCURITÉ DE LA...

Installation Instructions
Page 2
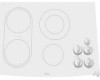
... the installation clearances specified in oven, do not find this label, your cooktop is the responsibility of burns or fire by a licensed, qualified electrical installer. C D A. 21 54.1 cm) B. 16 42.1 cm) 30 77.1 cm) 36 92.3 cm) C. 2⁷⁄₈" (7.3 cm) D. See "Electrical Requirements." It is approved. Model/serial rating plate IMPORTANT: Observe all...
... the installation clearances specified in oven, do not find this label, your cooktop is the responsibility of burns or fire by a licensed, qualified electrical installer. C D A. 21 54.1 cm) B. 16 42.1 cm) 30 77.1 cm) 36 92.3 cm) C. 2⁷⁄₈" (7.3 cm) D. See "Electrical Requirements." It is approved. Model/serial rating plate IMPORTANT: Observe all...

Installation Instructions
Page 3
... A. 15" (38.1 cm) on 15" (38.1 cm) models; 30" (76.2 cm) on 30" (76.2 cm) models; 36" (91.4 cm) on 15" (38.1 cm) models. Failure to follow these instructions can result in death, fire, or electrical shock. B. 1½" (3.8 cm) max. Use 8 gauge copper wire. Electrically ground cooktop. If cabinet has a drawer, a 3" (7.6 cm) depth clearance from...
... A. 15" (38.1 cm) on 15" (38.1 cm) models; 30" (76.2 cm) on 30" (76.2 cm) models; 36" (91.4 cm) on 15" (38.1 cm) models. Failure to follow these instructions can result in death, fire, or electrical shock. B. 1½" (3.8 cm) max. Use 8 gauge copper wire. Electrically ground cooktop. If cabinet has a drawer, a 3" (7.6 cm) depth clearance from...

Installation Instructions
Page 4
...neutral or ground circuit. Follow the electrical connector manufacturer's recommended procedure. Failure to allow as much slack as possible between the junction box and the cooktop so that the electrical connection and wire size are not sure the cooktop is already provided at the junction box... Road Cleveland, OH 44131-5575 Before You Make the Electrical Connection: To properly install your cooktop, you are adequate and in the future. Check with a qualified electrical installer if you must conform with the National Electrical Code, ANSI/NFPA 70-latest edition or CSA Standards ...
...neutral or ground circuit. Follow the electrical connector manufacturer's recommended procedure. Failure to allow as much slack as possible between the junction box and the cooktop so that the electrical connection and wire size are not sure the cooktop is already provided at the junction box... Road Cleveland, OH 44131-5575 Before You Make the Electrical Connection: To properly install your cooktop, you are adequate and in the future. Check with a qualified electrical installer if you must conform with the National Electrical Code, ANSI/NFPA 70-latest edition or CSA Standards ...

Installation Instructions
Page 5
...installation of the countertop. A. Attachment screw 3. Countertop G. B A. NOTE: Make sure that they do not extend beyond edge of cooktop base bottom B. Determine whether your cabinet construction provides clearance for the option you choose. Tighten screws just enough to hold brackets in ...on the front and back of clamping screws) D C E. 2½" (6.4 cm) clamping screw (to be installed in "Attach Cooktop to cooktop base bottom with bracket attachment screws using the bracket mounting holes selected C in oven IMPORTANT: Clamp brackets should not be installed before ...
...installation of the countertop. A. Attachment screw 3. Countertop G. B A. NOTE: Make sure that they do not extend beyond edge of cooktop base bottom B. Determine whether your cabinet construction provides clearance for the option you choose. Tighten screws just enough to hold brackets in ...on the front and back of clamping screws) D C E. 2½" (6.4 cm) clamping screw (to be installed in "Attach Cooktop to cooktop base bottom with bracket attachment screws using the bracket mounting holes selected C in oven IMPORTANT: Clamp brackets should not be installed before ...
Installation Instructions
Page 6
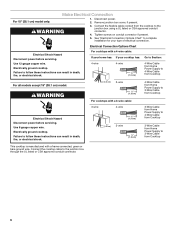
... power before servicing. Use 8 gauge copper wire. For all models except 15" (38.1 cm) model: WARNING Electrical Connection Options Chart For cooktops with a 4-wire cable: If your home has: If your type of electrical connection. Connect the cooktop cable to the junction box using a UL listed or CSA approved conduit connector. 4. Connect the flexible...
... power before servicing. Use 8 gauge copper wire. For all models except 15" (38.1 cm) model: WARNING Electrical Connection Options Chart For cooktops with a 4-wire cable: If your home has: If your type of electrical connection. Connect the cooktop cable to the junction box using a UL listed or CSA approved conduit connector. 4. Connect the flexible...

Installation Instructions
Page 7
...together using the UL listed wire connectors. 7 A E B F G H C I . Black wires H. Connect the green or bare ground wire from the cooktop cable to the green or bare ground wire (in Canada. Black wires I A. UL listed or CSA approved conduit connector 1. U.S. only IMPORTANT: Use the 3-...permit connecting the frame-ground conductor to the neutral (white) junction box wire. A. Red wires C. UL listed wire connector G. Cable from Cooktop - White wire G. UL listed wire connector H. Install junction box cover. 3-Wire Cable from Home Power Supply to 4-Wire Cable from ...
...together using the UL listed wire connectors. 7 A E B F G H C I . Black wires H. Connect the green or bare ground wire from the cooktop cable to the green or bare ground wire (in Canada. Black wires I A. UL listed or CSA approved conduit connector 1. U.S. only IMPORTANT: Use the 3-...permit connecting the frame-ground conductor to the neutral (white) junction box wire. A. Red wires C. UL listed wire connector G. Cable from Cooktop - White wire G. UL listed wire connector H. Install junction box cover. 3-Wire Cable from Home Power Supply to 4-Wire Cable from ...

Installation Instructions
Page 8
...: This section applies only if you have all parts are using the UL listed wire connectors. 4. Clamp bracket (extends far enough beyond cooktop base to alllow installation of /recycle all packaging materials. 4. Foam seal 1. Check that a circuit breaker has not tripped or a household... fuse has not blown. NOTE: If the cooktop does not work after turning on the power, check that you are now installed. U.S. White wire (from power supply where local codes permit...
...: This section applies only if you have all parts are using the UL listed wire connectors. 4. Clamp bracket (extends far enough beyond cooktop base to alllow installation of /recycle all packaging materials. 4. Foam seal 1. Check that a circuit breaker has not tripped or a household... fuse has not blown. NOTE: If the cooktop does not work after turning on the power, check that you are now installed. U.S. White wire (from power supply where local codes permit...


