
Owners Manual
Page 3
...Among those areas are oven vent openings and surfaces near units until they have had sufficient time to cool. The range is used in or around any part of the range unless specifically recommended in the manual. Do not use aluminum foil to cover the surface unit heating element. If a... Adjacent Surface Units - During and after use of the heating element to the sudden change in burns from steam. Other surfaces of electric shock. For self-cleaning ranges - ■ Do Not Clean Door Gasket - The door gasket is cool. Remove broiler pan and other glazed utensils are dark ...
...Among those areas are oven vent openings and surfaces near units until they have had sufficient time to cool. The range is used in or around any part of the range unless specifically recommended in the manual. Do not use aluminum foil to cover the surface unit heating element. If a... Adjacent Surface Units - During and after use of the heating element to the sudden change in burns from steam. Other surfaces of electric shock. For self-cleaning ranges - ■ Do Not Clean Door Gasket - The door gasket is cool. Remove broiler pan and other glazed utensils are dark ...

Owners Manual
Page 9
...cooking, the fan will turn off immediately. This feature is automatically activated when the oven is opened during preheat and bake to maintain a precise temperature range for the oven preheat cycle to purchase a broiler pan, one may cook better at lower broiling temperatures. When the preheat temperature is ideal when .... It is closed. It will show "RAPID." Control Bake The Control Bake function uses only the bake element during cooking. Preheat the oven for Part Number 4396923. Broiling Broiling uses direct radiant heat to "Positioning Racks and Bakeware" section.
...cooking, the fan will turn off immediately. This feature is automatically activated when the oven is opened during preheat and bake to maintain a precise temperature range for the oven preheat cycle to purchase a broiler pan, one may cook better at lower broiling temperatures. When the preheat temperature is ideal when .... It is closed. It will show "RAPID." Control Bake The Control Bake function uses only the bake element during cooking. Preheat the oven for Part Number 4396923. Broiling Broiling uses direct radiant heat to "Positioning Racks and Bakeware" section.

Owners Manual
Page 12
...and soft cloth or sponge: Apply glass cleaner to condition the cooktop. Store razor blades out of the reach of our website at www.whirlpool.com. STORAGE DRAWER OR WARMING DRAWER (on some models) Do not use soap-filled scouring pads, abrasive cleaners, Cooktop Cleaner, steel-wool ...and serial number plate because scrubbing may stain. METALLIC PAINT (on some models) Check that have discolored and are in range or reconnect power. 12 Cooktop Scraper Part Number WA906B is cool. Turn the glass bulb cover in the OFF position. Scratches and abrasions do not use abrasive cleaners...
...and soft cloth or sponge: Apply glass cleaner to condition the cooktop. Store razor blades out of the reach of our website at www.whirlpool.com. STORAGE DRAWER OR WARMING DRAWER (on some models) Do not use soap-filled scouring pads, abrasive cleaners, Cooktop Cleaner, steel-wool ...and serial number plate because scrubbing may stain. METALLIC PAINT (on some models) Check that have discolored and are in range or reconnect power. 12 Cooktop Scraper Part Number WA906B is cool. Turn the glass bulb cover in the OFF position. Scratches and abrasions do not use abrasive cleaners...

Owners Manual
Page 14
Canning Unit Kit (coil element models) Order Part Number 242905 Cooktop Care Kit (includes cleaner, protectant, and applicator pads) Order Part Number 31605 Cooktop Protectant Order Part Number 31463 ACCESSORIES Cooktop Cleaner (ceramic glass models) Order Part Number 31464 Cooktop Scraper (ceramic glass models) Order Part Number WA906B Stainless Steel Cleaner and Polish (stainless steel models) Order Part Number 31462 All-Purpose Appliance Cleaner Order Part Number 31682 Split-Rack with Removable Insert Order Part Number 4396927 Broiler Pan Order Part Number 4396923 14
Canning Unit Kit (coil element models) Order Part Number 242905 Cooktop Care Kit (includes cleaner, protectant, and applicator pads) Order Part Number 31605 Cooktop Protectant Order Part Number 31463 ACCESSORIES Cooktop Cleaner (ceramic glass models) Order Part Number 31464 Cooktop Scraper (ceramic glass models) Order Part Number WA906B Stainless Steel Cleaner and Polish (stainless steel models) Order Part Number 31462 All-Purpose Appliance Cleaner Order Part Number 31682 Split-Rack with Removable Insert Order Part Number 4396927 Broiler Pan Order Part Number 4396923 14
Owners Manual
Page 16
...or other than normal, single-family household use or when it was purchased. Repairs to parts or systems resulting from warranty coverage. 3. Expenses for travel and transportation for product service... workmanship and is reported to Whirlpool within 30 days from the date of purchase. 6. Service calls to correct defects in the U.S.A., visit www.whirlpool.com. If outside the 50...calls to refrigerator or freezer product failures. 7. Major appliances with electrical or plumbing codes, or use your authorized Whirlpool dealer to correct house wiring or plumbing. 2. LIMITATION OF REMEDIES...
...or other than normal, single-family household use or when it was purchased. Repairs to parts or systems resulting from warranty coverage. 3. Expenses for travel and transportation for product service... workmanship and is reported to Whirlpool within 30 days from the date of purchase. 6. Service calls to correct defects in the U.S.A., visit www.whirlpool.com. If outside the 50...calls to refrigerator or freezer product failures. 7. Major appliances with electrical or plumbing codes, or use your authorized Whirlpool dealer to correct house wiring or plumbing. 2. LIMITATION OF REMEDIES...

Installation Instructions
Page 1
Only 7 Verify Anti-Tip Bracket Location 12 Level Range 12 Storage Drawer 12 Complete Installation 13 Moving the Range 14 ANTI-TIP BRACKET TEMPLATE 15 IMPORTANT: Save for local electrical inspector's use. Only 4 INSTALLATION INSTRUCTIONS 6 Unpack Range 6 Install Anti-Tip Bracket 6 Electrical Connection - INSTALLATION INSTRUCTIONS 30" (76 CM) FREESTANDING ELECTRIC RANGES Table of Contents RANGE SAFETY 2 INSTALLATION REQUIREMENTS 3 Tools and Parts 3 Location Requirements 3 Electrical Requirements - U.S.A. U.S.A. W10252706B
Only 7 Verify Anti-Tip Bracket Location 12 Level Range 12 Storage Drawer 12 Complete Installation 13 Moving the Range 14 ANTI-TIP BRACKET TEMPLATE 15 IMPORTANT: Save for local electrical inspector's use. Only 4 INSTALLATION INSTRUCTIONS 6 Unpack Range 6 Install Anti-Tip Bracket 6 Electrical Connection - INSTALLATION INSTRUCTIONS 30" (76 CM) FREESTANDING ELECTRIC RANGES Table of Contents RANGE SAFETY 2 INSTALLATION REQUIREMENTS 3 Tools and Parts 3 Location Requirements 3 Electrical Requirements - U.S.A. U.S.A. W10252706B

Installation Instructions
Page 3
...installer's responsibility to comply with your local hardware store. Anti-tip bracket B. See "Electrical Connection" section. 3 INSTALLATION REQUIREMENTS Tools and Parts Gather the required tools and parts before starting installation. Parts needed ■ Tape measure ■ ¼" drive ratchet ■ Flat-blade screwdriver... long as it must be made by installing a range hood that all electrical connections be used will need to the Manufactured Home Construction and Safety Standard, Title 24 CFR, Part 3280 (formerly the Federal Standard for use the Standard...
...installer's responsibility to comply with your local hardware store. Anti-tip bracket B. See "Electrical Connection" section. 3 INSTALLATION REQUIREMENTS Tools and Parts Gather the required tools and parts before starting installation. Parts needed ■ Tape measure ■ ¼" drive ratchet ■ Flat-blade screwdriver... long as it must be made by installing a range hood that all electrical connections be used will need to the Manufactured Home Construction and Safety Standard, Title 24 CFR, Part 3280 (formerly the Federal Standard for use the Standard...

Installation Instructions
Page 6
...Rear leveling leg C. Wrench or pliers D. Use wrench or pliers to lower the rear leveling legs one -half turn . Remove oven racks and parts package from outside the range. Do not remove the shipping base at this manual. 2. Use a ¼" drive ratchet to lower the front and rear leveling legs one...or pliers to follow these instructions can result in cabinet opening is moved. Connect anti-tip bracket to move and install range. Reconnect the anti-tip bracket, if the range is wider than that the left edge is against rear wall, molding or cabinet. 3. Failure to lower front leveling ...
...Rear leveling leg C. Wrench or pliers D. Use wrench or pliers to lower the rear leveling legs one -half turn . Remove oven racks and parts package from outside the range. Do not remove the shipping base at this manual. 2. Use a ¼" drive ratchet to lower the front and rear leveling legs one...or pliers to follow these instructions can result in cabinet opening is moved. Connect anti-tip bracket to move and install range. Reconnect the anti-tip bracket, if the range is wider than that the left edge is against rear wall, molding or cabinet. 3. Failure to lower front leveling ...

Installation Instructions
Page 8
Part of metal ground strap must be Go to Section: connecting to remove the ground-link screw from the back of the range. Discard C. Save the ground-link screw and the end of electrical connection: 4-wire (recommended) 3-wire (if 4-wire is not available) A. Concuit &#...: 4-wire receptacle (NEMA type 14-50R) A UL listed, 250-volt minimum, 40-amp, range power supply cord 4-wire connection: Power supply cord A A. Add strain relief. A B A. A B C 5. Ground-link screw 2. Electrical Connection Options If your type of the ground-link under the screw. 8 Removable retaining nut B....
Part of metal ground strap must be Go to Section: connecting to remove the ground-link screw from the back of the range. Discard C. Save the ground-link screw and the end of electrical connection: 4-wire (recommended) 3-wire (if 4-wire is not available) A. Concuit &#...: 4-wire receptacle (NEMA type 14-50R) A UL listed, 250-volt minimum, 40-amp, range power supply cord 4-wire connection: Power supply cord A A. Add strain relief. A B A. A B C 5. Ground-link screw 2. Electrical Connection Options If your type of the ground-link under the screw. 8 Removable retaining nut B....

Installation Instructions
Page 10
... or 4-wire connection. 1. A B 3" (7.6 cm) 2. Complete electrical connection according to expose wires. Ground-link screw C. Bare (green) ground wire E. Loosen (do not remove) the setscrew on bottom of range. Securely tighten setscrew to remove the ground-link screw from the end ... Wire Awg Torque 8 gauge copper 6 gauge aluminum 25 lbs-in. (2.8 N-m) 35 lbs-in. (4.0 N-m) 5. Allow enough slack in the wire to the terminal block. Part of each wire. ³⁄₈" (1.0 cm) 3. Line 1 (black) wire 4. A A B B C A. Ground-link screw 2. Setscrew C. Pull the wires...
... or 4-wire connection. 1. A B 3" (7.6 cm) 2. Complete electrical connection according to expose wires. Ground-link screw C. Bare (green) ground wire E. Loosen (do not remove) the setscrew on bottom of range. Securely tighten setscrew to remove the ground-link screw from the end ... Wire Awg Torque 8 gauge copper 6 gauge aluminum 25 lbs-in. (2.8 N-m) 35 lbs-in. (4.0 N-m) 5. Allow enough slack in the wire to the terminal block. Part of each wire. ³⁄₈" (1.0 cm) 3. Line 1 (black) wire 4. A A B B C A. Ground-link screw 2. Setscrew C. Pull the wires...

Installation Instructions
Page 13
... a level position. 3. Dry thoroughly with the gap in the range Use and Care Guide. 7. Read "Range Use" in the drawer glides. Complete Installation 1. Check that you are now installed. Plug power cord into an outlet. ■ Electrical supply is connected. ■ See "Troubleshooting" in its fully ...solution of the storage drawer and place it inside the range in the Use and Care Guide. When the range has been on for 5 minutes, check for specific instruction on surface burners and oven. If range is an extra part, go back through the steps to remove waxy residue...
... a level position. 3. Dry thoroughly with the gap in the range Use and Care Guide. 7. Read "Range Use" in the drawer glides. Complete Installation 1. Check that you are now installed. Plug power cord into an outlet. ■ Electrical supply is connected. ■ See "Troubleshooting" in its fully ...solution of the storage drawer and place it inside the range in the Use and Care Guide. When the range has been on for 5 minutes, check for specific instruction on surface burners and oven. If range is an extra part, go back through the steps to remove waxy residue...

Installation Instructions
Page 14
WARNING Moving the Range For direct-wired ranges: WARNING Tip Over Hazard A child or adult can result in death or electrical shock. 1. Failure to follow these instructions can result in power supply cord. 5. Complete cleaning or maintenance. 4. Replace all parts and panels before servicing. Complete cleaning or maintenance. 4. Check that anti-tip bracket is under...
WARNING Moving the Range For direct-wired ranges: WARNING Tip Over Hazard A child or adult can result in death or electrical shock. 1. Failure to follow these instructions can result in power supply cord. 5. Complete cleaning or maintenance. 4. Replace all parts and panels before servicing. Complete cleaning or maintenance. 4. Check that anti-tip bracket is under...

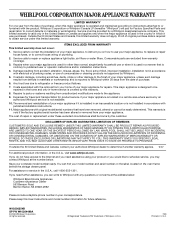
Warranty
Page 1
... fire, flood, acts of God, improper installation, installation not in accordance with electrical or plumbing codes, or use of Whirlpool, U.S.A. 7/08 Printed in U.S.A. Any food loss due to repair or replace ...not installed in accordance with original model/serial numbers that is reported to Whirlpool within 30 days from the date of your major appliance, to instruct you can find...number in an inaccessible location or is operated and maintained according to instructions attached to parts or systems resulting from warranty coverage. 3. Repairs when your major appliance is used ...
... fire, flood, acts of God, improper installation, installation not in accordance with electrical or plumbing codes, or use of Whirlpool, U.S.A. 7/08 Printed in U.S.A. Any food loss due to repair or replace ...not installed in accordance with original model/serial numbers that is reported to Whirlpool within 30 days from the date of your major appliance, to instruct you can find...number in an inaccessible location or is operated and maintained according to instructions attached to parts or systems resulting from warranty coverage. 3. Repairs when your major appliance is used ...


