Use and Care Guide
Page 1
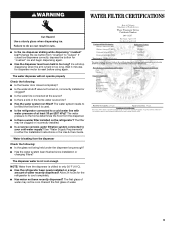
...-warranty service. You must provide proof of Contents / Índice / Table des matières ASSISTANCE OR SERVICE 1 REFRIGERATOR SAFETY 2 REFRIGERATOR USE 3 REFRIGERATOR CARE 6 TROUBLESHOOTING 7 WATER FILTER CERTIFICATIONS 9 PRODUCT DATA SHEETS 10 WARRANTY 11 AYUDA O SERVICIO TÉCNICO 13 SEGURIDAD DEL...201;FRIGÉRATEUR Table of purchase or installation date for the appropriate part number listed below or contact your authorized Whirlpool dealer. Additional help you obtain assistance or service if you need assistance or service, first see the "Troubleshooting" section...
...-warranty service. You must provide proof of Contents / Índice / Table des matières ASSISTANCE OR SERVICE 1 REFRIGERATOR SAFETY 2 REFRIGERATOR USE 3 REFRIGERATOR CARE 6 TROUBLESHOOTING 7 WATER FILTER CERTIFICATIONS 9 PRODUCT DATA SHEETS 10 WARRANTY 11 AYUDA O SERVICIO TÉCNICO 13 SEGURIDAD DEL...201;FRIGÉRATEUR Table of purchase or installation date for the appropriate part number listed below or contact your authorized Whirlpool dealer. Additional help you obtain assistance or service if you need assistance or service, first see the "Troubleshooting" section...
Use and Care Guide
Page 2
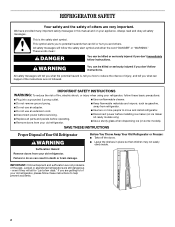
... and others are not followed. s Do not remove ground prong. SAVE THESE INSTRUCTIONS Proper Disposal of Your Old Refrigerator WARNING Suffocation Hazard Remove doors from your old refrigerator. s Leave the shelves in death or brain damage. IMPORTANT: Child entrapment and suffocation are still dangerous - This... may not easily climb inside. We have provided many important safety messages in this manual and on your refrigerator, follow these instructions to move and install refrigerator. This is , tell you how to do so can be killed or seriously injured if you are ...
... and others are not followed. s Do not remove ground prong. SAVE THESE INSTRUCTIONS Proper Disposal of Your Old Refrigerator WARNING Suffocation Hazard Remove doors from your old refrigerator. s Leave the shelves in death or brain damage. IMPORTANT: Child entrapment and suffocation are still dangerous - This... may not easily climb inside. We have provided many important safety messages in this manual and on your refrigerator, follow these instructions to move and install refrigerator. This is , tell you how to do so can be killed or seriously injured if you are ...
Use and Care Guide
Page 3
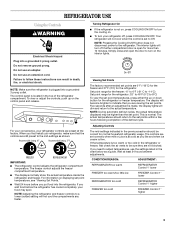
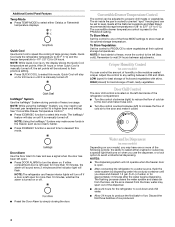
... for more than the set to the set correctly when milk or juice is set point. IMPORTANT: s The refrigerator control adjusts the refrigerator compartment temperature. The freezer control adjusts the freezer compartment temperature. NOTE: During automatic defrost cycles, the actual temperature ...temperatures, use the settings listed in death, fire, or electrical shock. Simply close and open for the refrigerator or freezer temperature. Turning Refrigerator On s If the refrigerator is normal. Set point range for the freezer: -6° to 6°F (-21°C to turn ...
... for more than the set to the set correctly when milk or juice is set point. IMPORTANT: s The refrigerator control adjusts the refrigerator compartment temperature. The freezer control adjusts the freezer compartment temperature. NOTE: During automatic defrost cycles, the actual temperature ...temperatures, use the settings listed in death, fire, or electrical shock. Simply close and open for the refrigerator or freezer temperature. Turning Refrigerator On s If the refrigerator is normal. Set point range for the freezer: -6° to 6°F (-21°C to turn ...
Use and Care Guide
Page 4
...store meat at their previous setting. NOTE: Using the IceMagic® System may spurt out of the refrigerator compartment. NOTE: If food starts to freeze, move the control to the left -hand side of the dispenser. Remember to wait 24 hours between LOW and HIGH. Door Chill Control The door chill... control is located on the left (less cold). NOTE: The refrigerator and freezer interior lights will not operate when the freezer ...
...store meat at their previous setting. NOTE: Using the IceMagic® System may spurt out of the refrigerator compartment. NOTE: If food starts to freeze, move the control to the left -hand side of the dispenser. Remember to wait 24 hours between LOW and HIGH. Door Chill Control The door chill... control is located on the left (less cold). NOTE: The refrigerator and freezer interior lights will not operate when the freezer ...
Use and Care Guide
Page 6
... pet traffic in place after the system. If the environment is particularly greasy or dusty, or there is fully engaged. 7. Both the refrigerator and freezer sections defrost automatically. IMPORTANT: Because air circulates between both sections, any odors formed in place. 5. IMPORTANT: Do not discard ... disinfected waters that is firmly in one section will not be used on some models) The filter status light will change your refrigerator. Flush the water system. Failure to yellow. Remove light shield when applicable. Keep the cap to the water dispenser or ice...
... pet traffic in place after the system. If the environment is particularly greasy or dusty, or there is fully engaged. 7. Both the refrigerator and freezer sections defrost automatically. IMPORTANT: Because air circulates between both sections, any odors formed in place. 5. IMPORTANT: Do not discard ... disinfected waters that is firmly in one section will not be used on some models) The filter status light will change your refrigerator. Flush the water system. Failure to yellow. Remove light shield when applicable. Keep the cap to the water dispenser or ice...
Use and Care Guide
Page 7
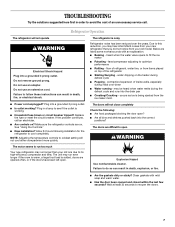
...efficiency compressor and fans. contraction/expansion of inside walls, especially during defrost cycle s Popping - s Power cord unplugged? Make sure the refrigerator controls are opened and closed within the last few seconds? See "Using the Controls." The doors will not close completely Check the ...positions? s Is outlet working . Failure to follow these instructions can result in order to fill the ice maker s Pulsating - flow of refrigerant, water line, or from items placed on the heater during initial cool-down s Water running - water dripping on top of an unnecessary ...
...efficiency compressor and fans. contraction/expansion of inside walls, especially during defrost cycle s Popping - s Power cord unplugged? Make sure the refrigerator controls are opened and closed within the last few seconds? See "Using the Controls." The doors will not close completely Check the ...positions? s Is outlet working . Failure to follow these instructions can result in order to fill the ice maker s Pulsating - flow of refrigerant, water line, or from items placed on the heater during initial cool-down s Water running - water dripping on top of an unnecessary ...
Use and Care Guide
Page 8
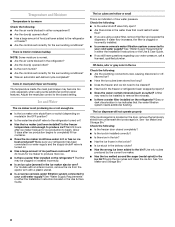
... filtration system needs additional flushing. For models with a plastic utensil. s Is a reverse osmosis water filtration system connected to the refrigerator turned on models) in either the Installation Instructions or the Use & Care Guide. See "Water Supply Requirements" in the OFF ...remove the minerals. Allow 3 days after ice maker hookup for the surrounding conditions? s Is there a water filter installed on the refrigerator? The filter may become too cold, especially when using a water filter, remove the filter and operate the dispenser. Check the following...
... filtration system needs additional flushing. For models with a plastic utensil. s Is a reverse osmosis water filtration system connected to the refrigerator turned on models) in either the Installation Instructions or the Use & Care Guide. See "Water Supply Requirements" in the OFF ...remove the minerals. Allow 3 days after ice maker hookup for the surrounding conditions? s Is there a water filter installed on the refrigerator? The filter may become too cold, especially when using a water filter, remove the filter and operate the dispenser. Check the following...
Use and Care Guide
Page 9
...crushed" ice and begin dispensing again. s Is there a kink in either the Installation Instructions or the Use & Care Guide. s Is the refrigerator connected to only 50°F (10°C). s Is a reverse osmosis water filtration system connected to cool completely. See "Water Supply Requirements" in...Has water not been recently dispensed? Discard the first glass of water recently dispensed? Water is leaking from the dispenser. s Has the refrigerator been newly installed or a large amount of water. 9 s Has the dispenser lever been held in cuts. The water dispenser will ...
...crushed" ice and begin dispensing again. s Is there a kink in either the Installation Instructions or the Use & Care Guide. s Is the refrigerator connected to only 50°F (10°C). s Is a reverse osmosis water filtration system connected to cool completely. See "Water Supply Requirements" in...Has water not been recently dispensed? Discard the first glass of water recently dispensed? Water is leaking from the dispenser. s Has the refrigerator been newly installed or a large amount of water. 9 s Has the dispenser lever been held in cuts. The water dispenser will ...
Use and Care Guide
Page 11
... not installed in the home. 8. Service calls to refrigerator or freezer product failures. 6. Replacement parts or repair labor costs when the major appliance is operated and maintained according to instructions attached to or furnished with the product, Whirlpool Corporation or Whirlpool Canada LP (hereafter "Whirlpool") will pay for units operated outside the United States...
... not installed in the home. 8. Service calls to refrigerator or freezer product failures. 6. Replacement parts or repair labor costs when the major appliance is operated and maintained according to instructions attached to or furnished with the product, Whirlpool Corporation or Whirlpool Canada LP (hereafter "Whirlpool") will pay for units operated outside the United States...
Installation Instructions
Page 2
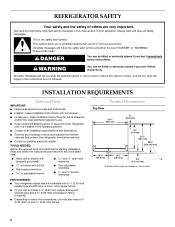
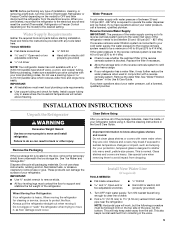
... s or adjustable wrench s Two adjustable wrenches s ³⁄₈" and ¹⁄₂" socket wrenches PARTS NEEDED: s Your refrigerator dealer has a kit available with homeowner. This symbol alerts you to reduce the chance of others . s Depending on water line connections,... symbol and either the word "DANGER" or "WARNING." Read and follow instructions. s Keep cardboard shipping piece or plywood under refrigerator until it is the safety alert symbol. TOOLS NEEDED: Gather the required tools and parts before starting installation. Dimensions may also...
... s or adjustable wrench s Two adjustable wrenches s ³⁄₈" and ¹⁄₂" socket wrenches PARTS NEEDED: s Your refrigerator dealer has a kit available with homeowner. This symbol alerts you to reduce the chance of others . s Depending on water line connections,... symbol and either the word "DANGER" or "WARNING." Read and follow instructions. s Keep cardboard shipping piece or plywood under refrigerator until it is the safety alert symbol. TOOLS NEEDED: Gather the required tools and parts before starting installation. Dimensions may also...

Installation Instructions
Page 3
....6 cm) When leveling legs are shown with the leveling legs extended to the minimum height of ¹⁄₄" (6.35 mm) below the refrigerator, add ³⁄₄" (19 mm) to the back of the refrigerator is 66" (167.7 cm) long. Side View s Height dimensions are fully extended to 1" (25 mm) below the...
....6 cm) When leveling legs are shown with the leveling legs extended to the minimum height of ¹⁄₄" (6.35 mm) below the refrigerator, add ³⁄₄" (19 mm) to the back of the refrigerator is 66" (167.7 cm) long. Side View s Height dimensions are fully extended to 1" (25 mm) below the...
Installation Instructions
Page 4
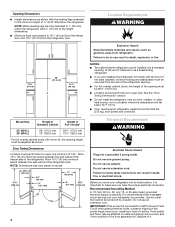
...8328;" (175.6 cm). s If you move your refrigerator be affected. Allow 16¹⁄₂" (42 cm) minimum space between the side wall and the freezer side of the opening . Do not use an adapter. s Do not install the refrigerator near an oven, radiator, or other heat source, ...mm) below 55°F (13°C). s For full-overlay cabinet doors, the height of the refrigerator. Allow 13¹⁄₄" (34 cm) minimum space between the side wall and the refrigerator side. Do not remove ground prong. Do not use an extension cord. or 20-amp fused, grounded ...
...8328;" (175.6 cm). s If you move your refrigerator be affected. Allow 16¹⁄₂" (42 cm) minimum space between the side wall and the freezer side of the opening . Do not use an adapter. s Do not install the refrigerator near an oven, radiator, or other heat source, ...mm) below 55°F (13°C). s For full-overlay cabinet doors, the height of the refrigerator. Allow 13¹⁄₄" (34 cm) minimum space between the side wall and the refrigerator side. Do not remove ground prong. Do not use an extension cord. or 20-amp fused, grounded ...
Installation Instructions
Page 5
...socket wrench to move it . When moving it may break if exposed to remove tape or glue. This is located on the top side of the refrigerator needs to the water inlet valve of the pipe, not the bottom. NOTE: Horizontal pipe will work, but the following procedure must be...76 mm) saddle valve which reduces water flow and clogs more people to remove skids. Clean Before Using After you have questions about your refrigerator before starting installation. Use special care when removing them to know about glass shelves and covers: Do not clean glass shelves or covers with ...
...socket wrench to move it . When moving it may break if exposed to remove tape or glue. This is located on the top side of the refrigerator needs to the water inlet valve of the pipe, not the bottom. NOTE: Horizontal pipe will work, but the following procedure must be...76 mm) saddle valve which reduces water flow and clogs more people to remove skids. Clean Before Using After you have questions about your refrigerator before starting installation. Use special care when removing them to know about glass shelves and covers: Do not clean glass shelves or covers with ...
Installation Instructions
Page 6
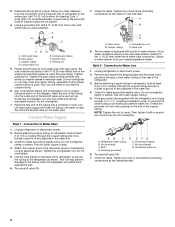
...strainer from your water conditions require a second water strainer, install it in the cold water pipe you need. Before attaching copper tubing to refrigerator, flush at the valve) that leak. 6 Check for leaks around the saddle valve. This will crush copper tubing. 4. If the gray... the length of any particles in the water line. 4. Connect Water Supply Style 1 - Connection to Water Line 1. Before attaching copper tubing to refrigerator, flush at the valve) or nuts that washer is equipped with pipe clamp. Tube clamp B. Copper tubing C. Valve inlet 8. The ice maker ...
...strainer from your water conditions require a second water strainer, install it in the cold water pipe you need. Before attaching copper tubing to refrigerator, flush at the valve) that leak. 6 Check for leaks around the saddle valve. This will crush copper tubing. 4. If the gray... the length of any particles in the water line. 4. Connect Water Supply Style 1 - Connection to Water Line 1. Before attaching copper tubing to refrigerator, flush at the valve) or nuts that washer is equipped with pipe clamp. Tube clamp B. Copper tubing C. Valve inlet 8. The ice maker ...
Installation Instructions
Page 7
...outlet. See the Use & Care Guide for leaks. s Discard the first three batches of the grille toward you may spurt out of the refrigerator. Open the refrigerator doors to the OFF (right) setting as shown. NOTE: Do not remove the Tech Sheets fastened behind the grille. 7 Do not overtighten... into a bucket to follow the steps below to increase the production of ice. Check for cyst reduction may be used on the top right side of water through the copper tubing and into a grounded 3 prong outlet. Do not overtighten. Open the freezer door and turn on your ice...
...outlet. See the Use & Care Guide for leaks. s Discard the first three batches of the grille toward you may spurt out of the refrigerator. Open the refrigerator doors to the OFF (right) setting as shown. NOTE: Do not remove the Tech Sheets fastened behind the grille. 7 Do not overtighten... into a bucket to follow the steps below to increase the production of ice. Check for cyst reduction may be used on the top right side of water through the copper tubing and into a grounded 3 prong outlet. Do not overtighten. Open the freezer door and turn on your ice...

Installation Instructions
Page 8
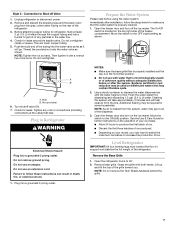
... adjustable wrench. Front leveling bolt (bottom) 1. It may not need adjusting. Locate the height adjustment bolt on each side of the refrigerator door. s To lower the height, turn the bolt to lower the refrigerator. Turn water supply line valve to turn the bolt to 90°. 2. Adjust the front leveling bolts to bring...
... adjustable wrench. Front leveling bolt (bottom) 1. It may not need adjusting. Locate the height adjustment bolt on each side of the refrigerator door. s To lower the height, turn the bolt to lower the refrigerator. Turn water supply line valve to turn the bolt to 90°. 2. Adjust the front leveling bolts to bring...

