
Energy Guide
Page 1
A) U.S. Refrigerator-Freezer • Automatic Defrost • Top-Mounted Freezer • Without Through-The-Door-Ice Service Whirlpool Corporation Models: GR2FHT*V*0*, G2IXEFMW*0*, GR2FHM*V*0*, GR2SHW*V*0* Capacity: 21.7 Cubic Feet Estimated Yearly Operating Cost $45 ▼ $44 $56 Cost Range of Similar Models 422 kWh Estimated Yearly Electricity Use ...
A) U.S. Refrigerator-Freezer • Automatic Defrost • Top-Mounted Freezer • Without Through-The-Door-Ice Service Whirlpool Corporation Models: GR2FHT*V*0*, G2IXEFMW*0*, GR2FHM*V*0*, GR2SHW*V*0* Capacity: 21.7 Cubic Feet Estimated Yearly Operating Cost $45 ▼ $44 $56 Cost Range of Similar Models 422 kWh Estimated Yearly Electricity Use ...
Owners Manual
Page 1
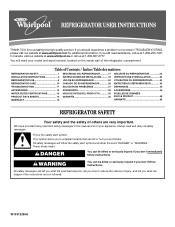
...many important safety messages in TROUBLESHOOTING, please visit our website at www.whirlpool.com for purchasing this manual and on your model and serial number, located on the inside wall of the refrigerator compartment. Always read and obey all safety messages. This is ,...-6777. In Canada, visit our website at www.whirlpool.ca or call us at 1-800-253-1301. Table of Contents / Índice / Table des matières REFRIGERATOR SAFETY 1 INSTALLATION INSTRUCTIONS 2 REFRIGERATOR USE 8 REFRIGERATOR CARE 10 TROUBLESHOOTING 11 ACCESSORIES 13 WATER FILTER CERTIFICATIONS ...
...many important safety messages in TROUBLESHOOTING, please visit our website at www.whirlpool.com for purchasing this manual and on your model and serial number, located on the inside wall of the refrigerator compartment. Always read and obey all safety messages. This is ,...-6777. In Canada, visit our website at www.whirlpool.ca or call us at 1-800-253-1301. Table of Contents / Índice / Table des matières REFRIGERATOR SAFETY 1 INSTALLATION INSTRUCTIONS 2 REFRIGERATOR USE 8 REFRIGERATOR CARE 10 TROUBLESHOOTING 11 ACCESSORIES 13 WATER FILTER CERTIFICATIONS ...
Owners Manual
Page 2
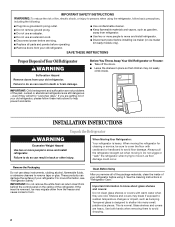
... off the doors. ■ Leave the shelves in back or other injury. Failure to do so can damage the surface of your old refrigerator, please follow basic precautions, including the following: ■ Plug into many small, pebble-size pieces. even if they will sit for cleaning... fluids, or abrasive cleaners to avoid dropping. 2 If you remove all parts and panels before operating. ■ Remove doors from your old refrigerator. ■ Use nonflammable cleaner. ■ Keep flammable materials and vapors, such as gasoline, away from behind the control panel on ice maker...
... off the doors. ■ Leave the shelves in back or other injury. Failure to do so can damage the surface of your old refrigerator, please follow basic precautions, including the following: ■ Plug into many small, pebble-size pieces. even if they will sit for cleaning... fluids, or abrasive cleaners to avoid dropping. 2 If you remove all parts and panels before operating. ■ Remove doors from your old refrigerator. ■ Use nonflammable cleaner. ■ Keep flammable materials and vapors, such as gasoline, away from behind the control panel on ice maker...
Owners Manual
Page 3
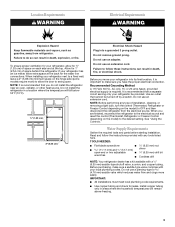
... cord. Failure to follow the instructions provided with any type of installation, cleaning, or removing a light bulb, turn the control (Thermostat, Refrigerator or Freezer Control depending on the model) to make sure a saddle-type valve complies with a ¹⁄₄" (6.35 mm) saddle... a piercing-type or 4.76 mm) saddle valve which reduces water flow and clogs more ) to OFF and then disconnect the refrigerator from refrigerator. Water Supply Requirements Gather the required tools and parts before starting installation. Use an outlet that cannot be provided. TOOLS NEEDED: ...
... cord. Failure to follow the instructions provided with any type of installation, cleaning, or removing a light bulb, turn the control (Thermostat, Refrigerator or Freezer Control depending on the model) to make sure a saddle-type valve complies with a ¹⁄₄" (6.35 mm) saddle... a piercing-type or 4.76 mm) saddle valve which reduces water flow and clogs more ) to OFF and then disconnect the refrigerator from refrigerator. Water Supply Requirements Gather the required tools and parts before starting installation. Use an outlet that cannot be provided. TOOLS NEEDED: ...
Owners Manual
Page 4
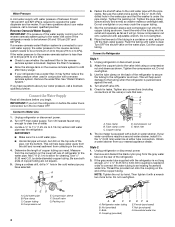
...tubing until water is pushed back against the wall. 4. Connect to Water Line 1. Attach the copper tube to the tubing when the refrigerator is clear. This will help avoid damage to the valve inlet using a compression nut and sleeve as shown. Turn shutoff valve ON. ... the ¹⁄₄" (6.35 mm) water line at the valve) or nuts that the washer is connected to an existing household water line. Unplug refrigerator or disconnect power. 2. A B C D E A. Style 2 1. Compression nut D E. Household water line Reverse Osmosis Water Supply IMPORTANT: The pressure of the ...
...tubing until water is pushed back against the wall. 4. Connect to Water Line 1. Attach the copper tube to the tubing when the refrigerator is clear. This will help avoid damage to the valve inlet using a compression nut and sleeve as shown. Turn shutoff valve ON. ... the ¹⁄₄" (6.35 mm) water line at the valve) or nuts that the washer is connected to an existing household water line. Unplug refrigerator or disconnect power. 2. A B C D E A. Style 2 1. Compression nut D E. Household water line Reverse Osmosis Water Supply IMPORTANT: The pressure of the ...

Owners Manual
Page 5
...doors. Lift the freezer door free from the cabinet. 6. Reverse Doors-Standard Door (optional) IMPORTANT: If you begin, turn the refrigerator control OFF, and remove food and adjustable door or utility bins from doors. Tighten any nuts or connections (including connections at the valve...4. Complete the Installation WARNING Electrical Shock Hazard Plug into a grounded 3 prong outlet. 2. See Base Grille graphic. 3. Close the refrigerator door and keep both doors closed until you are working. 4. Remove the cabinet hinge hole plugs from the bottom front of ice produced...
...doors. Lift the freezer door free from the cabinet. 6. Reverse Doors-Standard Door (optional) IMPORTANT: If you begin, turn the refrigerator control OFF, and remove food and adjustable door or utility bins from doors. Tighten any nuts or connections (including connections at the valve...4. Complete the Installation WARNING Electrical Shock Hazard Plug into a grounded 3 prong outlet. 2. See Base Grille graphic. 3. Close the refrigerator door and keep both doors closed until you are working. 4. Remove the cabinet hinge hole plugs from the bottom front of ice produced...
Owners Manual
Page 6
.... Do not use an extension cord. Failure to follow these instructions can result in place. Reset the controls. Move it to refrigerator. 6 Remove the refrigerator handle assembly as shown. Align the lower portion of freezer door. For Style 2, slide trim into a grounded 3 prong outlet....Hinge graphic. Remove the door stops from handle side and move them to the opposite side. See Bottom Hinge graphic. Replace the refrigerator door. Do not tighten the screws completely. 4. Check all models) 1. Do not remove ground prong. See Graphic 6-1. Move them...
.... Do not use an extension cord. Failure to follow these instructions can result in place. Reset the controls. Move it to refrigerator. 6 Remove the refrigerator handle assembly as shown. Align the lower portion of freezer door. For Style 2, slide trim into a grounded 3 prong outlet....Hinge graphic. Remove the door stops from handle side and move them to the opposite side. See Bottom Hinge graphic. Replace the refrigerator door. Do not tighten the screws completely. 4. Check all models) 1. Do not remove ground prong. See Graphic 6-1. Move them...

Owners Manual
Page 7
... C. Door Swing Reversal." Cabinet Hinge Hole Plugs 3 1-1 1 A A Hex-Head Hinge Screws A A. Door Stop Screw A B B. Door Stop A. Door Swing Reversal (optional) 2 1-2 A A B A A. Door Handle Seal Screw Front 6-1 A 1-2 A. Refrigerator Handle C. Refer to the indicated graphics found in "Standard Door - Door Hinge Hole Plug A. Standard Door - Bottom Hinge B Hex-Head Hinge Screws Contour Door Door...
... C. Door Swing Reversal." Cabinet Hinge Hole Plugs 3 1-1 1 A A Hex-Head Hinge Screws A A. Door Stop Screw A B B. Door Stop A. Door Swing Reversal (optional) 2 1-2 A A B A A. Door Handle Seal Screw Front 6-1 A 1-2 A. Refrigerator Handle C. Refer to the indicated graphics found in "Standard Door - Door Hinge Hole Plug A. Standard Door - Bottom Hinge B Hex-Head Hinge Screws Contour Door Door...

Owners Manual
Page 8
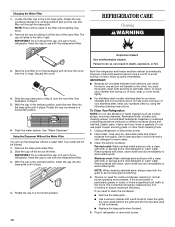
... when ice cream is as cold as shown. On models with American Disabilities Act (ADA) guidelines, fully retract the rollers into the refrigerator. ■ If you like . Your product will not cool the compartments any faster. Adjusting Controls The mid-settings indicated in the ...air vents to the word OFF or until the word OFF appears. The two leveling screws are part of the refrigerator takes some models) REFRIGERATOR too cold REFRIGERATOR or TEMPERATURE Control one setting lower FREEZER too cold FREEZER or TEMPERATURE Control one setting lower 8 It may spoil. ...
... when ice cream is as cold as shown. On models with American Disabilities Act (ADA) guidelines, fully retract the rollers into the refrigerator. ■ If you like . Your product will not cool the compartments any faster. Adjusting Controls The mid-settings indicated in the ...air vents to the word OFF or until the word OFF appears. The two leveling screws are part of the refrigerator takes some models) REFRIGERATOR too cold REFRIGERATOR or TEMPERATURE Control one setting lower FREEZER too cold FREEZER or TEMPERATURE Control one setting lower 8 It may spoil. ...
Owners Manual
Page 9
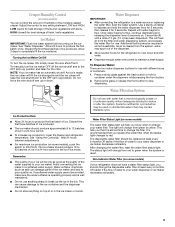
... lower the wire shutoff arm. Do not force the wire shutoff arm up ) position. Water Dispenser IMPORTANT: ■ After connecting the refrigerator to flow, continue depressing and releasing the dispenser lever (5 seconds on, 5 seconds off) until water begins to depress and hold a container... noticeably. 9 HIGH (closed) for cyst reduction may be required in the moisture-sealed crisper. See "Water Dispenser." Allow 3 days to your refrigerator does not have a water filter status light, you that is cleared from green to a softened water supply. Use a sturdy container to flow....
... lower the wire shutoff arm. Do not force the wire shutoff arm up ) position. Water Dispenser IMPORTANT: ■ After connecting the refrigerator to flow, continue depressing and releasing the dispenser lever (5 seconds on, 5 seconds off) until water begins to depress and hold a container... noticeably. 9 HIGH (closed) for cyst reduction may be required in the moisture-sealed crisper. See "Water Dispenser." Allow 3 days to your refrigerator does not have a water filter status light, you that is cleared from green to a softened water supply. Use a sturdy container to flow....
Owners Manual
Page 10
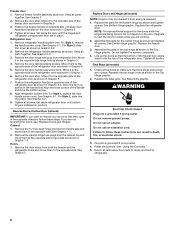
... used filter. You must thoroughly clean both sections, any odors formed in one section will not be water in the filter. Unplug refrigerator or disconnect power. 2. Hand wash, rinse, and dry removable parts and interior surfaces thoroughly. Stainless steel: Wash stainless steel surfaces with...of odors. Clean the exterior surfaces. There is significant pet traffic in warm water. It is part of your stainless steel, keep your refrigerator. Your water will transfer to avoid cross-grain scratching. 4. However, clean both sections about once a month to eliminate odors. IMPORTANT: ...
... used filter. You must thoroughly clean both sections, any odors formed in one section will not be water in the filter. Unplug refrigerator or disconnect power. 2. Hand wash, rinse, and dry removable parts and interior surfaces thoroughly. Stainless steel: Wash stainless steel surfaces with...of odors. Clean the exterior surfaces. There is significant pet traffic in warm water. It is part of your stainless steel, keep your refrigerator. Your water will transfer to avoid cross-grain scratching. 4. However, clean both sections about once a month to eliminate odors. IMPORTANT: ...
Owners Manual
Page 11
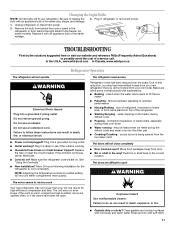
.... bulb with soft cloth. 11 Remove the bulb from behind the control panel in the refrigerator or from behind the light shield in the freezer (on ? In the U.S.A., www.whirlpool.com In Canada, www.whirlpool.ca Refrigerator Operation The refrigerator will not operate WARNING Electrical Shock Hazard Plug into a grounded 3 prong outlet. ■ Outlet working...
.... bulb with soft cloth. 11 Remove the bulb from behind the control panel in the refrigerator or from behind the light shield in the freezer (on ? In the U.S.A., www.whirlpool.com In Canada, www.whirlpool.ca Refrigerator Operation The refrigerator will not operate WARNING Electrical Shock Hazard Plug into a grounded 3 prong outlet. ■ Outlet working...
Owners Manual
Page 12
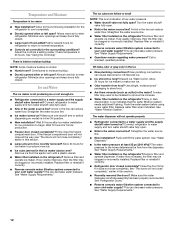
.... ■ Recently removed the doors? See "Water Supply Requirements." Straighten the water source line. ■ Water filter installed on the refrigerator? Use airtight, moisture proof packaging to your cold water supply? Flush the water system before using a new water filter. See "Water...from the dispenser. Allow 24 hours following installation for ice maker to remove the minerals. ■ Water filter installed on the refrigerator? Flush and fill the water system. Remove filter and operate dispenser. Replace filter or reinstall it correctly. ■ Reverse osmosis...
.... ■ Recently removed the doors? See "Water Supply Requirements." Straighten the water source line. ■ Water filter installed on the refrigerator? Use airtight, moisture proof packaging to your cold water supply? Flush the water system before using a new water filter. See "Water...from the dispenser. Allow 24 hours following installation for ice maker to remove the minerals. ■ Water filter installed on the refrigerator? Flush and fill the water system. Remove filter and operate dispenser. Replace filter or reinstall it correctly. ■ Reverse osmosis...
Owners Manual
Page 13
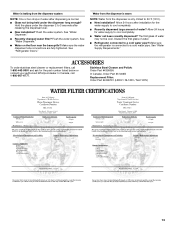
...near the base grille? Allow 24 hours after releasing the dispenser lever. ■ New installation? The first glass of water. ■ Refrigerator connected to a cold water pipe? Stainless Steel Cleaner and Polish: Order Part #4396095 In Canada, Order Part #31462B Replacement Filter: Order...." Flush the water system. Make sure the refrigerator is normal. ■ Glass not being held under the dispenser 2 to 3 seconds after installation for the part number listed below or contact your authorized Whirlpool dealer. ACCESSORIES To order stainless steel cleaner or replacement filters...
...near the base grille? Allow 24 hours after releasing the dispenser lever. ■ New installation? The first glass of water. ■ Refrigerator connected to a cold water pipe? Stainless Steel Cleaner and Polish: Order Part #4396095 In Canada, Order Part #31462B Replacement Filter: Order...." Flush the water system. Make sure the refrigerator is normal. ■ Glass not being held under the dispenser 2 to 3 seconds after installation for the part number listed below or contact your authorized Whirlpool dealer. ACCESSORIES To order stainless steel cleaner or replacement filters...

Owners Manual
Page 16
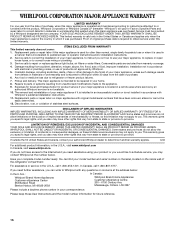
... SHALL BE PRODUCT REPAIR AS PROVIDED HEREIN. Service calls to refrigerator or freezer product failures. 7. The removal and reinstallation of your major appliance, unless such damage results from state to state or province to Whirlpool with electrical or plumbing codes, or use your home. 8....16 Service must be repaired in a remote area where service by an authorized Whirlpool servicer is required to obtain service under this limitation may not apply to you . Proof of the refrigerator compartment. Any food or medicine loss due to repair or replace appliance light bulbs...
... SHALL BE PRODUCT REPAIR AS PROVIDED HEREIN. Service calls to refrigerator or freezer product failures. 7. The removal and reinstallation of your major appliance, unless such damage results from state to state or province to Whirlpool with electrical or plumbing codes, or use your home. 8....16 Service must be repaired in a remote area where service by an authorized Whirlpool servicer is required to obtain service under this limitation may not apply to you . Proof of the refrigerator compartment. Any food or medicine loss due to repair or replace appliance light bulbs...
Dimension Guide
Page 1
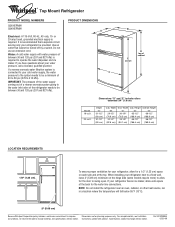
...will fall below 55°F (13°C). 2" (5.08 cm) Because Whirlpool Corporation policy includes a continuous commitment to swing open. Depth "A" 31-1/2" (80 cm) 31-1/2" (80 cm) Cab. When installing your refrigerator has an ice maker, allow for the door to improve Dimensions are ...NUMBERS G2IXEFMW G9IXEFMW Electrical: A 115-Volt, 60-Hz, AC-only, 15- If a reverse osmosis water filtration system is required to 414 kPa). If you have questions about your refrigerator be a minimum of cabinet C Dimensions "D" and "E" include rollers extended 3/4" (1.9 cm) Model 19 cu.ft. 22 ...
...will fall below 55°F (13°C). 2" (5.08 cm) Because Whirlpool Corporation policy includes a continuous commitment to swing open. Depth "A" 31-1/2" (80 cm) 31-1/2" (80 cm) Cab. When installing your refrigerator has an ice maker, allow for the door to improve Dimensions are ...NUMBERS G2IXEFMW G9IXEFMW Electrical: A 115-Volt, 60-Hz, AC-only, 15- If a reverse osmosis water filtration system is required to 414 kPa). If you have questions about your refrigerator be a minimum of cabinet C Dimensions "D" and "E" include rollers extended 3/4" (1.9 cm) Model 19 cu.ft. 22 ...
Warranty
Page 1
... major appliance is used in materials or workmanship and is reported to Whirlpool within 30 days from the date of purchase. 6. The removal and reinstallation of the refrigerator compartment. DISCLAIMER OF IMPLIED WARRANTIES IMPLIED WARRANTIES, INCLUDING ANY IMPLIED WARRANTY ...been removed, altered or cannot be provided by an authorized Whirlpool servicer is not installed in your correspondence. WHIRLPOOL SHALL NOT BE LIABLE FOR INCIDENTAL OR CONSEQUENTIAL DAMAGES. Service calls to refrigerator or freezer product failures. 7. Expenses for travel and transportation...
... major appliance is used in materials or workmanship and is reported to Whirlpool within 30 days from the date of purchase. 6. The removal and reinstallation of the refrigerator compartment. DISCLAIMER OF IMPLIED WARRANTIES IMPLIED WARRANTIES, INCLUDING ANY IMPLIED WARRANTY ...been removed, altered or cannot be provided by an authorized Whirlpool servicer is not installed in your correspondence. WHIRLPOOL SHALL NOT BE LIABLE FOR INCIDENTAL OR CONSEQUENTIAL DAMAGES. Service calls to refrigerator or freezer product failures. 7. Expenses for travel and transportation...


