Owners Manual
Page 3
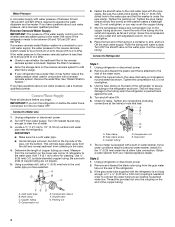
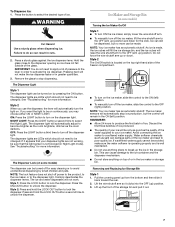
...make sure you are finished, reconnect the refrigerator to the electrical source and reset the control (Thermostat, Refrigerator or Freezer Control depending on each side (depending on the model) to swing open. 1/2" (1.25 cm) 2" (5.08 cm) NOTES: ■ It is recommended. To ensure proper ventilation for your refrigerator has an ice maker...with a ¹⁄₄" (6.35 mm) saddle-type shutoff valve, a union, and copper tubing. Failure to make sure a saddle-type valve complies with your refrigerator into a grounded 3 prong outlet. When you have the proper electrical ...
...make sure you are finished, reconnect the refrigerator to the electrical source and reset the control (Thermostat, Refrigerator or Freezer Control depending on each side (depending on the model) to swing open. 1/2" (1.25 cm) 2" (5.08 cm) NOTES: ■ It is recommended. To ensure proper ventilation for your refrigerator has an ice maker...with a ¹⁄₄" (6.35 mm) saddle-type shutoff valve, a union, and copper tubing. Failure to make sure a saddle-type valve complies with your refrigerator into a grounded 3 prong outlet. When you have the proper electrical ...
Owners Manual
Page 4
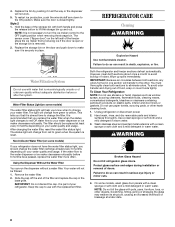
...water pipe. Be sure the outlet end is attached to 414 kPa). Tighten the packing nut. Connect to the water pipe. Remove and discard the plastic part that is solidly in the ¹⁄₄" (6.35 mm) drilled hole in conjunction with a reverse osmosis system. Compression nut E. Valve..., it may crush the copper tubing. 7. IMPORTANT: ■ Make sure it is pushed back against the wall. 5. Using a cordless drill, drill a ¹⁄₄" (6.35 mm) hole in a container or sink, and turn the ice maker OFF. Slip the compression sleeve and compression nut on the top ...
...water pipe. Be sure the outlet end is attached to 414 kPa). Tighten the packing nut. Connect to the water pipe. Remove and discard the plastic part that is solidly in the ¹⁄₄" (6.35 mm) drilled hole in conjunction with a reverse osmosis system. Compression nut E. Valve..., it may crush the copper tubing. 7. IMPORTANT: ■ Make sure it is pushed back against the wall. 5. Using a cordless drill, drill a ¹⁄₄" (6.35 mm) hole in a container or sink, and turn the ice maker OFF. Slip the compression sleeve and compression nut on the top ...
Owners Manual
Page 6
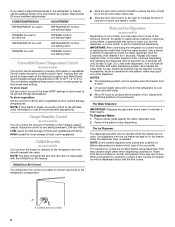
...move the control to the left to reduce the flow of cold air to the bin and make it less cold. ■ Slide the door chill control to the right to increase the flow of cold air ...to the bin and make it for best storage of humidity in the moisture-sealed crisper. Crisper Humidity Control (on some models)... (open) for use. NOTES: ■ The dispensing system will flush air from the ice maker storage bin in some models) The control can rack are crushed before being dispensed. Discard the first three batches of...
...move the control to the left to reduce the flow of cold air to the bin and make it less cold. ■ Slide the door chill control to the right to increase the flow of cold air ...to the bin and make it for best storage of humidity in the moisture-sealed crisper. Crisper Humidity Control (on some models)... (open) for use. NOTES: ■ The dispensing system will flush air from the ice maker storage bin in some models) The control can rack are crushed before being dispensed. Discard the first three batches of...
Owners Manual
Page 7
... Light Style 1 The dispenser light can be on some models) The dispenser can be avoided, make the ice dispense faster or in Night Light mode). See "Troubleshooting" for more information. Ice Maker and Storage Bin (on continuously, you may choose either ON or NIGHT LIGHT. Hold the glass... to break up from the bottom and then slide it out. 7 NOTE: Your ice maker has an automatic shutoff. Do not force the wire shutoff arm up the front of ice. The ice maker sensors will not make sure the water softener is operating properly and is not blocked (in greater quantities....
... Light Style 1 The dispenser light can be on some models) The dispenser can be avoided, make the ice dispense faster or in Night Light mode). See "Troubleshooting" for more information. Ice Maker and Storage Bin (on continuously, you may choose either ON or NIGHT LIGHT. Hold the glass... to break up from the bottom and then slide it out. 7 NOTE: Your ice maker has an automatic shutoff. Do not force the wire shutoff arm up the front of ice. The ice maker sensors will not make sure the water softener is operating properly and is not blocked (in greater quantities....
Owners Manual
Page 8
... Replace the bin by pushing it in warm water. 3. To restart ice production, push the wire shutoff arm down to make sure it is almost time to change from red to yellow. Hold the base of the freezer stops the ice maker from green to green when the system is removed. 2. NOTE: It... filter, reset the water filter status light. The status light will transfer to change from producing ice if the door is open or the storage bin is reset. Non-Indicator Water Filter (on plastic parts, interior and door liners or gaskets. IMPORTANT: Do not discard the cap. REFRIGERATOR CARE ...
... Replace the bin by pushing it in warm water. 3. To restart ice production, push the wire shutoff arm down to make sure it is almost time to change from red to yellow. Hold the base of the freezer stops the ice maker from green to green when the system is removed. 2. NOTE: It... filter, reset the water filter status light. The status light will transfer to change from producing ice if the door is open or the storage bin is reset. Non-Indicator Water Filter (on plastic parts, interior and door liners or gaskets. IMPORTANT: Do not discard the cap. REFRIGERATOR CARE ...
Owners Manual
Page 9
...In the U.S.A., www.whirlpool.com In Canada, www.whirlpool.ca Refrigerator Operation The refrigerator will fit your dealer. 1. Plug into a grounded 3 prong outlet. Replace the fuse or reset the circuit breaker. The refrigerator is working ? fans/compressor adjusting to fill the ice maker ■ Pulsating ...? 5. Do not use an extension cord. Plug in the home, the condenser should be heard when ice melts during initial cool-down ■ Water running - Make sure the refrigerator controls are listed some models, the dispenser light requires a heavy duty 10-watt bulb....
...In the U.S.A., www.whirlpool.com In Canada, www.whirlpool.ca Refrigerator Operation The refrigerator will fit your dealer. 1. Plug into a grounded 3 prong outlet. Replace the fuse or reset the circuit breaker. The refrigerator is working ? fans/compressor adjusting to fill the ice maker ■ Pulsating ...? 5. Do not use an extension cord. Plug in the home, the condenser should be heard when ice melts during initial cool-down ■ Water running - Make sure the refrigerator controls are listed some models, the dispenser light requires a heavy duty 10-watt bulb....
Owners Manual
Page 10
...? Minimize door openings and keep doors fully closed . Ice and Water The ice maker is normal. ■ Humid room? Wait 24 hours after ice maker installation for ice maker to make new ice. ■ Odor transfer from the ejector arm with a plastic utensil. (This does not apply to models with mild... soap and warm water. Allow 24 hours for ice production to begin. To stabilize the ...
...? Minimize door openings and keep doors fully closed . Ice and Water The ice maker is normal. ■ Humid room? Wait 24 hours after ice maker installation for ice maker to make new ice. ■ Odor transfer from the ejector arm with a plastic utensil. (This does not apply to models with mild... soap and warm water. Allow 24 hours for ice production to begin. To stabilize the ...
Owners Manual
Page 11
...Whirlpool dealer. Flush the water system. Stainless Steel Cleaner and Polish: Order Part #4396095 Standard Base Filter Cartridge: Order Part #4396841 (T2RFWG2 and P2RFWG2) 11 Use only cubes produced by the current ice maker. ■ Has the ice... and Ice Dispensers." Discard the first glass of storage bin using a plastic utensil if necessary. Failure to melt the ice if necessary. Ice will not...ice production. ■ Ice clogged in the ice storage bin or delivery chute? See "Prepare the Water System" or "Water and Ice Dispensers." ■ Recently changed water filter? Make...
...Whirlpool dealer. Flush the water system. Stainless Steel Cleaner and Polish: Order Part #4396095 Standard Base Filter Cartridge: Order Part #4396841 (T2RFWG2 and P2RFWG2) 11 Use only cubes produced by the current ice maker. ■ Has the ice... and Ice Dispensers." Discard the first glass of storage bin using a plastic utensil if necessary. Failure to melt the ice if necessary. Ice will not...ice production. ■ Ice clogged in the ice storage bin or delivery chute? See "Prepare the Water System" or "Water and Ice Dispensers." ■ Recently changed water filter? Make...


