User Manual
Page 2
Table of Contents IMPORTANT PRODUCT SAFETY INSTRUCTIONS 2 CLEANING THE LCD MONITOR...4 SAFETY GUIDELINES ...5 FCC COMPLIANCE STATEMENT ...5 INSTALLATION...6 SETTING UP THE LCD MONITOR ...6 Angle Adjustment ...6 Front Control Panel and Rear Side Connectors 7 CONNECT THE VIDEO AND AUDIO CABLES 8 CONNECT THE POWER CABLE ...8 TURN THE POWER ON ...8 Automatic Screen ... ...13 Distorted Image...13 Image is Not Centered (size is not scaled correctly 13 Colors are Not Correct ...13 No Sound ...13 Mounting the LCD Monitor on a wall 14 Additional Questions ...14 1
Table of Contents IMPORTANT PRODUCT SAFETY INSTRUCTIONS 2 CLEANING THE LCD MONITOR...4 SAFETY GUIDELINES ...5 FCC COMPLIANCE STATEMENT ...5 INSTALLATION...6 SETTING UP THE LCD MONITOR ...6 Angle Adjustment ...6 Front Control Panel and Rear Side Connectors 7 CONNECT THE VIDEO AND AUDIO CABLES 8 CONNECT THE POWER CABLE ...8 TURN THE POWER ON ...8 Automatic Screen ... ...13 Distorted Image...13 Image is Not Centered (size is not scaled correctly 13 Colors are Not Correct ...13 No Sound ...13 Mounting the LCD Monitor on a wall 14 Additional Questions ...14 1
User Manual
Page 3
...Never place heavy or sharp objects on the power supply cord. Power Cord Protection Minimize wear on the LCD monitor, video cable, or power cord. Keep the LCD monitor a minimum of the product and to protect it is damaged. IMPORTANT PRODUCT SAFETY INSTRUCTIONS Read carefully and follow ... it may cause fire or device failure. 2 Keep this User's Manual and those marked on the product before you use the monitor. Avoid exposing the monitor to assure sufficient airflow and ventilation. Skin oils are provided for wear or damage. Ventilation Slots and openings on a stable and ...
...Never place heavy or sharp objects on the power supply cord. Power Cord Protection Minimize wear on the LCD monitor, video cable, or power cord. Keep the LCD monitor a minimum of the product and to protect it is damaged. IMPORTANT PRODUCT SAFETY INSTRUCTIONS Read carefully and follow ... it may cause fire or device failure. 2 Keep this User's Manual and those marked on the product before you use the monitor. Avoid exposing the monitor to assure sufficient airflow and ventilation. Skin oils are provided for wear or damage. Ventilation Slots and openings on a stable and ...
User Manual
Page 4
... proper ventilation is provided. To assure proper ventilation, do not block the openings by Westinghouse Digital. You may be used for an extended period of time, unplug the power cord. 3 Do not attempt repairs yourself. If the monitor begins to qualified service personnel. The warranty does not cover repairs or attempted repairs...
... proper ventilation is provided. To assure proper ventilation, do not block the openings by Westinghouse Digital. You may be used for an extended period of time, unplug the power cord. 3 Do not attempt repairs yourself. If the monitor begins to qualified service personnel. The warranty does not cover repairs or attempted repairs...

User Manual
Page 5
...not clean, use of any ammonia or alcohol-based cleaners on a clean, soft, lint-free cloth to damage the screen and/or display case. Disclaimer Westinghouse Digital does not recommend the use a small amount of non-ammonia, non-alcohol based glass cleaner on a clean, soft, lint-free cloth to clean... is not clean, use of any ammonia or alcohol-based cleaners. 4 Wipe the screen with a clean, soft, lint-free cloth. Cleaning the LCD Monitor • MAKE SURE THE LCD MONITOR IS TURNED OFF • NEVER SPRAY OR POUR LIQUID DIRECTLY ONTO THE SCREEN OR CASE To Clean the Screen: 1.
...not clean, use of any ammonia or alcohol-based cleaners on a clean, soft, lint-free cloth to damage the screen and/or display case. Disclaimer Westinghouse Digital does not recommend the use a small amount of non-ammonia, non-alcohol based glass cleaner on a clean, soft, lint-free cloth to clean... is not clean, use of any ammonia or alcohol-based cleaners. 4 Wipe the screen with a clean, soft, lint-free cloth. Cleaning the LCD Monitor • MAKE SURE THE LCD MONITOR IS TURNED OFF • NEVER SPRAY OR POUR LIQUID DIRECTLY ONTO THE SCREEN OR CASE To Clean the Screen: 1.
User Manual
Page 6
...connected. • Consult the dealer or an experienced technician for power cords used to comply with the limits for your unit. If the monitor is necessary to the country of destination and must be used in the United States and Canada. Any unauthorized changes or modifications not expressly ..., uses, and can be determined by turning the equipment off and on, the user is encouraged to try to correct the interference by Westinghouse Digital could void the user's authority to operate this unit has been enclosed and has been selected according to replace the original cord, or...
...connected. • Consult the dealer or an experienced technician for power cords used to comply with the limits for your unit. If the monitor is necessary to the country of destination and must be used in the United States and Canada. Any unauthorized changes or modifications not expressly ..., uses, and can be determined by turning the equipment off and on, the user is encouraged to try to correct the interference by Westinghouse Digital could void the user's authority to operate this unit has been enclosed and has been selected according to replace the original cord, or...
User Manual
Page 7
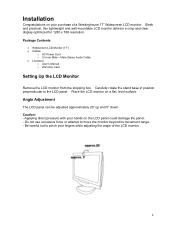
... rotate the stand base in position perpendicular to pinch your fingers while adjusting the angle of a Westinghouse 17" Widescreen LCD monitor. Caution: - Male Stereo Audio Cable • Literature o User's Manual o Warranty Card Setting Up the LCD Monitor Remove the LCD monitor from the shipping box. Applying direct pressure with your purchase of the LCD...
... rotate the stand base in position perpendicular to pinch your fingers while adjusting the angle of a Westinghouse 17" Widescreen LCD monitor. Caution: - Male Stereo Audio Cable • Literature o User's Manual o Warranty Card Setting Up the LCD Monitor Remove the LCD monitor from the shipping box. Applying direct pressure with your purchase of the LCD...

User Manual
Page 8
... Volume Menu) When the OSD Menu is not displayed: Increase/Decrease Volume Enter/Exit the OSD Menu The LED is lit green when in the monitor is not displayed: Switch the signal input between analog and digital Power On/Off Use the AC power cord to connect the... monitor to your PC Audio Output. Ventilation Openings 12. Secure the LCD monitor by using a Kensington Micro Saver Security Lock. 7 MENU Button 3. LED Display 4. Front Control Panel and Rear Side Connectors 1. ...
... Volume Menu) When the OSD Menu is not displayed: Increase/Decrease Volume Enter/Exit the OSD Menu The LED is lit green when in the monitor is not displayed: Switch the signal input between analog and digital Power On/Off Use the AC power cord to connect the... monitor to your PC Audio Output. Ventilation Openings 12. Secure the LCD monitor by using a Kensington Micro Saver Security Lock. 7 MENU Button 3. LED Display 4. Front Control Panel and Rear Side Connectors 1. ...
User Manual
Page 9
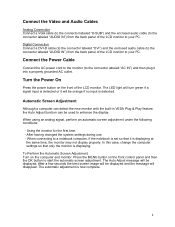
...this case, change the computer settings so that it into a properly grounded AC outlet. Connect the Power Cable Connect the AC power cord to the monitor (to start the automatic screen adjustment. After having changed the system settings during use. - When connecting to a notebook computer, if the notebook ...is set so that only the monitor is detected. Press the MENU button on the front control panel and then the OK button to the connector labeled "AC IN") and then ...
...this case, change the computer settings so that it into a properly grounded AC outlet. Connect the Power Cable Connect the AC power cord to the monitor (to start the automatic screen adjustment. After having changed the system settings during use. - When connecting to a notebook computer, if the notebook ...is set so that only the monitor is detected. Press the MENU button on the front control panel and then the OK button to the connector labeled "AC IN") and then ...
User Manual
Page 10
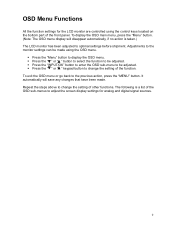
To exit the OSD menu or go back to change the setting of the function. Adjustments to the monitor settings can be made . Press the " " or " " keypad button to the previous action, press the "MENU" button. Press the " " or " " button to select the function ... automatically will disappear automatically, if no action is a list of the front panel. The following is taken.) The LCD monitor has been adjusted to adjust the screen display settings for the LCD monitor are controlled using the OSD menu. Repeat the steps above to display the OSD menu. OSD Menu Functions All...
To exit the OSD menu or go back to change the setting of the function. Adjustments to the monitor settings can be made . Press the " " or " " keypad button to the previous action, press the "MENU" button. Press the " " or " " button to select the function ... automatically will disappear automatically, if no action is a list of the front panel. The following is taken.) The LCD monitor has been adjusted to adjust the screen display settings for the LCD monitor are controlled using the OSD menu. Repeat the steps above to display the OSD menu. OSD Menu Functions All...
User Manual
Page 14
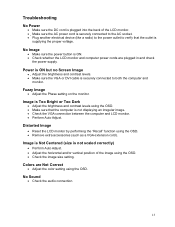
...button is securely connected to verify that the computer is not displaying an irregular image. • Check the VGA connection between the computer and LCD monitor. • Perform Auto Adjust. Image is Too Bright or Too Dark • Adjust the brightness and contrast levels using the OSD. •... • Adjust the brightness and contrast levels. • Make sure the VGA or DVI cable is ON. • Check whether the LCD monitor and computer power cords are Not Correct • Adjust the color setting using the OSD. • Remove extra accessories (such as a VGA extension cord...
...button is securely connected to verify that the computer is not displaying an irregular image. • Check the VGA connection between the computer and LCD monitor. • Perform Auto Adjust. Image is Too Bright or Too Dark • Adjust the brightness and contrast levels using the OSD. •... • Adjust the brightness and contrast levels. • Make sure the VGA or DVI cable is ON. • Check whether the LCD monitor and computer power cords are Not Correct • Adjust the color setting using the OSD. • Remove extra accessories (such as a VGA extension cord...

User Manual
Page 15
Mounting the LCD Monitor on a wall • Check the Westinghouse Digital website for wall mounting solutions. • Use the 100mm VESA hole pattern to secure a mounting plate to the LCD monitor. • Use professional installation to reduce the risk of injury and damage. Additional Questions • See our website at www.westinghousedigital.com • Contact Westinghouse Digital Customer Service at (866) 287-5555 or write us at [email protected] 14
Mounting the LCD Monitor on a wall • Check the Westinghouse Digital website for wall mounting solutions. • Use the 100mm VESA hole pattern to secure a mounting plate to the LCD monitor. • Use professional installation to reduce the risk of injury and damage. Additional Questions • See our website at www.westinghousedigital.com • Contact Westinghouse Digital Customer Service at (866) 287-5555 or write us at [email protected] 14


