
User Manual
Page 2
CONNECT THE VGA AND AUDIO CABLES 6 3. CONNECT THE POWER CABLE ...6 4. ATTACHING THE BASE STAND TO THE LCD MONITOR 6 2. TURN THE POWER ON ...6 OSD MENU FUNCTIONS...7 OSD MENUS...8 BACKLIGHT CONTROL...9 DISPLAY MODES ...9 9IMAGE PROBLEM ...10 NO SIGNAL INPUT...10 OUT OF RANGE ...10 ... Dark ...12 Distorted Image...12 Image is Not Centered (size is not scaled correctly 12 Colors are Not Correct...12 No Sound...12 Mounting the LCD Monitor on a Wall 13 Additional Questions...13 1 Table of Contents IMPORTANT PRODUCT SAFETY INSTRUCTIONS 2 CLEANING THE...
CONNECT THE VGA AND AUDIO CABLES 6 3. CONNECT THE POWER CABLE ...6 4. ATTACHING THE BASE STAND TO THE LCD MONITOR 6 2. TURN THE POWER ON ...6 OSD MENU FUNCTIONS...7 OSD MENUS...8 BACKLIGHT CONTROL...9 DISPLAY MODES ...9 9IMAGE PROBLEM ...10 NO SIGNAL INPUT...10 OUT OF RANGE ...10 ... Dark ...12 Distorted Image...12 Image is Not Centered (size is not scaled correctly 12 Colors are Not Correct...12 No Sound...12 Mounting the LCD Monitor on a Wall 13 Additional Questions...13 1 Table of Contents IMPORTANT PRODUCT SAFETY INSTRUCTIONS 2 CLEANING THE...

User Manual
Page 3
... in contact with care. Skin oils are provided for future shipping needs. Overloading Outlets Do not overload electrical power sources when installing the LCD monitor. The power supply cord should never be severely bent, pinched, or twisted. Periodically inspect the power cord and each end of ... covered. Failing to rain, water, moisture or high humidity. Do not route the power cord under rugs or carpeting. Always position the LCD monitor on the product before you use the monitor. Important: Save the original box and all warnings and instructions in this User's Manual ...
... in contact with care. Skin oils are provided for future shipping needs. Overloading Outlets Do not overload electrical power sources when installing the LCD monitor. The power supply cord should never be severely bent, pinched, or twisted. Periodically inspect the power cord and each end of ... covered. Failing to rain, water, moisture or high humidity. Do not route the power cord under rugs or carpeting. Always position the LCD monitor on the product before you use the monitor. Important: Save the original box and all warnings and instructions in this User's Manual ...

User Manual
Page 4
...There are no user serviceable parts inside. You may be used for an extended period of time, unplug the power cord. 3 The LCD monitor contains high voltage parts. If the monitor begins to qualified service personnel. The warranty does not cover repairs or attempted repairs by anyone...rack, unless proper ventilation is provided. Do not place it off and unplug the power cord. If the LCD Monitor will not be seriously injured if you touch them. Do not attempt repairs yourself. Contact the Westinghouse Service Center. To assure proper ventilation, do not block the openings by...
...There are no user serviceable parts inside. You may be used for an extended period of time, unplug the power cord. 3 The LCD monitor contains high voltage parts. If the monitor begins to qualified service personnel. The warranty does not cover repairs or attempted repairs by anyone...rack, unless proper ventilation is provided. Do not place it off and unplug the power cord. If the LCD Monitor will not be seriously injured if you touch them. Do not attempt repairs yourself. Contact the Westinghouse Service Center. To assure proper ventilation, do not block the openings by...
User Manual
Page 5
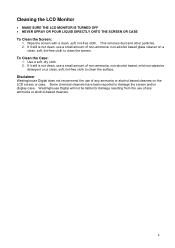
...does not recommend the use a small amount of non-ammonia, non-alcohol based glass cleaner on the LCD screen or case. Some chemical cleaners have been reported to clean the screen. Westinghouse Digital will not be liable for damage resulting from the use a small amount of non-ammonia, non... or alcohol-based cleaners. 4 This removes dust and other particles. 2. Wipe the screen with a clean, soft, lint-free cloth. Cleaning the LCD Monitor • MAKE SURE THE LCD MONITOR IS TURNED OFF • NEVER SPRAY OR POUR LIQUID DIRECTLY ONTO THE SCREEN OR CASE To Clean the Screen: 1.
...does not recommend the use a small amount of non-ammonia, non-alcohol based glass cleaner on the LCD screen or case. Some chemical cleaners have been reported to clean the screen. Westinghouse Digital will not be liable for damage resulting from the use a small amount of non-ammonia, non... or alcohol-based cleaners. 4 This removes dust and other particles. 2. Wipe the screen with a clean, soft, lint-free cloth. Cleaning the LCD Monitor • MAKE SURE THE LCD MONITOR IS TURNED OFF • NEVER SPRAY OR POUR LIQUID DIRECTLY ONTO THE SCREEN OR CASE To Clean the Screen: 1.

User Manual
Page 7
..., the Auto Adjust function can be orange if no input is detected. To perform the Auto Adjust: Turn on the front of the LCD monitor. The LCD monitor will perform the Auto Adjust process automatically for 1024 x 768 resolution. Turn the Power On Press the power button on the computer...labeled "D-SUB") and an audio cable (to the connector labeled "LINE-IN") from the back panel of the LCD monitor to start Auto Adjust. Press the "Auto" button to your purchase of a Westinghouse 15" LCD monitor. To remove the base stand, press the tabs on your PC. 3. Auto Adjust Although a computer ...
..., the Auto Adjust function can be orange if no input is detected. To perform the Auto Adjust: Turn on the front of the LCD monitor. The LCD monitor will perform the Auto Adjust process automatically for 1024 x 768 resolution. Turn the Power On Press the power button on the computer...labeled "D-SUB") and an audio cable (to the connector labeled "LINE-IN") from the back panel of the LCD monitor to start Auto Adjust. Press the "Auto" button to your purchase of a Westinghouse 15" LCD monitor. To remove the base stand, press the tabs on your PC. 3. Auto Adjust Although a computer ...

User Manual
Page 8
...Quick Contrast adjustment Enter the OSD menu Access the OSD sub-menu & selection Quick Brightness switching D-Sub (VGA) All the function settings for the LCD monitor. 7 Adjustments to the monitor settings can be adjusted. Press the "+" or "-" keypad button to change the setting of the function. ... Indicator Green: Normal Orange: Power Saving Off: Power Off Automatically optimizes positions, phase & clock (only when the OSD is taken.) The LCD monitor has been adjusted to optimal settings before shipment. To display the OSD main menu, press the "Menu" keypad button on the bottom ...
...Quick Contrast adjustment Enter the OSD menu Access the OSD sub-menu & selection Quick Brightness switching D-Sub (VGA) All the function settings for the LCD monitor. 7 Adjustments to the monitor settings can be adjusted. Press the "+" or "-" keypad button to change the setting of the function. ... Indicator Green: Normal Orange: Power Saving Off: Power Off Automatically optimizes positions, phase & clock (only when the OSD is taken.) The LCD monitor has been adjusted to optimal settings before shipment. To display the OSD main menu, press the "Menu" keypad button on the bottom ...

User Manual
Page 11
Image Problem No Signal Input If there is no source connected to the monitor, the following error message will be displayed: Out of Range If the monitor settings are not compatible with the PC or out of range of the LCD monitor, the following error message will be displayed: 10
Image Problem No Signal Input If there is no source connected to the monitor, the following error message will be displayed: Out of Range If the monitor settings are not compatible with the PC or out of range of the LCD monitor, the following error message will be displayed: 10

User Manual
Page 12
... Mount Input Signal Physical Video Audio Speaker Output Power Voltage Operating Conditions Temperature Humidity Altitude Storage Conditions Temperature Humidity Altitude Dimensions Physical 15" Color TFT LCD Panel 1024 x 768 16 ms 450:1 370 Nits 120° (H) / 110° (V) 72% TBD 75mm VESA® HD-15 pin mini D-Sub (VGA connector) 3.5mm...
... Mount Input Signal Physical Video Audio Speaker Output Power Voltage Operating Conditions Temperature Humidity Altitude Storage Conditions Temperature Humidity Altitude Dimensions Physical 15" Color TFT LCD Panel 1024 x 768 16 ms 450:1 370 Nits 120° (H) / 110° (V) 72% TBD 75mm VESA® HD-15 pin mini D-Sub (VGA connector) 3.5mm...

User Manual
Page 13
... Centered (size is securely connected to verify that the computer is ON. • Check whether the LCD monitor and computer power cords are Not Correct • Adjust the color setting using the OSD. •...displaying an irregular image. • Check the VGA connection between the computer and LCD monitor. • Perform Auto Adjust. Troubleshooting No Power • Make sure the DC cord is plugged... into the back of the LCD monitor. • Make sure the AC power cord is securely connected to the AC socket...
... Centered (size is securely connected to verify that the computer is ON. • Check whether the LCD monitor and computer power cords are Not Correct • Adjust the color setting using the OSD. •...displaying an irregular image. • Check the VGA connection between the computer and LCD monitor. • Perform Auto Adjust. Troubleshooting No Power • Make sure the DC cord is plugged... into the back of the LCD monitor. • Make sure the AC power cord is securely connected to the AC socket...

User Manual
Page 14
Mounting the LCD Monitor on a wall • Check the Westinghouse Digital website for wall mounting solutions. • Use the 75mm VESA hole pattern to secure a mounting plate to the LCD monitor. • Use professional installation to reduce the risk of injury and damage. Additional Questions • See our website at www.westinghousedigital.com • Contact Westinghouse Digital Customer Service at (866) 287-5555 or write us at [email protected] 13
Mounting the LCD Monitor on a wall • Check the Westinghouse Digital website for wall mounting solutions. • Use the 75mm VESA hole pattern to secure a mounting plate to the LCD monitor. • Use professional installation to reduce the risk of injury and damage. Additional Questions • See our website at www.westinghousedigital.com • Contact Westinghouse Digital Customer Service at (866) 287-5555 or write us at [email protected] 13


