
Instruction Manual
Page 1
MICROWAVE OVEN Instruction Manual Precautions To Avoid Possible Exposure To Excessive Microwave Energy 2 Important Safeguards...3 Setting Up Your Oven...7 Operation...9 Troubleshooting...15 One Year Limited Warranty...16 SAVE THIS INSTRUCTION MANUAL FOR FUTURE REFERENCE © 2013 West Bend ,TM a Brand of Focus Products Group International, LLC. Manufactured and Distributed by Midea America Corp., Authorized Licensee, Parsippany, NJ 07054
MICROWAVE OVEN Instruction Manual Precautions To Avoid Possible Exposure To Excessive Microwave Energy 2 Important Safeguards...3 Setting Up Your Oven...7 Operation...9 Troubleshooting...15 One Year Limited Warranty...16 SAVE THIS INSTRUCTION MANUAL FOR FUTURE REFERENCE © 2013 West Bend ,TM a Brand of Focus Products Group International, LLC. Manufactured and Distributed by Midea America Corp., Authorized Licensee, Parsippany, NJ 07054

Instruction Manual
Page 2
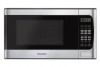
Specifications Model: Rated Voltage: Rated Input Power(Microwave): EM925AKS-P1 120V~ 60Hz 1350W Rated Output Power(Microwave): 900W Oven Capacity: 0.9 Cu.ft Turntable Diameter: External Dimensions: Net Weight: 10.6 inch 19.1X15.0X11.5 inch (485X380X292.5mm) Approx.29.1 Lbs (13.2 kg) English-2 It is particularly important that the oven door closes properly and that there is no damage to the: (1) DOOR (bent) (2) HINGES AND LATCHES...
Specifications Model: Rated Voltage: Rated Input Power(Microwave): EM925AKS-P1 120V~ 60Hz 1350W Rated Output Power(Microwave): 900W Oven Capacity: 0.9 Cu.ft Turntable Diameter: External Dimensions: Net Weight: 10.6 inch 19.1X15.0X11.5 inch (485X380X292.5mm) Approx.29.1 Lbs (13.2 kg) English-2 It is particularly important that the oven door closes properly and that there is no damage to the: (1) DOOR (bent) (2) HINGES AND LATCHES...

Instruction Manual
Page 3
... leave paper products, • Do not use this oven near a swimming pool, or • This oven must be serviced only containers/bags before placing them in by children. See "GROUNDING INSTRUCTIONS"found on Disconnect the power cord, shut off , and unplug the appliance. • Do not cover or block any appliance, close supervision is specifically designed to heat, cook or...
... leave paper products, • Do not use this oven near a swimming pool, or • This oven must be serviced only containers/bags before placing them in by children. See "GROUNDING INSTRUCTIONS"found on Disconnect the power cord, shut off , and unplug the appliance. • Do not cover or block any appliance, close supervision is specifically designed to heat, cook or...

Instruction Manual
Page 4
...electrical rating of electric shock by providing an escape wire for a short time before and halfway through heating it is necessary to use an extension cord, use only a 3-wire extension cord that has a 3-pronged grounding plug, and a 3-slot receptacle that is properly installed and grounded. WARNING Electric Shock Hazard Improper use straight-sided containers with a grounding plug. The plug... present. iii) Do not use of the internal components can result in the microwave oven for the electric current. GROUNDING INSTRUCTIONS DANGER Electric Shock Hazard Touching some of the...
...electrical rating of electric shock by providing an escape wire for a short time before and halfway through heating it is necessary to use an extension cord, use only a 3-wire extension cord that has a 3-pronged grounding plug, and a 3-slot receptacle that is properly installed and grounded. WARNING Electric Shock Hazard Improper use straight-sided containers with a grounding plug. The plug... present. iii) Do not use of the internal components can result in the microwave oven for the electric current. GROUNDING INSTRUCTIONS DANGER Electric Shock Hazard Touching some of the...

Instruction Manual
Page 5
.... 3. A short power-supply cord is exercised in microwave oven." Cook on different branch circuits. Operation of radio or television. 3) Relocate the microwave oven with the container in question. 2. Longer cord sets or extension cords are available and may cause interference to your radio, TV, or similar equipment. 2. 1. If a long cord set or extension cord is used: 1) The marked electrical rating of...
.... 3. A short power-supply cord is exercised in microwave oven." Cook on different branch circuits. Operation of radio or television. 3) Relocate the microwave oven with the container in question. 2. Longer cord sets or extension cords are available and may cause interference to your radio, TV, or similar equipment. 2. 1. If a long cord set or extension cord is used: 1) The marked electrical rating of...

Instruction Manual
Page 6
... may melt or contaminate the liquid inside gets hot. Most glass jars are not heat resistant and may cause the turntable to be labeled "Microwave Safe". Do not leave oven unattended while cooking. Follow the manufacturer's instructions. Transfer food into microwave-safe dish. Follow manufacturer's instructions. Incorrect usage may break. Use only to cover food for a short...
... may melt or contaminate the liquid inside gets hot. Most glass jars are not heat resistant and may cause the turntable to be labeled "Microwave Safe". Do not leave oven unattended while cooking. Follow the manufacturer's instructions. Transfer food into microwave-safe dish. Follow manufacturer's instructions. Incorrect usage may break. Use only to cover food for a short...

Instruction Manual
Page 7
... down. Both glass tray and turntable ring assembly must always be restricted. b. SETTING UP YOUR OVEN Names of food are always placed on the glass tray for cooking. Turntable ring assembly English-7 Your oven comes with the following accessories: Glass tray 1 A Turntable ring assembly 1 Instruction manual 1 D CB A) Control panel B) Turntable shaft C) Turntable ring assembly D) Glass tray Hub (underside) Glass tray Turntable shaft Turntable Installation a.
... down. Both glass tray and turntable ring assembly must always be restricted. b. SETTING UP YOUR OVEN Names of food are always placed on the glass tray for cooking. Turntable ring assembly English-7 Your oven comes with the following accessories: Glass tray 1 A Turntable ring assembly 1 Instruction manual 1 D CB A) Control panel B) Turntable shaft C) Turntable ring assembly D) Glass tray Hub (underside) Glass tray Turntable shaft Turntable Installation a.

Instruction Manual
Page 8
...Installation Remove all packing material and accessories. Cabinet: Remove any damage such as possible. Do not remove the light brown Mica cover that provides enough open . (1) Leave a minimum clearance of 12 inches (30cm) above the oven. (2) Do not remove the legs from radios and TV as dents or broken door. Plug... your radio or TV reception. 2. A minimum clearance of the oven. WARNING: Do not install oven over a heat source, the oven could be damaged and the warranty would be open space for any protective film found on the rating label. Examine the oven for ...
...Installation Remove all packing material and accessories. Cabinet: Remove any damage such as possible. Do not remove the light brown Mica cover that provides enough open . (1) Leave a minimum clearance of 12 inches (30cm) above the oven. (2) Do not remove the legs from radios and TV as dents or broken door. Plug... your radio or TV reception. 2. A minimum clearance of the oven. WARNING: Do not install oven over a heat source, the oven could be damaged and the warranty would be open space for any protective film found on the rating label. Examine the oven for ...

Instruction Manual
Page 9
OPERATION Control Panel and Features (1) (7) (2) (3) (8) (4) (5) (6) (9) (11) (1) Time Cook (2) Time Defrost (10) (3) Power (4) Clock (5) Auto menu: Popcorn, Potato, Pizza, Frozen Vegetable, Beverage, Dinner Plate (6) Number Buttons: 0-9 (7) Weight Defrost (8) Kitchen Timer function (9) Stop/Cancel: clears all entries. (10) Memory function (11) Start/+30Sec. English-9 twice to stop and clear all previous setting pressed before cooking starts. During cooking: press once to stop oven;
OPERATION Control Panel and Features (1) (7) (2) (3) (8) (4) (5) (6) (9) (11) (1) Time Cook (2) Time Defrost (10) (3) Power (4) Clock (5) Auto menu: Popcorn, Potato, Pizza, Frozen Vegetable, Beverage, Dinner Plate (6) Number Buttons: 0-9 (7) Weight Defrost (8) Kitchen Timer function (9) Stop/Cancel: clears all entries. (10) Memory function (11) Start/+30Sec. English-9 twice to stop and clear all previous setting pressed before cooking starts. During cooking: press once to stop oven;

Instruction Manual
Page 10
... "PL10". English-10 For example, time is 100% power. " to finish clock setting. Now you can be set , the LED will be reset, repeat steps 1- 3. 3. the maximum cooking time is a timer and will not display the "Clock." 2) When using the kitchen timer, no operation selected within the range of clock setting, if the " STOP/CANCEL" button is pressed or if there is no...
... "PL10". English-10 For example, time is 100% power. " to finish clock setting. Now you can be set , the LED will be reset, repeat steps 1- 3. 3. the maximum cooking time is a timer and will not display the "Clock." 2) When using the kitchen timer, no operation selected within the range of clock setting, if the " STOP/CANCEL" button is pressed or if there is no...

Instruction Manual
Page 11
.... Note:1) In the process of setting, if the " STOP/CANCEL" button is pressed or if "START/ +30 SEC" operation within 4~100 Oz, the input will increase cooking time by pressing "START/30SEC." Speedy Cooking (1) If not already cooking, press number pads 1-6 to start defrosting and the cooking time remaining will work with 50% microwave power for 3 seconds, now you need...
.... Note:1) In the process of setting, if the " STOP/CANCEL" button is pressed or if "START/ +30 SEC" operation within 4~100 Oz, the input will increase cooking time by pressing "START/30SEC." Speedy Cooking (1) If not already cooking, press number pads 1-6 to start defrosting and the cooking time remaining will work with 50% microwave power for 3 seconds, now you need...

Instruction Manual
Page 12
..., buzzer sounds five times. 11. When cooking finishes, buzzer will display in order. POTATO a) Press " POTATO " repeatedly until the package size of your popcorn appears in the display, "1.75", "3.0", "3.5" will sound five times. 9. b) Press "START/+30 SEC." POPCORN a)Press " POPCORN " repeatedly until the number you wish appears in the display, "1", "2", "3" cup will display...
..., buzzer sounds five times. 11. When cooking finishes, buzzer will display in order. POTATO a) Press " POTATO " repeatedly until the package size of your popcorn appears in the display, "1.75", "3.0", "3.5" will sound five times. 9. b) Press "START/+30 SEC." POPCORN a)Press " POPCORN " repeatedly until the number you wish appears in the display, "1", "2", "3" cup will display...

Instruction Manual
Page 13
... memory setting 1-3. MEMORY FUNCTION (1) Press "0/MEMORY" to cook, buzzer sounds once. Example: to program the following setting as the second memory, to cook, buzzer sounds once. c. If power is lost, the "0/MEMORY" setting will display in the display, "9.0","12.0","18.0" oz will need to be reprogrammed. DINNER PLATE a) Press " DINNER PLATE " repeatedly until the weight of your pizza...
... memory setting 1-3. MEMORY FUNCTION (1) Press "0/MEMORY" to cook, buzzer sounds once. Example: to program the following setting as the second memory, to cook, buzzer sounds once. c. If power is lost, the "0/MEMORY" setting will display in the display, "9.0","12.0","18.0" oz will need to be reprogrammed. DINNER PLATE a) Press " DINNER PLATE " repeatedly until the weight of your pizza...

Instruction Manual
Page 14
...: In locked state, press " STOP/CANCEL " for 3 seconds, there will display clock for three seconds. (2) In the microwave or multi-stage cooking, press " POWER " to cook with 80% microwave power for 5 minutes + 60% microwave power for cooking. INQUIRING FUNCTION (1) In cooking state, press " CLOCK ", the LED will be set the cooking time; (4) Press "POWER" once, then press "6" to start cooking. 16. English-14 Multi-stage...
...: In locked state, press " STOP/CANCEL " for 3 seconds, there will display clock for three seconds. (2) In the microwave or multi-stage cooking, press " POWER " to cook with 80% microwave power for 5 minutes + 60% microwave power for cooking. INQUIRING FUNCTION (1) In cooking state, press " CLOCK ", the LED will be set the cooking time; (4) Press "POWER" once, then press "6" to start cooking. 16. English-14 Multi-stage...

Instruction Manual
Page 15
.... a. Use correct cooking time, power level. Food is not suitable. d. Use microwave-safe cookware only. c. b. lation ports are restricted. Materials to see that oven venti- English-15 c. c. Cooking time, power level is set. Electrical cord for each problem. c. b. c. Use correct cooking time, power level. Turn or stir food. Wrong operation is not suitable. c. b. d. c. b. b. The oven is not plugged in microwave oven were used . Completely defrost food. Check instructions. Clean cavity with oven...
.... a. Use correct cooking time, power level. Food is not suitable. d. Use microwave-safe cookware only. c. b. lation ports are restricted. Materials to see that oven venti- English-15 c. c. Cooking time, power level is set. Electrical cord for each problem. c. b. c. Use correct cooking time, power level. Turn or stir food. Wrong operation is not suitable. c. b. d. c. b. b. The oven is not plugged in microwave oven were used . Completely defrost food. Check instructions. Clean cavity with oven...

Instruction Manual
Page 16
ONE YEAR LIMITED WARRANTY This product carries a warranty that you . IMPORTANT: This warranty does not cover damages resulting from the date of parts, or subjecting the appliance to get the exact shipping address before sending out the unit. 800-842-1289 Midea America Corp 4...for consequential damages or incidental losses caused by use of your original sales receipt. We suggest that it will be found on the back cabinet. Please call our customer service number below for future reference Model Number Serial Number SAVE THIS MANUAL AND YOUR ORIGINAL RECEIPT FOR YOUR RECORDS Made ...
ONE YEAR LIMITED WARRANTY This product carries a warranty that you . IMPORTANT: This warranty does not cover damages resulting from the date of parts, or subjecting the appliance to get the exact shipping address before sending out the unit. 800-842-1289 Midea America Corp 4...for consequential damages or incidental losses caused by use of your original sales receipt. We suggest that it will be found on the back cabinet. Please call our customer service number below for future reference Model Number Serial Number SAVE THIS MANUAL AND YOUR ORIGINAL RECEIPT FOR YOUR RECORDS Made ...


