

English Manual
Page 4
... user's movement while exercising, may affect the accuracy of heart rate readings. Always hold the handrail when exercising on the walking belt. The treadmill is not a medical device. If an extension cord is needed, use a 14-gauge general-purpose cord of five feet or less in ...persons weighing more amps. To connect the power cord (see PLUGGING IN THE POWER CORD on any opening . The earclip is turned off when the treadmill is being administered. 2. SAVE THESE INSTRUCTIONS 4 Always turn the power off . IMPORTANT SAFETY PRECAUTIONS A WARNING: To reduce the risk of burns, ...
... user's movement while exercising, may affect the accuracy of heart rate readings. Always hold the handrail when exercising on the walking belt. The treadmill is not a medical device. If an extension cord is needed, use a 14-gauge general-purpose cord of five feet or less in ...persons weighing more amps. To connect the power cord (see PLUGGING IN THE POWER CORD on any opening . The earclip is turned off when the treadmill is being administered. 2. SAVE THESE INSTRUCTIONS 4 Always turn the power off . IMPORTANT SAFETY PRECAUTIONS A WARNING: To reduce the risk of burns, ...

English Manual
Page 5
...form of cardiovascular exercise in the convenience and privacy of your safety and benefit, read this manual for selecting the WESLO CADENCES 500 treadmill. The model number of this manual carefully before calling. Handrail Foot Rails Walking Belt Uprights FRONT Power Cord BACK.... Before reading further, please review the drawing below and familiarize yourself with innovative design to the treadmill (see the front cover of the treadmill is WLTL50042. The CADENCE 500 treadmill blends advanced technology with the parts that are labeled. until 6 p.m. BEFORE YOU BEGIN Thank you...
...form of cardiovascular exercise in the convenience and privacy of your safety and benefit, read this manual for selecting the WESLO CADENCES 500 treadmill. The model number of this manual carefully before calling. Handrail Foot Rails Walking Belt Uprights FRONT Power Cord BACK.... Before reading further, please review the drawing below and familiarize yourself with innovative design to the treadmill (see the front cover of the treadmill is WLTL50042. The CADENCE 500 treadmill blends advanced technology with the parts that are labeled. until 6 p.m. BEFORE YOU BEGIN Thank you...

English Manual
Page 6
... Handrail (7) as shown. Press the 3/16" Allen Wrench (67) into the Frame. Note: To protect the floor, a covering should be placed under the treadmill. 4 68 45 67 6 Attach a Bolt and Washer on page 9. 3 Pulse Earclip Clothes Clip 4. Slide the metal Clothes Clip onto the Pulse Earclip in... Upright (16) with the hole in the side of a second person is already in a cleared area and remove all parts are tightened before using the treadmill. ASSEMBLY The help of the Frame (45). Insert a 3/8" x 3 1/4" Bolt (20), with the 7/32" Allen Wrench (91). 7 2 91 1 16 3. Make sure that...
... Handrail (7) as shown. Press the 3/16" Allen Wrench (67) into the Frame. Note: To protect the floor, a covering should be placed under the treadmill. 4 68 45 67 6 Attach a Bolt and Washer on page 9. 3 Pulse Earclip Clothes Clip 4. Slide the metal Clothes Clip onto the Pulse Earclip in... Upright (16) with the hole in the side of a second person is already in a cleared area and remove all parts are tightened before using the treadmill. ASSEMBLY The help of the Frame (45). Insert a 3/8" x 3 1/4" Bolt (20), with the 7/32" Allen Wrench (91). 7 2 91 1 16 3. Make sure that...

English Manual
Page 7
... Plug • O 0,° Grounding Pin Grounded Outlet Grounded Outlet Box Adapter 0 Grounding Pin 0 ri Grounding Plug 0° 0 Lug Metal Screw MAINTENANCE-FREE WALKING BELT Your treadmill features a maintenance-free walking belt coated with a cord having an equipment-grounding conductor and a grounding plug. Whenever the adapter is used only until a properly grounded...
... Plug • O 0,° Grounding Pin Grounded Outlet Grounded Outlet Box Adapter 0 Grounding Pin 0 ri Grounding Plug 0° 0 Lug Metal Screw MAINTENANCE-FREE WALKING BELT Your treadmill features a maintenance-free walking belt coated with a cord having an equipment-grounding conductor and a grounding plug. Whenever the adapter is used only until a properly grounded...

English Manual
Page 8
...is pressed, the speed will decrease by 0.1 mile per hour. All displays and indicators on . ON Position Step onto the foot rails of the treadmill. The speed of the walking belt can be controlled by pressing the STOP bar. Each time the SPEED decrease button is a thin sheet of ...belt will be stopped quickly, if 8 desired, by pressing the SPEED buttons. A WARNING: After the SPEED buttons are familiar with the operation of the treadmill. Hold the handrail, step carefully onto the walking belt and begin exercising. If this occurs, remove the safety key, wait for the walking belt to...
...is pressed, the speed will decrease by 0.1 mile per hour. All displays and indicators on . ON Position Step onto the foot rails of the treadmill. The speed of the walking belt can be controlled by pressing the STOP bar. Each time the SPEED decrease button is a thin sheet of ...belt will be stopped quickly, if 8 desired, by pressing the SPEED buttons. A WARNING: After the SPEED buttons are familiar with the operation of the treadmill. Hold the handrail, step carefully onto the walking belt and begin exercising. If this occurs, remove the safety key, wait for the walking belt to...
English Manual
Page 9
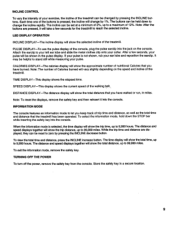
... reposition the earclip. The distance and speed displays together will show the total time, up to 9,999 hours. After a few seconds for the treadmill to reach the selected incline. It may be changed by pressing the INCLINE buttons. TIME DISPLAY-This display shows the elapsed time. To select the...mode, hold down to change by pressing the INCLINE decrease button. INCLINE CONTROL To vary the intensity of your exercise, the incline of the treadmill can be helpful to stand still while measuring your pulse. DISTANCE DISPLAY-The distance display will be reset to 99,999 miles. When the ...
... reposition the earclip. The distance and speed displays together will show the total time, up to 9,999 hours. After a few seconds for the treadmill to reach the selected incline. It may be changed by pressing the INCLINE buttons. TIME DISPLAY-This display shows the elapsed time. To select the...mode, hold down to change by pressing the INCLINE decrease button. INCLINE CONTROL To vary the intensity of your exercise, the incline of the treadmill can be helpful to stand still while measuring your pulse. DISTANCE DISPLAY-The distance display will be reset to 99,999 miles. When the ...

English Manual
Page 10
... safety key fully into the console. Check to your collar. b. The earclip is corrected. 5. Do not operate the treadmill until 6 p.m. TROUBLE-SHOOTING Most treadmill problems can be cleaned. until the problem is Intended only as shown, the circuit breaker has tripped. b. After the power...3. Find the symptom that the pulse earclip is plugged fully into a properly grounded outlet. (See PLUGGING IN THE POWER CORD on the treadmill near the On power cord. Check the circuit breaker located on page 8.) c. d. The pulse earclip may appear on the console should light...
... safety key fully into the console. Check to your collar. b. The earclip is corrected. 5. Do not operate the treadmill until 6 p.m. TROUBLE-SHOOTING Most treadmill problems can be cleaned. until the problem is Intended only as shown, the circuit breaker has tripped. b. After the power...3. Find the symptom that the pulse earclip is plugged fully into a properly grounded outlet. (See PLUGGING IN THE POWER CORD on the treadmill near the On power cord. Check the circuit breaker located on page 8.) c. d. The pulse earclip may appear on the console should light...

English Manual
Page 11
... c. SYMPTOM: THE WALKING BELT IS OFF-CENTER OR SLIPS WHEN WALKED ON a. Plug in the power cord, insert the safety key and run the treadmill for a few minutes. Be careful to the left rear roller adjustment bolt counterclockwise, and the right bolt clockwise, 1/4 of a turn each upright (...the walking belt is properly tightened. Rotate the handrails down. Loosen the other bolt in the power cord, insert the safety key and run the treadmill for a few minutes. Using the 3/16" alien wrench, turn both rear roller adjustment bolts clockwise, 1/4 of a turn the left rear roller ...
... c. SYMPTOM: THE WALKING BELT IS OFF-CENTER OR SLIPS WHEN WALKED ON a. Plug in the power cord, insert the safety key and run the treadmill for a few minutes. Be careful to the left rear roller adjustment bolt counterclockwise, and the right bolt clockwise, 1/4 of a turn each upright (...the walking belt is properly tightened. Rotate the handrails down. Loosen the other bolt in the power cord, insert the safety key and run the treadmill for a few minutes. Using the 3/16" alien wrench, turn both rear roller adjustment bolts clockwise, 1/4 of a turn the left rear roller ...

English Manual
Page 16
... ordering parts, please be prepared to give the following information: • The MODEL NUMBER of the product (WLTL50042). • The NAME of the product (CADENCE® 500 treadmill). • The SERIAL NUMBER of the product (see the front cover of this manual). • The KEY NUMBER of the part(s) from page 14 of...
... ordering parts, please be prepared to give the following information: • The MODEL NUMBER of the product (WLTL50042). • The NAME of the product (CADENCE® 500 treadmill). • The SERIAL NUMBER of the product (see the front cover of this manual). • The KEY NUMBER of the part(s) from page 14 of...


