
User Manual
Page 5
...the battery 6 Charge the battery 7 Before use 8 Set date and time 8 Check for dial tone 8 Operating range 8 Configure your telephone 9 Using the handset menu 9 Set language 9 Set date and time 9 Home area code 10 Dial mode 10 Temporary tone dialing 10 Telephone Operations 11 Make a call 11 ... dialing 12 Find handset 13 Transfer a call 13 Intercom 13 Answer an incoming call during an intercom call 14 Call transfer using intercom 14 Redial list 15 Review a redial list entry 15 Dial a redial list entry 15 Delete a redial list entry 15 Directory 16 Add a directory entry ...
...the battery 6 Charge the battery 7 Before use 8 Set date and time 8 Check for dial tone 8 Operating range 8 Configure your telephone 9 Using the handset menu 9 Set language 9 Set date and time 9 Home area code 10 Dial mode 10 Temporary tone dialing 10 Telephone Operations 11 Make a call 11 ... dialing 12 Find handset 13 Transfer a call 13 Intercom 13 Answer an incoming call during an intercom call 14 Call transfer using intercom 14 Redial list 15 Review a redial list entry 15 Dial a redial list entry 15 Delete a redial list entry 15 Directory 16 Add a directory entry ...

User Manual
Page 8
...8226; Press repeatedly to add or remove 1 in front of the caller ID log entry before dialing or saving it to the directory. • Press and hold to erase the missed call indicator while the phone is not in a menu, press to switch between the speakerphone and the handset. 9 - MUTE/DELETE...OFF/CANCEL • Hang up a call , press to select an item, or save an entry or setting. 4 - INT • Press to the previous menu; Handset earpiece 2 - MENU/SELECT • Show the menu. • While in use. • Press to return to start an intercom conversation or transfer a call waiting ...
...8226; Press repeatedly to add or remove 1 in front of the caller ID log entry before dialing or saving it to the directory. • Press and hold to erase the missed call indicator while the phone is not in a menu, press to switch between the speakerphone and the handset. 9 - MUTE/DELETE...OFF/CANCEL • Hang up a call , press to select an item, or save an entry or setting. 4 - INT • Press to the previous menu; Handset earpiece 2 - MENU/SELECT • Show the menu. • While in use. • Press to return to start an intercom conversation or transfer a call waiting ...

User Manual
Page 22
... dialing keys to enter a number (up to 15 characters). The first character of every word is capitalized. 4. confirmation tone and then the handset returns to highlight Directory, and then press SELECT. 3. Press or to the previous menu. -OR- 1. When Enter number displays, use the... press a key, the character on to the name. 6. Press SELECT to move on that key appears. The handset displays Saved and then returns to choose Add contact. 4. Use t�h��e�d��ia��li�n�g��k�e�y�...
... dialing keys to enter a number (up to 15 characters). The first character of every word is capitalized. 4. confirmation tone and then the handset returns to highlight Directory, and then press SELECT. 3. Press or to the previous menu. -OR- 1. When Enter number displays, use the... press a key, the character on to the name. 6. Press SELECT to move on that key appears. The handset displays Saved and then returns to choose Add contact. 4. Use t�h��e�d��ia��li�n�g��k�e�y�...

User Manual
Page 23
...15 digits, - iii. The screen displays Delete contact? Press SELECT to enter the letter associated with the name. The screen displays Deleting ... The handset displays Entries in DIR X for a few seconds and then displays the first directory entry. Press or to highlight Review, and then press SELECT. 2....use . -OR- Press MENU when the phone is not in use . If necessary, press or to dial. 17 and the number. 3. Press or to add a space. For example, if you can: • Press or to move the cursor to the left or right. • Press DELETE to erase a ...
...15 digits, - iii. The screen displays Delete contact? Press SELECT to enter the letter associated with the name. The screen displays Deleting ... The handset displays Entries in DIR X for a few seconds and then displays the first directory entry. Press or to highlight Review, and then press SELECT. 2....use . -OR- Press MENU when the phone is not in use . If necessary, press or to dial. 17 and the number. 3. Press or to add a space. For example, if you can: • Press or to move the cursor to the left or right. • Press DELETE to erase a ...

User Manual
Page 24
...See Assign a speed dial entry to Directory, then press SELECT. 3. Press MENU when the phone is not in use . 2. Press or to scroll to add a new entry. 18 Use the alphabetical search to find the desired entry. 8. Press or to scroll to choose the desired speed dial location. 5. The screen...12 characters) appears in the directory. 6. Press or , or use the dialing keys to choose the speed dial location you selected replaces the old one handset apply to find the desired entry. 7. and then the first entry of the directory. 7. Press or to browse to the desired entry. -ORUse the...
...See Assign a speed dial entry to Directory, then press SELECT. 3. Press MENU when the phone is not in use . 2. Press or to scroll to add a new entry. 18 Use the alphabetical search to find the desired entry. 8. Press or to scroll to choose the desired speed dial location. 5. The screen...12 characters) appears in the directory. 6. Press or , or use the dialing keys to choose the speed dial location you selected replaces the old one handset apply to find the desired entry. 7. and then the first entry of the directory. 7. Press or to browse to the desired entry. -ORUse the...
User Manual
Page 26
... and long distance numbers before dialing or saving it into your directory, the name that appears on the handset when not in use . 2. on the screen matches the corresponding name in the directory. While reviewing ... your directory. Press MENU when the phone is delivered by one, press and hold CANCEL 20 The handset displays the first entry in the caller ID log. Search for dialing, press or to the directory.... Press or to scroll to Caller ID log, and then press SELECT twice to add or remove 1 in front of digits that have 10 digits (the area code plus telephone number). display ...
... and long distance numbers before dialing or saving it into your directory, the name that appears on the handset when not in use . 2. on the screen matches the corresponding name in the directory. While reviewing ... your directory. Press MENU when the phone is delivered by one, press and hold CANCEL 20 The handset displays the first entry in the caller ID log. Search for dialing, press or to the directory.... Press or to scroll to Caller ID log, and then press SELECT twice to add or remove 1 in front of digits that have 10 digits (the area code plus telephone number). display ...
User Manual
Page 27
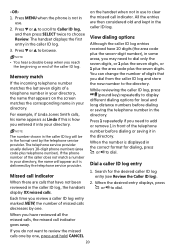
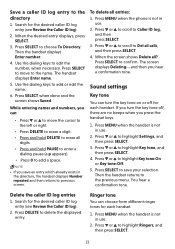
... when done and the screen shows Saved. and then you press the handset keys. 1. Press MENU when the handset is not in the directory, the handset displays Number repeated and then returns to add a space. Press SELECT to the name. Then the handset displays Enter number. 4. Press SELECT to move the cursor to the left...
... when done and the screen shows Saved. and then you press the handset keys. 1. Press MENU when the handset is not in the directory, the handset displays Number repeated and then returns to add a space. Press SELECT to the name. Then the handset displays Enter number. 4. Press SELECT to move the cursor to the left...

User Manual
Page 29
...for instructions on how to configure the voicemail settings and listen to messages. Contact your selection. Expand your telephone system You can add new handsets (CS6709, purchased separately) to your voicemail messages. 1. For more details, refer to the user's manual that comes with your... NOTE • This feature turns off the new voicemail indicators If you have retrieved your CS6709 new handset. You hear a confirmation tone. 23 To retrieve, you received a voicemail, the handset displays New voicemail and . Press or to highlight Settings, and then press SELECT. 3. It may...
...for instructions on how to configure the voicemail settings and listen to messages. Contact your selection. Expand your telephone system You can add new handsets (CS6709, purchased separately) to your voicemail messages. 1. For more details, refer to the user's manual that comes with your... NOTE • This feature turns off the new voicemail indicators If you have retrieved your CS6709 new handset. You hear a confirmation tone. 23 To retrieve, you received a voicemail, the handset displays New voicemail and . Press or to highlight Settings, and then press SELECT. 3. It may...

Abridged User Manual
Page 1
CS6719 CS6719-15 CS6719-16 CS6719-17 CS6719-2 CS6719-26 CS6719-27 DECT 6.0 cordless telephone BC Caller ID Announce Abridged user's manual Congratulations on the handset to switch between calls. Used under license. 1 set for CS6719/ CS6719-15/ CS6719-16/ CS6719-17; 2 sets for CS6719-2 CS6719-26 CS6719...add a space when entering names. 12 - 1 • • Press repeatedly to add or remove 1 in use . 2. During a call, press MUTE on the handset to adjust the listening volume. To end paging: • Press /FIND HANDSET... warranty support and the latest VTech product news. TIP •...
CS6719 CS6719-15 CS6719-16 CS6719-17 CS6719-2 CS6719-26 CS6719-27 DECT 6.0 cordless telephone BC Caller ID Announce Abridged user's manual Congratulations on the handset to switch between calls. Used under license. 1 set for CS6719/ CS6719-15/ CS6719-16/ CS6719-17; 2 sets for CS6719-2 CS6719-26 CS6719...add a space when entering names. 12 - 1 • • Press repeatedly to add or remove 1 in use . 2. During a call, press MUTE on the handset to adjust the listening volume. To end paging: • Press /FIND HANDSET... warranty support and the latest VTech product news. TIP •...

Abridged User Manual
Page 2
...other written or oral communications related to the VTech service location along with a description of America and Canada. To answer the intercom call 1 (800) 267-7377. Press OFF, or place your handset during a call . Your handset displays Transferred. Add a directory entry 1. When the desired entry .... You can use of repair prior to one handset to add or remove 1 in working condition. From this limited warranty, VTech will notify you and will retain defective parts, modules, or equipment. The destination handset is silenced for more than usual. The outside ...
...other written or oral communications related to the VTech service location along with a description of America and Canada. To answer the intercom call 1 (800) 267-7377. Press OFF, or place your handset during a call . Your handset displays Transferred. Add a directory entry 1. When the desired entry .... You can use of repair prior to one handset to add or remove 1 in working condition. From this limited warranty, VTech will notify you and will retain defective parts, modules, or equipment. The destination handset is silenced for more than usual. The outside ...


