User Manual
Page 1
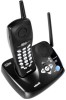
...8 Answering Machine...8 In Use/Low Batt LED...8 BASE UNIT FEATURES AND KEYS 9 New Message LED...9 Answer On/Off LED...9 In Use/Charging LED...9 Play/Stop...9 Repeat...9 Skip...9 Delete...9 Page...9 Volume...9 BASIC OPERATION...10 USING YOUR VT 9152 CORDLESS TELEPHONE 10 Making Calls...10 Answering Calls...10 Handset Volume Control 10 Ending a Call...10 Redial...10 Changing Channels...10 Tone/Pulse Setting...10 Temporary Tone...10 Ringer Programming 10 Checking the Ringer...10 Memory Dialing...11 Programming Speed Dial Numbers 11 Speed Dialing...11 To Change or Replace a Speed Dial Number...
...8 Answering Machine...8 In Use/Low Batt LED...8 BASE UNIT FEATURES AND KEYS 9 New Message LED...9 Answer On/Off LED...9 In Use/Charging LED...9 Play/Stop...9 Repeat...9 Skip...9 Delete...9 Page...9 Volume...9 BASIC OPERATION...10 USING YOUR VT 9152 CORDLESS TELEPHONE 10 Making Calls...10 Answering Calls...10 Handset Volume Control 10 Ending a Call...10 Redial...10 Changing Channels...10 Tone/Pulse Setting...10 Temporary Tone...10 Ringer Programming 10 Checking the Ringer...10 Memory Dialing...11 Programming Speed Dial Numbers 11 Speed Dialing...11 To Change or Replace a Speed Dial Number...
User Manual
Page 2
TABLE OF CONTENTS Set Security Code 14 Set Day & Time...14 Set Audible Message Alert 14 Set Announce Only 14 Set Base Ringer...15 Set Number of Rings 15 Checking Day and Time 15 Recording a Memo 15 Turning Your Answering System ON/OFF 15 Playback of Greetings, Messages and Memos 16 REMOTE OPERATION OF YOUR VT 9152 ANSWERING SYSTEM 17 Remote Commands 17 HEADSET OPERATION 18 Belt Clip...18 Operation...18 ADDITIONAL INFORMATION 19 IN CASE OF DIFFICULTY 19 LIMITTED WARRANTY STATEMENT 21 FCC AND IC REGULATIONS 23 THE RBRC R SEAL 24 MAINTENANCE...25 TECHNICAL SPECIFICATIONS 26 2
TABLE OF CONTENTS Set Security Code 14 Set Day & Time...14 Set Audible Message Alert 14 Set Announce Only 14 Set Base Ringer...15 Set Number of Rings 15 Checking Day and Time 15 Recording a Memo 15 Turning Your Answering System ON/OFF 15 Playback of Greetings, Messages and Memos 16 REMOTE OPERATION OF YOUR VT 9152 ANSWERING SYSTEM 17 Remote Commands 17 HEADSET OPERATION 18 Belt Clip...18 Operation...18 ADDITIONAL INFORMATION 19 IN CASE OF DIFFICULTY 19 LIMITTED WARRANTY STATEMENT 21 FCC AND IC REGULATIONS 23 THE RBRC R SEAL 24 MAINTENANCE...25 TECHNICAL SPECIFICATIONS 26 2
User Manual
Page 3
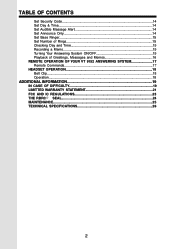
... must not be a remote risk of electric shock from the wall outlet : A. SAVE THESE INSTRUCTIONS 3 Follow all instructions. 2. This product should never be placed in a built-in the risk of fire or electric shock. 12. Opening or removing cabinet parts other than a cordless type) during an electrical storm. When the power supply cord or plug is required, contact VTECH Customer Service at 1-800-595...
... must not be a remote risk of electric shock from the wall outlet : A. SAVE THESE INSTRUCTIONS 3 Follow all instructions. 2. This product should never be placed in a built-in the risk of fire or electric shock. 12. Opening or removing cabinet parts other than a cordless type) during an electrical storm. When the power supply cord or plug is required, contact VTECH Customer Service at 1-800-595...

User Manual
Page 5
... the battery. Unplug and remove the old battery pack. Recharging the Battery Pack Your VT 9152 provides both audible and visual alerts when the battery pack is slowly flashing; You hear a double beep while you press PHONE/FLASH to short the battery with conducting materials such as rings, bracelets, and keys. The new battery pack must be toxic if swallowed. 3. Use only VTECH battery pack. 2. GETTING STARTED REPLACING THE HANDSET BATTERIES 1. Plug...
... the battery. Unplug and remove the old battery pack. Recharging the Battery Pack Your VT 9152 provides both audible and visual alerts when the battery pack is slowly flashing; You hear a double beep while you press PHONE/FLASH to short the battery with conducting materials such as rings, bracelets, and keys. The new battery pack must be toxic if swallowed. 3. Use only VTECH battery pack. 2. GETTING STARTED REPLACING THE HANDSET BATTERIES 1. Plug...
User Manual
Page 6
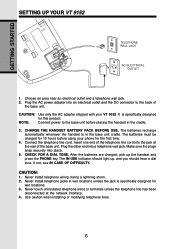
... AC power adapter into place. 5. CHECK FOR A DIAL TONE. The IN USE indicator should light up the handset and press the PHONE key. Never touch uninsulated telephone wires or terminals unless the telephone line has been disconnected at the rear of the telephone line cord into a telephone wall jack. It is specifically designed for wet locations. 3. The batteries recharge automatically whenever the handset is specifically designed for this product. Make sure the plugs snap securely...
... AC power adapter into place. 5. CHECK FOR A DIAL TONE. The IN USE indicator should light up the handset and press the PHONE key. Never touch uninsulated telephone wires or terminals unless the telephone line has been disconnected at the rear of the telephone line cord into a telephone wall jack. It is specifically designed for wet locations. 3. The batteries recharge automatically whenever the handset is specifically designed for this product. Make sure the plugs snap securely...

User Manual
Page 10
... Handset and the IN USE/CHARGING LED will revert to Pulse dialing mode. HANDSET VOLUME CONTROL Use the Volume UP and DOWN keys, located on the Base Unit. CHANGING CHANNELS If you notice noise or interference when using your Handset will flash on the bottom of the Handset keypad to adjust the earpiece volume to a clear channel. You can choose among 4 ring styles. BASIC OPERATION USING YOUR VT 9152 CORDLESS TELEPHONE MAKING CALLS Pick up , then press PHONE/FLASH to dial the last number...
... Handset and the IN USE/CHARGING LED will revert to Pulse dialing mode. HANDSET VOLUME CONTROL Use the Volume UP and DOWN keys, located on the Base Unit. CHANGING CHANNELS If you notice noise or interference when using your Handset will flash on the bottom of the Handset keypad to adjust the earpiece volume to a clear channel. You can choose among 4 ring styles. BASIC OPERATION USING YOUR VT 9152 CORDLESS TELEPHONE MAKING CALLS Pick up , then press PHONE/FLASH to dial the last number...

User Manual
Page 12
... listen to your callers leave them . BASIC OPERATION ANSWERING SYSTEM OPERATION INTRODUCTION Your VT 9152 has a digital Answering Device in . You will hear messages at the Base Unit as a message comes in the Base Unit, capable of storing approximately 12 minutes of messages. The answering system will be able to idle mode. 12 USE THE VT 9152 HANDSET TO PROGRAM YOUR ANSWERING SYSTEM!!! • You can also screen messages while your caller now, press PHONE/ FLASH.
... listen to your callers leave them . BASIC OPERATION ANSWERING SYSTEM OPERATION INTRODUCTION Your VT 9152 has a digital Answering Device in . You will hear messages at the Base Unit as a message comes in the Base Unit, capable of storing approximately 12 minutes of messages. The answering system will be able to idle mode. 12 USE THE VT 9152 HANDSET TO PROGRAM YOUR ANSWERING SYSTEM!!! • You can also screen messages while your caller now, press PHONE/ FLASH.

User Manual
Page 13
... OPERATION HANDSET LAYOUT FOR ANSWERING SYSTEM OPERATION With the Handset in the idle mode (on hook), first press ANS. MACHINE to enter Answering System mode, then one of the following keys: KEY FUNCTION 1 Repeat current message 2 Play/Stop 3 Skip to the next message 4 MENU (for programming your Answering System) 5 SET (for programming your Answering System) 6 SELECT (for programming your Answering System) 7 Record 9 Increment by 10 (for programming time and security code) 0 Answering System ON/OFF # Erase KEY 2 KEY 1 KEY 4 KEY 7 KEY 0 KEY 3 KEY 5 KEY 6 KEY 9 KEY 8 KEY...
... OPERATION HANDSET LAYOUT FOR ANSWERING SYSTEM OPERATION With the Handset in the idle mode (on hook), first press ANS. MACHINE to enter Answering System mode, then one of the following keys: KEY FUNCTION 1 Repeat current message 2 Play/Stop 3 Skip to the next message 4 MENU (for programming your Answering System) 5 SET (for programming your Answering System) 6 SELECT (for programming your Answering System) 7 Record 9 Increment by 10 (for programming time and security code) 0 Answering System ON/OFF # Erase KEY 2 KEY 1 KEY 4 KEY 7 KEY 0 KEY 3 KEY 5 KEY 6 KEY 9 KEY 8 KEY...
User Manual
Page 14
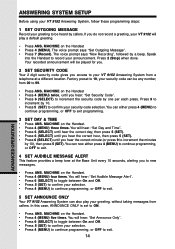
... for you. 2 SET SECURITY CODE Your 2 digit security code gives you access to your VT 9152 Answering System from a telephone at the Base Unit every 10 seconds, alerting you hear the correct minute (or press 9 to increment the minutes by one per each press. MACHINE on the Handset. • Press 4 (MENU) four times. MACHINE on the Handset. • Press 4 (MENU) three times. The voice prompt says "Set Outgoing Message". • Press 7 (Record). In this...
... for you. 2 SET SECURITY CODE Your 2 digit security code gives you access to your VT 9152 Answering System from a telephone at the Base Unit every 10 seconds, alerting you hear the correct minute (or press 9 to increment the minutes by one per each press. MACHINE on the Handset. • Press 4 (MENU) four times. MACHINE on the Handset. • Press 4 (MENU) three times. The voice prompt says "Set Outgoing Message". • Press 7 (Record). In this...
User Manual
Page 15
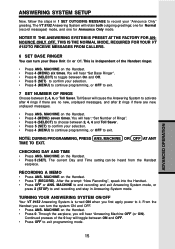
.... MACHINE on the Handset. • Press 7 (RECORD). From the Handset you will toggle between 2, 4, 6, or Toll Saver. MACHINE on the Handset. • Press 5 (SET). RECORDING A MEMO • Press ANS. THIS IS THE NORMAL MODE, REQUIRED FOR YOUR VT 9152 TO RECEIVE MESSAGES FROM CALLERS. 6 SET BASE RINGER You can be heard from the Handset earpiece. This is turned ON when you first apply power to exit. 7 SET NUMBER OF RINGS Choose...
.... MACHINE on the Handset. • Press 7 (RECORD). From the Handset you will toggle between 2, 4, 6, or Toll Saver. MACHINE on the Handset. • Press 5 (SET). RECORDING A MEMO • Press ANS. THIS IS THE NORMAL MODE, REQUIRED FOR YOUR VT 9152 TO RECEIVE MESSAGES FROM CALLERS. 6 SET BASE RINGER You can be heard from the Handset earpiece. This is turned ON when you first apply power to exit. 7 SET NUMBER OF RINGS Choose...
User Manual
Page 16
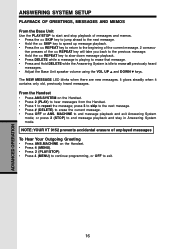
ADVANCED OPERATION ANSWERING SYSTEM SETUP PLAYBACK OF GREETINGS, MESSAGES AND MEMOS From the Base Unit Use the PLAY/STOP to start and stop playback of messages and memos. • Press the >> SKIP key to jump ahead to the next message. • Hold the >> SKIP key to speed up message playback. • Press the
ADVANCED OPERATION ANSWERING SYSTEM SETUP PLAYBACK OF GREETINGS, MESSAGES AND MEMOS From the Base Unit Use the PLAY/STOP to start and stop playback of messages and memos. • Press the >> SKIP key to jump ahead to the next message. • Hold the >> SKIP key to speed up message playback. • Press the

User Manual
Page 17
...the following remote commands: REMOTE COMMANDS #1 #2 #4 #4, #4 #5 #6 #7 #9 #0 *7 *8 *0 HELP MENU PLAY ALL MESSAGES REPEAT CURRENT MESSAGES PLAY PREVIOUS MESSAGE STOP (Playback or Recording) SKIP TO NEXT MESSAGE REVIEW GREETING ERASE CURRENT MESSAGE ANSWERING SYSTEM ON/OFF RECORD GREETING RECORD MEMO HANG UP NOTE: You do not have to wait unit the voice menu announces the command to your 2 digit security code. ADVANCED OPERATION 17 REMOTE OPERATION OF YOUR VT 9152 ANSWERING SYSTEM You can access messages and change your greeting remotely, using a touch tone phone from a different line or...
...the following remote commands: REMOTE COMMANDS #1 #2 #4 #4, #4 #5 #6 #7 #9 #0 *7 *8 *0 HELP MENU PLAY ALL MESSAGES REPEAT CURRENT MESSAGES PLAY PREVIOUS MESSAGE STOP (Playback or Recording) SKIP TO NEXT MESSAGE REVIEW GREETING ERASE CURRENT MESSAGE ANSWERING SYSTEM ON/OFF RECORD GREETING RECORD MEMO HANG UP NOTE: You do not have to wait unit the voice menu announces the command to your 2 digit security code. ADVANCED OPERATION 17 REMOTE OPERATION OF YOUR VT 9152 ANSWERING SYSTEM You can access messages and change your greeting remotely, using a touch tone phone from a different line or...

User Manual
Page 18
... cordless Handset. Align the pins on the inside edge of the belt clip with an accessory Headset for hands-free operation. Do not force the connection. ADVANCED OPERATION HEADSET OPERATION Your VT 9152 cordless telephone is equipped with a 2.5mm Headset Jack for use with the notches on the side of the VT 9152 handset. The plug should snap securely into place. the same may also apply to other (non-VTECH) compatible headsets, but VTECH...
... cordless Handset. Align the pins on the inside edge of the belt clip with an accessory Headset for hands-free operation. Do not force the connection. ADVANCED OPERATION HEADSET OPERATION Your VT 9152 cordless telephone is equipped with a 2.5mm Headset Jack for use with the notches on the side of the VT 9152 handset. The plug should snap securely into place. the same may also apply to other (non-VTECH) compatible headsets, but VTECH...

User Manual
Page 19
... the range. IN CASE OF DIFFICULTY If you recently installed a new battery pack, make sure it is installed correctly. If there is plugged in the base momentarily to another outlet. Make sure the power cord is no dial tone on your phone, the suggestions below should solve the problem. NO DIAL TONE. • First check all of your home may be too far from the telephone jack and connect a different phone...
... the range. IN CASE OF DIFFICULTY If you recently installed a new battery pack, make sure it is installed correctly. If there is plugged in the base momentarily to another outlet. Make sure the power cord is no dial tone on your phone, the suggestions below should solve the problem. NO DIAL TONE. • First check all of your home may be too far from the telephone jack and connect a different phone...

User Manual
Page 20
YOU HEAR OTHER CALLS WHILE USING YOUR PHONE. • Press CHAN key to switch to another channel. • Disconnect your local telephone company. See TURNING YOUR ANSWERING SYSTEM ON/OFF. • Your Answering System may be set. Disconnect the power to normal (record messages) operation. Install the handset battery pack. 6. If the handset has not been recently charged, allow 16 hours before use. 20 ADDITIONAL INFORMATION Call your base unit from the telephone jack, and...
YOU HEAR OTHER CALLS WHILE USING YOUR PHONE. • Press CHAN key to switch to another channel. • Disconnect your local telephone company. See TURNING YOUR ANSWERING SYSTEM ON/OFF. • Your Answering System may be set. Disconnect the power to normal (record messages) operation. Install the handset battery pack. 6. If the handset has not been recently charged, allow 16 hours before use. 20 ADDITIONAL INFORMATION Call your base unit from the telephone jack, and...

User Manual
Page 21
... numbers have been removed, altered or rendered illegible; or 6. You should expect the repair or replacement to the extent that the problem experienced is not covered by this product, we may use with operation instructions. Product to take approximately 30 days. or 7. Product returned without charge, a Materially Defective Product. Product that has been damaged due to you or (b) the time...
... numbers have been removed, altered or rendered illegible; or 6. You should expect the repair or replacement to the extent that the problem experienced is not covered by this product, we may use with operation instructions. Product to take approximately 30 days. or 7. Product returned without charge, a Materially Defective Product. Product that has been damaged due to you or (b) the time...

User Manual
Page 22
...mailing address, and telephone number. and 3. VTECH provides no other express warranties. State Law Rights: This warranty gives you specific legal rights, and you return with a description of the malfunction or difficulty; 2. Limitations: Implied warranties, including those of repair prior to any further repair activity. VTECH... a service call 1-800-595-9511 for this limited warranty. A check of this Product. LIMITED WARRANTY STATEMENT How do you and VTECH. VTECH assumes no event shall VTECH be liable for service, please check the user's manual. You...
...mailing address, and telephone number. and 3. VTECH provides no other express warranties. State Law Rights: This warranty gives you specific legal rights, and you return with a description of the malfunction or difficulty; 2. Limitations: Implied warranties, including those of repair prior to any further repair activity. VTECH... a service call 1-800-595-9511 for this limited warranty. A check of this Product. LIMITED WARRANTY STATEMENT How do you and VTECH. VTECH assumes no event shall VTECH be liable for service, please check the user's manual. You...

User Manual
Page 23
... discontinue your service if your local telephone company. FCC AND IC REGULATIONS This equipment complies with part 15 of the FCC rules. For repair procedures, follow the instructions outlined under the VTECH Limited Warranty. This equipment is connected. • Consult the dealer or an experienced radio/TV technician for the specific number in a residential installation.This equipment generates, uses and can...
... discontinue your service if your local telephone company. FCC AND IC REGULATIONS This equipment complies with part 15 of the FCC rules. For repair procedures, follow the instructions outlined under the VTECH Limited Warranty. This equipment is connected. • Consult the dealer or an experienced radio/TV technician for the specific number in a residential installation.This equipment generates, uses and can...
User Manual
Page 24
... areas. FCC AND IC REGULATIONS Before installing this equipment, users should ensure that it easy for you may connect to the telephone loop which may be illegal in your area. RBRC R is voluntarily participating in an industry program to collect and recycle these batteries at authorized VTECH product service centers. is a registered trademark of the local telecommunications company. Please...
... areas. FCC AND IC REGULATIONS Before installing this equipment, users should ensure that it easy for you may connect to the telephone loop which may be illegal in your area. RBRC R is voluntarily participating in an industry program to collect and recycle these batteries at authorized VTECH product service centers. is a registered trademark of the local telecommunications company. Please...

User Manual
Page 26
Actual operating range may vary according to 927.75 MHz NOMINAL EFFECTIVE RANGE Maximum power allowed by FCC and IC. Power Adapter: 9V DC @ 400mA SPECIFICATIONS ARE TYPICAL AND MAY CHANGE WITHOUT NOTICE. 26 SIZE Handset: Base: 17.5cm x 5.5cm x 3.9cm (L x W xT) maximum (antenna excluded) 18.1cm x 12.5cm x 5.9cm (L x W x T) maximum (antenna excluded) WEIGHT Handset: Base: 130 grams 310 grams (battery pack excluded) POWER REQUIREMENTS Handset: Self...
Actual operating range may vary according to 927.75 MHz NOMINAL EFFECTIVE RANGE Maximum power allowed by FCC and IC. Power Adapter: 9V DC @ 400mA SPECIFICATIONS ARE TYPICAL AND MAY CHANGE WITHOUT NOTICE. 26 SIZE Handset: Base: 17.5cm x 5.5cm x 3.9cm (L x W xT) maximum (antenna excluded) 18.1cm x 12.5cm x 5.9cm (L x W x T) maximum (antenna excluded) WEIGHT Handset: Base: 130 grams 310 grams (battery pack excluded) POWER REQUIREMENTS Handset: Self...


