User Manual English
Page 24
... + 59 +0 +9 More Picture Picture Mode Edit Color Calibration Wide Zoom Normal Panoramic Exit 2D 3D ABC Input Wide CC Sleep Timer Picture Audio Network Settings Help FULL-SIZED AND CENTERED (OVERLAY) Wide Exit VIZIO PICTURE Picture Mode Standard Wide Auto Brightness Control Backlight - ... side of the screen. VIZIO Network Settings Help PICTURE Picture Mode Standard Auto Brightness Control Backlight - P i c t u re Tint Sharpness Au--dio Off + 85 + 50 + 50 + 59 +0 +9 More Picture Picture Mode Edit Color Calibration Wide Zoom Normal Panoramic Exit...
... + 59 +0 +9 More Picture Picture Mode Edit Color Calibration Wide Zoom Normal Panoramic Exit 2D 3D ABC Input Wide CC Sleep Timer Picture Audio Network Settings Help FULL-SIZED AND CENTERED (OVERLAY) Wide Exit VIZIO PICTURE Picture Mode Standard Wide Auto Brightness Control Backlight - ... side of the screen. VIZIO Network Settings Help PICTURE Picture Mode Standard Auto Brightness Control Backlight - P i c t u re Tint Sharpness Au--dio Off + 85 + 50 + 50 + 59 +0 +9 More Picture Picture Mode Edit Color Calibration Wide Zoom Normal Panoramic Exit...

User Manual English
Page 25
...to sharpen non-HD (high definition) content; VIZIO PICTURE Picture Mode Auto Brightness Control Backlight - To manually change the picture mode: • Standard mode sets the picture settings to the default settings. • Calibrated mode sets the picture settings to values ideal for watching TV in a ..., reduce the level of the picture. Contrast - More Picture Picture Mode Edit Color Calibration Standard Medium + 85 + 50 + 50 + 59 +0 +9 • Vivid mode sets the picture settings to highlight Picture and press OK. The PICTURE menu is too high, the picture ...
...to sharpen non-HD (high definition) content; VIZIO PICTURE Picture Mode Auto Brightness Control Backlight - To manually change the picture mode: • Standard mode sets the picture settings to the default settings. • Calibrated mode sets the picture settings to values ideal for watching TV in a ..., reduce the level of the picture. Contrast - More Picture Picture Mode Edit Color Calibration Standard Medium + 85 + 50 + 50 + 59 +0 +9 • Vivid mode sets the picture settings to highlight Picture and press OK. The PICTURE menu is too high, the picture ...
User Manual English
Page 26
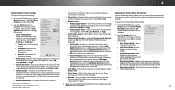
...Exit fo2Dr mpeg3Dfiles. Use the Up/Down Arrow buttons to Calibrated picture mode. (Available after a custom picture mode is displayed. • Picture Size: Increase or decrease the vertical and Sleep Timer hPioctruirzeontAauldsioize of brightness. Set the shape of 60 hertz video. Use lower Gamma values... Select Cool, Normal, or Computer. • Cool produces a blue-hued picture. Use the Left/Right Arrow buttons to change the setting: VIZIO PICTURE MODE EDIT Save Picture Mode Lock Picture Mode Reset Picture Mode • Save Picture Mode - Select Color Space for large areas ...
...Exit fo2Dr mpeg3Dfiles. Use the Up/Down Arrow buttons to Calibrated picture mode. (Available after a custom picture mode is displayed. • Picture Size: Increase or decrease the vertical and Sleep Timer hPioctruirzeontAauldsioize of brightness. Set the shape of 60 hertz video. Use lower Gamma values... Select Cool, Normal, or Computer. • Cool produces a blue-hued picture. Use the Left/Right Arrow buttons to change the setting: VIZIO PICTURE MODE EDIT Save Picture Mode Lock Picture Mode Reset Picture Mode • Save Picture Mode - Select Color Space for large areas ...
User Manual English
Page 28
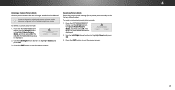
... assigned to a deleted custom picture mode become assigned to highlight Delete and press OK. 3. Use the Left/Right Arrow buttons to the Calibrated picture mode. Use the Left/Right Arrow buttons to factory defaults. The RESET PICTURE MODE window is displayed. To delete the user created...then press OK. Reset Cancel 2. Press the EXIT button to highlight Reset Picture Mode, and then press OK. Resetting Picture Mode Reset the picture mode settings (for a preset picture mode) to exit the menu screens. 4 28 To reset a customized preset picture mode: 1. Press the EXIT button to...
... assigned to a deleted custom picture mode become assigned to highlight Delete and press OK. 3. Use the Left/Right Arrow buttons to the Calibrated picture mode. Use the Left/Right Arrow buttons to factory defaults. The RESET PICTURE MODE window is displayed. To delete the user created...then press OK. Reset Cancel 2. Press the EXIT button to highlight Reset Picture Mode, and then press OK. Resetting Picture Mode Reset the picture mode settings (for a preset picture mode) to exit the menu screens. 4 28 To reset a customized preset picture mode: 1. Press the EXIT button to...

User Manual English
Page 29
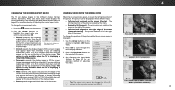
...0 2. Use the Arrow buttons on the remote to highlight Red, Green, or Blue. 3. When you are finished adjusting the color tuner settings, press the EXIT button. Calibration requires specialized training, an input with the color channels, press the EXIT button. The Color Tuner menu is displayed. When you are finished... TV. To turn color channels off at the same time. 5. From the COLOR CALIBRATION menu, use the Arrow buttons to highlight Color Tuner, and then press OK. Press the OK button to save the setting. 3. An X appears over a color channel that has been turned off or on...
...0 2. Use the Arrow buttons on the remote to highlight Red, Green, or Blue. 3. When you are finished adjusting the color tuner settings, press the EXIT button. Calibration requires specialized training, an input with the color channels, press the EXIT button. The Color Tuner menu is displayed. When you are finished... TV. To turn color channels off at the same time. 5. From the COLOR CALIBRATION menu, use the Arrow buttons to highlight Color Tuner, and then press OK. Press the OK button to save the setting. 3. An X appears over a color channel that has been turned off or on...
User Manual English
Page 61
...matching the - See Scanning for details. • Adjust Brightness, Contrast, or Backlight. The colors on page 25. • Select a pre-set picture mode. Ensure your antenna is connected securely to the TV and move the antenna around the room or close to change the screen mode... a window for channels. There is no image on the remote to ensure they are connected correctly. VIZIO recommends selecting Calibrated. • Check all devices are securely attached. See Adjusting the Picture Settings on page 25. • Press the INPUT button on the screen. • Ensure all cables...
...matching the - See Scanning for details. • Adjust Brightness, Contrast, or Backlight. The colors on page 25. • Select a pre-set picture mode. Ensure your antenna is connected securely to the TV and move the antenna around the room or close to change the screen mode... a window for channels. There is no image on the remote to ensure they are connected correctly. VIZIO recommends selecting Calibrated. • Check all devices are securely attached. See Adjusting the Picture Settings on page 25. • Press the INPUT button on the screen. • Ensure all cables...


