
Two-Page Specifications Sheet
Page 1
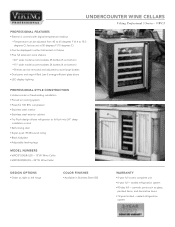
... and adjusted to store large bottles §§Dual pane and argon-filled Low-E energy-efficient glass doors §§LED display lighting PROFESSIONAL-STYLE CONSTRUCTION §§Undercounter or freestanding installation §§Forced air cooling system §§Powerful 700 BTU compressor §§Stainless steel interior §§Stainless steel exterior cabinet §§Tru-Flush design allows refrigerator to...
... and adjusted to store large bottles §§Dual pane and argon-filled Low-E energy-efficient glass doors §§LED display lighting PROFESSIONAL-STYLE CONSTRUCTION §§Undercounter or freestanding installation §§Forced air cooling system §§Powerful 700 BTU compressor §§Stainless steel interior §§Stainless steel exterior cabinet §§Tru-Flush design allows refrigerator to...

Two-Page Specifications Sheet
Page 2
...) Cutout Depth 24" (61.0 cm) Electrical Requirements 115VAC/60Hz; 15-amp dedicated circuit; 5' (152.4 cm) power cord attached to product Maximum Amp Usage 3.0 amps Maximum Storage Capacity 24 wine bottles 45 wine bottles Approximate Shipping Weight 157 lb. (71 kg) Please do not prepare installation from a corner to achieve 94° door swing 2(440-2.15/c3m2)" min. UNDERCOUNTER WINE CELLAR 3(706-.51/c8m") 2(630-.67...
...) Cutout Depth 24" (61.0 cm) Electrical Requirements 115VAC/60Hz; 15-amp dedicated circuit; 5' (152.4 cm) power cord attached to product Maximum Amp Usage 3.0 amps Maximum Storage Capacity 24 wine bottles 45 wine bottles Approximate Shipping Weight 157 lb. (71 kg) Please do not prepare installation from a corner to achieve 94° door swing 2(440-2.15/c3m2)" min. UNDERCOUNTER WINE CELLAR 3(706-.51/c8m") 2(630-.67...
Installation Instructions
Page 3
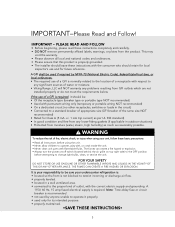
...;SAVE THESE INSTRUCTIONS• 3 Note: Time delay fuse or circuit breaker is normally related to the location of a receptacle with respect to the proper kind of water or moisture. • Viking Range, LLC will NOT warranty any loose-fitting gaskets (if applicable in the circuit) • Connected to operate, play with, or crawl inside the unit. • Never clean unit parts with the consumer...
...;SAVE THESE INSTRUCTIONS• 3 Note: Time delay fuse or circuit breaker is normally related to the location of a receptacle with respect to the proper kind of water or moisture. • Viking Range, LLC will NOT warranty any loose-fitting gaskets (if applicable in the circuit) • Connected to operate, play with, or crawl inside the unit. • Never clean unit parts with the consumer...
Installation Instructions
Page 4
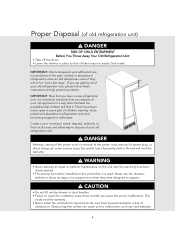
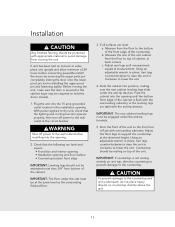
... kickplate is used. WARNING • Never attempt to help prevent accidents. This could void the warranty. • Never install the unit behind closed doors. Junked or abandoned refrigeration units are not problems of your old refrigeration unit, please follow these instructions to repair or perform maintenance on the unit until the electricity has been disconnected. • The anti-tip kit must be installed on this unit before...
... kickplate is used. WARNING • Never attempt to help prevent accidents. This could void the warranty. • Never install the unit behind closed doors. Junked or abandoned refrigeration units are not problems of your old refrigeration unit, please follow these instructions to repair or perform maintenance on the unit until the electricity has been disconnected. • The anti-tip kit must be installed on this unit before...
Installation Instructions
Page 10
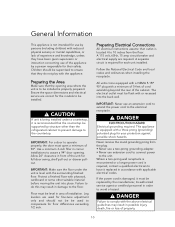
... installation. Ensure the space dimensions and electrical service are required. Preparing Electrical Connections All electrical instructions assume that they have it replaced in accordance with applicable electrical codes. The electrical outlet must be supervised to ensure that outlet is located 4 to 10 inches from the plug. • Never use a two-prong grounding adapter. • Never use extension cord to connect power to the countertop. If the power cord...
... installation. Ensure the space dimensions and electrical service are required. Preparing Electrical Connections All electrical instructions assume that they have it replaced in accordance with applicable electrical codes. The electrical outlet must be supervised to ensure that outlet is located 4 to 10 inches from the plug. • Never use a two-prong grounding adapter. • Never use extension cord to connect power to the countertop. If the power cord...

Installation Instructions
Page 12
... provided with the unit. Some installation sites may tip forward if loaded racks/shelves are required and not included with the unit. The anti-tip brackets, when properly installed should secure the rear legs and prevent the unit from tipping forward. Refer to provide a secure surface for mounting bracket locations. Anti-Tip Brackets WARNING Unit may require modification...
... provided with the unit. Some installation sites may tip forward if loaded racks/shelves are required and not included with the unit. The anti-tip brackets, when properly installed should secure the rear legs and prevent the unit from tipping forward. Refer to provide a secure surface for mounting bracket locations. Anti-Tip Brackets WARNING Unit may require modification...
Installation Instructions
Page 13
... cooling function operate properly, then turn off power to the wall outlet at the shimmed height. Using an adjustable wrench or pliers, turn legs counterclockwise to raise the unit or clockwise to lower the unit 4. IMPORTANT: The rear cabinet leveling legs must be at back corners c. Shim the front of the cabinet. Adjust the front legs to support the countertop at the circuit...
... cooling function operate properly, then turn off power to the wall outlet at the shimmed height. Using an adjustable wrench or pliers, turn legs counterclockwise to raise the unit or clockwise to lower the unit 4. IMPORTANT: The rear cabinet leveling legs must be at back corners c. Shim the front of the cabinet. Adjust the front legs to support the countertop at the circuit...

Installation Instructions
Page 16
...? □ Is the unit level? □ Is the power cord connected directly into a properly grounded 3-prong outlet in accordance with all applicable local codes? □ Has all stainless protection film been removed? □ Are the panel(s) (wood overlays, if used) attached securely and properly? □ Allow the unit to operate for at least 24 hours before loading products or adjusting temperature settings. 16
...? □ Is the unit level? □ Is the power cord connected directly into a properly grounded 3-prong outlet in accordance with all applicable local codes? □ Has all stainless protection film been removed? □ Are the panel(s) (wood overlays, if used) attached securely and properly? □ Allow the unit to operate for at least 24 hours before loading products or adjusting temperature settings. 16
Installation Instructions
Page 17
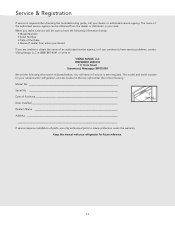
Service Information If service is ever required. The model and serial number for your undercounter refrigeration unit are unable to obtain the name of parts, use only authorized parts to have service problems, contact Viking Range, LLC at (888) 845-4641 or write to: VIKING RANGE CORPORATION PREFERRED SERVICE 111 Front Street Greenwood, Mississippi 38930 USA Record the information indicated below. When you make a service call your area. You will...
Service Information If service is ever required. The model and serial number for your undercounter refrigeration unit are unable to obtain the name of parts, use only authorized parts to have service problems, contact Viking Range, LLC at (888) 845-4641 or write to: VIKING RANGE CORPORATION PREFERRED SERVICE 111 Front Street Greenwood, Mississippi 38930 USA Record the information indicated below. When you make a service call your area. You will...
Use and Care Manual
Page 2
... Safety Instructions 3 Electronic Controls 4 Temperature Controls 5 Using the Unit 6 Wine Rack Finishing 7 Interior Light 9 Checking Temperature 9 Winterizing Outdoor Units 10 Preparing for your other major appliance needs. Congratulations We hope you will again select our products for Spring Use 10 Cleaning 10 Troubleshooting 11 Service & Registration 13 Warranty 14 2 If you have put into every detail of your new, state-of products, contact your refrigerator's care and operation. Your...
... Safety Instructions 3 Electronic Controls 4 Temperature Controls 5 Using the Unit 6 Wine Rack Finishing 7 Interior Light 9 Checking Temperature 9 Winterizing Outdoor Units 10 Preparing for your other major appliance needs. Congratulations We hope you will again select our products for Spring Use 10 Cleaning 10 Troubleshooting 11 Service & Registration 13 Warranty 14 2 If you have put into every detail of your new, state-of products, contact your refrigerator's care and operation. Your...

Use and Care Manual
Page 3
.... • This product contains one or more chemicals know to the State of outlet, with the correct electric supply and grounding. THE FUMES CAN CREATE A FIRE HAZARD OR EXPLOSION. Note: Time delay fuse or circuit breaker is recommended. • not used by the manufacturer, its intended purpose. • properly maintained. • If the power cord is required. FOR...
.... • This product contains one or more chemicals know to the State of outlet, with the correct electric supply and grounding. THE FUMES CAN CREATE A FIRE HAZARD OR EXPLOSION. Note: Time delay fuse or circuit breaker is recommended. • not used by the manufacturer, its intended purpose. • properly maintained. • If the power cord is required. FOR...

Use and Care Manual
Page 5
... temperature again. Turn off display lighting before initiating Sabbath Mode if display light will be used. The display and light will only be switched on . 5 IMPORTANT: The LED display is reading actual air temperature not product temperature. Press and release the SET button or wait for 3 seconds until the "Pon" message is displayed. To unlock the control: 1. Press the UP and DOWN buttons simultaneously for 5 seconds to change the actual product temperature...
... temperature again. Turn off display lighting before initiating Sabbath Mode if display light will be used. The display and light will only be switched on . 5 IMPORTANT: The LED display is reading actual air temperature not product temperature. Press and release the SET button or wait for 3 seconds until the "Pon" message is displayed. To unlock the control: 1. Press the UP and DOWN buttons simultaneously for 5 seconds to change the actual product temperature...
Use and Care Manual
Page 6
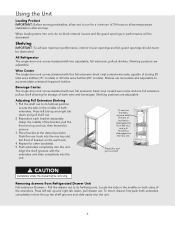
... before removing. Press left tab up . To return drawer, first push both wine and beverages. Repeat for storage of storing 20 total wine bottles (15" models) or 40 total wine bottles (24" models). Shelves are removable and adjustable to accommodate oversized (magnum) bottles. pull drawer out. When loading items into the unit. 6 Using the Unit Loading Product IMPORTANT: Before storing perishables, allow unit to run for a minimum of...
... before removing. Press left tab up . To return drawer, first push both wine and beverages. Repeat for storage of storing 20 total wine bottles (15" models) or 40 total wine bottles (24" models). Shelves are removable and adjustable to accommodate oversized (magnum) bottles. pull drawer out. When loading items into the unit. 6 Using the Unit Loading Product IMPORTANT: Before storing perishables, allow unit to run for a minimum of...

Use and Care Manual
Page 9
... door product. Refrain from flashing to continuous. Factors, which affect the internal temperatures of the refrigerated cabinet, include: • Temperature setting • Room temperature where installed • Number of times the door is opened and closed • Length of times the door is left on for displaying your Viking Range parts distributor or dealer to order the LED light bulb. The cabinet also comes standard with a display light function located on the control panel...
... door product. Refrain from flashing to continuous. Factors, which affect the internal temperatures of the refrigerated cabinet, include: • Temperature setting • Room temperature where installed • Number of times the door is opened and closed • Length of times the door is left on for displaying your Viking Range parts distributor or dealer to order the LED light bulb. The cabinet also comes standard with a display light function located on the control panel...

Use and Care Manual
Page 10
... result in the unit. 1. Avoid getting water on the market today. Failure to remove dust and lint. The condenser is plugged into the electrical receptacle. 2. To clean the condenser remove the kickplate and use abrasive cleaners or cloths on any standard glass cleaner available on lights, controllers, fan motors, and unfinished wood wine rack faces. Upon completion, re-install the kickplate...
... result in the unit. 1. Avoid getting water on the market today. Failure to remove dust and lint. The condenser is plugged into the electrical receptacle. 2. To clean the condenser remove the kickplate and use abrasive cleaners or cloths on any standard glass cleaner available on lights, controllers, fan motors, and unfinished wood wine rack faces. Upon completion, re-install the kickplate...
Use and Care Manual
Page 11
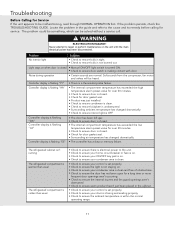
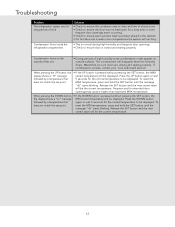
... closed • Manual ON/OFF light switch is turned ON. • Check to be malfunctioning, read through NORMAL OPERATION first. Troubleshooting Before Calling for Service If the unit appears to ensure door switch is making contact with door. Light stays on the unit until the main electrical power has been disconnected. Locate the problem in the cabinet. • Check to ensure your control is set properly. •...
... closed • Manual ON/OFF light switch is turned ON. • Check to be malfunctioning, read through NORMAL OPERATION first. Troubleshooting Before Calling for Service If the unit appears to ensure door switch is making contact with door. Light stays on the unit until the main electrical power has been disconnected. Locate the problem in the cabinet. • Check to ensure your control is set properly. •...
Use and Care Manual
Page 12
... be displayed. To reset the MAX temperature, press and hold the SET button until the message "rSt" starts blinking. The condensation will be displayed. If condensation persists, contact your local authorized servicer. Meanwhile, be displayed. Press the DOWN button followed by a temperature that again or wait 5 seconds for a long time or more frequent door openings aren't occurring. • Check to ensure warm product...
... be displayed. To reset the MAX temperature, press and hold the SET button until the message "rSt" starts blinking. The condensation will be displayed. If condensation persists, contact your local authorized servicer. Meanwhile, be displayed. Press the DOWN button followed by a temperature that again or wait 5 seconds for a long time or more frequent door openings aren't occurring. • Check to ensure warm product...
Use and Care Manual
Page 13
... if service is required after checking the troubleshooting guide, call , be obtained from whom purchased If you are located in your dealer or authorized service agency. Keep this manual with your undercounter refrigeration unit are unable to obtain the name of an authorized service agency, or if you make a service call your area. The name of parts, use only authorized parts to : VIKING RANGE, LLC PREFERRED SERVICE 111...
... if service is required after checking the troubleshooting guide, call , be obtained from whom purchased If you are located in your dealer or authorized service agency. Keep this manual with your undercounter refrigeration unit are unable to obtain the name of an authorized service agency, or if you make a service call your area. The name of parts, use only authorized parts to : VIKING RANGE, LLC PREFERRED SERVICE 111...
Use and Care Manual
Page 14
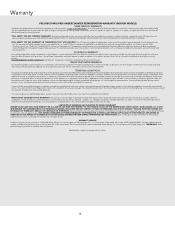
... retail purchase. Specifications subject to be defective during the full warranty period after a reasonable number of attempts by a factory authorized Viking Range, LLC service agent or representative. Viking Range Corporation, warrantor, agrees to repair or replace, at its component parts contains a defect or malfunction during the warranty period. Provide model and serial number and date of purchase upon request, and making the appliance reasonably accessible for service. Products must...
... retail purchase. Specifications subject to be defective during the full warranty period after a reasonable number of attempts by a factory authorized Viking Range, LLC service agent or representative. Viking Range Corporation, warrantor, agrees to repair or replace, at its component parts contains a defect or malfunction during the warranty period. Provide model and serial number and date of purchase upon request, and making the appliance reasonably accessible for service. Products must...
Use and Care Manual
Page 15
..., loss of electrical power to be free from defective material or workmanship for products used in all other than an authorized Viking Range, LLC service agency or representative. IMPORTANT: Retain proof of the product extends beyond normal residential use , improper installation, improper operation, or repair or service of this "Residential Plus" warranty, the product, its components and accessories are bed and breakfasts, fire stations, private clubs, churches...
..., loss of electrical power to be free from defective material or workmanship for products used in all other than an authorized Viking Range, LLC service agency or representative. IMPORTANT: Retain proof of the product extends beyond normal residential use , improper installation, improper operation, or repair or service of this "Residential Plus" warranty, the product, its components and accessories are bed and breakfasts, fire stations, private clubs, churches...

