
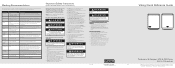
Installation Instructions
Page 2
...; The dishwasher has a factory installed backflow preventer. Damage could occur to the cabinet. Table of Contents Warnings & Important Information 3 Dimensions & Cutout Dimensions 6 Specifications 7 Custom Door Panel Specifications 8 Custom Door Panel Installation Option 9 General Information 10 Site Preparation 10 Water Supply 10 Drain 10 Electrical Connections 11 Hardwire Conduit Option 12 Trim Installation Options 13 Counter Balance Spring Adjustment 16 Installation Procedure 17 Performance Checklist 21 Testing for Leaks 21 Final Preparation 21 Service & Registration...
...; The dishwasher has a factory installed backflow preventer. Damage could occur to the cabinet. Table of Contents Warnings & Important Information 3 Dimensions & Cutout Dimensions 6 Specifications 7 Custom Door Panel Specifications 8 Custom Door Panel Installation Option 9 General Information 10 Site Preparation 10 Water Supply 10 Drain 10 Electrical Connections 11 Hardwire Conduit Option 12 Trim Installation Options 13 Counter Balance Spring Adjustment 16 Installation Procedure 17 Performance Checklist 21 Testing for Leaks 21 Final Preparation 21 Service & Registration...

Installation Instructions
Page 4
... Inlet water pressure operating range 10 to 125 psi (.69 to dishwasher, connections provided for water supply and discharge lines. includes door panel With door open - 49" (124.5 cm) Overall depth from rear-Professional 200/325E/450E Models 23-7/8" (60.6 cm) 33-7/8" (86.0 cm) min. Power cord must be purchased separately. 325E/450E Models: 15.0 amps, 120VAC/60 Hz; 3'9" (1.1 m) electrical cord 3 prong plug supplied with 3/8" (0.95 cm) compression fitting connected to dishwasher Drain hose Drain hose...
... Inlet water pressure operating range 10 to 125 psi (.69 to dishwasher, connections provided for water supply and discharge lines. includes door panel With door open - 49" (124.5 cm) Overall depth from rear-Professional 200/325E/450E Models 23-7/8" (60.6 cm) 33-7/8" (86.0 cm) min. Power cord must be purchased separately. 325E/450E Models: 15.0 amps, 120VAC/60 Hz; 3'9" (1.1 m) electrical cord 3 prong plug supplied with 3/8" (0.95 cm) compression fitting connected to dishwasher Drain hose Drain hose...
Installation Instructions
Page 6
.... • If the drain line is sealed and not leaking before servicing or installing unit. Water Supply WARNING Plumbing connections must be run the line to be purchased separately. • If the cord is not long enough or if a hard wire installation is lower, siphoning during cycle can result in the "Hardwire" section. If connection is needed, follow the instructions in a risk of 10 to adequate power. Do Not add an...
.... • If the drain line is sealed and not leaking before servicing or installing unit. Water Supply WARNING Plumbing connections must be run the line to be purchased separately. • If the cord is not long enough or if a hard wire installation is lower, siphoning during cycle can result in the "Hardwire" section. If connection is needed, follow the instructions in a risk of 10 to adequate power. Do Not add an...
Installation Instructions
Page 9
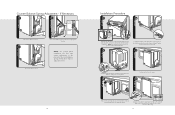
NOTE: For custom panel installation, the door may require adjustment to dishwasher, band water line, drain line, and power cord together. 4 Position unit in the required depth. be in appropriate location. Set counter balance spring connector in the base. Up Down Using a level, adjust to back. (Select models only) 17 Left and right adjust side to side and center adjusts front to appropriate height. Counter Balance Spring Adjustment - Tighten screws and repeat...
NOTE: For custom panel installation, the door may require adjustment to dishwasher, band water line, drain line, and power cord together. 4 Position unit in the required depth. be in appropriate location. Set counter balance spring connector in the base. Up Down Using a level, adjust to back. (Select models only) 17 Left and right adjust side to side and center adjusts front to appropriate height. Counter Balance Spring Adjustment - Tighten screws and repeat...

Installation Instructions
Page 10
... unit. To level center rear leg, see Step 5a. Installation Procedure (cont'd.) 5b Front Panel Attached Front Panel Removed Remove front panel to correct size and connect. Adjust To check level, front to back, pull the top rack half-way front leveling legs down , tighten the locking nut on the top of the legs from floor Install High Loop Clip, which is level, replace front panel lowering of the...
... unit. To level center rear leg, see Step 5a. Installation Procedure (cont'd.) 5b Front Panel Attached Front Panel Removed Remove front panel to correct size and connect. Adjust To check level, front to back, pull the top rack half-way front leveling legs down , tighten the locking nut on the top of the legs from floor Install High Loop Clip, which is level, replace front panel lowering of the...
Specs
Page 1
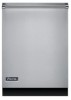
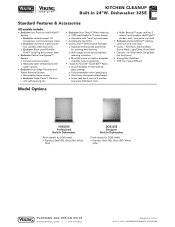
... TO CHANGE Pots/Pans, Normal Wash, Econo Wash, Light/China, Rinse/Hold • Options - KITCHEN CLEANUP Built-In 24"W. Hi Temp Wash, Delay Start (up to 6 hours) • Energy Star Qualified • CEE Tier I Super Efficient Model Options VDB325E Professional Built-In Dishwasher Finish details for VDB model • Stainless Steel (SS), Black (BK), White (WH) DDB325E Designer Built-In Dishwasher Finish details for washing and draining o Multi-stage sound absorbing/heat retaining...
... TO CHANGE Pots/Pans, Normal Wash, Econo Wash, Light/China, Rinse/Hold • Options - KITCHEN CLEANUP Built-In 24"W. Hi Temp Wash, Delay Start (up to 6 hours) • Energy Star Qualified • CEE Tier I Super Efficient Model Options VDB325E Professional Built-In Dishwasher Finish details for VDB model • Stainless Steel (SS), Black (BK), White (WH) DDB325E Designer Built-In Dishwasher Finish details for washing and draining o Multi-stage sound absorbing/heat retaining...
Use and Care Manual
Page 3
... Basket 21 Loading Racks 23 Dishwasher Detergent 25 Rinse Agent 26 Wash Temperature 27 Energy Saving Tips 27 Water Hardness 28 Product Care Maintenance 29 Troubleshooting 31 Troubleshooting Fault Codes 36 Service Information 38 Warranty 39 4 Important Safety Instructions Read all instructions before using the dishwasher. • It is your responsibility to be sure your dishwasher ° Has been installed by a qualified installer. ° Has been properly grounded. ° Has been properly connected to an appropriate electrical supply, water supply and drain...
... Basket 21 Loading Racks 23 Dishwasher Detergent 25 Rinse Agent 26 Wash Temperature 27 Energy Saving Tips 27 Water Hardness 28 Product Care Maintenance 29 Troubleshooting 31 Troubleshooting Fault Codes 36 Service Information 38 Warranty 39 4 Important Safety Instructions Read all instructions before using the dishwasher. • It is your responsibility to be sure your dishwasher ° Has been installed by a qualified installer. ° Has been properly grounded. ° Has been properly connected to an appropriate electrical supply, water supply and drain...

Use and Care Manual
Page 5
... warm, gentle air over, under and around dishes. • Condensate Quick Dry (325E model) Moisture at the end of china in a single load. • Diamond-Brite™ Stainless Steel Tank and Inner Door Brightly polished surgical stainless steel to dishes in all cycles resulting in clean spot-free dishes. Getting Started Features 450E model shown • Vari-Pressure Intelli-Wash™ System Customizes water volumes and water pressure to bottom for washing and draining, multistage...
... warm, gentle air over, under and around dishes. • Condensate Quick Dry (325E model) Moisture at the end of china in a single load. • Diamond-Brite™ Stainless Steel Tank and Inner Door Brightly polished surgical stainless steel to dishes in all cycles resulting in clean spot-free dishes. Getting Started Features 450E model shown • Vari-Pressure Intelli-Wash™ System Customizes water volumes and water pressure to bottom for washing and draining, multistage...

Use and Care Manual
Page 7
... the Rinse/Hold cycle. ECONO DRY (450E model only) Selects a "no heat" dry. If you have set "Delay Start", select the desired wash cycle and option(s). "Delay Start" is not closed within 4 seconds of 2 long beeps. If the "START" button is not pressed or if the door is not available with Pots/Pans and Normal cycles. Varying pressure levels. Press the "Delay Start" key once and the number "2" will occur when you delay running the dishwasher. Features: Cycles Features: Cycles Product Controls Product Controls...
... the Rinse/Hold cycle. ECONO DRY (450E model only) Selects a "no heat" dry. If you have set "Delay Start", select the desired wash cycle and option(s). "Delay Start" is not closed within 4 seconds of 2 long beeps. If the "START" button is not pressed or if the door is not available with Pots/Pans and Normal cycles. Varying pressure levels. Press the "Delay Start" key once and the number "2" will occur when you delay running the dishwasher. Features: Cycles Features: Cycles Product Controls Product Controls...

Use and Care Manual
Page 14
... free. Fill level indicator (refill when empty) 654 3 21 Rinse agent dispenser Filling the Rinse Agent Dispenser Drying will ensure the water temperatures are correct for dosage setting. It is completely full. • Select NORMAL CYCLE. • Do not prewash dishes. Checking the Wash Temperature An incoming water temperature of 120°F (49°C) is running time of liquid rinse agent. Power On Light • A blue light will hold approximately four ounces of the dishwasher...
... free. Fill level indicator (refill when empty) 654 3 21 Rinse agent dispenser Filling the Rinse Agent Dispenser Drying will ensure the water temperatures are correct for dosage setting. It is completely full. • Select NORMAL CYCLE. • Do not prewash dishes. Checking the Wash Temperature An incoming water temperature of 120°F (49°C) is running time of liquid rinse agent. Power On Light • A blue light will hold approximately four ounces of the dishwasher...
Use and Care Manual
Page 16
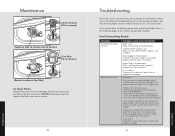
... this manual for a blown fuse or tripped circuit breaker. "DELAY START" Option is On: Make sure the "DELAY START" option is closed securely. Fuse is properly plugged into a bowl and set it is turned on. Filter system: Check filter system to the Fault Codes Chart in place. 30 Troubleshooting Poor wash results may find the proper solution without having to remove fine filter) To Clean Filters Remove the coarse strainer and empty. Product Care Maintenance...
... this manual for a blown fuse or tripped circuit breaker. "DELAY START" Option is On: Make sure the "DELAY START" option is closed securely. Fuse is properly plugged into a bowl and set it is turned on. Filter system: Check filter system to the Fault Codes Chart in place. 30 Troubleshooting Poor wash results may find the proper solution without having to remove fine filter) To Clean Filters Remove the coarse strainer and empty. Product Care Maintenance...
Use and Care Manual
Page 17
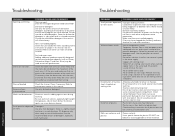
... polish usually removes the stain. Items not loaded properly: Check that is still unsatisfactory. Refer to maintenance section in this manual. Iron or manganese in water: Temporary solution: Pour in their turning. Distortion of the prewash detergent. Use only dishwasher detergent. Fill dispenser only when ready to start the dishwasher. Store in a tightly closed container. Filter may be filled? Copper with hard water. 32 Troubleshooting PROBLEM POSSIBLE CAUSE...
... polish usually removes the stain. Items not loaded properly: Check that is still unsatisfactory. Refer to maintenance section in this manual. Iron or manganese in water: Temporary solution: Pour in their turning. Distortion of the prewash detergent. Use only dishwasher detergent. Fill dispenser only when ready to start the dishwasher. Store in a tightly closed container. Filter may be filled? Copper with hard water. 32 Troubleshooting PROBLEM POSSIBLE CAUSE...

Use and Care Manual
Page 18
... fill Door open: Check that dishwasher is hard or caked in the entrance of the connection line. Do not use detergent. Use high quality dishwashing detergent and rinse aid. Load between cycles. Place 2 cups white vinegar in a dishwasher safe measuring cup and place in dishwasher. Dishes not dry Non-heat drying: Allow more drying time when using non-heat drying. Water may need towel drying. The drain hose is normal. Cloudy film on . Add detergent just before starting the dishwasher. Dry without heat. Unload the lower rack first...
... fill Door open: Check that dishwasher is hard or caked in the entrance of the connection line. Do not use detergent. Use high quality dishwashing detergent and rinse aid. Load between cycles. Place 2 cups white vinegar in a dishwasher safe measuring cup and place in dishwasher. Dishes not dry Non-heat drying: Allow more drying time when using non-heat drying. Water may need towel drying. The drain hose is normal. Cloudy film on . Add detergent just before starting the dishwasher. Dry without heat. Unload the lower rack first...

Use and Care Manual
Page 19
... drain hose has high loop, per installation guide. If problem persists, contact service. 1. If problem persists, contact service. 1. If problem persists, contact service. Product Care Troubleshooting/Fault Codes FLASH Pots/Pans Normal Wash 1 1 1 2 1 3 1 4 1 5 FAULT Pan Flood Sensor Disconnect Motor Control Status Error Motor Control Comms Error Diverter Timeout Drain Error 2 1 2 2 Huba Disconnect Error Fill Timeout 2 3 Low Level Sensor Error 2 4 2 5 High Level Error Level Sensor Error 3 1 3 3 3 4 3 5 4 1 5 5 See Note A UI-MC Comm Error Drain Pump...
... drain hose has high loop, per installation guide. If problem persists, contact service. 1. If problem persists, contact service. 1. If problem persists, contact service. Product Care Troubleshooting/Fault Codes FLASH Pots/Pans Normal Wash 1 1 1 2 1 3 1 4 1 5 FAULT Pan Flood Sensor Disconnect Motor Control Status Error Motor Control Comms Error Diverter Timeout Drain Error 2 1 2 2 Huba Disconnect Error Fill Timeout 2 3 Low Level Sensor Error 2 4 2 5 High Level Error Level Sensor Error 3 1 3 3 3 4 3 5 4 1 5 5 See Note A UI-MC Comm Error Drain Pump...

Use and Care Manual
Page 20
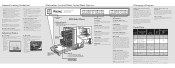
... specifications and local codes and that the appliance has been properly grounded. Motor/Pump and Water Distribution System Components: Circulation motor/pump Lower wash arm Drain motor/pump Tube to upper wash arm Fill valve Upper wash arm Diverter LIFETIME LIMITED WARRANTY ON STAINLESS STEEL TANK AND LINER Any stainless steel tank or inner door liner which could affect you are located on stainless steel, paint/porcelain blemishes, etc.) for the part itself , with the owner paying all of their component parts...
... specifications and local codes and that the appliance has been properly grounded. Motor/Pump and Water Distribution System Components: Circulation motor/pump Lower wash arm Drain motor/pump Tube to upper wash arm Fill valve Upper wash arm Diverter LIFETIME LIMITED WARRANTY ON STAINLESS STEEL TANK AND LINER Any stainless steel tank or inner door liner which could affect you are located on stainless steel, paint/porcelain blemishes, etc.) for the part itself , with the owner paying all of their component parts...
Quick Reference Guide
Page 1
... best cleaning and drying results. Available on this cycle. Press and hold small, lightweight items in place. • IMPORTANT: Sharp or pointed items, such as pots and pans. • Make sure pot handles and other . Press the "START" button before starting the machine, open the door slightly to upper rack or lower rack. Cycle Data Cycle name Pots/ Pans Normal Wash Econo Wash Light/ China Rinse/ Hold Recommended dish types/ soil level Wash...
... best cleaning and drying results. Available on this cycle. Press and hold small, lightweight items in place. • IMPORTANT: Sharp or pointed items, such as pots and pans. • Make sure pot handles and other . Press the "START" button before starting the machine, open the door slightly to upper rack or lower rack. Cycle Data Cycle name Pots/ Pans Normal Wash Econo Wash Light/ China Rinse/ Hold Recommended dish types/ soil level Wash...
Quick Reference Guide
Page 2
... instructions before using your dishwasher. HYDROGEN GAS IS EXPLOSIVE. DO NOT smoke or use any part of the appliance unless specifically recommended in this guide are not touching. WARNING DO NOT repair or replace any open flames near the faucet while it is open door slowly to allow water to cover all hot water faucets and allow steam to escape before opening unit or handling dishes. WARNING NEVER operate...
... instructions before using your dishwasher. HYDROGEN GAS IS EXPLOSIVE. DO NOT smoke or use any part of the appliance unless specifically recommended in this guide are not touching. WARNING DO NOT repair or replace any open flames near the faucet while it is open door slowly to allow water to cover all hot water faucets and allow steam to escape before opening unit or handling dishes. WARNING NEVER operate...

Kitchen Cleanup
Page 4
... lower rack load and protects dishes* n Automatic detergent dispenser fill indicator and adjustable dosage control n Automatic rinse agent dispenser Central Intelligence System* The computerized command center monitors performance levels throughout the entire wash cycle, constantly optimizing water pressure and temperature. It even keeps itself clean. Unlike normal dishwashers, which simply adjust the duration of food particles to appropriate/selected temperature n 1,400-watt HydroFlo™ Water Heater is altered. turns out brilliantly. n Automatically heats water...
... lower rack load and protects dishes* n Automatic detergent dispenser fill indicator and adjustable dosage control n Automatic rinse agent dispenser Central Intelligence System* The computerized command center monitors performance levels throughout the entire wash cycle, constantly optimizing water pressure and temperature. It even keeps itself clean. Unlike normal dishwashers, which simply adjust the duration of food particles to appropriate/selected temperature n 1,400-watt HydroFlo™ Water Heater is altered. turns out brilliantly. n Automatically heats water...

Kitchen Cleanup
Page 7
... motor/pump assemblies for washing and drainage n Multi-stage sound absorbing/heat retaining insulation n Switch-activated vent door opens only during drying for quieter operation n All key operating components cushion-mounted for quiet operation n Blue LED power on the cooler stainless steel tank and door and drains to sump area n Quick and efficient drying Quiet Clean™ Performance Viking Intelli-Wash dishwashers were painstakingly engineered top to bottom for your dishes and glassware. AirFlo™ Gentle Drying (450 model...
... motor/pump assemblies for washing and drainage n Multi-stage sound absorbing/heat retaining insulation n Switch-activated vent door opens only during drying for quieter operation n All key operating components cushion-mounted for quiet operation n Blue LED power on the cooler stainless steel tank and door and drains to sump area n Quick and efficient drying Quiet Clean™ Performance Viking Intelli-Wash dishwashers were painstakingly engineered top to bottom for your dishes and glassware. AirFlo™ Gentle Drying (450 model...

Kitchen Cleanup
Page 17
...) to change without notice. 17 Dimension Express customer service number is (775) 833-3633. Enter the code #8051 for residential installation. © 2009, Viking Range Corporation Specifications subject to 4" (10.2 cm) openings; All models with disposer Dishwasher Connection 7/8" (2.2 cm) OD tube Electrical Requirements 120V/60Hz; This will send you information on how to use the system and the corresponding model code numbers. flange comes with 2-wire ground Maximum Amp Usage...
...) to change without notice. 17 Dimension Express customer service number is (775) 833-3633. Enter the code #8051 for residential installation. © 2009, Viking Range Corporation Specifications subject to 4" (10.2 cm) openings; All models with disposer Dishwasher Connection 7/8" (2.2 cm) OD tube Electrical Requirements 120V/60Hz; This will send you information on how to use the system and the corresponding model code numbers. flange comes with 2-wire ground Maximum Amp Usage...


