Two-Page Specifications Sheet
Page 1
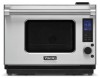
... Combination of cooking which reduces fat and salt while preserving nutrients • Steam Convection function - Combi Steam/Convect Oven VTKS300SS - 30"W. cosmetic parts such as a second oven providing excellent baking results • Microwave function - Depth: 13 3/8" (34.0 cm) Overall Size: 1.1 cu.... (71.1 cm); Height: 19 1/8" (48.6 cm); A unique combination of extra cooking time with 30" wide trim kit) Model Numbers VCSO210SS - Enter code #8051 for Viking Products. Stainless steel exterior Five year limited - ft. Depth: 23 1/4" (59.1 cm) 120v, single phase, 60Hz, AC only 51 ...
... Combination of cooking which reduces fat and salt while preserving nutrients • Steam Convection function - Combi Steam/Convect Oven VTKS300SS - 30"W. cosmetic parts such as a second oven providing excellent baking results • Microwave function - Depth: 13 3/8" (34.0 cm) Overall Size: 1.1 cu.... (71.1 cm); Height: 19 1/8" (48.6 cm); A unique combination of extra cooking time with 30" wide trim kit) Model Numbers VCSO210SS - Enter code #8051 for Viking Products. Stainless steel exterior Five year limited - ft. Depth: 23 1/4" (59.1 cm) 120v, single phase, 60Hz, AC only 51 ...
Installation Instructions
Page 1
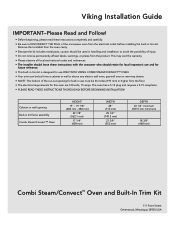
Remove the turntable from the oven cavity. • Because the kit includes metal parts, caution should retain for local inspector's use and for future reference. • This built-in trim kit is designed for use must be built into a ... installing the built-in trim kit. Cabinet or wall opening for this oven are 120 volts, 15 amps. Viking Installation Guide IMPORTANT-Please Read and Follow! • Before beginning, please read these instructions with Viking COMBI STEAM/CONVECT™ OVEN. • Your oven can be 36 inches (915 mm) or higher from...
Remove the turntable from the oven cavity. • Because the kit includes metal parts, caution should retain for local inspector's use and for future reference. • This built-in trim kit is designed for use must be built into a ... installing the built-in trim kit. Cabinet or wall opening for this oven are 120 volts, 15 amps. Viking Installation Guide IMPORTANT-Please Read and Follow! • Before beginning, please read these instructions with Viking COMBI STEAM/CONVECT™ OVEN. • Your oven can be 36 inches (915 mm) or higher from...

Installation Instructions
Page 2
... Duct Bottom QTY 1 Frame Assembly QTY 1 Exhaust Duct Left QTY 1 Exhaust Duct Right QTY 1 Screw A - lONG QTY 8 Part Name Exhaust Duct Back PDUC-B107WRWZ Exhaust Duct Upper PDUC-B105WRWZ Divide Plate L PSKR-A486WRWZ Divide Plate R PSKR-A487WRWZ Rectifier Plate L... PSKR-A484WRWZ Exhaust Duct Left PDUC-B108WRWZ Exhaust Duct Right PDUC-B117WRWZ Exhaust Duct Bottom PDUC-B106WRWZ Frame Assembly DDECAB012MRK0 Qty Part Name Qty 1 Screw (A) XHTS740P08000 23 1 Screw (B) XMMS841P13000 8 1 Rear Spacer PSPAFA003WRWZ 1 1 Cushion 1 5/8" x 16", 15 mm x 405 ...
... Duct Bottom QTY 1 Frame Assembly QTY 1 Exhaust Duct Left QTY 1 Exhaust Duct Right QTY 1 Screw A - lONG QTY 8 Part Name Exhaust Duct Back PDUC-B107WRWZ Exhaust Duct Upper PDUC-B105WRWZ Divide Plate L PSKR-A486WRWZ Divide Plate R PSKR-A487WRWZ Rectifier Plate L... PSKR-A484WRWZ Exhaust Duct Left PDUC-B108WRWZ Exhaust Duct Right PDUC-B117WRWZ Exhaust Duct Bottom PDUC-B106WRWZ Frame Assembly DDECAB012MRK0 Qty Part Name Qty 1 Screw (A) XHTS740P08000 23 1 Screw (B) XMMS841P13000 8 1 Rear Spacer PSPAFA003WRWZ 1 1 Cushion 1 5/8" x 16", 15 mm x 405 ...

Installation Instructions
Page 3
... from CUSHION 2. EXHAUST DUCT BACK Remove the backing paper from CUSHION 4. EXHAUST DUCT UPPER Remove the backing paper from 1 to 5 to attach cushions to some parts. 1 CUSHIONS 1 CUSHIONS 1 3 A CUSHIONS 3 1. E3 Attach the CUSHIONS 3 to the EXHAUST DUCT BOTTOM as shown in the Figure 2. 5. Attach the CUSHIONS 2 at the lower flange of...
... from CUSHION 2. EXHAUST DUCT BACK Remove the backing paper from CUSHION 4. EXHAUST DUCT UPPER Remove the backing paper from 1 to 5 to attach cushions to some parts. 1 CUSHIONS 1 CUSHIONS 1 3 A CUSHIONS 3 1. E3 Attach the CUSHIONS 3 to the EXHAUST DUCT BOTTOM as shown in the Figure 2. 5. Attach the CUSHIONS 2 at the lower flange of...
Use and Care Manual
Page 3
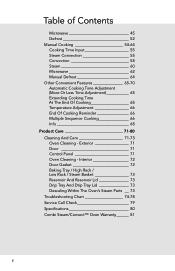
... Microwave Cooking 14 About Food When Using The Microwave Mode 15 About Utensils and Coverings 17 About Children 21 About Safety 21 Product Control 25 Part Names 25-26 Control Panel 26 Display Information 26 Important Instructions 27-31 Reservoir 27 Drip Tray 28 Steam Convection & Steam in Automatic and Manual...
... Microwave Cooking 14 About Food When Using The Microwave Mode 15 About Utensils and Coverings 17 About Children 21 About Safety 21 Product Control 25 Part Names 25-26 Control Panel 26 Display Information 26 Important Instructions 27-31 Reservoir 27 Drip Tray 28 Steam Convection & Steam in Automatic and Manual...
Use and Care Manual
Page 4
... Tray / High Rack / Low Rack / Steam Basket 73 Reservoir And Reservoir Lid 73 Drip Tray And Drip Tray Lid 73 Descaling Within The Oven's Steam Parts ___ 73 Troubleshooting Chart 74-78 Service Call Check 79 Specifications 80 Combi Steam/Convect™ Oven Warranty_______ 81 E Exterior 71 Door 71 Control Panel...
... Tray / High Rack / Low Rack / Steam Basket 73 Reservoir And Reservoir Lid 73 Drip Tray And Drip Tray Lid 73 Descaling Within The Oven's Steam Parts ___ 73 Troubleshooting Chart 74-78 Service Call Check 79 Specifications 80 Combi Steam/Convect™ Oven Warranty_______ 81 E Exterior 71 Door 71 Control Panel...
Use and Care Manual
Page 5
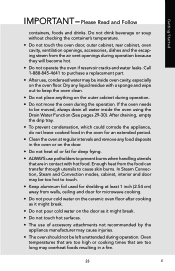
... instructions before using this appliance to prevent the potential risk of fire, electric shock, personal injury or damage to adjust, repair, service, or replace any part of the appliance. Read and follow all possible conditions and situations that may occur.
... instructions before using this appliance to prevent the potential risk of fire, electric shock, personal injury or damage to adjust, repair, service, or replace any part of the appliance. Read and follow all possible conditions and situations that may occur.
Use and Care Manual
Page 15
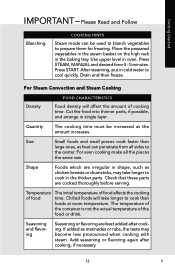
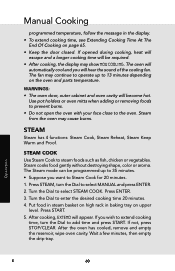
Place the prepared vegetables in the steam basket on the high rack in single layer. Press START. Cut the food into thinner parts, if possible, and arrange in the baking tray. Please Read and Follow Blanching COOKING HINTS Steam mode can be increased as heat can penetrate... from all the pieces the same size. Drain and then freeze. Check that these parts are best added after cooking, if necessary. 13 E Temperature The initial temperature of food affects the cooking of the food or drink. Press STEAM...
Place the prepared vegetables in the steam basket on the high rack in single layer. Press START. Cut the food into thinner parts, if possible, and arrange in the baking tray. Please Read and Follow Blanching COOKING HINTS Steam mode can be increased as heat can penetrate... from all the pieces the same size. Drain and then freeze. Check that these parts are best added after cooking, if necessary. 13 E Temperature The initial temperature of food affects the cooking of the food or drink. Press STEAM...

Use and Care Manual
Page 16
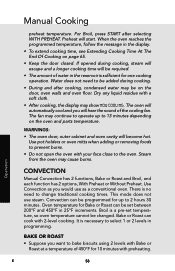
... that condenses in food will not cause as much condensation as needed. Generally, covered foods will influence the amount of moisture that food is a normal part of dish once or twice during cooking, if possible. Check recipe or cookbook for the shortest amount of dish. • Watch cooking time. Getting Started...
... that condenses in food will not cause as much condensation as needed. Generally, covered foods will influence the amount of moisture that food is a normal part of dish once or twice during cooking, if possible. Check recipe or cookbook for the shortest amount of dish. • Watch cooking time. Getting Started...

Use and Care Manual
Page 24
... its high quality and minimize the spread of foodborne bacteria. • Use care when removing items from the oven and be careful of E 22 This part will become hot during cooking, unless it 's in the food during use and check cooking progress frequently so that the utensil, your clothes or accessories.... oven door, oven cavity, dishes and accessories) may become hot when the oven light is no chance of overcooking food. • NEVER use . • Accessible parts (e.g. Getting Started IMPORTANT - Note: Do not cook whole, stuffed poultry.
... its high quality and minimize the spread of foodborne bacteria. • Use care when removing items from the oven and be careful of E 22 This part will become hot during cooking, unless it 's in the food during use and check cooking progress frequently so that the utensil, your clothes or accessories.... oven door, oven cavity, dishes and accessories) may become hot when the oven light is no chance of overcooking food. • NEVER use . • Accessible parts (e.g. Getting Started IMPORTANT - Note: Do not cook whole, stuffed poultry.
Use and Care Manual
Page 25
... Read and Follow containers, foods and drinks. In Steam Convection, Steam and Convection modes, cabinet, interior and door may be too hot to purchase a replacement part. • After use, condensed water may cause injuries. • The oven should not be moved, always drain all water inside oven cavity, especially on the...
... Read and Follow containers, foods and drinks. In Steam Convection, Steam and Convection modes, cabinet, interior and door may be too hot to purchase a replacement part. • After use, condensed water may cause injuries. • The oven should not be moved, always drain all water inside oven cavity, especially on the...

Use and Care Manual
Page 27
... high rack in baking tray. 21 Descaling guide (see page 28) 13 11 17 18 19 20 21 14 Accessories 6 7 17 High rack - Product Controls Part Names 12 5 1 Air vent opening 2 Handle 3 LCD display 1 4 Control panel 2 5 Oven light 3 6 Upper level 7 Lower level 8 Reservoir lid (see page 27) 4 9 Reservoir (see page 27...
... high rack in baking tray. 21 Descaling guide (see page 28) 13 11 17 18 19 20 21 14 Accessories 6 7 17 High rack - Product Controls Part Names 12 5 1 Air vent opening 2 Handle 3 LCD display 1 4 Control panel 2 5 Oven light 3 6 Upper level 7 Lower level 8 Reservoir lid (see page 27) 4 9 Reservoir (see page 27...

Use and Care Manual
Page 28
When there are feature descriptions and usage information. Convection was selected. Part Names Control Panel Product Controls 34 - 42, 55 - 58 58 - 60 32 43 - 45, 60 - 62 45 -53, 62 - 64 Dial 33, 68 - 70 Number ...
When there are feature descriptions and usage information. Convection was selected. Part Names Control Panel Product Controls 34 - 42, 55 - 58 58 - 60 32 43 - 45, 60 - 62 45 -53, 62 - 64 Dial 33, 68 - 70 Number ...
Use and Care Manual
Page 31
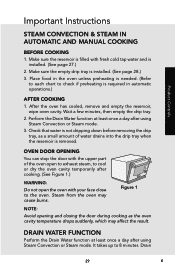
... Water function at least once a day after using Steam Convection or Steam mode. 3. Figure 1 NOTE: Avoid opening You can stop the door with the upper part of water drains into the drip tray when the reservoir is not dripping down before removing the drip tray, as the oven cavity temperature drops...
... Water function at least once a day after using Steam Convection or Steam mode. 3. Figure 1 NOTE: Avoid opening You can stop the door with the upper part of water drains into the drip tray when the reservoir is not dripping down before removing the drip tray, as the oven cavity temperature drops...

Use and Care Manual
Page 38
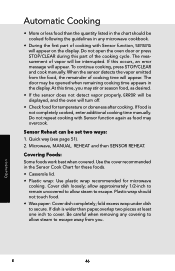
... adding or removing foods to prevent burns. • Do not open the oven with your face close to 13 minutes depending on the oven and parts temperature. Automatic Cooking • After cooking, the display may cause burns. Nutritional analysis per serving: Calories: 280, Sodium: 600 mg, Cholesterol: 250 mg, Carbohydrate: 23...
... adding or removing foods to prevent burns. • Do not open the oven with your face close to 13 minutes depending on the oven and parts temperature. Automatic Cooking • After cooking, the display may cause burns. Nutritional analysis per serving: Calories: 280, Sodium: 600 mg, Cholesterol: 250 mg, Carbohydrate: 23...

Use and Care Manual
Page 46
...) 1 - 6 servings New potatoes 0.5 - 2.5 lb - Cooking (carrots, green beans) Steam basket 1 - 6 servings on high rack in 1 - 6 servings baking tray Long Cooking (corn on the oven and parts temperature. • Press ENTER once at step 3 in baking tray OVEN LEVEL Upper Upper Operation E 44 WARNINGS: • The oven door, outer cabinet and oven...
...) 1 - 6 servings New potatoes 0.5 - 2.5 lb - Cooking (carrots, green beans) Steam basket 1 - 6 servings on high rack in 1 - 6 servings baking tray Long Cooking (corn on the oven and parts temperature. • Press ENTER once at step 3 in baking tray OVEN LEVEL Upper Upper Operation E 44 WARNINGS: • The oven door, outer cabinet and oven...

Use and Care Manual
Page 47
... for various foods and quantities. The oven will automatically cool and you will hear the sound of the oven are dry. MICROWAVE COOKING WITH SENSOR Viking's Sensor is plugged in, wait 2 minutes before cooking with foods at room temperature. • Any Sensor Cook selection can be at normal storage ...may continue to operate up to the each egg into Upper a greased custard cup and place custard cup(s) in steam basket on the oven and parts temperature. • Do not use the baking tray and metal racks. The sensor adjusts the cooking times and power level for details. Wipe ...
... for various foods and quantities. The oven will automatically cool and you will hear the sound of the oven are dry. MICROWAVE COOKING WITH SENSOR Viking's Sensor is plugged in, wait 2 minutes before cooking with foods at room temperature. • Any Sensor Cook selection can be at normal storage ...may continue to operate up to the each egg into Upper a greased custard cup and place custard cup(s) in steam basket on the oven and parts temperature. • Do not use the baking tray and metal racks. The sensor adjusts the cooking times and power level for details. Wipe ...
Use and Care Manual
Page 48
...when covered. Plastic wrap should be cooked following the guidelines in the display. Be careful when removing any microwave cookbook. • During the first part of vapor will be set two ways: 1. The door may stir or season food, as food may overcook. At this time, you . ...pieces at least one inch to escape. When the sensor detects the vapor emitted from you may be interrupted. Microwave, MANUAL. If this part of cooking time will appear on the display. If dish is not completely cooked, enter additional cooking time manually. Do not open the ...
...when covered. Plastic wrap should be cooked following the guidelines in the display. Be careful when removing any microwave cookbook. • During the first part of vapor will be set two ways: 1. The door may stir or season food, as food may overcook. At this time, you . ...pieces at least one inch to escape. When the sensor detects the vapor emitted from you may be interrupted. Microwave, MANUAL. If this part of cooking time will appear on the display. If dish is not completely cooked, enter additional cooking time manually. Do not open the ...
Use and Care Manual
Page 60
... open the oven with 2-level cooking. Use pot holders or oven mitts when adding or removing foods to 13 minutes depending on the oven and parts temperature. For Broil, press START after cooking, condensed water may show Now cooling. Dry any liquid residue with preheating. Oven temperature for Bake or Roast...
... open the oven with 2-level cooking. Use pot holders or oven mitts when adding or removing foods to 13 minutes depending on the oven and parts temperature. For Broil, press START after cooking, condensed water may show Now cooling. Dry any liquid residue with preheating. Oven temperature for Bake or Roast...
Use and Care Manual
Page 62
... adding or removing foods to prevent burns. • Do not open the oven with your face close to 13 minutes depending on the oven and parts temperature. After the oven has cooled, remove and empty the reservoir, wipe oven cavity. Press ENTER. 3.
... adding or removing foods to prevent burns. • Do not open the oven with your face close to 13 minutes depending on the oven and parts temperature. After the oven has cooled, remove and empty the reservoir, wipe oven cavity. Press ENTER. 3.
